
Using a deployment service such as DeployHQ to automate your deployment process is very convenient, but it can be a troublesome process to set up if you don't have direct access to the destination server. This is most common in situations where the server is within a private network.
The Solution
Fortunately, we've created our own application, the DeployHQ Agent that is designed with this use case in mind. The Agent is a tiny application that runs on a server in your network, keeping a persistent, secure connection open to our network and allowing, optionally, access to other servers in the same network.
Because the agent acts as a proxy, you can actually use to connect via any supported protocol, whether that's FTP, SSH/SFTP or even S3.
In this guide, we'll be setting up the DeployHQ agent on an Ubuntu server, but specific guides for other operating systems can be found when you're setting up the agent in your account.
Installing the DeployHQ Agent
To get started, you'll need to head to Settings -> Network Agents in your DeployHQ account, then click the New Network Agent Button:
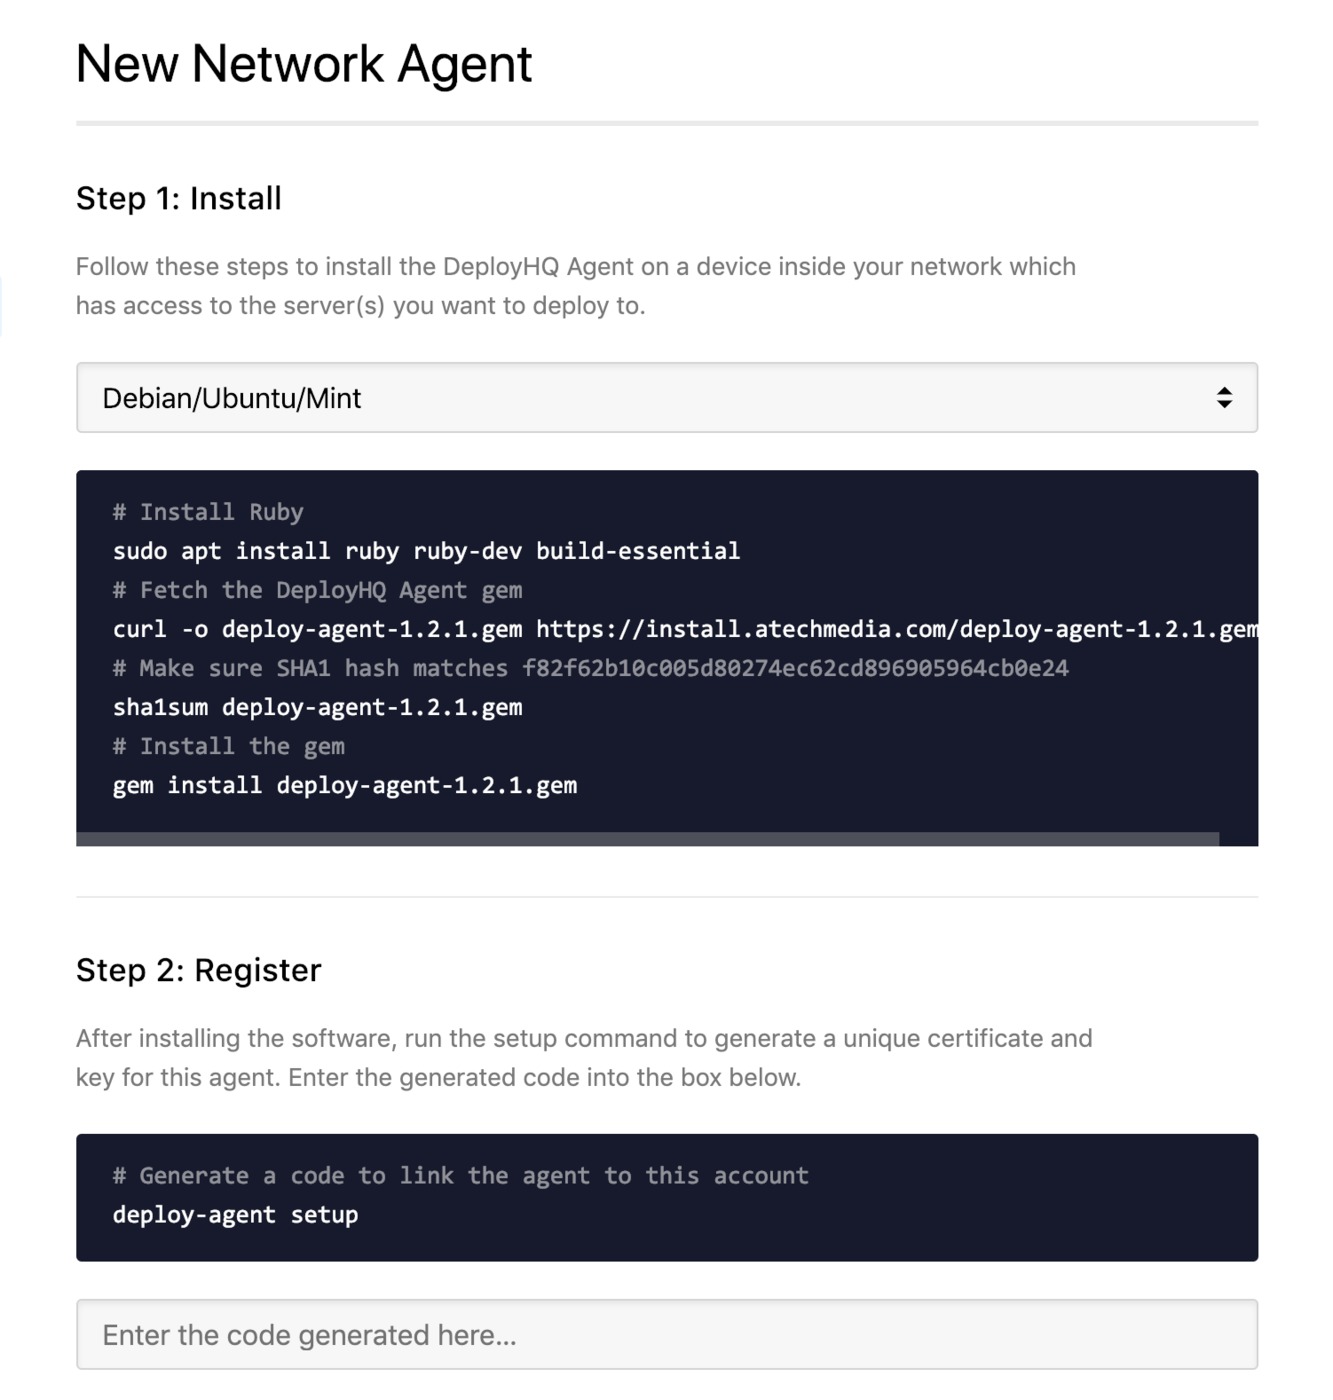
You'll need Ruby 2.2.x, or above installed on your system to be able to use the DeployHQ Agent. You can install it and the required dependencies using the commands below:
$ sudo apt install ruby ruby-dev build-essential
Next, you'll need to fetch the DeployHQ Agent gem:
$ curl -o deploy-agent-1.2.1.gem https://install.atechmedia.com/deploy-agent-1.2.1.gem
Make sure the SHA1 hash sum matches the version displayed in the set up page:
$ sha1sum deploy-agent-1.2.1.gem
Install the gem:
$ gem install deploy-agent-1.2.1.gem
Then, start the setup process to generate a code to verify the Agent in your DeployHQ account, and also add optional IP addresses that the agent can connect to in your network:
$ deploy-agent setup

This tool will assist you in generating a certificate for your Deploy agent.
Please enter a name for this agent.
Agent Name: DeployHQ Agent

Certificate has been successfully generated and installed.

By default this utility only allows connections from DeployHQ to localhost.
To to deploy to other hosts or networks enter their addresses below:
IP Address [leave blank to finish]: 10.0.2.111
IP Address [leave blank to finish]:

You can now associate this Agent with your Deploy account.
Browse to Settings -> Agents in your account and enter the code below:

 >> AAAABBBB <<
Once you've verified the agent, start it on your server:
$ deploy-agent start
Deploy agent started. Process ID 25444
Then click Complete Agent Setup back in DeployHQ to finish.
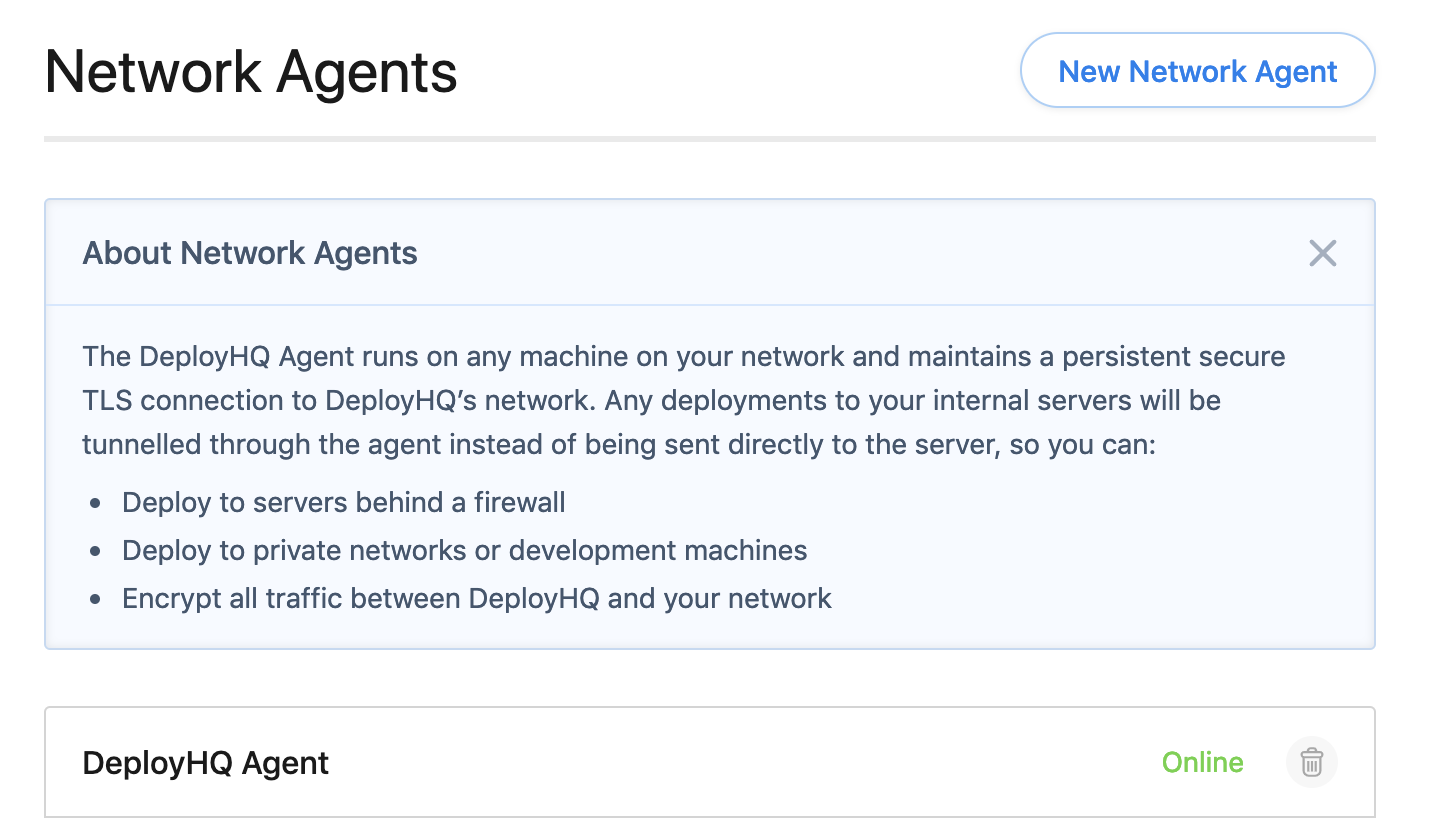
Once the setup process has finished, you'll find the agent in your list, with a status showing as online.
Connecting to a server using the agent
Now your agent is running, you can add a new server to any project in your account and choose to connect using it.
Head to your project, then the Servers and Groups page. Click New Server, then enter a name and select a protocol, in this case we'll choose SSH:
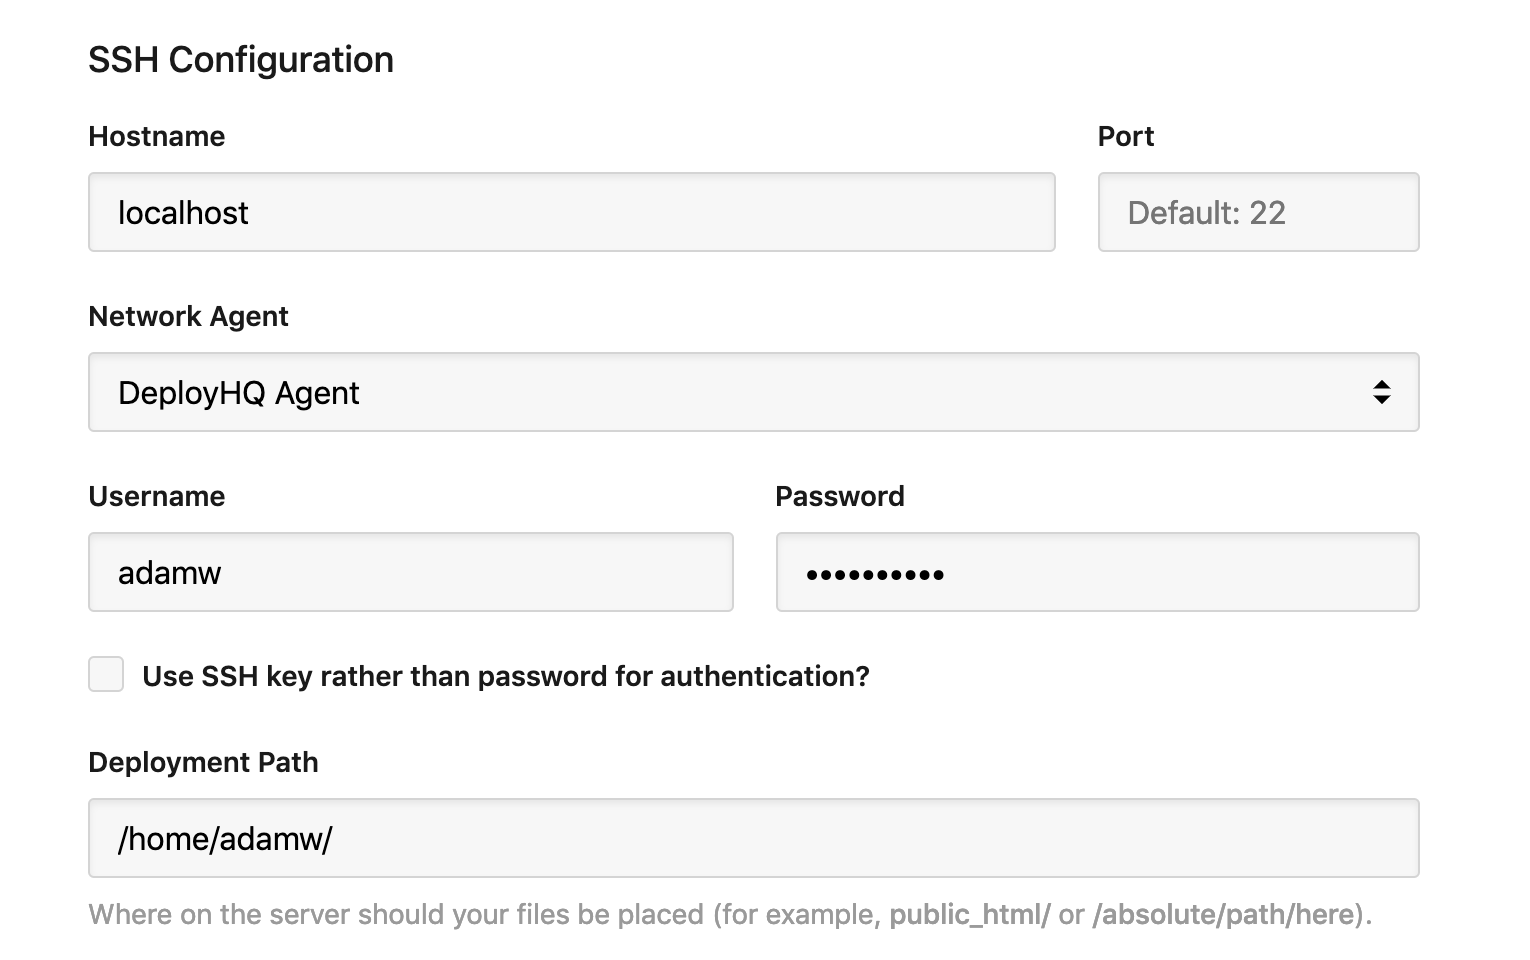
Enter the hostname as localhost if you're connecting to the same machine as that running the agent, or the private IP address of any servers behind that you've allowed. The rest of the information can be entered as normal.
Click Create Server at the bottom of the page, then you can start deploying to it!
Further reading
There are a number of useful things to note when using the agent.
- The server running the agent only needs to be able to connect to agent.deployhq.com via TCP port 7777, and does not need to accept incoming connections. Once a secure TLS connection is established, this is persisted, and all data is routed through this connection.
- The agent by default only allows access to the machine it's installed on, but you can modify the ~/.deploy/agent.access file to allow connections to additional destination servers within your network. After changes are made to agent.access, you'll need to restart it using the
deploy-agent restartcommand.
We hope you've found this guide useful, do get in touch if you have any questions.