I had yet another discussion about WordPress the other day with a friend here at my co-work space (Impact Hub in Honolulu). I told them I was working on a deployment script for spinning up WordPress and Ghost on Azure’s infrastructure and their response was what I’m used to:
WordPress? Dude… is this new gig warping your mind?
It might be. My response was a variation of the same one I always give:
WordPress powers 30% of the entire web. I think supporting it well on Azure is a no-brainer.
I use WordPress. I like it and yes there are things that, as a developer, I wish could be different. The simplicity of the thing, however, is what really attracts me to it. So, if you’re a person who uses WordPress and you also use Azure, this post might prove useful!
_ Disclosure : I work at Microsoft in Developer Relations. My job is to figure things like this out and then 1) tell the product teams what could work better and 2) report to you how I managed to get it all to work. If this is helpful, hooray!_
Step 0: Get Comfortable with the CLI
There are other ways to do this, but I like “scripted recipes”. There are ARM (Azure Resource Management) templates as well that allow you to click a button and “deploy to Azure” which I think is great, but I’m a bit of a control freak and dig my shell scripts (which may not be the best so sound off if you see improvements).
The other reason I like shell scripts is that you can add comments and use them as a bit of a learning tool. At least that’s what I’m hoping to do here – learning this Azure stuff for me hasn’t been easy and hopefully my notes help some of you.
If you want to jump right to it, here’s a gist you can read through. Yes, I know, I could just use a Docker Compose file and be done. I wanted a better database solution and I also wanted the challenge to… back under the bridge with you!
Finally – if you want to play along, make sure you have the Azure CLI installed and that you’re logged in with a default subscription set.
The first thing we need to do is declare our variables, etc:
RG="[YOUR RESOURCE GROUP]"
APPNAME=$RG-wordpress #Name what you want
LOCATION="Central US" #put where you like

#Recommend to keep these random, but if you need to change go for it
USER=admin_$RANDOM #set this to whatever you like but it's not something that should be easy
PASS=$(uuidgen) #Again - whatever you like but keep it safe! Better to make it random
SERVERNAME=server$RANDOM #this has to be unique across azure

#accepted values for the service plan: B1, B2, B3, D1, F1, FREE, P1, P1V2, P2, P2V2, P3, P3V2, PC2, PC3, PC4, S1, S2, S3, SHARED
#B2 is good for getting started - read up on the different levels and their associated cost.
PLAN=B2

#Kick it off by creating the Resource Group
echo "Creating resource group"
az group create -n $RG -l $LOCATION
At the very top I’m setting the resource group as RGbecause it’s used everywhere. I’m then setting the APPNAMEand LOCATION, the latter with a default of “Central US”.
When you create things in Azure, you use “resource groups” for logical groupings. This is extremely helpful when you want to wholesale remove everything when you’re playing around, which I am. It also keeps project-based stuff nice and tidy.
The name of your website needs to be unique across Azure as well. I usually try to name mine with the resource group appended to it somehow. I’ll talk about the user name and password stuff later.
The final step is to create the resource group. Now let’s create MySQL.
Step 1: Spinning Up a Managed MySQL Instance
This, to me, is the main benefit of using Azure. You get a super-scalable MySQL instance to back your fully-managed website. Most one-click installs you see online give you a single VM with MySQL installed right next to WordPress. This usually works fine (such as with this blog you’re reading) but if you’re planning on ramping up, it can be a bit scary.
The first thing to decide is the size of our database. You can ramp this thing to the moon if you want, but I suggest keeping it small to start. I’ve listed out the SKU structure in the script:
#The sku-name parameter value follows the convention {pricing tier}_{compute generation}_{vCores} as in the examples below:
# --sku-name B_Gen5_2 maps to Basic, Gen 5, and 2 vCores.
# --sku-name GP_Gen5_32 maps to General Purpose, Gen 5, and 32 vCores.
# --sku-name MO_Gen5_2 maps to Memory Optimized, Gen 5, and 2 vCores.

#WARNING - this might error out if your region doesn't support the SKU you set here. If it does, execute:
#az group delete -g [resource group] to drop everything and try again
#The SKU below is reasonable for a WP blog, but if you're going to host something more, consider more RAM/Cores
SKU=B_Gen5_1 #this is the cheapest one

echo "Spinning up MySQL $SERVERNAME in group $RG Admin is $USER"

# Create the MySQL service
az mysql server create --resource-group $RG \
    --name $SERVERNAME --admin-user $USER \
    --admin-password $PASS --sku-name $SKU \
    --ssl-enforcement Disabled \
    --location $LOCATION
This code creates a smaller MySQL instance – in fact it’s the smallest one you can create. I ran into some issues with certain SKUs not being supported in certain regions, but if you get an error just drop the resource group and try again.
We then spin up MySQL. The one big thing to notice here is --ssl-enforcement Disabledwhich caused me some headaches. WordPress doesn’t use SSL out of the box, which you can change with a plugin or config changes (surprise surprise). If you’re behind a firewall or part of a VPN, this might not be a huge deal. You can change this later on, however, when the plugin is installed.
The final thing to point out is the admin-user and admin-passwordsettings. I am not a fan of leaving the root level stuff to the user, but right now that’s the way it is. To softly get around this, the script creates a random user name and generates a GUID for the password, which you can see in the first script above.
We’re now ready to open a firewall and create our WordPress database.
Step 2: Firewall and WordPress Database
Our server is up and running but is locked down completely, which I think is marvy. We need to be explicit about who/how/what can access our server, so we need to open a few holes in the firewall. The first will be for us, the second will be for our website later on:
echo "Guessing your external IP address from ipinfo.io"
IP=$(curl -s ipinfo.io/ip)
echo "Your IP is $IP"

# Open up the firewall so we can access
echo "Popping a hole in firewall for IP address $IP (that's you)"
az mysql server firewall-rule create --resource-group $RG \
        --server $SERVERNAME --name AllowMyIP \
        --start-ip-address $IP --end-ip-address $IP

# Open up the firewall so wordpress can access - this is internal IP only
echo "Popping a hole in firewall for IP address $IP (that's you)"
az mysql server firewall-rule create --resource-group $RG \
        --server $SERVERNAME --name AllowAzureIP \
        --start-ip-address 0.0.0.0 --end-ip-address 0.0.0.0

echo "Creating WordPress Database"
#IMPORTANT: you have to have the client installed locally. If you don't, you'll get an error right about here.
mysql --host=$SERVERNAME.mysql.database.azure.com \
      --user=$USER@$SERVERNAME --password=$PASS \
      -e 'create database wordpress;' mysql
The first hole is for my local IP address, which I’m grabbing using curl. This is a subshell that pings ipinfo.io and reads the response, setting it to a variable. I use that response to create the first firewall rule: AllowMyIP.
The next rule looks a bit scary. I’m creating a firewall rule that allows any service within Azure to ping my server. This is what the Azure docs have to say about it (emphasis mine):
To allow applications from Azure to connect to your Azure SQL server, Azure connections must be enabled. When an application from Azure attempts to connect to your database server, the firewall verifies that Azure connections are allowed. A firewall setting with starting and ending address equal to 0.0.0.0 indicates these connections are allowed. If the connection attempt is not allowed, the request does not reach the Azure SQL Database server.
Important
This option configures the firewall to allow all connections from Azure including connections from the subscriptions of other customers. When selecting this option, make sure your login and user permissions limit access to only authorized users.
This might seem suboptimal when it comes to security because it is. However, this is how every service works within any data center. We can, if we want, further lock this thing down later on when we know the IP of our site (assuming it won’t change).
The final step in the code above is to use the mysqlclient to create the remote database. I couldn’t find a way around this. I know that most people don’t have MySQL installed locally, so this could be a problem for you. I’m hoping to find a better solution someday.
Optional Step 2a: Convenience Stuff
I’m a control freak and I like to have access to my database. I also hate trying to remember login information so to help myself out I’ll setup a .envfile with the relevant bits:
echo "Setting ENV variables locally"
MYSQL_SERVER=$SERVERNAME.mysql.database.azure.com
MYSQL_USER=$USER@$SERVERNAME
MYSQL_PASSWORD=$PASS
MYSQL_PORT=3306
MYSQL_DB=$DATABASE
echo "MYSQL_SERVER=$MYSQL_SERVER\nMYSQL_USER=$USER\nMYSQL_PASSWORD=$PASS\nMYSQL_PORT=3306" >> .env
echo "alias prod=\"mysql --host=$SERVERNAME.mysql.database.azure.com --user=$USER@$SERVERNAME --password=$PASS\" wordpress"
echo "MySQL ENV vars added to .env. You can printenv to see them, or cat .env."
echo "To access your MySQL Instance just run `prod` as an alias. You can rename this in .env."
If you don’t know, a .envfile typically contains environment variables and other things intended to help you with development. They might contain local database configuration, etc. Here, I’m outputting some environment variables and I’m also setting up an alias so I can connect to prodas needed.
Side note: if you use zshell and oh-my-zsh! there’s a plugincalled “dotenv” that will automatically load any .env file in a directory when you navigate to it.
You don’t want this checked into source control!
Step 3: Creating The Web App
We want our WordPress site to be fully managed, from the database all the way down to the website itself. This will allow us to flip a few bits in the future to add more cores to either the site or the database.
This is not a VM. Well, at least as far as you’re concerned. All of that is abstracted into Azure’s “service fabric”. That said, the first thing you need to do is to pick the size of your VM in the form of a plan :p:
#create the plan
#accepted values: B1, B2, B3, D1, F1, FREE, P1, P1V2, P2, P2V2, P3, P3V2, PC2, PC3, PC4, S1, S2, S3, SHARED
#B2 is good for getting started - read up on the different levels and their associated cost.
PLAN=B2

echo "Creating AppService Plan"
az appservice plan create --name $RG \
                          --resource-group $RG \
                          --sku $PLAN \
                          --is-linux
You can think about this plan in terms of its capacity and compute power. B1 is the lowest but won’t work if you’re using Linux. If your WordPress site is going to power some serious traffic, you might consider a plan with a bit more horsepower to it. It’s not the most straightforward thing, but you can have a read about plans here.
Now we get to spin up our WordPress site. We could pull down the WordPress source (PHP) and then send it up to Azure, specifying deployment and runtime settings etc. Or we could simply specify the image on DockerHub:
echo "Creating Web app"
az webapp create --resource-group $RG \
                  --plan $RG --name $APPNAME \
                  --deployment-container-image-name wordpress
When you create a webappon Azure, it needs to know 1) how to run it and 2) how to deploy it. You can specify a Python runtime, for instance, and “local Git” as the deployment option. This would allow you to push from your local machine and have your Flask app “just run”.
If you’re using Docker, however, the runtime is built into the image. All that Azure needs to do is to know where to get it. It’ll use your plan to create and run a container. In the code above, I’m telling Azure to use the wordpress image, which Azure knows to pull down from DockerHub.
Having a look at the image description on DockerHub, you can see there are a number of environment variables that I can set for the image, namely the database connection bits. This is perfect for our needs, but how do you pass this through from Azure?
The good news is that Azure will pass whatever app settings you have for your webapp directly to your container:
echo "Adding app settings"
#add the settings for the new MYSQL bits
az webapp config appsettings set --name $APPNAME \
                                 --resource-group $RG \
                                 --settings WORDPRESS_DB_HOST=$MYSQL_SERVER \
                                 WORDPRESS_DB_USER=$MYSQL_USER \
                                 WORDPRESS_DB_PASSWORD=$MYSQL_PASSWORD \
                                 WEBSITES_PORT=80
The environment variables are expected by the WordPress container, and I’m setting them to the MySQL database that I created above.
The last setting, WEBSITES_PORT, tells Azure which port to forward to in the container. I think the default is port 80, but I’m setting it here just for clarity.
The final thing we need to do is a bit of a bugger for me: we need to explicitly turn on logging. I wish this just happened by default, like with Heroku, but it doesn’t so we need to:
#turn on logging
echo "Setting up logging"
#setup logging and monitoring
az webapp log config --application-logging true \
                    --detailed-error-messages true \
                    --web-server-logging filesystem \
                    --level information \
                    --name $APPNAME \
                    --resource-group $RG
I’m outputting everything here because I want to know exactly what happens when Azure tries to spin up this container. I’ll be honest: debugging the container stuff has been difficult.
Step 3a: More Convenience Bits
As I mention, I’m a huge fan of laziness and I like to add things to .env files when I can. Let’s do that now so we can tail our application logs with a simple command:
echo "Adding logs alias to .env. Invoking this will allow you to see the application logs realtime-ish."

#set an alias for convenience - add to .env
alias logs="az webapp log tail --name $APPNAME --resource-group $RG"
echo "alias logs='az webapp log tail -n $APPNAME -g $RG'" >> .env
I’m setting the alias for the current shell and I’m also appending it to .envso I can access it later on.
Step 4: Run it!
We’re ready to go! The only thing left to do is to navigate to our new site. The first request will take a while as Azure is pulling down our image and running it for the first time. You can see this if you tail the logs while the site is loading, which is the very last step of our script:
echo "Opening site and viewing logs"
open https://$APPNAME.azurewebsites.net
source .env
logs
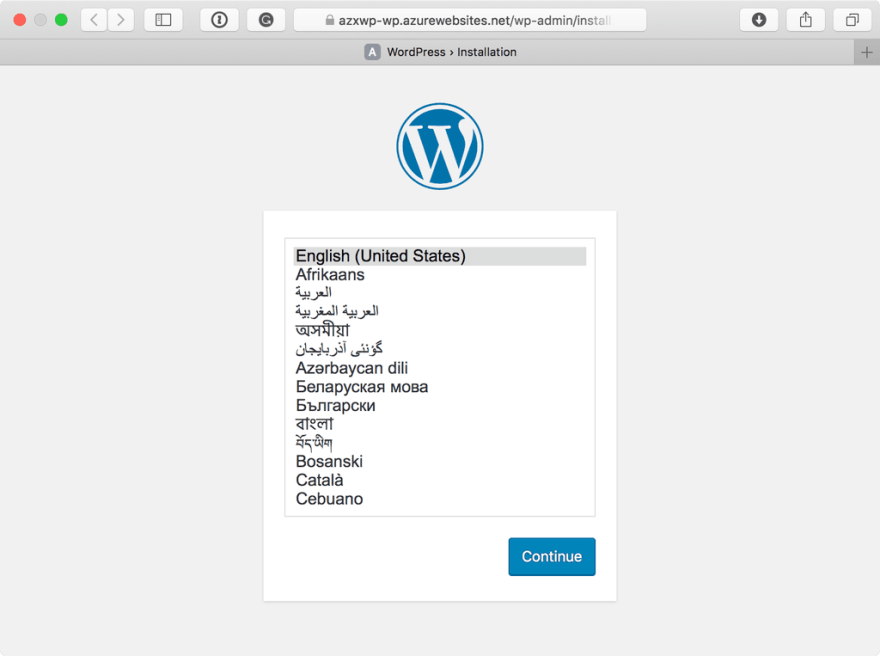
I’m opening our new URL, loading our new .env file into the shell and then calling our new alias, logs. This will allows us to see what’s happening at Azure as WordPress spins up. Hopefully, after a minute or so, you see something like this:
Seriously, Why Would You Do All of This?
It’s a good question, one I’ve asked myself repeatedly over the last few days. The answer is simple: this WordPress site is massively scalable. That’s kind of a big deal. It’s running right on the Azure “metal”, so to speak and I don’t need to worry about upscaling a VM.
As I mention: I really like WordPress and I run my business on it. Having it all on Azure would be a nice piece of mind.
As for costs, you’ll have to take a look at your subscription and decide if something like this is right for you. I have a regular subscription that I pay for and I can tell you that this setup is comparable with what I’ve seen for WordPress hosting.
Feedback, On Its Way
Every time I do stuff like this I end up with a big writeup for the product teams to look over. It’s important to note that this isn’t a situation where I “just send an email” or file a bug. My team works closely with the product teams and they like (I think) that we’re beating on their stuff.
I’ll be letting them know my thoughts on the MySQL stuff (admin user/pass, executing a remote command, etc) and a few more things that I need to get clarity on first. That’s a bit of a problem I have right now as I step into all of this: learning it is not straightforward.
I suppose that will be my biggest point of feedback. There’s so much to learn! It’s hard to get going and often I find myself doing things the “old way”. It’s also my job to help get this stuff in order, which I like.


Top comments (0)