
Flutter: Pull-To-Refresh was yesterday. Check out Pull-To-Reach!
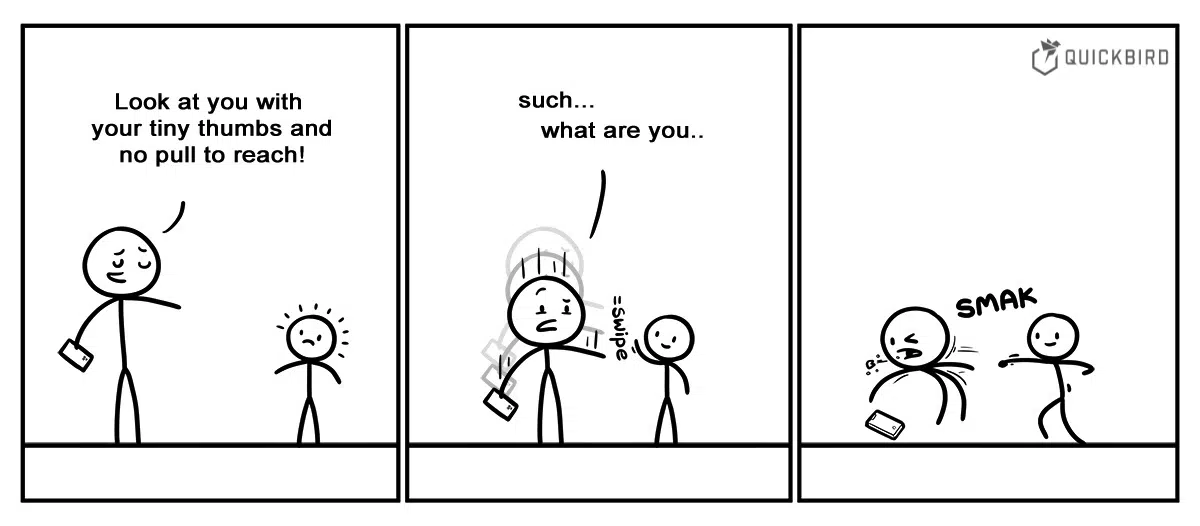
This is based on the following problem: Phones are getting bigger and bigger. I remember that I could easily carry my phone, headphones and some other stuff in the same pocket without any problems. Now I can barely fit my new phone into the pocket of slightly tighter pants 😅. Besides that this also leads to the problems that certain screen areas, like the top toolbar, are getting harder to reach.
In this article, we present a design solution used in the Soor.app. With Pull-To-Reach, the user can select toolbar items by swiping down rather than stretching his thumb up to the top. We explain how you can implement such functionality for your Flutter app. It’s a really neat solution that you have to see to know what it means:
By loading the video, you agree to Vimeo's privacy policy.
Learn more
The Problem with Phone Sizes
UX really suffers from bigger screens as this visualization of the thumb reachable area shows:
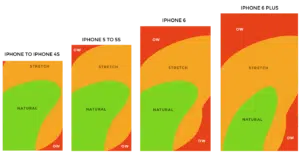
by Scott Hurff – How to design for thumbs in the Era of Huge Screens
As you can see, the top part of the screen can’t be reached without some hand gymnastics. Guess what most apps display there? Right, a AppBar/Navigation bar! This View can be essential for some of your app’s features. The solution to this problem is obvious and simple: Just don’t put all the stuff there. ✅
Samsungs OneUI solves this Problem by moving the toolbar down and adding a bigger area at the top that contains UI elements that don’t require user interaction.
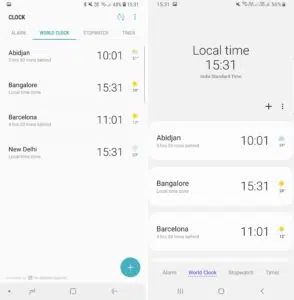
The Problem here is that space isn’t used very nicely and I am pretty sure that many apps want to display important information there. Just imagine an App that displays a feed of information. The question remains the same: What if you don’t want to rethink your whole design but still want to increase reachability?
Know Pull-To-Refresh? Get to know Pull-To-Reach!
The pull gesture isn’t anything new to smartphone users. A very basic implementation is the Pull-To-Refresh action in apps like Twitter, Chrome or Instagram. Pull-To-Reach uses the pull gesture to overcome the problem of accessing the non-reachable controls in the upper area of an app. You pull down and depending on when you release your thumb, a different control in your AppBar is highlighted and triggered. The Soor app is one of the few apps that use this mechanism to access all buttons in the top bar. Here you can see an example of this behavior:
By loading the video, you agree to Vimeo's privacy policy.
Learn more
Getting our Hands dirty!
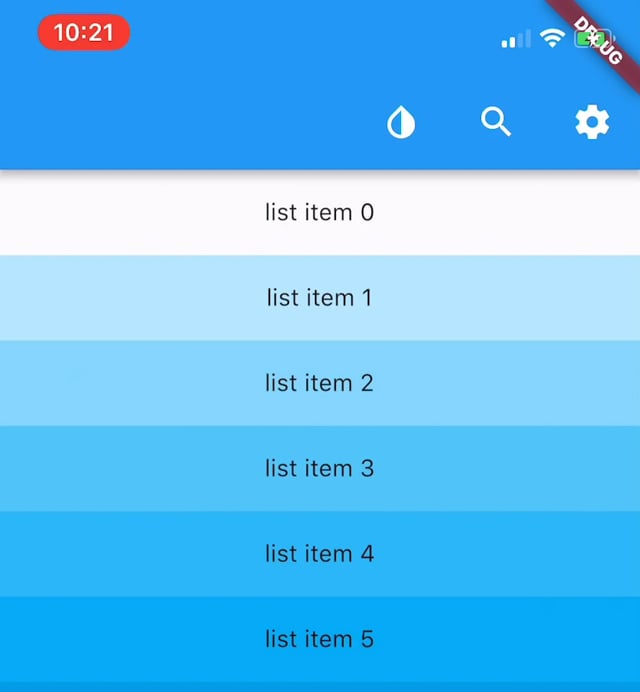
Before writing any widgets, we should specify what we really want to do. When we drag down and reach the top of the list, the items should be focused from right to left. Once we release our thumb the currently focused item should be selected!
First, we need a class that transforms the scroll distance into an index. This information needs to be distributed across the screen. Once this is done we can create widgets that consume this information and react to a focus or selection change.
Step 1: How much is the user over-scrolling?
In order to get some information about the focused item, we have to know how much the user is over-scrolling. This is similar to implementing Pull-To-Refresh. In Flutter, every Scrollable sends Notifications that contains information about the current scroll state. You can catch these notifications by using a NotificationListener Widget.
There are different kinds of ScrollNotifications such as
ScrollStartNotificationScrollUpdateNotificationScrollEndNotificationUserScrollNotificationOverscrollNotification
Easy. So we can simply listen for OverscrollNotifications? No, not really, there is a twist. Flutters ListView has a different scroll behavior on Android and iOS. This makes the implementation a little more complex. On iOS, the list bounces down and sends ScrollUpdateNotification and on Android, it shows an over-scroll-glow and sends OverscrollNotification. We need to handle both cases.
The max scroll distance can be accessed using notification.metrics.viewportDimension.
Now we have everything we need to calculate the scrolling progress (0 to 1).
Step 1 done. Now, we know how much the user is over-scrolling.
Step 2: Map the percentage to an index
Before we go any further we should move the written code into a widget.
In addition, we are also disabling Android’s overscroll glow when the user reaches the top of the List. This happens in _handleGlowNotification. We also have to implement the IndexCalculator interface. I will leave that simple math to you 😉
We can now detect the index for every scroll percent.
Step 3: Create Focus and Select Events
First, we have to decide how to distribute the focus and select the index across the screen. Flutter offers different ways to share a state between multiple Widgets and in our case, I went for an InheritedWidget. Feel free to use something else.
Let’s wrap our page in this widget and finish the ScrollToIndexConverter. Whenever the index has changed the PullToReachScope should be notified.
If the user releases the finger we have to update the selected index. This is a little tricky since iOS and Android send different notifications.
A ScrollEndNotification is sent if the list stops scrolling. For Android, this is fine since the list sends this event whenever the drag ends. On iOS, the list isn’t stopping immediately since it bounces back. We use a little workaround to get this working on iOS as well.
We now have all the necessary information to know when a widget is focused or selected.
Step 4: Adding Reachable Widgets
Our <code>Reachable</code> Widget will use the information stored in the PullToReachScope to give use a callback whenever an item with a specific index is focused or selected. This Widget would look like this:
Now we can compose this widget and implement visual feedback for focus and some routing when it’s selected! Here is an example of a ReachableIcon that shows a circular background when its in focus.
Creating an AppBar with ReachableIcons is now done in a few seconds!
Conclusion
We think Pull-To-Reach is nice design solution inspired by what people know from Pull-To-Refresh. It feels very natural and people understand it in no time at all. In this, we created the Foundation for our Pull-To-Reach mechanism that is customizable and easy to integrate. We are now able to reach the top ui elements in our app by adding just a few lines to the existing screen. Pretty cool I’d say. 😎
Pull-To-Reach is available as library here: https://github.com/TiO-Design/pull_to_reach.
And you can also check out the source code of this article here: https://github.com/quickbirdeng/flutter_pull_to_reach_demo
Pull-To-Reach might be especially useful for search widgets. If you want to learn how to build a platform-adaptive search widget in Flutter, check out our article Creating an Adaptive Search Widget in Flutter!
