Building a Powerful Vue.js SPA for E-Commerce
How often do you visit a website and wonder why they look and feel so much like a native web application?
Well, those web applications like Gmail, Google Maps, Netflix, and Twitter have something in common. They all share the same build approach; they’re all single-page applications.
They are quite easy to deploy and feel more snapping than more traditional websites, but how can you build one yourself. Stop wondering, ‘cause guess what? I will show you how to build a Vue.js SPA (single-page application) using a headless CMS–Graph CMS.

But how good would a tutorial be if we didn’t explore the concept a little more? So here’s an overview of what we’ll explore today:
What is a SPA?
How to set up your headless CMS?
How to build our SPA?
What is a SPA?
Unless you’ve been living under a rock for the past ten years, you’re probably loosely familiar with the concept of a single-page application. Still, a quick refresher is always good. So here's how they work and how they might benefit you.
SPAs are not like traditional websites. Rather than getting fed server-rendered HTML pages, they leverage JavaScript to fetch data and update the current page dynamically. The data it fetches isn’t embedded in any view layer, just plain JSON. It means there’s no page refresh. You’re always on the same page. When implemented correctly, this can make SPA much more snappier than a traditional application.
SPAs are part of the Jamstack umbrella term, but this architecture is broader; it also includes static sites. For me, where SPAs shine most is when paired to a headless CMS, and that’s precisely what we will do in this demo. That way, you are sure you don’t have to think about any back-end stuff. For many, this lets them focus on what they’re good at; building delighting front-end user experiences.
However, there are some drawbacks to single-page applications. For one, it makes your content much less crawlable by search engines. If you want your content to be indexed, it’s good to know that you can deal with this using an extra step–pre-rendering.
How to set up your headless CMS?
For our demo, we will use Graph CMS to store our data. It's a powerful headless CMS that leverages GraphQL as its query language. Don't worry if you're not familiar with it; our queries won't be too complex. It's more about setting you up on a real-life scenario infrastructure than digging into the nitty-gritty of a CMS.
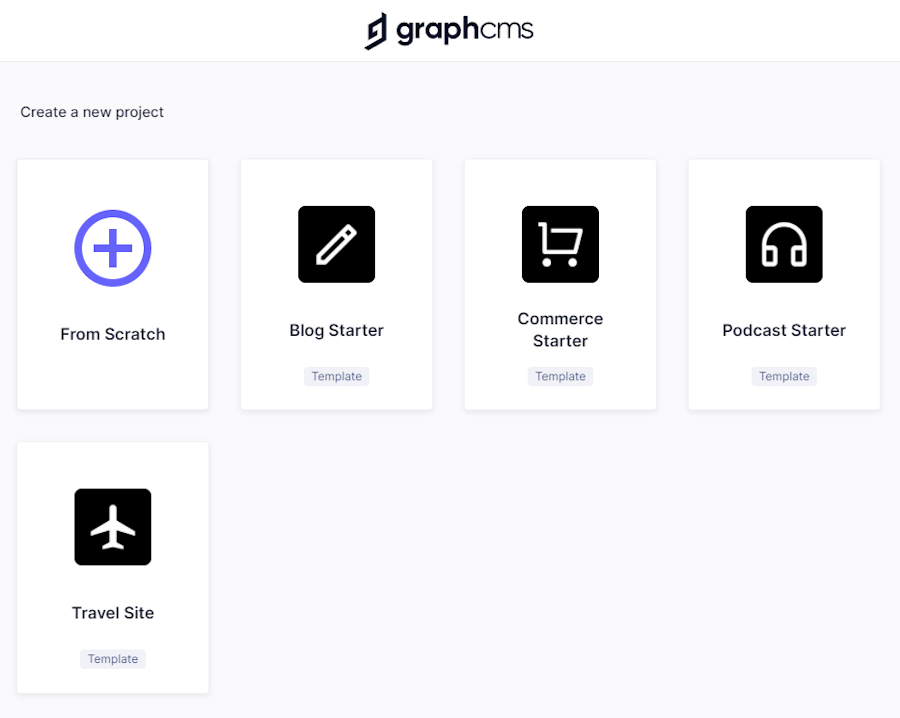
First, you'll need to hop on their website, set up an account, and create a project using the From Scratch option.

We will follow the following steps:
Set up your schema
Create Content
Make your API accessible
Integrate your content in your applications
Setting up our schema
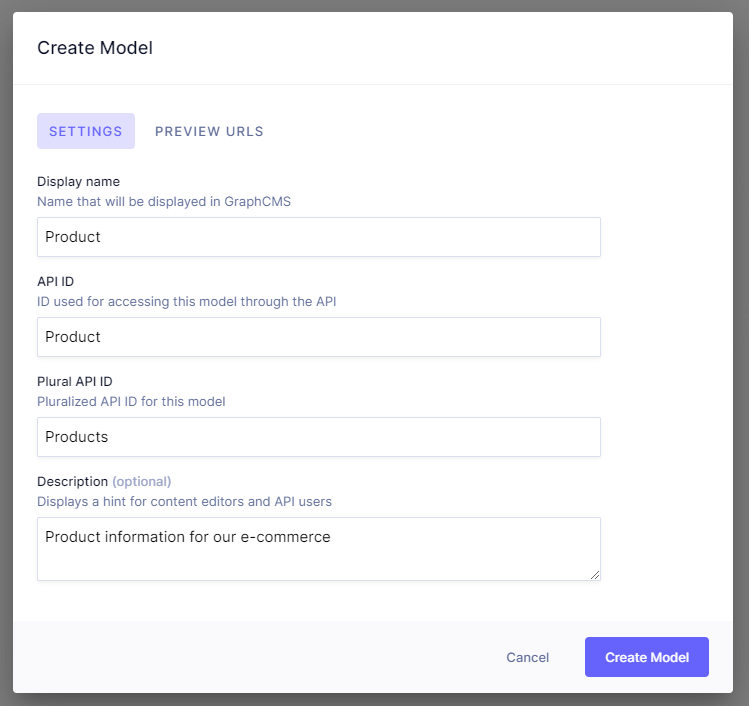
Go ahead and click on the Set up your schema link in the app dashboard. Then, again on the + Create Model button. We're only going to define one schema for our product.

Now, we need to add fields to our schema. It's pretty straightforward. Here's how to do it:

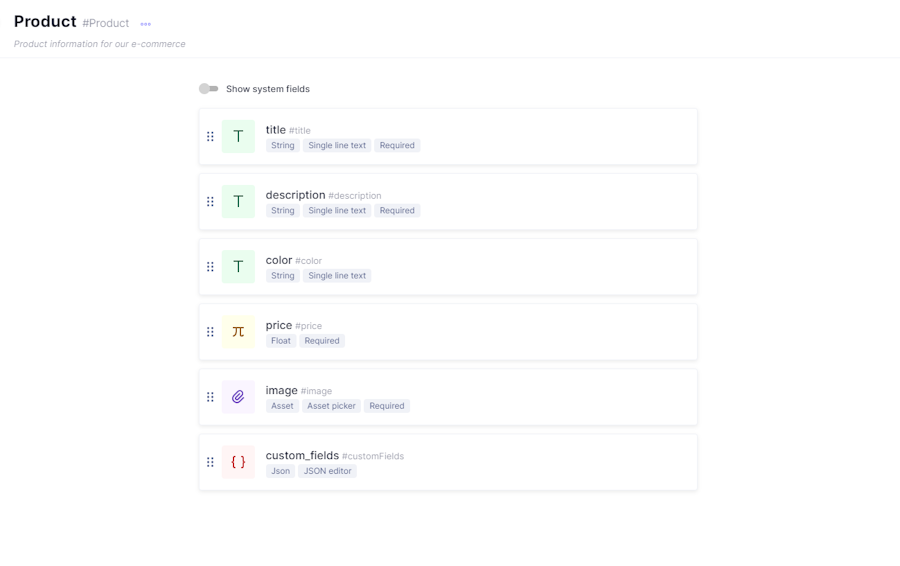
Give the preceding name in the settings panel, but don't forget to check the Make field required box in the Validations panel for all of them.
The last field we need is one for our custom fields. We could do this two ways:
Use a good ol' raw JSON field and write it ourselves.
Create a second schema for custom fields with relationships between our products and custom fields.
In a full-blown project, I'd go for the second one. It makes things much more manageable at scale since it normalizes our data; different products could use the same custom field. Although, for this example, I feel like keeping things at minimal complexity. So we’ll be opting for the first option, using a JSON field.
Add our last custom_fields field with a JSON editor field type, but do not check the Make field required for this one.
Creating products
We now have our product schema, great! But we need to instantiate concrete products now.
To create a product, click on the Content button on the left side panel. Then, on the + Create item button in the top right corner. I was at a loss to find a theme store when I was struck with what could be the best business idea after the idea of selling tap water in plastic bottles. 😉
Let's sell colors.


Here's the example of my first product “creation” (creation need to be taken with a grain of salt here. I'm pretty sure I didn’t create the orange color):

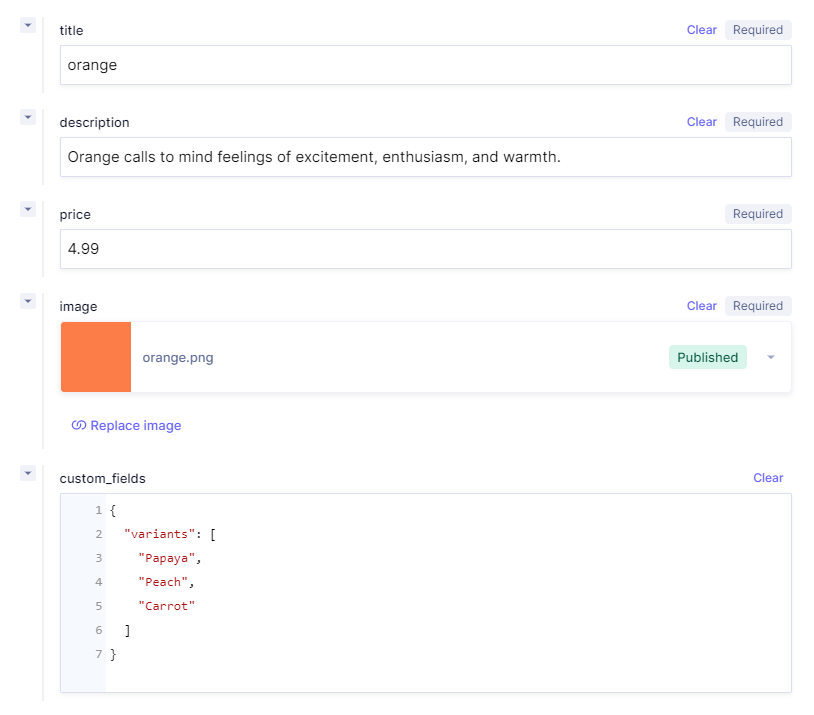
Once you’ve entered your product information, hit the Save and publish button in the top right corner.
Exposing products
Now, it’s time to expose our products. Go to the Settings panel at the bottom left of the dashboard. Then into the API Access section of the submenu, let's update the configuration as follow:

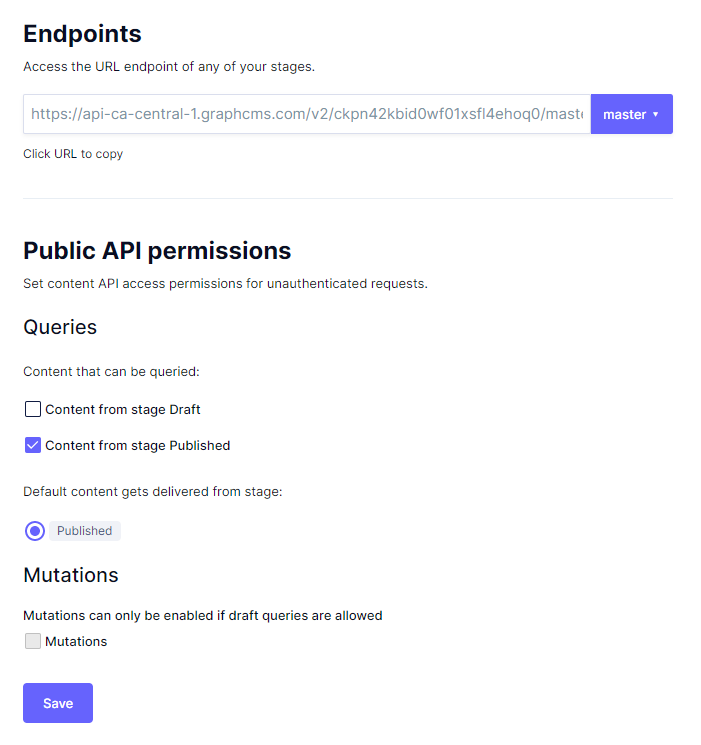
It would help if you also kept the endpoint nearby; it will be handy when creating the SPA.
Creating queries
While we could do this step on the SPA side, Graph CMS offers a great API Playground directly in the dashboard. This way, we can ensure our products can be fetched and craft our queries before switching development context. It could save us some time downstream. We need two queries for our app:
One that fetches all the products for our home page.
One that fetches an individual product for a specific product page.
Let's start with the first query:
{
  products {
    id,
    title,
    description,
    price,
    image {
      url
    }
    customFields
  }
}
Just copy and paste the query inside the Playground, and you should see the response on the right-side section. If you don’t see anything, the most common issue is that you probably forgot to publish the content.
Let's go for the individual query now:
{
  product(where: { id: "ckpoaw5mw63dz0d283xz8mr4r"}) {
    id,
    title,
    description,
    price,
    image {
      url
    }
    customFields
  }
}
Even if you're not familiar with GraphQL, the queries are pretty self-explanatory. We pass the fields we want in our queries, and the engine will ensure that they are provided in the response.
For the moment, I hardcoded a value for the id field to test that we could indeed fetch a single product, but we will swap that later. To try this on your side, you can use any id retrieved with the first query.
Building our SPA
Initializing our application
As you know, we will be using Vue.js to create our SPA. The Vue CLI makes it really easy to scaffold a project directly from your shell. It sets up a project with the proper dependencies and with commonly used configurations. If you don't already have the CLI, you can install it with the following command:
npm install -g @vue/cli
# OR
yarn global add @vue/cli
Then you can create a project with: vue create snipcart-vue-spa. We’ll use the Default (Vue 3) preset. Before booting our project, we need to add some more dependencies to support our GraphQL queries with yarn add vue-apollo graphql apollo-client. The last thing we need is a router. This is crucial in a SPA since you'd just have static files without it, and we want dynamical rendering, to use requests strictly for data & not for views. Run yarn add vue-router@4. It will install the next version of the Vue router, supporting both Vue 3 and Vue 2. Boot up your favorite editor and head to the next step!
Building the scaffolding
The first thing we want to do is jump in the main.js file. That's where we will instantiate and configure the services we will use: the router, GraphQL client & Vue.
Let's update it as follow:
// '.src/main.js'
import { createApp } from 'vue'
import App from './App.vue'
import { ApolloClient, createHttpLink, InMemoryCache } from '@apollo/client/core'
import VueApollo from '@vue/apollo-option'
import ProductComponent from './components/Product'
import ProductsComponent from './components/Products'
import { createRouter, createWebHashHistory } from 'vue-router'

const httpLink = createHttpLink({
    uri: 'https://api-ca-central-1.graphcms.com/v2/ckpn42kbid0wf01xsfl4ehoq0/master',
})

// Cache implementation
const cache = new InMemoryCache()

// Create the apollo client
const apolloClient = new ApolloClient({
    link: httpLink,
    cache,
})

const apolloProvider = new VueApollo({
    defaultClient: apolloClient,
})

const routes = [
    { path: '/', component: ProductsComponent },
    { path: '/product/:id', component: ProductComponent },
]

const router = createRouter({
    history: createWebHashHistory(),
    routes: routes
})

createApp(App)
    .use(router)
    .provide('apollo', apolloProvider)
    .mount('#app')
I used the typical configuration for every service, although one thing to note is the uri field in the createHttpLink method. It's the GraphCMS route I told you to keep close earlier. It's the endpoint that will execute the GraphQL queries we send it. You might see that we are importing two components; ProductsComponent and ProductComponent. The first one will be for the home page, showcasing our products list and linking to individual product pages. There won't be any buy buttons on this page. The second one will be for particular products, and this one will contain the product description and buy buttons.
But, not too fast. Two last things before jumping in the components, let's modify the default App component. You can delete the HelloWorld component provided and replace the App one with:
<template>
  <router-view></router-view>
</template>

<script>

export default {
  name: 'App'
}
</script>

<style>
#app {
  flex: 1;
  display: flex;
  flex-direction: column;
  justify-content: space-around;
}

body {
  display: flex;
  flex: 1;
  height: 100%;
  margin: 0;
}

html {
  overflow: hidden;
  box-sizing: border-box;
  width: 100%;
  height: 100%;
  padding: 10px;
}
</style>
It's pretty simple. It's only a wrapper for us to mount our <router-view></router-view> and define some site-wide CSS. The router-view represents the dynamic component provided by our routes mapping; it will be replaced at runtime by the router.
The last thing we need is Snipcart's necessary script & CSS to handle to buy buttons and cart. So we will put them in the ./public/index.html file.
You can paste the template as-is:
<!DOCTYPE html>
<html lang="">
  <head>
    <meta charset="utf-8">
    <meta http-equiv="X-UA-Compatible" content="IE=edge">
    <meta name="viewport" content="width=device-width,initial-scale=1.0">
    <link rel="icon" href="<%= BASE_URL %>favicon.ico">
    <link data-n-head="ssr" rel="preconnect" href="https://cdn.snipcart.com">
    <link data-n-head="ssr" rel="preconnect" href="https://app.snipcart.com">
    <link data-n-head="ssr" rel="stylesheet" href="https://cdn.snipcart.com/themes/v3.0/default/snipcart.css" defer>
    <script data-n-head="ssr" src="https://cdn.snipcart.com/themes/v3.0/default/snipcart.js" defer></script>
    <title><%= htmlWebpackPlugin.options.title %></title>
  </head>
  <body>
    <div hidden id="snipcart" data-api-key="MzMxN2Y0ODMtOWNhMy00YzUzLWFiNTYtZjMwZTRkZDcxYzM4" data-config-modal-style="side"></div>
    <noscript>
      <strong>We're sorry but <%= htmlWebpackPlugin.options.title %> doesn't work properly without JavaScript enabled. Please enable it to continue.</strong>
    </noscript>
    <div id="app"></div>
    <!-- built files will be auto injected -->
  </body>
</html>
You will need to change the data-api-key attribute for yours.
Building the components
Before defining our components, we will create the GraphQL queries necessary to fetch their data. Let's create a graphql folder in the src one. Inside, create a products.js file.
Here are our queries:
// '.src/graphql/products.js'
import gql from 'graphql-tag'

export const productsQuery = {
        query: gql`query {
            products {
              id,
              title,
              color,
            }
          }`
}

export const productQuery = (id) => ({
        query: gql`query {
            product(where: { id: "${id}"}) {
                id,
                title,
                description,
                price,
                color,
                image {
                    url
                }
                customFields
            }
        }`
    } )
They're almost identical to those we used for our tests in GraphCMS's playground, but we removed some fields in the productsQuery query and used gql to parse the query. We've also replaced the hardcoded id to make sure we can provide it dynamically.
We're now ready to define our components. Let's create a ProductsComponent file in the Components folder. I won't be including style tag in our components definition to avoid cluttering, but you can find it in the GitHub repo at the end of the post.
// './src/components/ProductsComponent.vue'
<template>
  <div class="products">
      <div class="product"
      @click="() => productClicked(product.id)"
      :style="{backgroundColor: product.color}"
      :key="product.id" v-for="product in products">
        <span class="title">{{product.title}}</span>
      </div>
  </div>
</template>

<script>
import { productsQuery } from '../graphql/products'

export default {
  name: 'App',
  inject: ['apollo'],
  data(){
    return {
      products: []
    }
  },
  methods: {
    productClicked(id){
      this.$router.push(`/product/${id}`)
    }
  },
  mounted(){
    this.apollo.defaultClient.query(productsQuery)
      .then(({data}) => {
        this.products = data.products
      })
  }
}
</script>
Once the component is mounted, we use the apollo client to execute the productsQuery, which we’ll then use to update our data. We have access to the this.apollo because we passed it as a dependency in our component's “inject” attribute. As stated in Vue.js doc, it's a neat way to let a ["parent component] serve as dependency provider for all its children, regardless of how deep the component hierarchy is." In our case, the parent component is the App one, and we injected the dependency when we use the .provide('apollo', apolloProvider) method in the main.js file.
The other thing we are doing is calling productClicked on a click event. It uses the router to push a new route. Once the route is pushed, the router will update the <router-view></router-view> in our App accordingly.
Let's create our second component:
// '/src/components/ProductComponent.vue'
<template>
<div class="wrapper">
<router-link class="home" to="/">🌈</router-link>
<div class="product" v-if="product">
<div class="description">{{product.description}}</div>
<div class="buy_button snipcart-add-item"
:data-item-id="product.id"
:data-item-price="product.price"
:data-item-description="product.description"
:data-item-image="product.image.url"
:data-item-name="product.title"
data-item-quantity="1"
data-item-url=""
data-item-custom1-name="variants"
:data-item-custom1-options="customFieldsOptions"
>
Buy
<span class="hidden_title" :style="{color: product.title}" > {{product.title}} <br/></span>
{{product.price}}$
</div>
</div>
</div>
</template>
<script>
import { productQuery } from '../graphql/products'
export default {
name: 'App',
inject: ['apollo'],
props: ['id'],
data(){
return {
product: null,
customFieldsOptions: ''
}
},
mounted(){
this.apollo.defaultClient.query(productQuery(this.$route.params.id))
.then(({data}) => {
this.product = data.product
this.customFieldsOptions = data.product.customFields.variants
.reduce((options, option) => options.concat(`|${option}`),'')
window.document.documentElement.style.setProperty('--product-color', data.product.color)
})
}
}
</script>We're doing the same thing with the apollo client here. We also trigger the data fetching in the mounted lifecycle method. Then, we update the data with our product and format our custom field options. You can see we are providing every necessary Snipcart field in our buy button. Snipcart's JS will pick up on the event and handle the cart session from there when clicking on it.
In the first component, we used the router programmatically to trigger a component change. To show you another way, I decided to use a <router-link to='path'></router-link> in this one. It's doing the same thing as before, but declaratively.
Deploying our SPA
We're now ready to publish our application to the public and test if we can process dummy orders. We're going to use Netlify to do so. You'll need a Netlify and a GitHub account.
Although, before we do so, we need to get two things done:
Provide a way for Snipcart’s crawler to validate our products.
Setting up our environment variables.
If you're not too familiar with Snipcart's order validation logic, you can read more about it here.
Since our application is a SPA, we need to find another way to provide our products' information. We will create a serverless function that fetches our GraphCMS endpoint and returns it in a JSON format. Then, we link to this serverless endpoint in the data-item-url of our products.
Since we will be deploying our app on Netlify, we will leverage their serverless offering called Netlify Functions, which abstracts much of the details we would otherwise have to deal with. Let's create a netlify/functions folder in the root directory of our project.
In it, we will create a crawler.js:
const gql = require('graphql-tag');
const { ApolloClient, createHttpLink, InMemoryCache } = require('@apollo/client/core');
const fetch = require("node-fetch");

const cache = new InMemoryCache()

const httpLink = createHttpLink({
    uri: 'https://api-ca-central-1.graphcms.com/v2/ckpn42kbid0wf01xsfl4ehoq0/master',
    fetch
})

const apolloClient = new ApolloClient({
    link: httpLink,
    cache
})

const crawlerQuery = {
    query: gql`query {
        products {
          id,
          title,
          price
        }
      }`
}

exports.handler = async (event, context) => {
  try {
    const { data } = await apolloClient.query(crawlerQuery);

    return {
        statusCode: 200,
        headers: {
          'Content-Type': 'application/json',
        },
        body: JSON.stringify(data.products)
    };
  } catch (error) {
    console.log(error);
    return {
      statusCode: 500,
      body: JSON.stringify({ error: 'Failed fetching data' }),
    };
  }
};
The export format is specific to Netlify, but besides that, the code is similar to stuff we already covered, so you should understand it. Since we included a netlify/functions folder, Netlify will automatically build files & expose them as serverless functions. The last missing piece is adding an environment variable to dynamically provide our website's base URL in our ProductComponent.
Let's create a .env file, one single line in it: VUE_APP_BASE=http://localhost:8080. It configures the default value for our base URL, but we’ll overwrite it during Netlify's build.
Now, hop back in our ProductComponent file and, update the product's URL with: :data-item-url="${baseUrl}/.netlify/functions/crawler".
Push the project to GitHub and head to Netlify's dashboard. Hit the New site from Git button, and find your project's repository; the default configuration is fine for us. Open the Site settings page and scroll down to the Environment section. Create it as such:


Make sure to use your project's URL and not the same as in the screenshot. 😉
Trigger a redeploy, and BAM! We got our store.


You can see it live in action here.
See the GitHub repo here.
Closing thoughts
I had a lot of fun making this demo, I had not touched Vue.js for some time, and it was refreshing to jump back in. GraphCMS's onboarding and general UI are just so pleasing. I had no issues and didn't even need to consult the documentation. However, if I had more time, I would have liked to dig further into Vue's new composition API to leverage a more functional approach.
Another thing that I would also like to try is Netlify's new pre-rendering functionality. It's still in Beta, but this could theoretically bypass the need for us to create a serverless function and directly serves a pre-rendered page with your product information without needing to execute JavaScript. I'll have to test things out; it's a great plus for any SPAs.
Let me know in the comments below your experience using Vue to build a SPA.
Liked the article? Hit those share buttons!


