I saw an interesting question on Twitter few days ago.
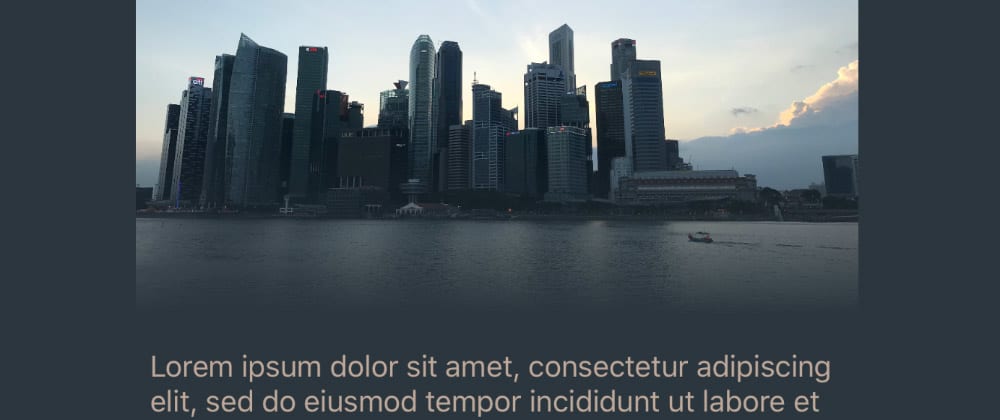
How does the iTunes app select the background color for the view depending on colors of the poster image?
The answer might seem simple:
- Pick the main color of the image.
- Set that as the background color.
- Pick a color that looks good on that background.
- Use it as the text color.
Real life is usually not so simple but much more interesting.
Ok, so let's do this!
I'll be using Swift, UIKit and CoreGraphics classes like UIImage, UIColor, CGImage but the same principles apply for any other languages or frameworks.
Picking the Dominant Color of an Image
The most simple way of picking the dominant color is to take the average color of the image, i.e. sum the value of all pixels and divide it by the number of the pixels.
I was surprised how well this works 🤯. Seriously, you can ignore most of this article and just use the average color.
Of course there are edge cases where the average doesn't really work: imagine a picture that is half black and half white. The average would be gray even though there is no gray color in the image.
Another option could be somehow ordering the colors and picking the median. You could order by hue or saturation.
But let's overcomplicate everything and use a technique called k-means clustering.
K-Means Clustering
If you clicked the Wikipedia link your head might be spinning from words like "signal processing" and "spacial extent", but it's simpler than it sounds.
Trust me.
What it does is group data into k number of groups (clusters). In our case it will group all the colors of an image into k number of groups, then you pick one of those groups (usually the biggest one), compute it's center (a.k.a. mean) and you have the dominant color of that image.
The algorithm:
- Pick k number of random colors from your image. This will be the centers of your clusters.
- Calculate the distance from each pixel's color to the center of each cluster.
- Assign the pixel's color to the closest cluster.
- Calculate the new center of each cluster by taking the average of all colors assigned to the cluster.
- Goto 2. Repeat until the centers of all clusters no longer change.
You might be wondering how on earth do you compute the distance between two colors or a color and the cluster's center? Fortunately we can treat colors as points in the 3D space! Usually a color is defined by three (or four, if you take transparency into account) components: red, green, blue; or hue, saturation and brightness. Points in 3D space are also defined by three components: X, Y and Z. So red becomes X, green becomes Y, blue becomes Z and suddenly you have a point in a 3D space! Then computing the distance between two colors is as simple as computing the distance between two points.
Right, time to write some code!
Resizing the Image
First we need to resize our image to some manageable size (like 100x100) or else the clustering will take forever.
Let's make an extension for UIImage that will resize it:
extension UIImage {
    func resized(to size : CGSize) -> UIImage {
        let format = UIGraphicsImageRendererFormat()
        format.scale = 1
        //disable HDR:
        format.preferredRange = .standard
        let renderer = UIGraphicsImageRenderer(size: size, format: format)
        let result = renderer.image { (context) in
            self.draw(in: CGRect(origin: CGPoint.zero, size: size))
        }
        return result
    }
}
Getting the Color Data
Next we need to get all the color data of all pixels in the image.
My solution is to get the CGImage from an UIImage and take the image data which is an array of bytes. Copy the bytes to an array of unsigned 32 bit integers. This gives an array where each element represents the color of a single pixel.
Iterate over this array, extract red, green and blue components using some bitwise magic and finally create an instance of UIColor.
This seems way more complicated than it should be. If you know a better way of converting an UIImage to an array of UIColor please let me know!
extension UIImage {
    func getPixels() -> [UIColor] {
        guard let cgImage = self.cgImage else {
            return []
        }
        assert(cgImage.bitsPerPixel == 32, "only support 32 bit images")
        assert(cgImage.bitsPerComponent == 8,  "only support 8 bit per channel")
        guard let imageData = cgImage.dataProvider?.data as Data? else {
            return []
        }
        let size = cgImage.width * cgImage.height
        let buffer = UnsafeMutableBufferPointer<UInt32>.allocate(capacity: size)
        _ = imageData.copyBytes(to: buffer)
        var result = [UIColor]()
        result.reserveCapacity(size)
        for pixel in buffer {
            var r : UInt32 = 0
            var g : UInt32 = 0
            var b : UInt32 = 0
            if cgImage.byteOrderInfo == .orderDefault || cgImage.byteOrderInfo == .order32Big {
                r = pixel & 255
                g = (pixel >> 8) & 255
                b = (pixel >> 16) & 255
            } else if cgImage.byteOrderInfo == .order32Little {
                r = (pixel >> 16) & 255
                g = (pixel >> 8) & 255
                b = pixel & 255
            }
            let color = UIColor(red: CGFloat(r) / 255.0, green: CGFloat(g) / 255.0, blue: CGFloat(b) / 255.0, alpha: 1)
            result.append(color)
        }
        return result
    }
}
I know, 😱!
But seriously, this was the most difficult part.
Defining the Data Structures
Next we need a convenient way to do all the maths on the colors/points. You could implement several extension functions for UIColor, but I decided to create a new Point structure:
struct Point : Equatable {
    let x : CGFloat
    let y : CGFloat
    let z : CGFloat
    init(_ x: CGFloat, _ y : CGFloat, _ z : CGFloat) {
        self.x = x
        self.y = y
        self.z = z
    }
    init(from color : UIColor) {
        var r : CGFloat = 0
        var g : CGFloat = 0
        var b : CGFloat = 0
        var a : CGFloat = 0
        if color.getRed(&r, green: &g, blue: &b, alpha: &a) {
            x = r
            y = g
            z = b
        } else {
            x = 0
            y = 0
            z = 0
        }
    }
    func toUIColor() -> UIColor {
        return UIColor(red: x, green: y, blue: z, alpha: 1)
    }
    static func == (lhs: Point, rhs: Point) -> Bool {
        return lhs.x == rhs.x && lhs.y == rhs.y && lhs.z == rhs.z
    }
}
We now have a simple way to convert from/to UIColor and our Point structure. Next let's define several helper operators:
static let zero = Point(0, 0, 0)
static func +(lhs : Point, rhs : Point) -> Point {
    return Point(lhs.x + rhs.x, lhs.y + rhs.y, lhs.z + rhs.z)
}
static func /(lhs : Point, rhs : CGFloat) -> Point {
    return Point(lhs.x / rhs, lhs.y / rhs, lhs.z / rhs)
}
...and a function to compute the distance between two points.
func distanceSquared(to p : Point) -> CGFloat {
    return (self.x - p.x) * (self.x - p.x)
        + (self.y - p.y) * (self.y - p.y)
        + (self.z - p.z) * (self.z - p.z)
}
Note that it returns the squared distance. We could get the real distance by taking the square root of the result, but in our case it makes no practical difference. Look at it like a performance optimization.
Next let's create the Cluster class. All it needs is the center point and an array to keep the assigned points:
class Cluster {
    var points = [Point]()
    var center : Point
    init(center : Point) {
        self.center = center
    }
}
We also need a way to calculate the center for the points in the array:
func calculateCurrentCenter() -> Point {
    if points.isEmpty {
        return Point.zero
    }
    return points.reduce(Point.zero, +) / points.count
}
It computes the mathematical average of all the points by summing each of their components and dividing by the number of points.
We could use this mathematical average as the new center, but remember the edge case when the image contains only black and white pixels but the average is gray? Well, to get around this, instead of using the average, we find an existing point which is closest to the average and use that as the new center:
func updateCenter() {
    if points.isEmpty {
        return
    }
    let currentCenter = calculateCurrentCenter()
    center = points.min(by: {$0.distanceSquared(to: currentCenter) < $1.distanceSquared(to: currentCenter)})!
}
Here I'm using the Swift's Standard Library's min(by:) function to find the point with the smallest distance to the center.
We also need a function to find the the cluster which is closest to a point:
private func findClosest(for p : Point, from clusters: [Cluster]) -> Cluster {
    return clusters.min(by: {$0.center.distanceSquared(to: p) < $1.center.distanceSquared(to: p)})!
}
Clustering
Finally we're ready to implement the clustering!
Let's create a function that will take a list of points and return an array of k clusters:
func cluster(points : [Point], into k : Int) -> [Cluster] {
}
First we need to pick k random points from the lists making sure we accidentally don't pick two identical points!
var clusters = [Cluster]()
for _ in 0 ..< k {
    var p = points.randomElement()
    while p == nil || clusters.contains(where: {$0.center == p}) {
        p = points.randomElement()
    }
    clusters.append(Cluster(center: p!))
}
Next we'll assign each point to the closest cluster:
for p in points {
    let closest = findClosest(for: p, from: clusters)
    closest.points.append(p)
}
Now let's compute the new center point for each cluster:
clusters.forEach {
    $0.updateCenter()
}
And... that's it! Repeat this several times and you'll have each point assigned to the best matching cluster.
It usually takes about 5 iterations for the centers to converge, so you could just loop it for 5 or 10 times and get an acceptable result. But let's implement a test to check if the centers no longer move around by checking the distance between the old and the new center of a cluster. Here's the final code:
for i in 0 ..< 10 {
    clusters.forEach {
        $0.points.removeAll()
    }
    for p in points {
        let closest = findClosest(for: p, from: clusters)
        closest.points.append(p)
    }
    var converged = true
    clusters.forEach {
        let oldCenter = $0.center
        $0.updateCenter()
        if oldCenter.distanceSquared(to: $0.center) > 0.001 {
            converged = false
        }
    }
    if converged {
        print("Converged. Took \(i) iterations")
        break;
    }
}
Choosing the Main Color
We now have a list of k clusters.
How do we get the main color? Well, if you want the dominant color, just take the center point of the cluster with most points assigned and convert it back to a UIColor.
You could also convert all centers to UIColor and pick the one with the highest (or smallest) saturation.
For now, let's just pick the biggest cluster:
let clusters = kMeans.cluster(points: points, into: 3).sorted(by: {$0.points.count > $1.points.count})
let colors = clusters.map(({$0.center.toUIColor()}))
guard let mainColor = colors.first else {
    return
}
setBackgroundColor(mainColor)
...aaaand done! 🤗
Not quite. We still need to pick a color that looks good on our main color to use as the text color.
Choosing the Text Color
Let's start by taking a complimentary color of our main color.
We'll need to convert our main color from RGB to the HSL (hue, saturation, brightness) color space. Fortunately UIColor can do this for us.
We'll then shift the Hue component by 180 degrees. This will result in a complimentary color which gives us the highest possible contrast. Think yellow text on blue background.
Next we need to bump down the contrast to make it possible to read the text without squinting. This took some trial and error, but I'm getting quite good result by shifting the saturation and brightness in different directions.
Time for some more code!
We first need a structure to store our HSL color:
struct HSLColor {
    let hue, saturation, brightness, alpha : CGFloat
    init(hue : CGFloat, saturation : CGFloat, brightness : CGFloat, alpha : CGFloat = 1) {
        self.hue = hue
        self.saturation = saturation
        self.brightness = brightness
        self.alpha = alpha
    }
}
We also need a way to shift the Hue, Saturation and Brightness components by a certain amount. UIColors stores them in the [0..1] interval, so the result needs two wrap around in this interval.
Let's say the current value is 0.8 and we want to shift it by 0.6:
0.8 + 0.6 = 1.4
wrapping 1.4 around [0..1] gives us 0.4.
We can use Swift's truncatingRemainder(dividingBy:) function for this.
At first I thought this would be enough, but sometimes this produces an oversaturated bright text on a dark background which is difficult to read. After some experimenting I discovered that saturation and brightness should be shifted to different directions: brightness goes up, while saturation goes down. If brightness is already high, it will wrap around. But this shouldn't happen for saturation: if it's low, it should not wrap around and become high.
This is the solution I came up with:
private func shift(_ value : CGFloat, by amount : CGFloat) -> CGFloat {
    return abs((value + amount).truncatingRemainder(dividingBy: 1))
}
And some helper functions to shift each of the components:
func shiftHue(by amount : CGFloat) -> HSLColor {
    return HSLColor(hue: shift(hue, by: amount),
                    saturation: saturation,
                    brightness: brightness, alpha: alpha)
}
func shiftBrightness(by amount : CGFloat) -> HSLColor {
    return HSLColor(hue: hue, saturation: saturation,
                    brightness: shift(brightness, by: amount), alpha: alpha)
}
func shiftSaturation(by amount : CGFloat) -> HSLColor {
    return HSLColor(hue: hue, saturation: shift(saturation, by: amount),
                    brightness: brightness, alpha: alpha)
}
Phew, that's about it! We're now ready compute the matching text color from our main color:
func makeTextColor(from color : UIColor) -> UIColor {
        return color.hslColor.shiftHue(by: 0.5)
                            .shiftSaturation(by: -0.5)
                            .shiftBrightness(by: 0.5).uiColor
}
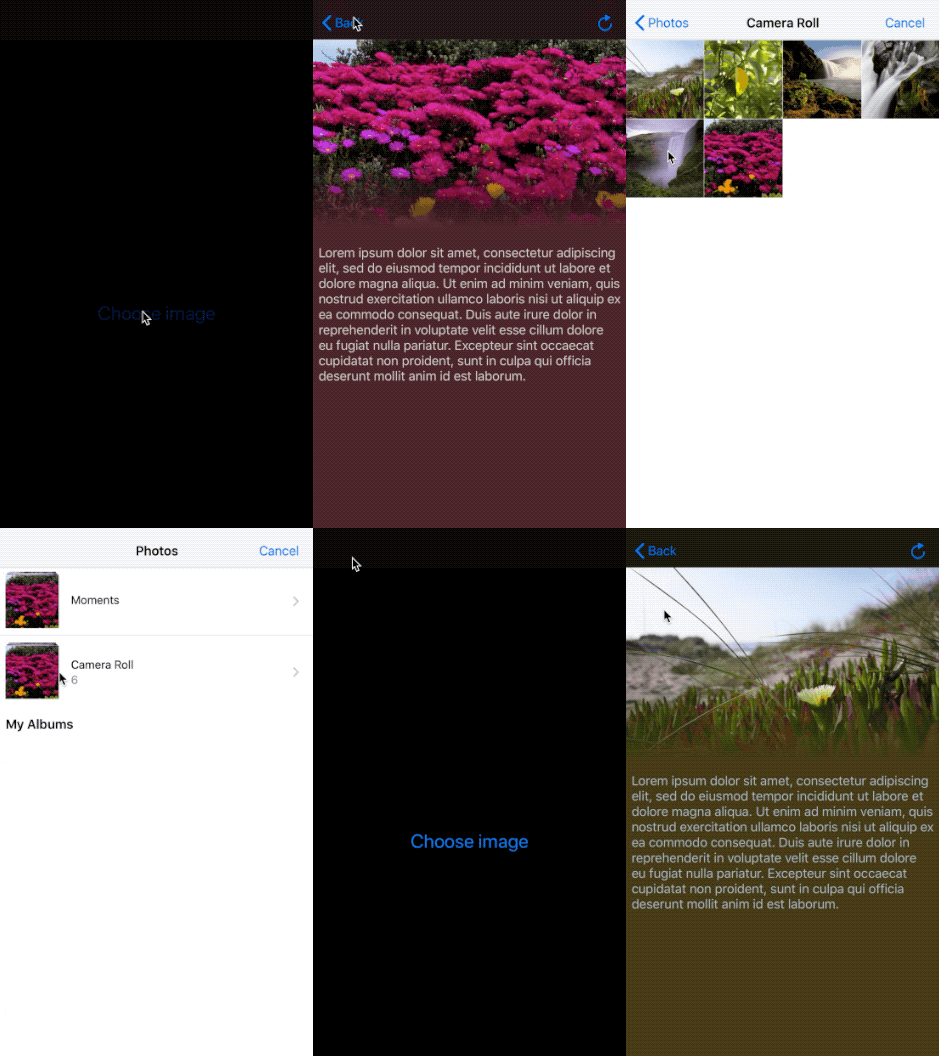
And now we're really done. Here's a couple of results with different pictures:

Note that the result depends on the initial randomly selected cluster centers so the result will be slightly different each time you run it.
The full source code (as an iOS app) is available on GitHub.
Hope you enjoyed this post!


Top comments (1)
Thank you for this amazing article. How would you then go backwards and redraw the image using only say the dominate 10 colors?