
Creating and Managing Vue Projects with Vue UI

Version 3 of the Vue CLI gives us a graphical user interface to create and manage Vue.js projects. Read along to learn how to create and manage a Vue.js project using Vue UI.
The Vue CLI provides standard tooling for rapid development in Vue.js. It ensures that various build tools needed for Vue.js development work smoothly together with sensible defaults so you can focus on writing your app instead of spending days wrangling configurations. With the Vue CLI we get:
- Instant project scaffolding
- Rapid prototyping of new ideas with a single Vue file
- A collection of official plugins for integration
- A full graphical user interface (GUI) to create and manage Vue.js projects
I will show you how to create and manage a Vue.js project using the graphical user interface tool of the Vue CLI. This GUI is referred to as the Vue UI.
Getting Started
We need to install the Vue CLI to be able to use it. To install it, open the command line and run npm install -g @vue/cli if you’re using npm, or run yarn global add @vue/cli if you’re using yarn. You can verify that it is properly installed by simply running vue. This should present you with a help message listing all available commands.
Creating A Project
In order to use the Vue UI, we will run the vue ui command in the command line. This should bring up a graphical user interface in the like the one below.
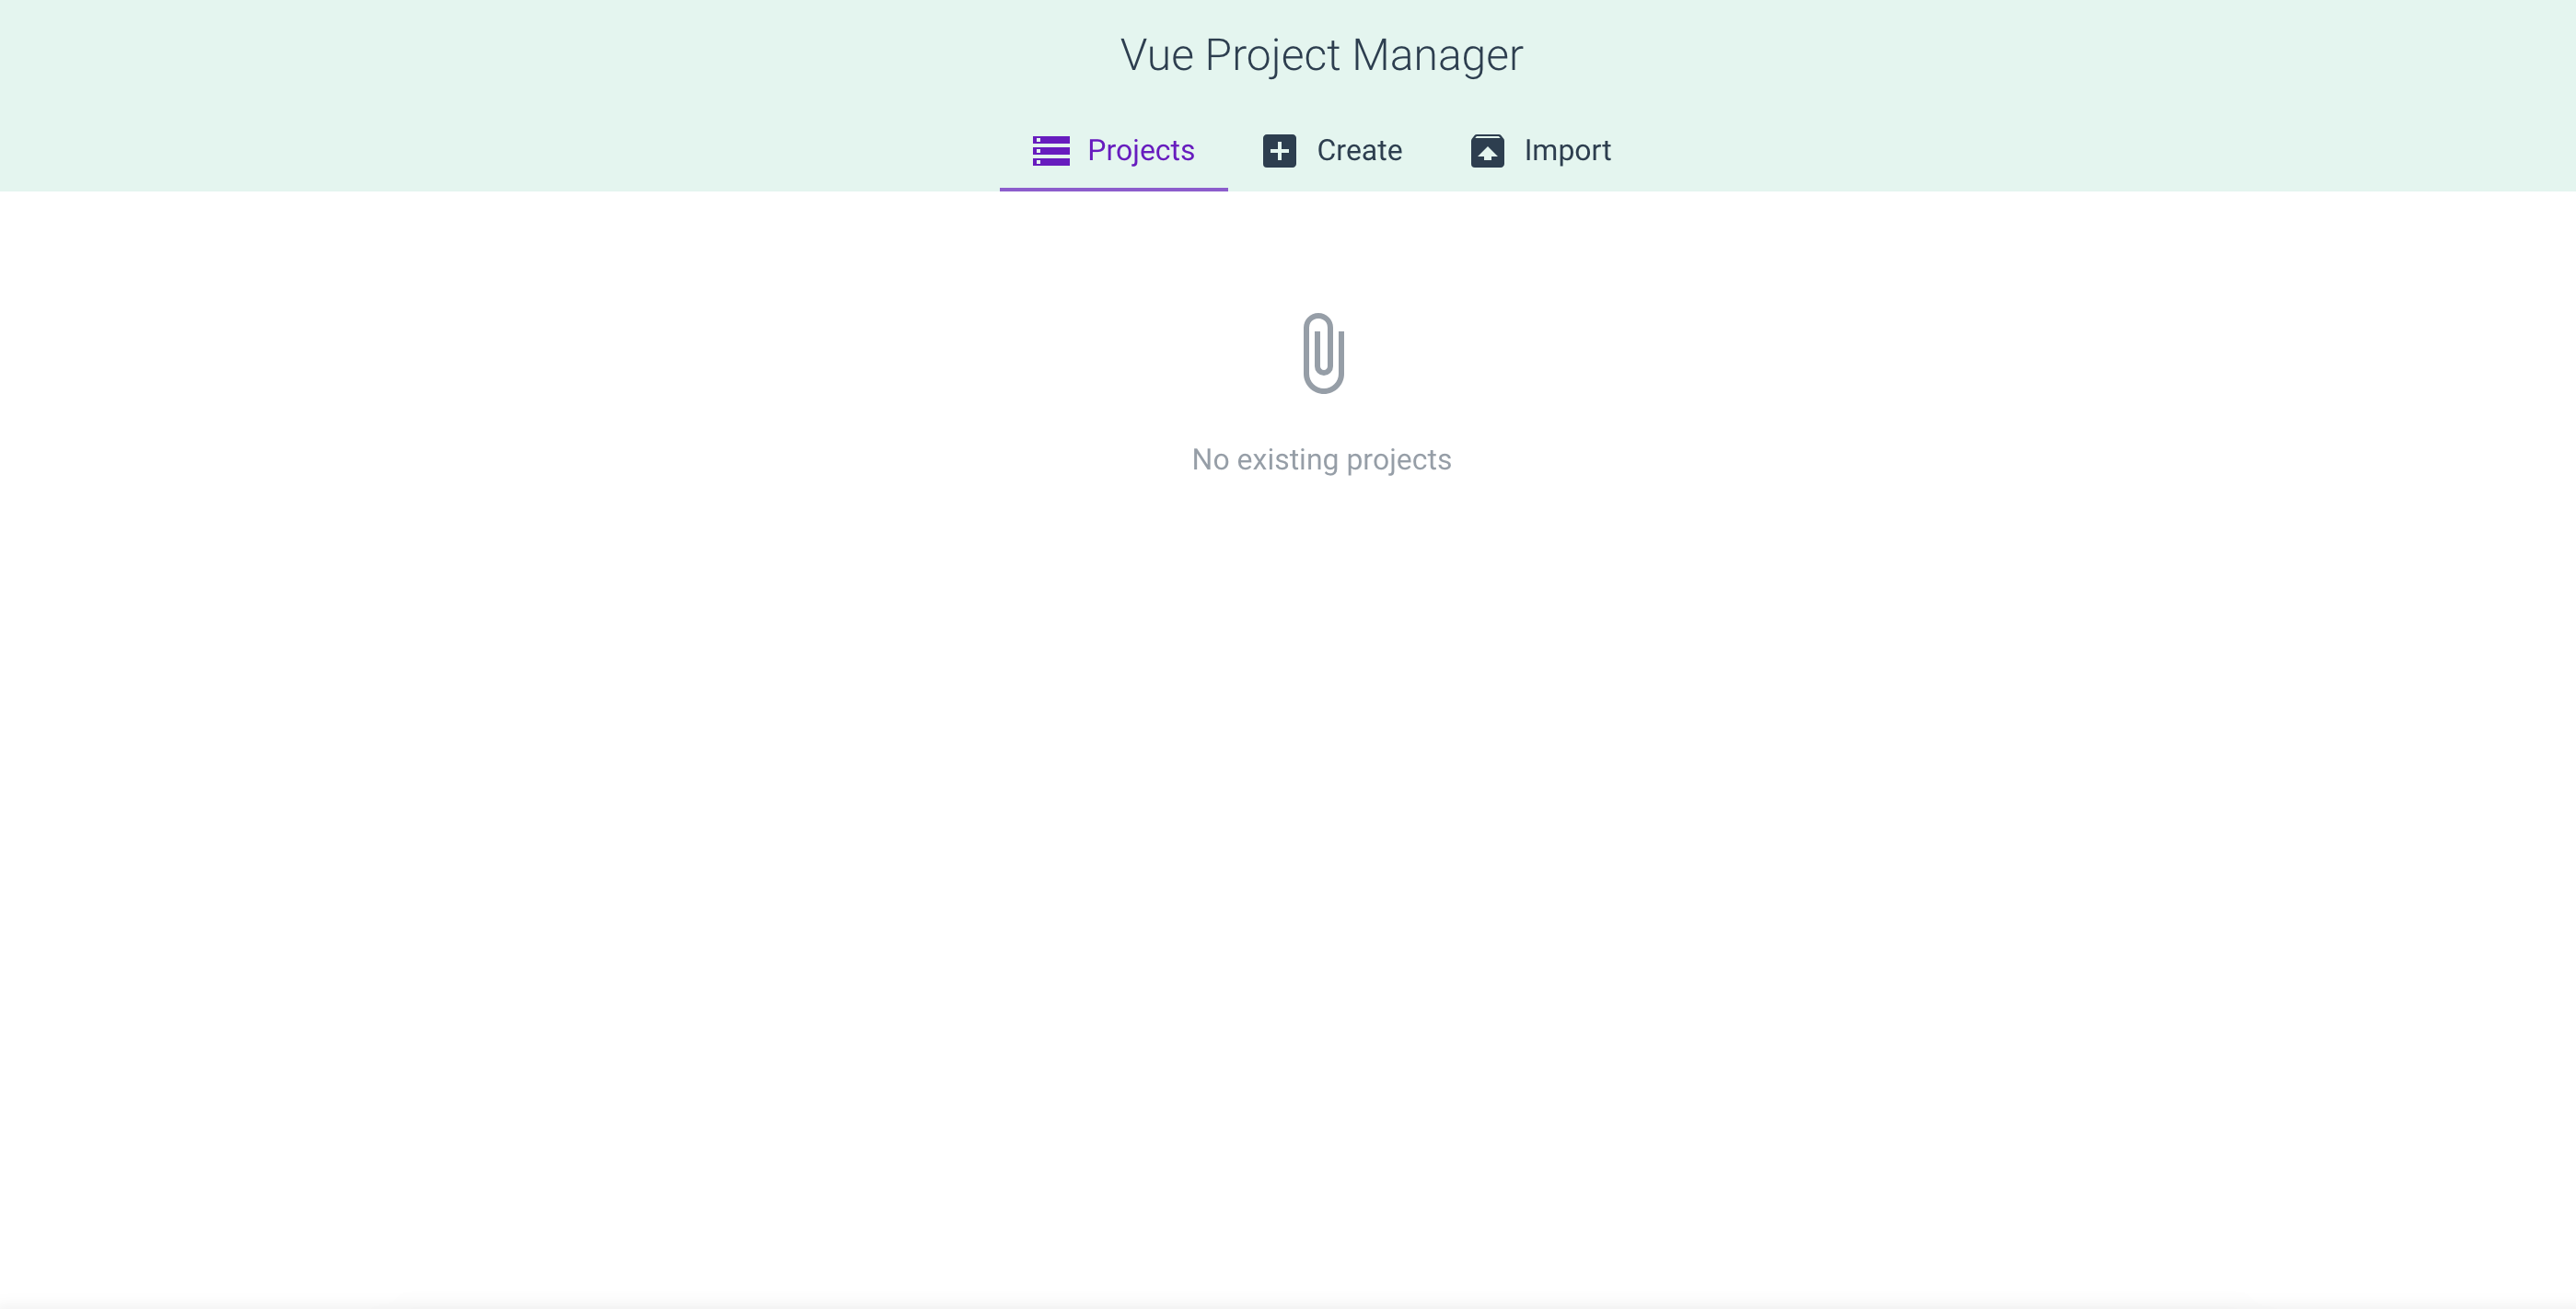
The UI has three tabs; Projects, Create and Import. The Projects tab shows a list of existing projects, the Create tab shows a screen with options to scaffold a new project, and the Import tab allows you to import an existing Vue project that’s not listed in the Project tab.
To create a new project, do the following:
- Click the Create tab.
- Select the location where you want to save our project.
- Click the “Create a new project here” button. This takes us to the Create a new project screen.
- Then enter a name for the project in the textbox under the Project folder label.
- Select the package manager of your choice, and choose if you want to initialize a git repository and whether to override existing project folder if it exists. Leave the default options and click the Next button to take you to the next step.
- The next screen asks you to select a preset. You can choose the default preset, which comes with a basic Babel + ESLint setup; select Manual to pick the features you need; or choose Remote to use a remote preset. Select manual and click the Next button to go to the next screen.
- The next screen shows the list of features we want to add to the project. Select Babel, Linter/Formatter, CSS Pre-processors, and Use config files. Then click the Next button to go to the next screen.
- On the next page, we select Sass/SCSS as the CSS Pre-processor, ESLint + Prettier as the linter/formatter option, and the option to lint on save.
- Click the Create project button to create the project using the options we selected above. It shows a dialog window asking if we want to save the options as a new preset so we can use it to scaffold projects later. Click “Continue without saving” so it creates the project without saving any preset.
The project will be created and it should show a page with a list of installed plugins for the project.
Project Plugins
Vue CLI uses a plugin-based architecture that makes Vue CLI flexible and extensible. You can add more plugins by clicking the Add plugin button at the top right. You can manage your project’s dependencies from the Dependencies tab, with the ability to remove or install new dependencies.
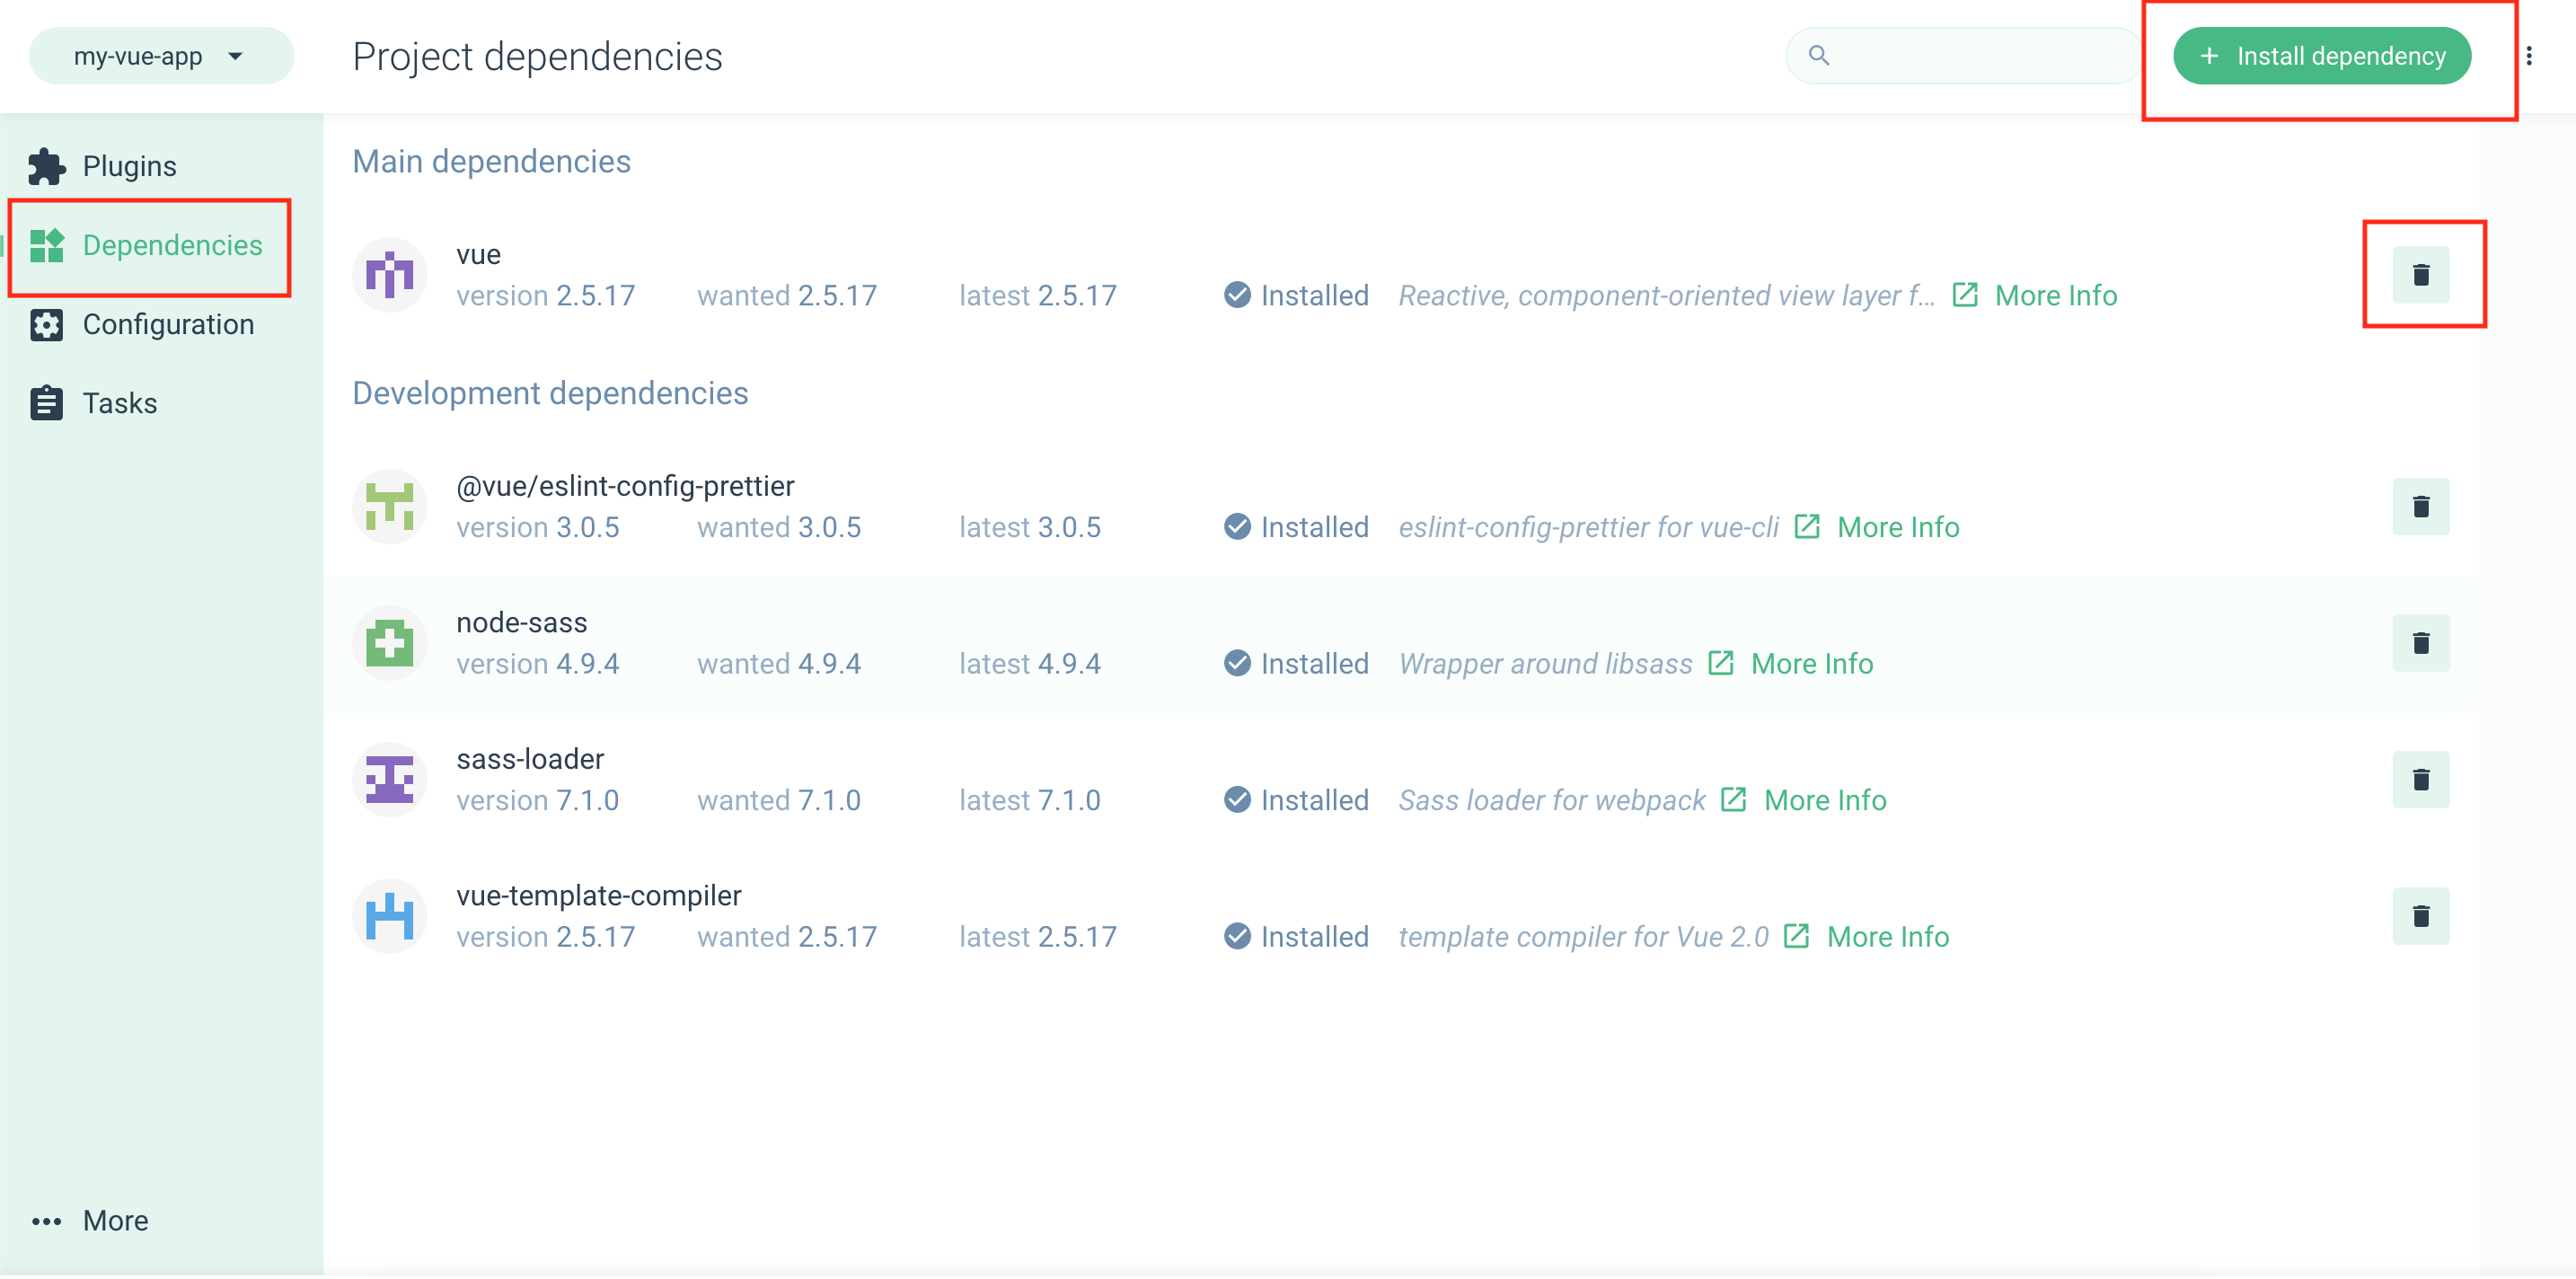
Project Dependencies
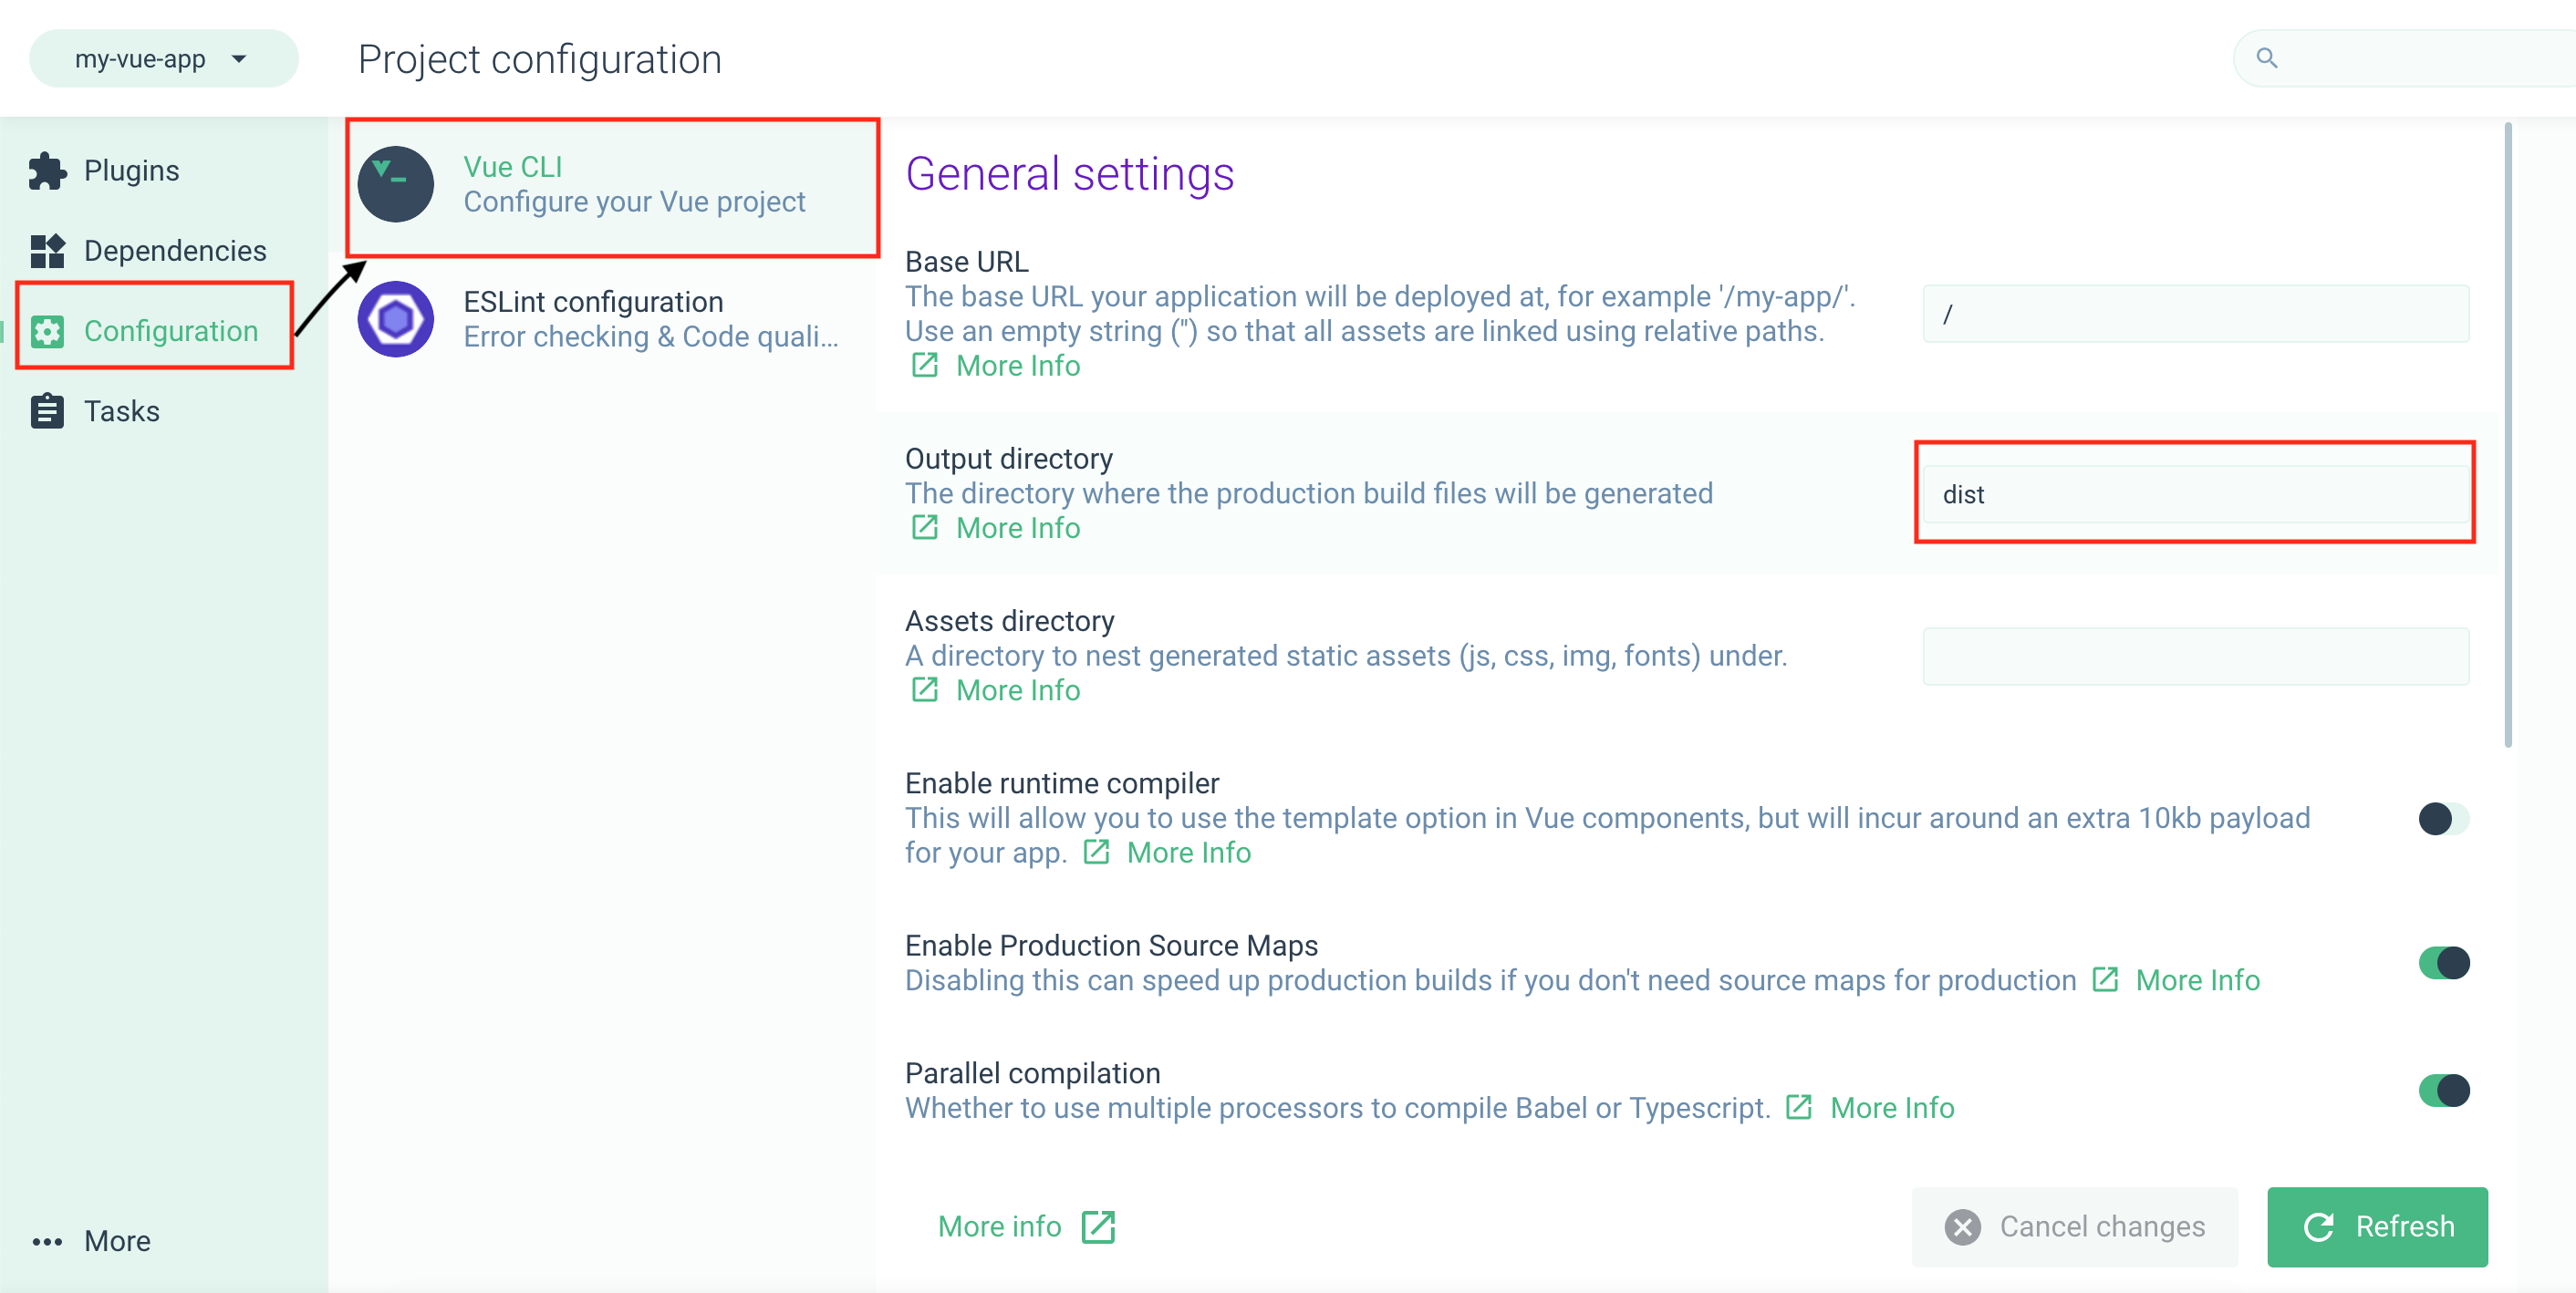
You have the option to change some project configurations. For example, to change the directory where the production build files are saved, navigate to the Configuration tab by selecting it from the side menu. Then select Vue CLI and change the Output directory option.
Project Tasks
The Tasks tab allows us to run a task such as serve, build, lint, or inspect. The serve task starts the development server with hot reloading. When this task is running, we can access the web app on localhost:8080. Also on that page, we see a dashboard with analysis of the project’s dependency size, asset size, and more. This can help keep us aware of the size of the application and how it may affect different users with varying connection speeds. The build task also has this informative dashboard, but is used when we want to build our application so that it compiles and minifies files for production use. The lint task lints and fixes errors.
Import Projects
If you’ve created Vue projects without using the Vue UI, they won’t be listed in the Projects tab. The Import feature of the Vue UI allows us to import projects so we can manage and run them from the Vue UI.
To import a project, you simply navigate to the Import from the Home screen, select the folder to import, and then click the Import this folder button. If you’re away from the Home page, click the Home icon at the bottom on the left side of the page.
That’s It!
All these awesome features help us easily create and manage Vue projects. The Vue CLI is plugin-based, which allows us to add and remove plugins. We can add Vuetify (a material design component framework for Vue) as a plugin. We can also modify the Vue CLI and ESLint configuration, and run task such as serve (equivalent to running npm run serve from the command line).
I hope this post has shown you how to work with the Vue UI. Go forth and build awesome Vue apps!
For more info on Vue
Want to learn about creating great user interfaces with Vue? Check out Kendo UI for Vue, our complete UI component library that allows you to quickly build high-quality, responsive apps. It includes all the components you’ll need, from grids and charts to schedulers and dials. And it integrates easily with the Vue CLI.

Peter Mbanugo
Peter is a software consultant, technical trainer and OSS contributor/maintainer with excellent interpersonal and motivational abilities to develop collaborative relationships among high-functioning teams. He focuses on cloud-native architectures, serverless, continuous deployment/delivery, and developer experience. You can follow him on Twitter.
Related Posts
Comments
All articles
Topics
Latest Stories
in Your Inbox
Subscribe to be the first to get our expert-written articles and tutorials for developers!
All fields are required