The series so far:
- How to Linux for SQL Server DBAs — Part 1
- How to Linux for SQL Server DBAs — Part 2
- How to Linux for SQL Server DBAs — Part 3
- Navigate Linux for SQL Server DBAs
As you jump into Part 3, you’ll begin to realize how involved your education will be with Linux, and how it is taking over the world. The previous articles just scratched the surface with your new Docker container with Linux and SQL Server. You have embraced how users are created in a Linux system and what a group is. You’ve begun to understand the power of the Linux kernel and the pure simplicity of it. This takes you to the next step in your education: ownership and permissions.
Unlike Windows, there’s no registry layer when working with Linux. As an operating system, Linux expects that if you’ve been granted rights to perform a task, you should have the knowledge and skills to be trusted to perform the task. Every object in Linux is treated as a file, and permissions are at the core of this. Understanding how permissions work is essential, and this is the next step in your Linux journey.
In the following section, you’ll create:
- A Unix user
- A home directory
- A lesson directory
- And empty files to work with ownership and permission assignments.
As you proceed into the next sections of the article, you may need to check users on your Linux host and what groups exist. You can do this by typing in the following command after you open a bash shell to your container:
|
1 |
>cat /etc/passwd |
To view groups, you can do this by cat’ing the group file:
|
1 |
>cat /etc/group |
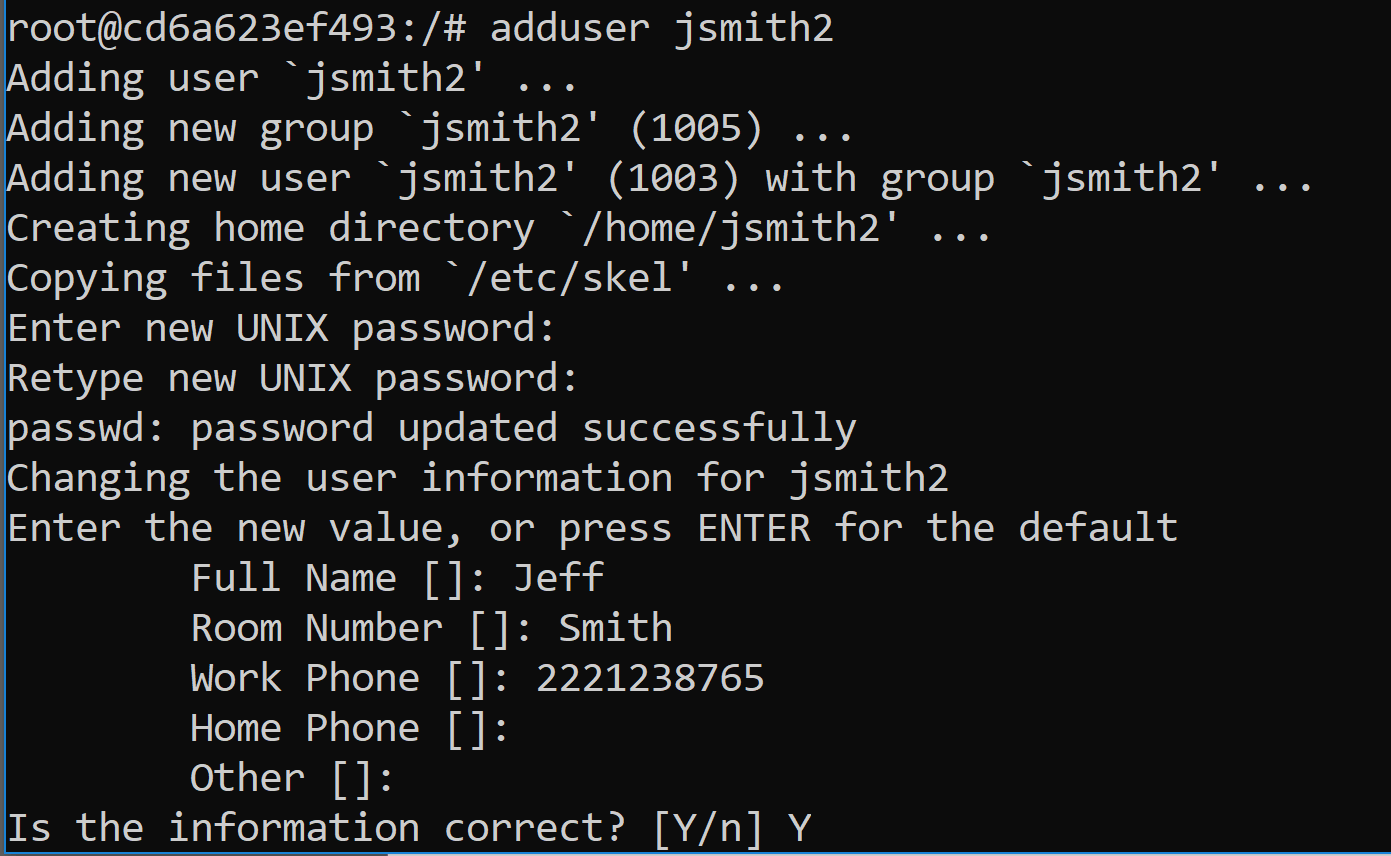
The following commands will take you through these steps. The first step will be to create a user for the test, with a home directory, using the adduser command:
|
1 |
>adduser jsmith2 |
Fill in the password, etc., for jsmith2 and retain the password for future logins.
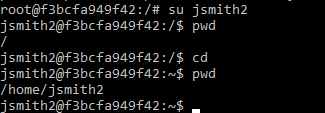
SU, (switch user) to jsmith2.
|
1 |
>su jsmith2 |

Check your current location and verify that you’re in the /home/jsmith2 directory:
|
1 |
>pwd |
If you find yourself at the root directory, (/) perform the following:
|
1 |
>cd |
Now check with the pwd command again to verify that you’re in the /home/smith2 home directory.
Create a new directory in jsmith2’s home directory and set permissions
|
1 2 |
>mkdir part3 >chmod 744 part3 |
I’ll explain more about the chmod command and numeric value later in the article. Switch over to the new directory:
|
1 |
>cd part3 |
Create a new file:
|
1 2 |
>touch test.txt >ls -la |
You should see the following in your new directory:

Identity Crisis
There are two main commands that are connected to permissions:
Change Owner chown Changes the owner of a file(s)
Change Modify chmod Modifies permissions of a file(s)
Each file will have three designations of ownership. One will be the owner; the second will be the group assignment, (which can also be assigned to the owner) and lastly, all others. The third designation isn’t an assignment, but the first two, owner and group, are.
When creating a file, ownership and group are defaulted to the user that created it. To reassign permissions, you must first have the rights to do so. Secondly, the user and group must exist. If you are the owner of the file, you can do both, but if the file is owned by another and you don’t have permissions, you will have to use “super user” (su) to perform the task. To perform an ownership change, you would run the following:
|
1 |
>sudo chown <new owner>:<new group> <filename/folder> |
As root, (domain owner) you would be able to change the owner of any file or switch permissions. You can also do this as the user if they have SUDO, (Switch User to Domain Owner). As you’re currently logged in as jsmith2, exit out of the current shell from user jsmith2 back to root.
The second choice, if you want to run everything with the SUDO command, is to grant SUDO to jsmith2 as ROOT. To do either, you must exit out of the current shell back to ROOT.
|
1 |
>exit |

Note that the prompt returns to displaying the root login at the very left. If you want to grant SUDO, it can be done with the following command. Recognize that jsmith2 now has root privileges on the host and, although his sudo executions can be audited, this user will now have these privileges.
|
1 |
>usermod -a -G sudo jsmith2 |
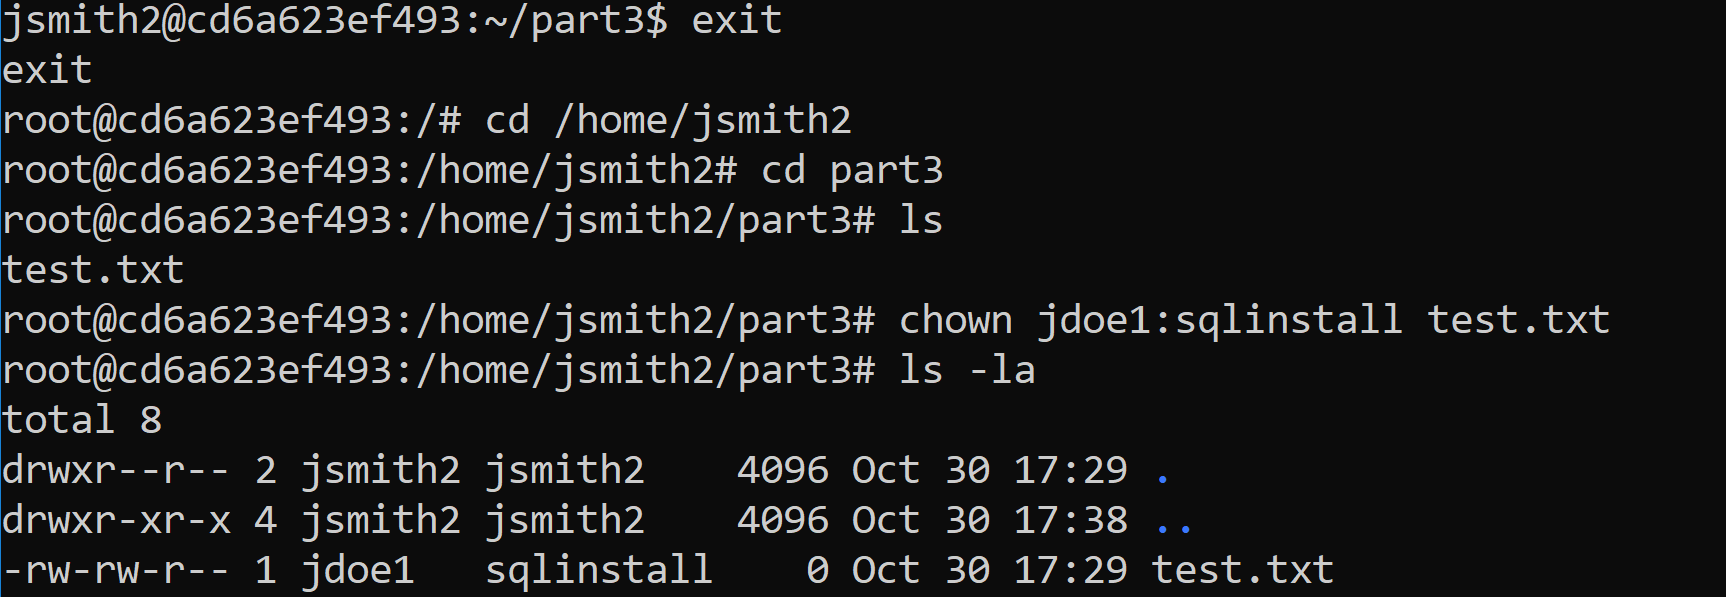
You can now change the owner and group of the files in the existing directory. The example displayed below demonstrates what would be required if you weren’t root and using the SUDO command as jsmith2, but if you are logged in as root, the SUDO is left off the command. In this example, you’ll change the owner to jdoe1 and the group to sqlinstall. Note that the account and group were created in the last article.
|
1 2 |
>cd /home/jsmith2/part3 >sudo chown jdoe1:sqlinstall test.txt |
Or as ROOT, then you’d simply leave the SUDO off the command:
|
1 |
>chown jdoe1:sqlinstall test.txt |
If the SUDO command returns an error about not being available, you will have to install it:
|
1 |
>apt-get install sudo |
This is all there is to changing the ownership on a file, as well as the group in one command.
Permissions and Modes
As a DBA, you put in significant time into understanding database level security and permissions. It’s as important to understand how OS level permissions impact the security of your database residing on the host. On Linux, you change permissions to files and folders by using the change modify, (chmod) command. There are different categories of user ownership and escalation of privileges to each file in Linux. The categories of user ownership are:
- User/Owner=u
- Group=g
- Other/all users=o
- ALL=A
Similar to Microsoft Windows, there are three main categories of ownership that can be assigned singularly or in combination to create the correct allocation of ownership to any file. There’s also a global grant to “ALL” that encompasses all categories as one.
From here, permissions are granted to perform tasks. As with a database, the least required privilege(s) to perform the action should be considered. Although three simple grants are all that are available, in combination, they create the complexity required to secure the users internal to the OS.
- Read
- Write
- Execute
There are multiple modes to allocate permissions to files and directories. I’ll discuss the two main ones- numeric and alpha mode.
Numeric Mode
In this mode, there is a numerical value that is assigned to each permission to simplify grants. Where this might sound confusing at first, when you see the values clearly displayed by grant, it begins to make sense.
Read,(r)= 4
Write,(w)= 2
Execute, (x)=1
For the first run through the permissions, log back in as a jsmith2 user and switch to the user’s home directory if you are not already there:
|
1 2 3 |
>su jsmith2 >cd >cd part3 |
The numerical values for permissions are used in conjunction with the chmod command to assign privileges to the owner, group and other for an individual or group of files. Using the example file, test.txt, you can request that permissions be set for the following to meet requirements:
- Owner has read, write and execute
- Group has read and execute
- Other has no privileges to the file.
The command would be:
|
1 |
>chmod 750 test.txt |
If you typed this command in, you should receive the following error, but why?
|
1 |
chmod: changing permissions of 'test.txt': Operation not permitted |
Check the ownership and group permissions on the file:
|
1 |
>ls -la |

The file is no longer owned or even part of a group that jsmith2 is part of. You could switch back the ownership of the file, but for this exercise, you’ll understand the importance of ownership and create a new file to work with, this time calling it test.sh and changing the permissions on this new file.
|
1 2 3 |
>touch test.sh >chmod 740 test.sh >ls -la |
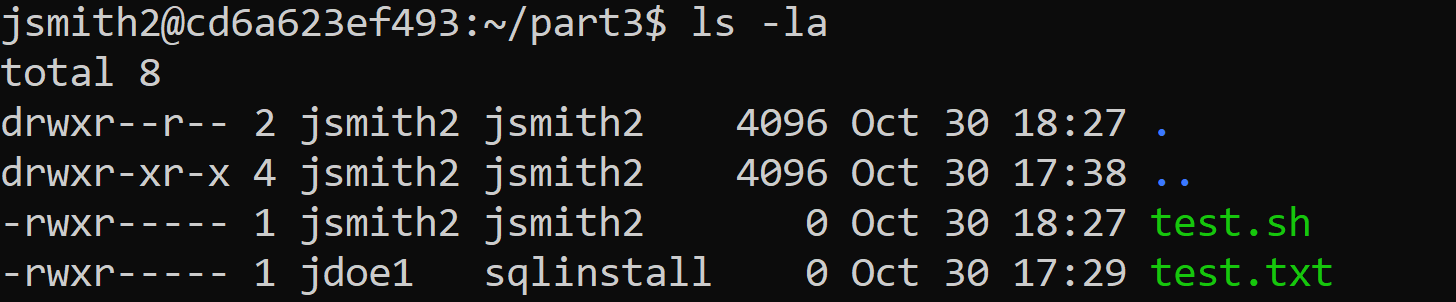
This command comes from the numerical values per grant in the list above, calculated for each category- owner, group and other and results in the following:
- owner has 4+2+1=7
- group has 4+0+0=4
- other has 0+0+0=0
Unlike a standard ls, (list) command, a ls -la, (list all) command will display the permissions for the files contained in any directory broken down by owner, group, other and by individual grants.
|
1 2 3 4 5 6 |
jsmith2@cd6a623ef493:~/part3$ ls -la total 8 drwxr--r-- 2 jsmith2 jsmith2 4096 Oct 30 17:29 . drwxr-xr-x 4 jsmith2 jsmith2 4096 Oct 30 17:38 .. -rwxr----- 1 jsmith2 jsmith2 0 Oct 30 18:27 test.sh -rwxr----- 1 jdoe1 sqlinstall 0 Oct 30 17:29 test.txt |
A “d” in the beginning columns signifies that this is a directory, vs. a file. Notice that there are ten fields that are populated by the output- one for type and nine for permissions to the three categories, owner/user, group and other.
In the example above, you’ll note the directories without a name, just marked with “.”. These are directory identifiers. The first “.” is to identify the current directory and the privileges granted to it. To translate this to a numeric mode command, it would look like the following:
|
1 |
>chmod 744 . |
The directory identified with “..” is the directory above the current one and Linux is displaying that it has more privileges to the groups and other categories, both read and execute. If you translated this to numeric mode, it would result in the following:
|
1 |
>chmod 755 .. |
You can view how changes to permissions via numeric mode occur by again, changing the permissions on the shell script:
|
1 2 |
>chmod 764 test.sh >ls -la test.sh |

The owner has read, write and execute on the file, the group has read and write to the file and all others are only allowed read access. Understanding these privileges is essential to a DBA so you can manage the privileges to system and data files, subsequently securing your database server at the OS level.
Now that you know how to change the owner and grant privileges on a file, it may be helpful to have a reminder on a few ways to create a file. Below are the most common ways users create a file, most often for write at the time or later.
Create an empty file touch <filename>
Create empty file and open for edit vi(m) <filename>
Common editor to create files nano <filename>
You may choose any of these methods, vi(m) being an older method, and nano, emacs and other editors being newer ones. Touch is most often used to verify write privileges to a location, as it efficiently creates an empty file in the directory and will fail if privileges are missing.
Alpha Mode
The secondary mode for granting privileges is Alpha mode, which uses letters to identify the category of user and privilege.
You will again work with your jsmith2 user and part3 directory from the home/jsmith2/part3 location.
The difference when working with alpha mode, is that the permissions are a bit more complicated in their execution. Unlike numeric mode that simply rewrites over existing permissions, alpha requires a + or a -, along with the initial of the permissions to grant:
- r(Read)
- w(Write)
- x(Execute)
This method can be used to remove permissions as easily as grant them, simply executing the chmod command, a “-“, the alpha mode permission and the file or directory name to remove privileges to the owner. To assist in why you would want to remove privileges from yourself, a use case is a file or directory you want to protect yourself from an accidental write or execution of, you can change the permissions to help ensure this.
This command ends with the name of the file, and when no user/group/category is added, it only addresses permissions for the user executing the chmod command.
|
1 |
>chmod -wx test.sh |
You would then be required to change the permissions and add read and write on the file for the owner before you’d be able to perform either or if you have SUDO, then this would suffice. Always remember, SUDO, (Switch User Domain Owner is GOD.)
The next command adds execute to the owner, group and other category for file ownership. This would result in everyone being able to execute the shell script.
Example:
|
1 |
>chmod +x test.sh |
At this point in the process, exit back out and become root to perform the next commands.
|
1 |
>exit |
The root user should be at the left of your prompt if you’re using the Docker image to work along with this article.
|
1 2 |
>cd /home/jsmith2/part3 >chmod -w test.sh |
This would remove jsmith2’s write privileges to the test.sh file. This might seem counter intuitive. Why would you wish to remove write privileges from your own file? Removing write or execute could protect from mistakes in processing or remind the user which script is the active one, while retaining historical code.
To perform permissions changes using alpha mode for a group, or other, then you use the initial format and add the category before the permissions change:
Example:
|
1 2 |
>chmod g+x test.sh >chmod g-w test.sh |
The above commands have added execute to the test.sh file for the group assigned, but then removed write from the test.sh file. You can do the same for o, (others) by changing its permissions to read and no write or execute on the file:
|
1 2 |
>chmod o+r test.sh >chmod o-wx test.sh |
You can combine the privilege change for owner, group and other at once. Just as:
|
1 |
>chmod 777 test.sh |
This would result in the owner, group and other having read, write and execute on a file, the same would be in alpha mode:
|
1 |
>chmod ugo+rwx test.sh |
This also could be done with the a(All) category:
|
1 |
>chmod a=rwx test.sh |
At the end of this exercise, all users- owner, group and other have permissions to read, write and execute the shell script test.sh:

Group Shift
Beyond chmod, is chgrp, (Change Group) which unlike chown, (change owner) that allows for a group allocation at the time of the command, can change the group with a separate command.
|
1 2 |
>chgrp sqlinstall ./test.sh >chgrp sqlinstall ../part3 |
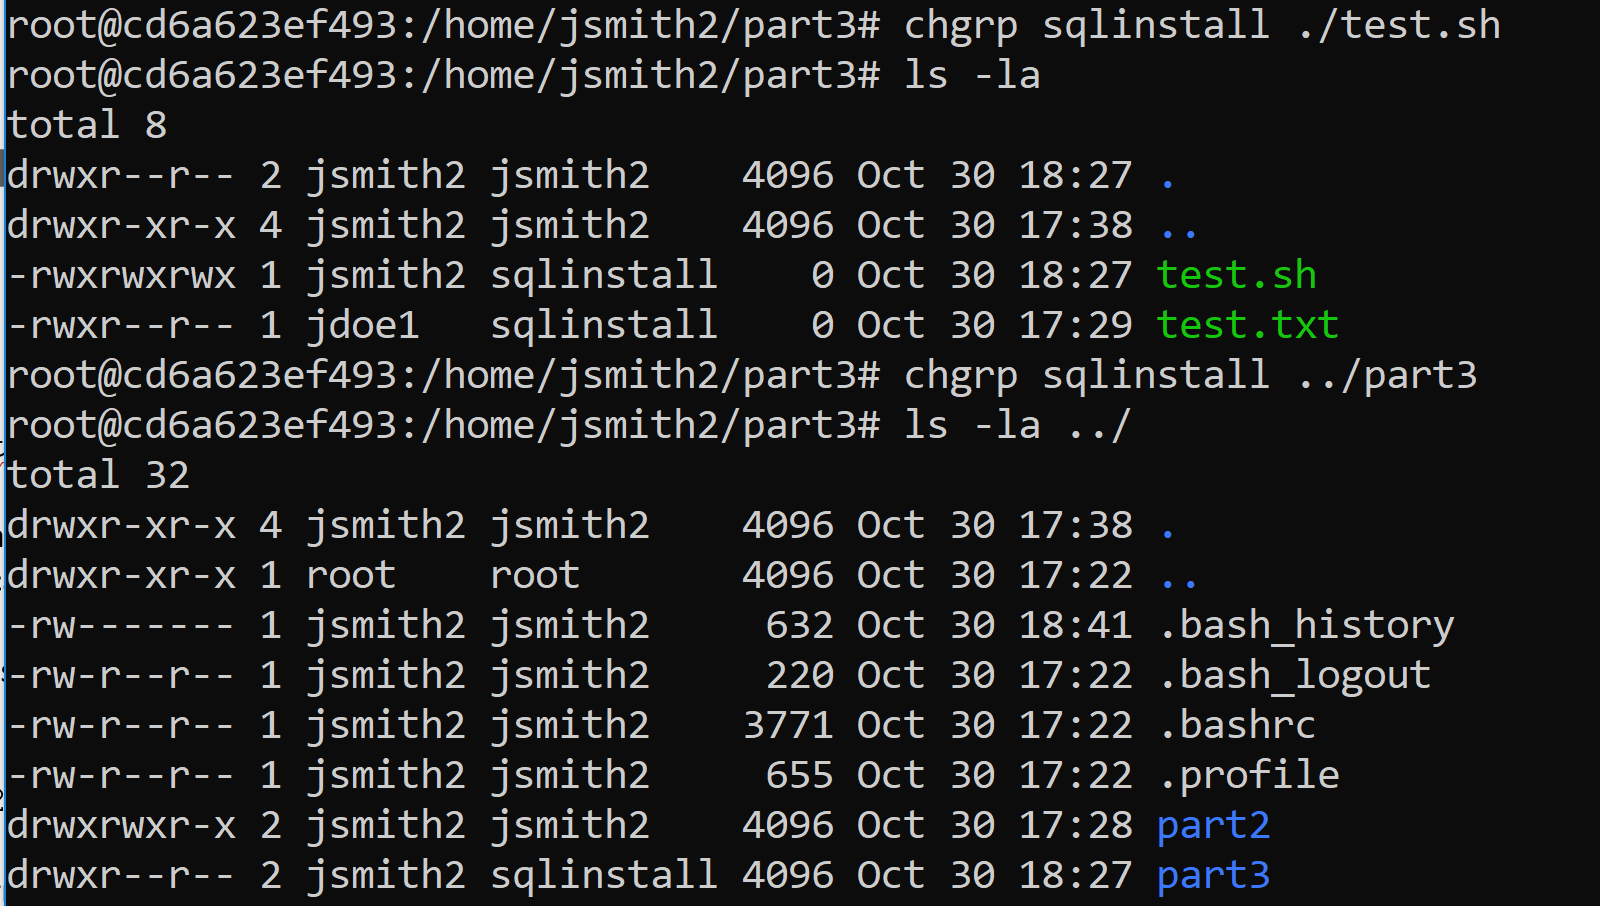
Notice that you can change the group on a file or a directory, (remember, everything is treated as a file in Linux) as easily as I can change owner, permissions, and groups for a single file. You are able to do all of this from the current directory, using the “.” and “..” to tell Linux that you want to work in the current directory or the directory one up from where you are.
Wildcards are permissible for all these commands as well. If you wish to change the owner of all the files in a directory:
|
1 |
>chown jsmith2:sqlinstall * |
You can change the permissions on all files with the .sql extension in a directory:
|
1 |
>chmod 744 *.sql |
You can also grant ownership to all files and subfolders with the -R, (recursive) argument.
If you go up one folder:
|
1 2 3 |
>cd .. >chmod 774 . >chown -R jsmith2:sqlinstall . |
The above command just granted read, write and execute to the owner and the group, and read to others. The second command changed ownership of everything in the current folder, (.) and files in subfolders to jsmith2.
Conclusion
As you can see, there’s a lot more to permissions than meets the eye. Learning how to change permissions, either by alpha or numeric mode is enough, but make sure you understand the permissions and how they translate in whichever mode you’re going to use. A secure database system is essential down to the operating system level, so as a DBA your understanding of how Linux does this allow you to secure your Linux host for SQL Server and help everyone sleep at night.
The next article will start working with navigation and processes in Linux. There’s a lot to come and, hopefully, you’re able to work through these scenarios on your Docker image.

Load comments