Getting Started with XAML Islands: Hosting a UWP Control in WPF and WinForms Apps

No, XAML Islands is not an exotic vacation spot, but in some ways it's even more exciting. This new functionality for .NET desktop developers from Microsoft aims to modernize classic WPF, WinForms and Win32 apps. Let's dive in.
In this blog series, we will walk you through what XAML Islands is, what it’s good for and how can you use it in your applications. In the previous article, we briefly talked about the history behind the implementation of the XAML islands, what it is, key functionalities & API, what's available for use now, as well as what you can expect in the near future.
Today's focus will be on: Hosting a UWP WebView, InkCanvas, MapControl and establishing native UWP Bindings in a WPF and Windows Forms application. Let's dive in and take a in-depth look into the available wrappers (WebView, InkCanvas and the WindowsXamlHost) and how native UWP bindings could be created from within the WPF and WinForms worlds.
WebView, InkCanvas and WindowsXamlHost Wrappers
Building a custom wrapper for a specific UWP control could be a time-consuming job. For that reason some of the most used UWP controls are wrapped for you and can be used out of the box. The currently wrapped controls are WebView, InkCanvas, InkToolBar, MediaPlayerElement and the MapControl.
NOTE: You need to have the latest version of Windows (1809) installed in order to be able to use XAML Islands.
In order to use these controls first you need to add a reference to the Microsoft.Toolkit.Wpf.UI.Controls Nuget package for WPF and to the Microsoft.Toolkit.Forms.UI.Controls for Windows Forms.

After the package is added you can head out and open the Visual Studio toolbox – the wrapped controls should be visualized there. You can simply drag and drop them inside your application and use them as any other WPF/WinForms control.
For example we can add InkCanvas and WebView:
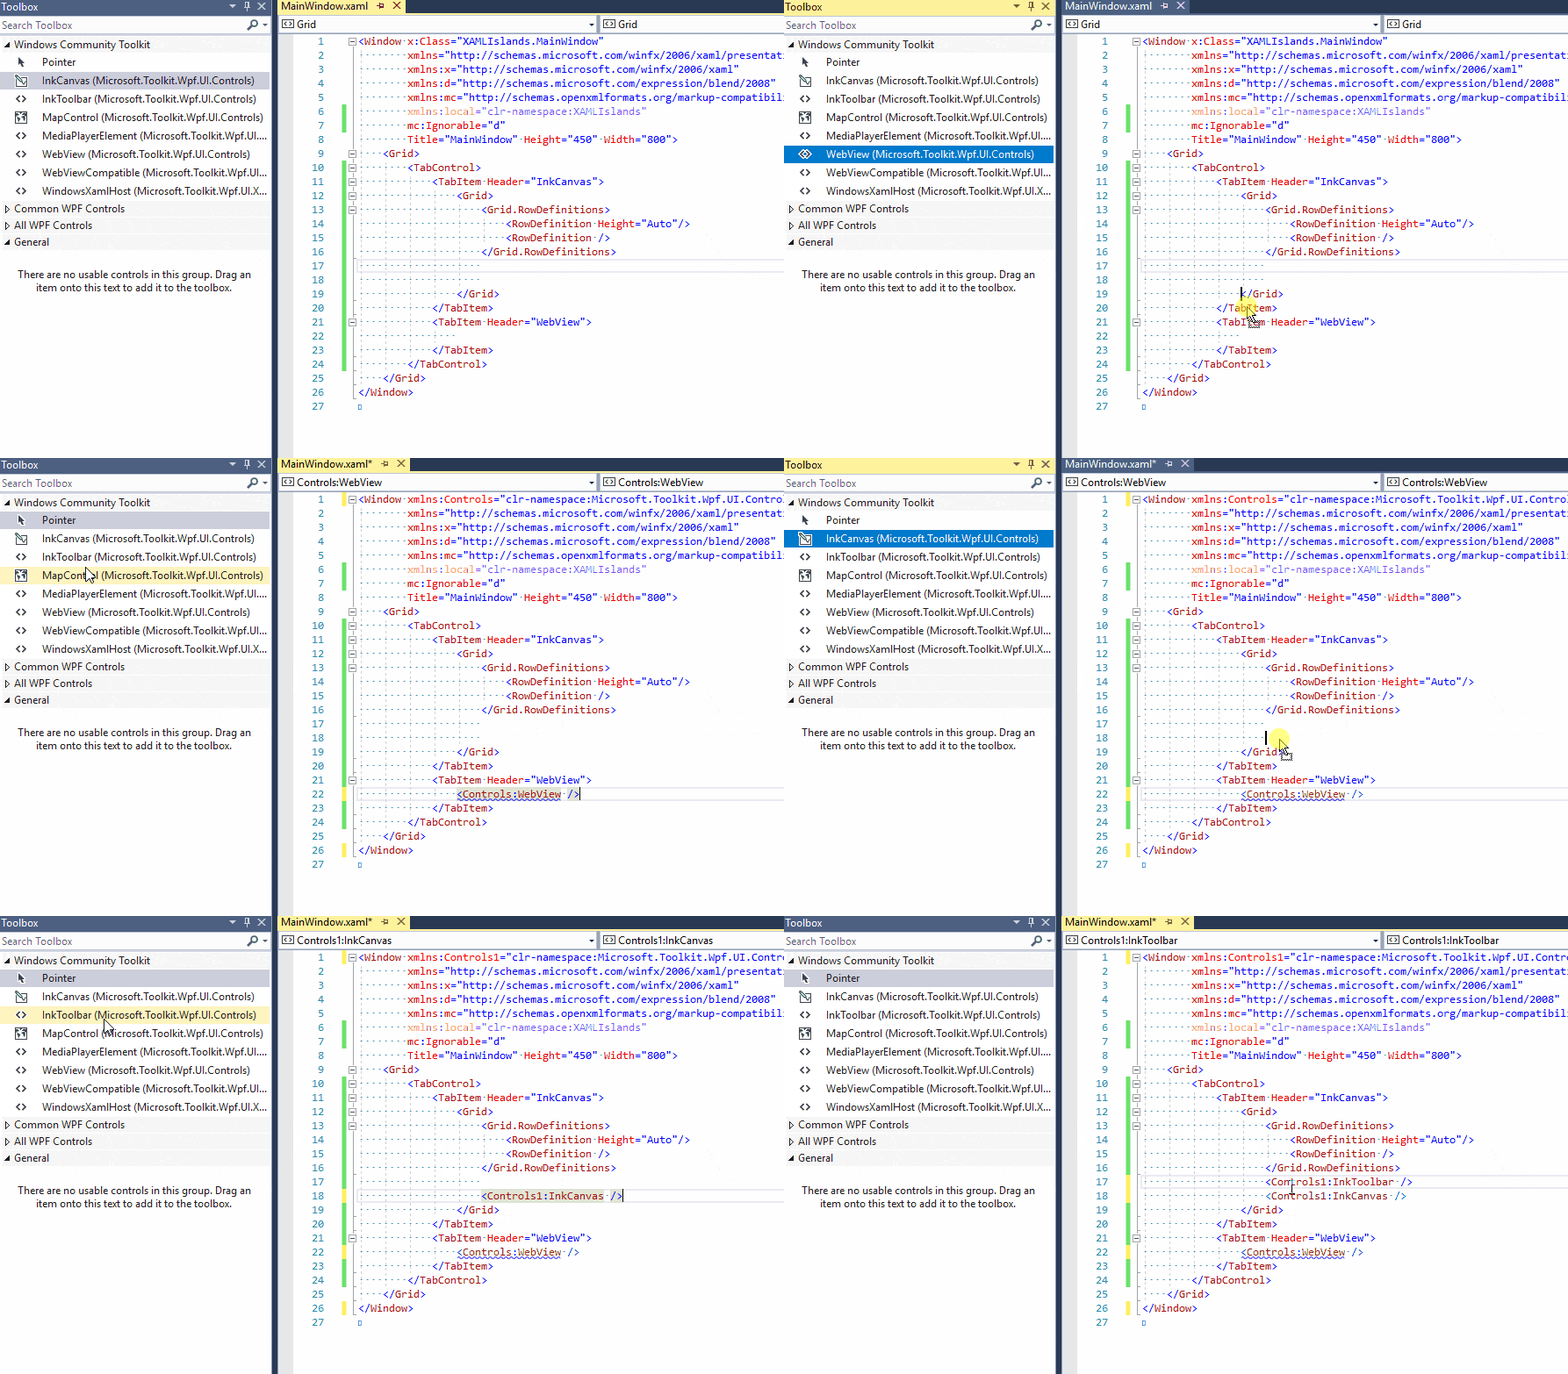
The properties and methods of the WebView and the InkCanvas are exposed as well and can be used directly:
 <TabControl>

    <TabItem Header="InkCanvas">

        <Grid>

            <Grid.RowDefinitions>

                <RowDefinition Height="Auto"/>

                <RowDefinition Height="*"/>

            </Grid.RowDefinitions>

            <Controls1:InkToolbar TargetInkCanvas="{x:Reference Name=inkCanvas}"/>

            <Controls1:InkCanvas Grid.Row="1" x:Name="inkCanvas" />

        </Grid>

    </TabItem>

    <TabItem Header="WebView">

        <Controls:WebView Source="https://www.telerik.com"/>

    </TabItem>

</TabControl>
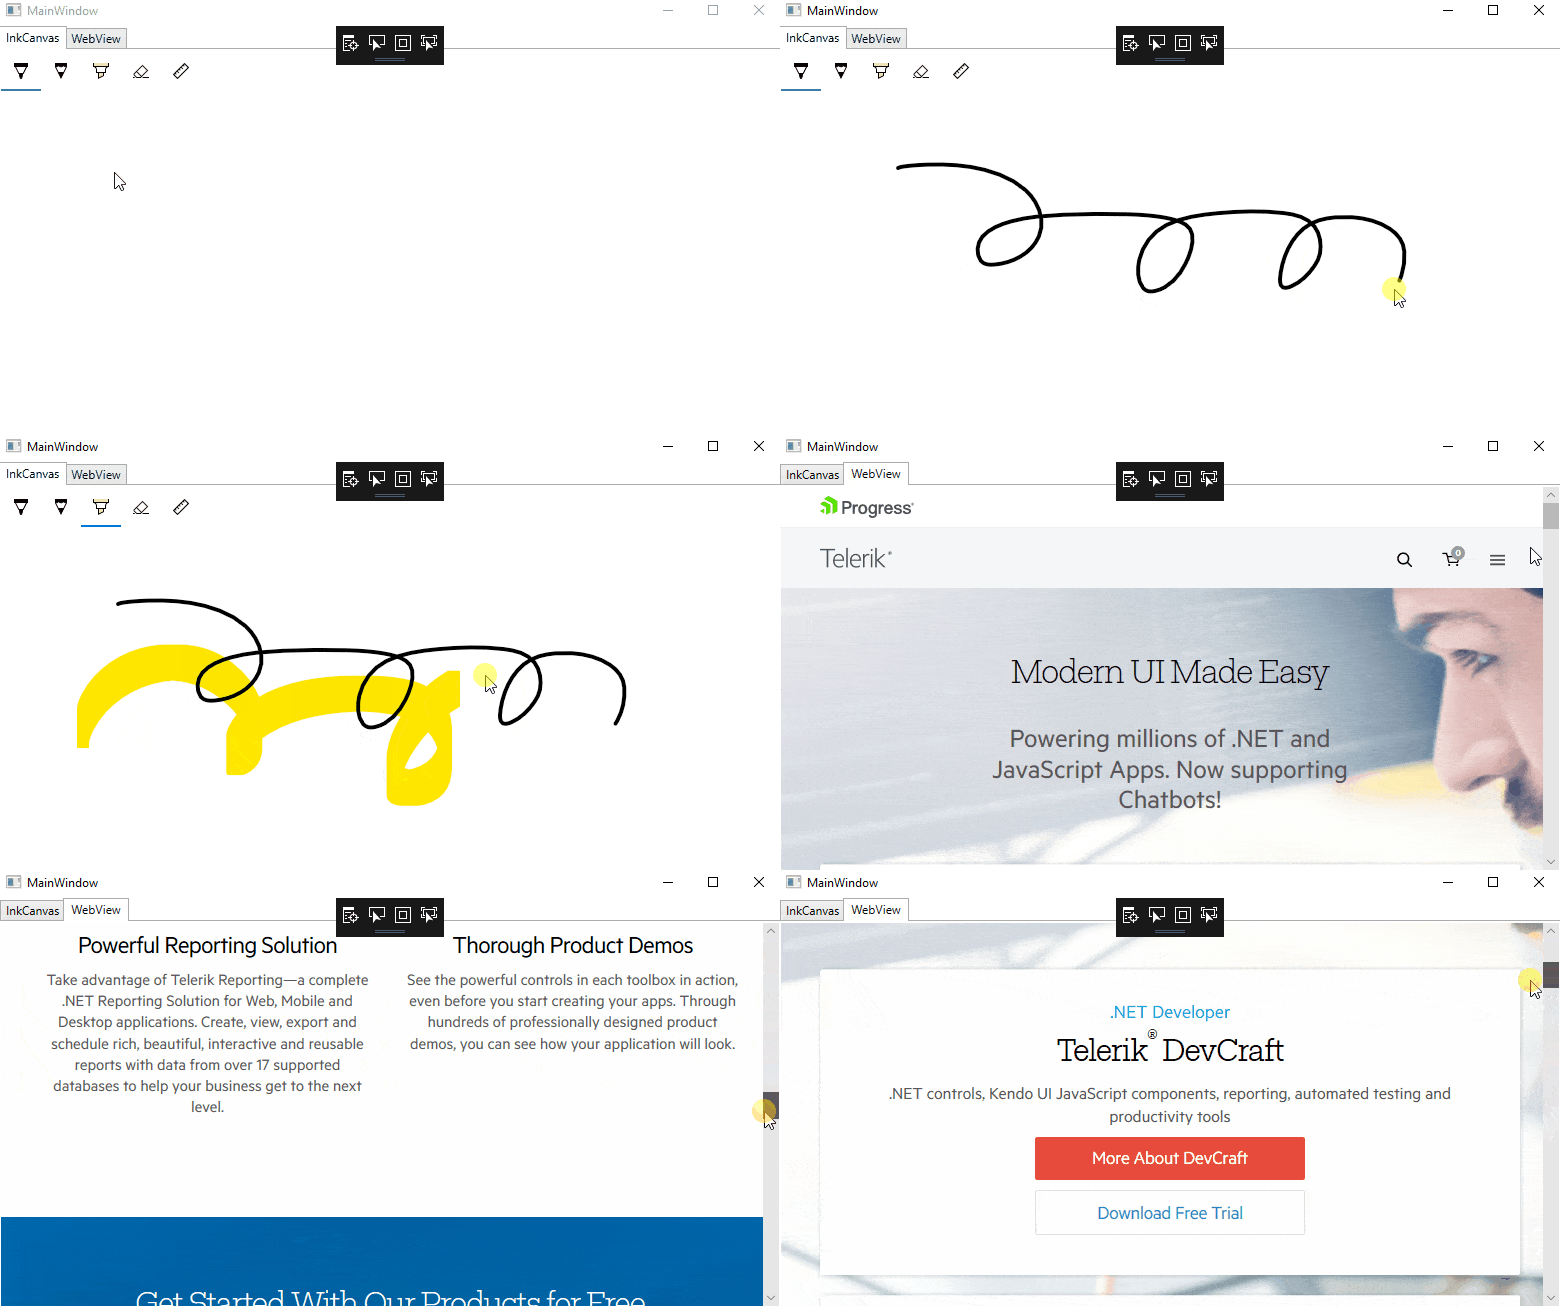
And the result should look like this:
How to Wrap Other UWP Controls?
For every other control that is not wrapped out of the box, you can use the WindowsXamlHost and visualize it in WPF.
First you need to add the following namespace in XAML in order to be able to use the WindowsXamlHost:
xmlns:XamlHost="clr-namespace:Microsoft.Toolkit.Wpf.UI.XamlHost;assembly=Microsoft.Toolkit.Wpf.UI.XamlHost"
After the namespace is added the WindowsXamlHost can be declared. Using the InitialTypeName of the host you need to specify the exact type of the control you want to initialize. For example, here is how you can show a pure native UWP Button:
<XamlHost:WindowsXamlHost InitialTypeName="Windows.UI.Xaml.Controls.Button" />NOTE: In order to be able to reference the Windows 10 APIs in your WPF/WinForms application please, make sure you have added the needed references.
Using ChildChanged you can access the Button in code behind and play with it. The ChildChanged event guarantees the Button is completely loaded:
<XamlHost:WindowsXamlHost x:Name="xamlHost" InitialTypeName="Windows.UI.Xaml.Controls.Button" ChildChanged="WindowsXamlHost_ChildChanged"/>
And in the code-behind:
 private void WindowsXamlHost_ChildChanged(object sender, System.EventArgs e)

{

    var host = (WindowsXamlHost)sender;

    var button = host.Child as Windows.UI.Xaml.Controls.Button;

    button.Content = "I am UWP Button";

}
This is just a simple example of initializing a UWP Button in WPF using the host. You can declare even more complex UI and assign them as a Child to the WindowsXamlHost:
 ...

global::Windows.UI.Xaml.Hosting.WindowsXamlManager.InitializeForCurrentThread();


var uwpGrid = new Grid();

uwpGrid.Margin = new Windows.UI.Xaml.Thickness(12, 20, 12, 14);

uwpGrid.RowDefinitions.Add(new RowDefinition());

uwpGrid.RowDefinitions.Add(new RowDefinition() { Height = Windows.UI.Xaml.GridLength.Auto });


var map = new MapControl();


var sliderGrid = new Grid();

Grid.SetRow(sliderGrid, 1);

sliderGrid.Margin = new Windows.UI.Xaml.Thickness(12);


var sliderPanel = new StackPanel();

vqr zoomSlider = new Slider();

zoomSlider.Minimum = 1;

zoomSlider.Maximum = 20;

zoomSlider.Header = "Zoom Level";

zoomSlider.Value = 17.5;

sliderPanel.Children.Add(zoomSlider);


var headingSlider = new Slider();

headingSlider.Minimum = 0;

headingSlider.Maximum = 360;

headingSlider.Header = "Heading";

headingSlider.Value = 0;

sliderPanel.Children.Add(headingSlider);


var desiredPitchSlider = new Slider();

desiredPitchSlider.Minimum = 0;

desiredPitchSlider.Maximum = 64;

desiredPitchSlider.Header = "Desired Pitch";

desiredPitchSlider.Value = 32;

sliderPanel.Children.Add(desiredPitchSlider);

sliderGrid.Children.Add(sliderPanel);


uwpGrid.Children.Add(this.map);

uwpGrid.Children.Add(sliderGrid);

this.xamlHost.Child = uwpGrid;

...
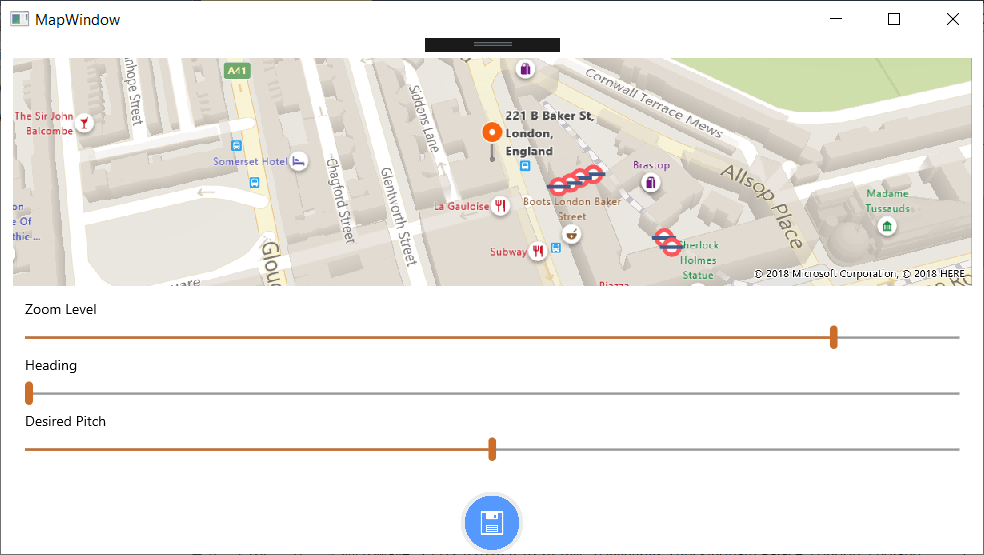
And the final result should be:
Host UWP Controls in Windows Forms
Similarly to WPF, you can wrap any native UWP control and visualize it in Windows Forms.
First you need to add the Microsoft.Toolkit.Forms.UI.Controls Nuget package. Like in WPF, you should be able to see the wrapped UWP controls in your Toolbox.
With a simple drag and drop the desired control can be placed and used in your application.
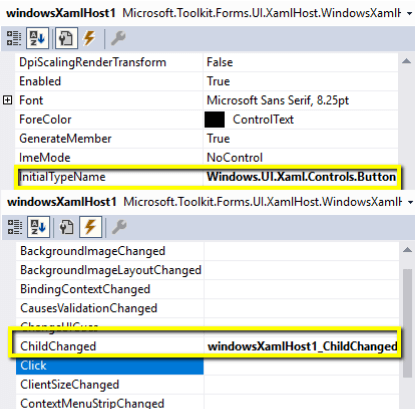
For example here is how a UWP Button can be created in the WinForms world:
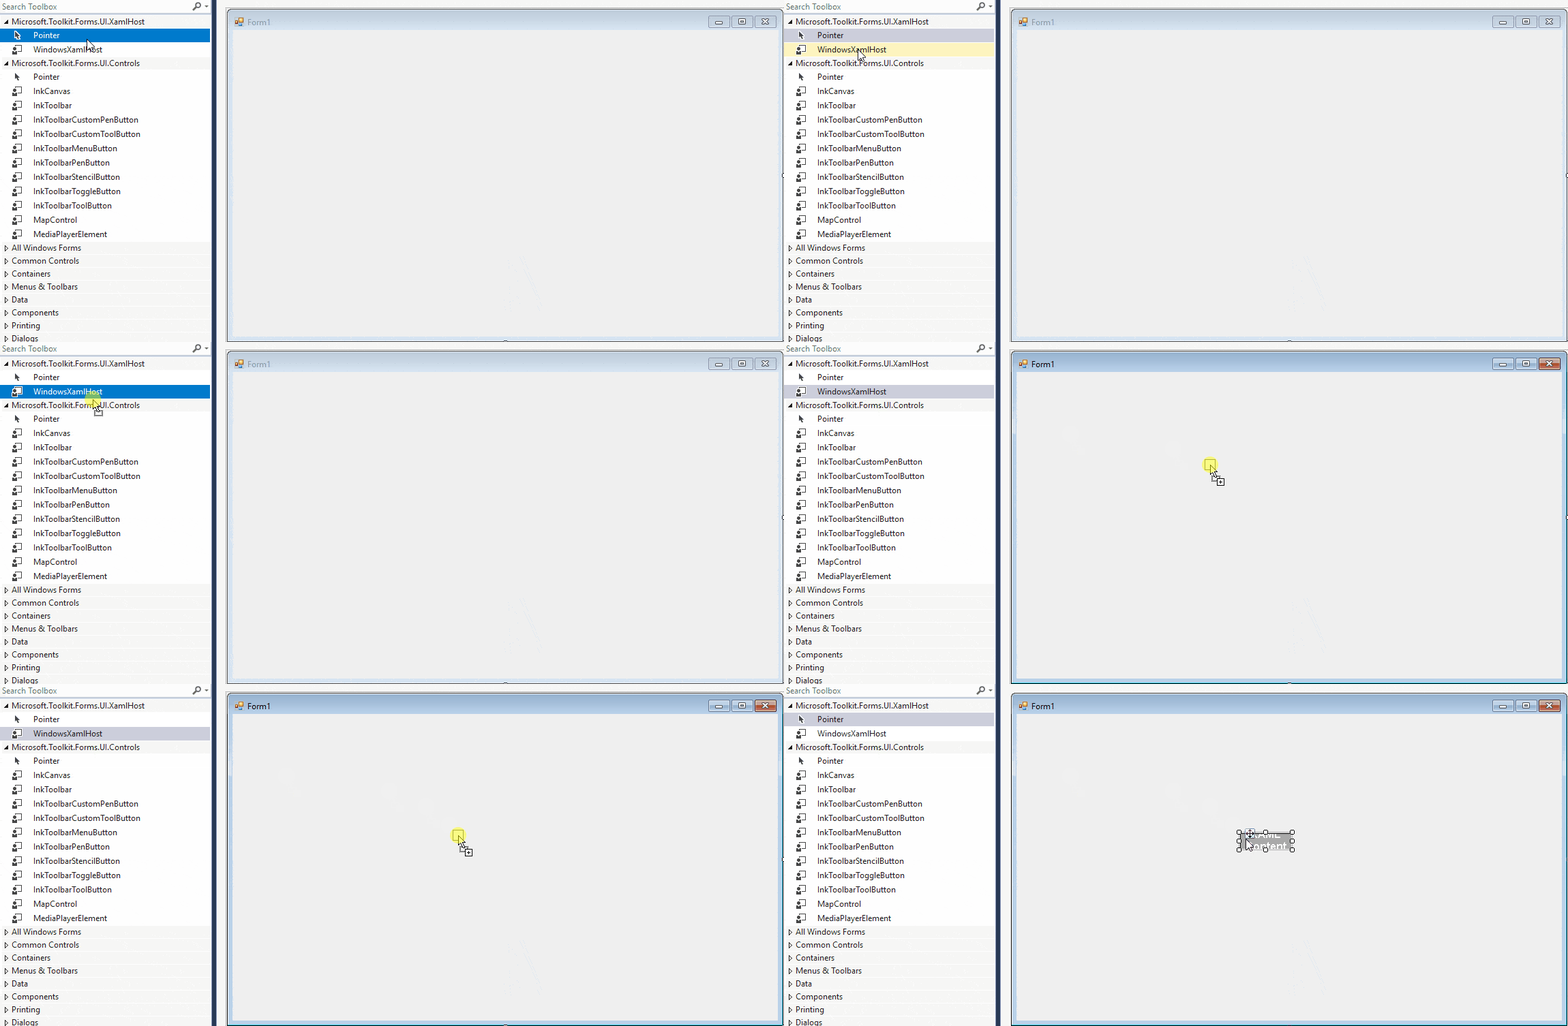
And in code behind using the ChildChanged event you can set the desired properties to the Button:
 private void windowsXamlHost1_ChildChanged(object sender, EventArgs e)

{

    var host = (WindowsXamlHost)sender;

    var button = host.Child as Windows.UI.Xaml.Controls.Button;

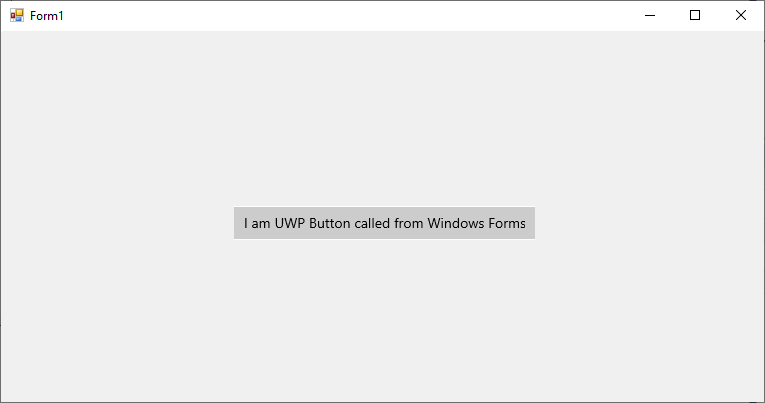
    button.Content = "I am UWP Button called from Windows Forms :)";

}
The final result should look like this:
Using Bindings with the XAML Islands
One of the most useful features of XAML is Bindings. Because the Child of the WindowsXamlHost is running on the same process and on the exact same thread, just like with WPF and Windows Forms, you can establish bindings for your native UWP control without any concerns.
For example, lets create a simple ViewModel class:
public class ViewModel : INotifyPropertyChanged

{

    private string uwpBtnContent;


    public ViewModel()

    {

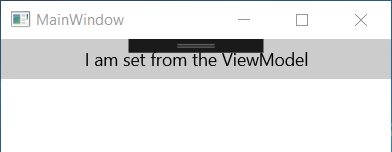
        this.UwpBtnContent = "I am set from the ViewModel";

    }


    public string UwpBtnContent

    {

        get

        {

            return this.uwpBtnContent;

        }

        set

        {

            if (this.uwpBtnContent != value)

            {

                this.uwpBtnContent = value;

                this.NotifyPropertyChanged(nameof(UwpBtnContent));

            }

        }

    }


    public event PropertyChangedEventHandler PropertyChanged;


    private void NotifyPropertyChanged([CallerMemberName] string propertyName = "")

    {

        PropertyChanged?.Invoke(this, new PropertyChangedEventArgs(propertyName));

    }

}
After that inside the ChildChanged event we can create the following binding for the Content property of the Button:
 private void WindowsXamlHost_ChildChanged(object sender, System.EventArgs e)

{

    var host = (WindowsXamlHost)sender;

    var button = host.Child as Windows.UI.Xaml.Controls.Button;

    button.SetBinding(

        Windows.UI.Xaml.Controls.Button.ContentProperty,

        new Windows.UI.Xaml.Data.Binding()

        {

            Path = new Windows.UI.Xaml.PropertyPath("UwpBtnContent"),

            Source = new ViewModel()

        });

}
The result should look like this:
Limitations
As the XAML Islands is still in preview it has a few limitations. Here are some of them:
- The Wrapped controls are not properly responding to changes in DPI and scale
- Accessibility tools do not work seamlessly across the application and hosted controls
You can find a complete list with more information about the other limitations of XAML Islands here.
Closing Words
Being a desktop developer has never been so exciting. Bringing a native look and feel to your WPF and WinForms application using XAML Islands is another great functionality introduced by Microsoft. I am excited to see how XAML Islands develops, and for all the new functionalities that I believe are coming to us as developers in the future.
Do not hesitate and give XAML Islands a try right now. Believe me you won't regret it. You might also be interested in checking out our WPF, WinForms and UWP suites, which are in lock step with everything new from XAML Islands to .NET Core 3.0.
Thanks and Happy coding. 😊
P.S. In the 3rd and final blog of the series, we are going to focus on styling and customizations and in particular, how to create Fluent Design-inspired WPF and WinForms applications.
Recommended Articles:

Atanas Popatanasov
Atanas Popatanasov is a Software Developer working on the Progress Telerik Xamarin and UWP team. He holds a bachelor's degree in Computer Systems and Technologies. In his spare time, Atanas loves reading programming books, to hang out with friends and to watch his favorite football team.
