
Today we’re going to cover how I integrated Stripe Terminal into a multitenant Rails application. Stripe Terminal is a combination of SDK, and physical hardware to swipe credit cards. This is a huge moment in web development because Stripe Terminal offers a JS based SDK for use with web applications.
It plays a key role in my software platform Sport Keeper - a business management platform that provides automated billing and member management for places like climbing gyms and skate parks. It contains a P.O.S. component that utilizes Stripe Terminal.
Before we begin we’re going to start by assuming you have a rails app already setup. You’ll also want the Developer Kit from Stripe which includes the Verifone P400 P.O.S. hardware unit.
The developer kit costs $300. It was a purchase that was hard to stomach, especially being a bootstrapped startup. Terminal is in invitation only beta, so if you pester them enough times they may invite you and give you the instructions on how to purchase the developer kit.
Heads up! My implementation also utilizes Stripe Connect, so all API calls have the stripe_account as an additional parameter. If you're not utilizing Stripe Connect, just remove the added param.
Workflow Overview
It’s a good idea to get familiar with how Stripe Terminal works, and how this will integrate into a web app. It took me a couple days to really get my head around the workflow, because there are quite a few steps needed to take before actually swiping a card. I'm hoping the number of steps is reduced before it's moved out of beta. Essentially, this is what we’re looking at from a high level overview:
- Register the card reader.
- Fetch connection token
- Discover readers to connect to
- Connect to the reader
- Create Payment Intent
- Collect payment method
- Confirm Payment Intent
- Capture Payment Intent
You can also reference the official documentation. Let's dive in!
Add JS SDK
This is the easiest part of the whole process. Add the script.
<script src="https://js.stripe.com/terminal/v1/"></script>
Register Reader
Make a call to the API endpoint with the registration code, and a label at minimum. In my app I did this outside the flow of the P.O.S. process because it only has to happen once.
I created a CardReader model and I keep them in sync with Stripe. This lets the user create, edit readers (the current version of Stripes API does not allow for destroying readers yet), and set a specific reader as the preferred reader to connect to. When the user creates a new reader, we just send this off to the Stripe API to register it.
  class RegisterReader

    def initialize(params)
      @stripe_account       = params[:stripe_account]
      @reader_params        = params[:reader_params]
    end

    def call
      reader = Stripe::Terminal::Reader.create(@reader_params,{stripe_account:@stripe_account})
    rescue Stripe::StripeError => e
      OpenStruct.new({success?: false, error: e})
    else
      OpenStruct.new({success?: true, payload: reader})
    end

  end
Once registered you can call the following in a controller to list the available readers for reference. As of this writing, there isn't a U.I. yet for Terminal Readers within the Stripe Dashboard.
  class RetrieveReaders

    def initialize(params)
      @stripe_account    = params[:stripe_account]
    end

    def call
      readers = Stripe::Terminal::Reader.list({},{stripe_account:@stripe_account})
    rescue Stripe::StripeError => e
      OpenStruct.new({success?: false, error: e})
    else
      OpenStruct.new({success?: true, payload: readers})
    end

  end
Setup Token Endpoint
From this point forward we’ll be working in the context of a form. When Stripe Terminal completes the payment, we want to submit the form with the charge id.
I setup a separate controller to handle everything related to Stripe Terminal. This first method grabs a connection token from Stripe. It's a short-lived token that's used with a single Terminal session.
  def fetch_connection_token
    result = StripeServices::FetchConnectionToken.new(stripe_account:current_tenant_stripe_account).call
    render json: result.payload
  end
current_tenant_stripe_account is a custom method in my app that looks up the Stripe Connect account ID based on the current tenant. The controller method above, calls the service method below, which in turn returns the token.
module StripeServices

  class FetchConnectionToken

    def initialize(params)
      @stripe_account       = params[:stripe_account]
    end

    def call
      token = Stripe::Terminal::ConnectionToken.create({},{stripe_account:@stripe_account})
    rescue Stripe::StripeError => e
      OpenStruct.new({success?: false, error: e})
    else
      OpenStruct.new({success?: true, payload: token})
    end

  end

end
Again if you're not using Stripe Connect, don't pass the stripe_account param.
Fetch Connection Token
In a JS file add the code below. We're calling our controller method above and returning the client_secret from the service.
  function fetchConnectionToken() {
    return fetch('/terminal/fetch-connection-token.json').then(response => response.json()).then(response =>
      response.secret
    );
  }
How or when you fetch the token is up to you. There’s no documentation or guides on how to do this in the context of a web app yet. This is the first! For my app I have an invoice form with multiple payment methods. I added a new payment method of Terminal. When the cashier clicks the terminal payment option, we then fetch the connection token to begin the process.
With the token in hand, we can instantiate terminal.
  var terminal = StripeTerminal.create({
    // fetchConnectionToken must be a function that returns a promise
    onFetchConnectionToken: fetchConnectionToken,
    onUnexpectedReaderDisconnect: unexpectedDisconnect,
  });
Heads up, on May 3rd 2019 this function was updated to stay inline with Terminal docs. They now require the callback onUnexpectedReaderDisconnect to be in place, with the functions job to "notify the user that the reader disconnected. You can also include a way to attempt to reconnect to a reader."
Discover Readers to Connect To
So again, when the cashier clicks the Terminal option, we fetch the connection token, instantiate Terminal, then list the available readers for the cashier to connect to in a side panel. This assumes that the facility where the P.O.S. unit is installed has multiple readers.
If there’s only one card reader, you can connect to it automatically by stashing the id in local storage. See the Stripe docs for that. For the sake of this tutorial, we’ll have the cashier select the reader to connect to.
Add the following to your JS file.
  terminal.discoverReaders().then(function(discoverResult) {
    if (discoverResult.error) {
      console.log('Failed to discover: ', discoverResult.error);
    } else if (discoverResult.discoveredReaders.length === 0) {
      console.log('No available readers.');
    } else {
      buildReaderList(discoverResult.discoveredReaders)
    }
  });
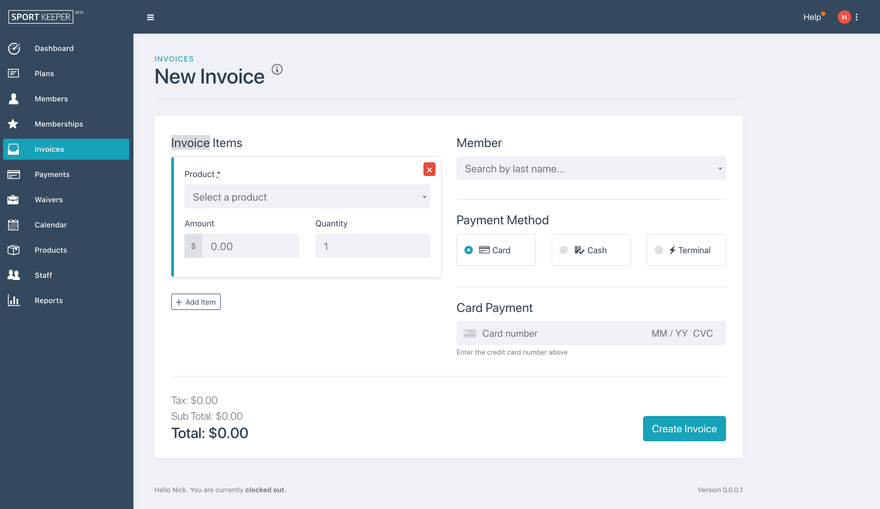
buildReaderList() is a custom JS function builds a list of readers. Each of them have a "connect" button. How you build that logic in JS is up to you. All the cool kids use React, Vue, and whatever else. I just use jQuery as it's already being loaded. Super simple. Here's what this process looks like visually:
Connect to Reader
When we click "connect" on a reader, we're going to call connectReader() in Stripe Terminal. Here's that click event.
  $(document).delegate('.js--select-reader', 'click', function(e){
    e.preventDefault()
    connectReader($(this).data('reader'))
  })
I'm just stashing the reader object as a data attribute. When the connect button is clicked, we pass that to connectReader() to connect to the reader unit.
  function connectReader(selectedReader) {
    terminal.connectReader(selectedReader).then(function(connectResult) {
      console.log(connectResult)
      if (connectResult.error) {
         console.log('Failed to connect: ', connectResult.error);
       } else {
         createPaymentIntent()
         //console.log('Connected to reader: ',connectResult.connection.reader.label);
       }
    });
  }
Heads up, I had some trouble initially connecting. The process would take 15 seconds or so, then timeout and I’d get hit back with an error. I was fairly certain the setup was correct, so I hopped onto the #stripe IRC channel and had a chat with their engineers. Super helpful group!
Apparently Chrome has sporadic issues resolving DNS, so I was instructed to update my Macs local DNS to connect to Googles DNS. If you Google search "change Mac DNS Google DNS", you'll find out how to do it.
Create Payment Intent
After the reader connects, we immediately create an intent to collect a payment in the form of a payment intent. This includes the amount, and the customer (optional). If you’re going to associate it with a customer, you’ll need to spin off another service to get that customer id before creating the payment intent. I haven't even done this myself yet, but there's a @todo shown in the blocks below where that should happen.
In my app I'm creating the payment intent via a POST call to our terminal controller. If successful it will send back the payment intent secret that we can use to collect the payment.
  function createPaymentIntent() {
    $.rails.refreshCSRFTokens()
    $.ajax({
      url: '/terminal/create-payment-intent.json',
      type: 'POST',
      beforeSend: function(xhr) {xhr.setRequestHeader('X-CSRF-Token', $('meta[name="csrf-token"]').attr('content'))},
      data: {charge_amount:$('#js--invoice-total').attr('data-amount')},
      success: function(response) {
        collectPaymentMethod(response.client_secret)
      }
    });
  }
I use Turbolinks in my apps, which means you often encounter issues with stale CSRF tokens when working with JS. This comes in the form of the error "can't verify CSRF token". To fix that I'm calling $.rails.refreshCSRFTokens() prior to POST'ing.
The POST call above hits our controller method below. You can also see where you would pass in the customer as an additional param to Stripe if needed.
  # @todo pass customer here
  def create_payment_intent
    result = StripeServices::CreatePaymentIntent.new(intent_params:{
      amount: params[:charge_amount],
      currency: 'usd',
      payment_method_types: ['card_present'],
      capture_method: 'manual',
    }, stripe_account:current_tenant_stripe_account).call

    render json: result.payload
  end
Again with our service object pattern, the controller method above calls the service object below.
module StripeServices

  class CreatePaymentIntent

    def initialize(params)
      @intent_params    = params[:intent_params]
      @stripe_account   = params[:stripe_account]
    end

    def call
      intent = Stripe::PaymentIntent.create(@intent_params,{stripe_account:@stripe_account})
    rescue Stripe::StripeError => e
      OpenStruct.new({success?: false, error: e})
    else
      OpenStruct.new({success?: true, payload: intent})
    end

  end

end
I know, it's a long process. Before we continue, let's recap what we did so far.
- Registered the reader
- Fetched connected token to instantiate Terminal.
- Used the token to list the registered readers.
- Used connectTerminal to connect to a card reader.
- Once connected it immediate creates a payment intent
- We now have the secret from the payment intent.
Collect Payment Method
At this point we need to collect the payment from the customer.
  function collectPaymentMethod(secret){
    terminal.collectPaymentMethod(secret).then(function(result) {
      if (result.error) {
        console.error("Collect payment method failed: " + result.error.message);
      } else {
        //console.log("Payment method: ", result.paymentIntent.payment_method)
        confirmPaymentIntent(result.paymentIntent)
      }
    });
  }
The customer will now be prompted to swipe their card. For testing purposes if the amount ends in .00 it'll be considered a success. An amount ending in .05 will simulate a card declined error. On an error we display it back to the cashier, and then reset the process.
Using the the result, we call confirmPaymentIntent().
Process Payment (previously Confirm Payment Intent )
In the JS file we add the confirmPaymentIntent() function.
  function confirmPaymentIntent(paymentIntent) {
    return terminal.processPayment(paymentIntent).then(function(confirmResult) {
      if (confirmResult.error) {
        console.log(confirmResult.error.message)
      } else if (confirmResult.paymentIntent) {
        capturePaymentIntent(paymentIntent)
      }
    });
  }
When the confirmation is successful, the funds are authorized, but not yet captured. For that we need to capture the payment intent.
Capture Payment Intent
Starting with JS, add the below to your JS file. We're passing the payment intent from our confirmation in the previous step.
  function capturePaymentIntent(paymentIntent){
    $.rails.refreshCSRFTokens()
    $.ajax({
      url: '/terminal/capture-payment-intent',
      type: 'POST',
      beforeSend: function(xhr) {xhr.setRequestHeader('X-CSRF-Token', $('meta[name="csrf-token"]').attr('content'))},
      data: {payment_intent_id:paymentIntent.id},
      success: function(response) {
        // Append Transaction ID
        terminalFormHandler(response.charges.data[0].id)
      }
    });
  }
We call a new method capture_payment_intent in our Terminal controller.
  def capture_payment_intent
    result = StripeServices::RetrievePaymentIntent.new(intent_id:params[:payment_intent_id], stripe_account:current_tenant_stripe_account).call
    render json: result.payload
  end
Which in turn calls the service object below.
module StripeServices

  class RetrievePaymentIntent

    def initialize(params)
      @intent_id        = params[:intent_id]
      @stripe_account   = params[:stripe_account]
    end

    def call
      intent = Stripe::PaymentIntent.retrieve(@intent_id,{stripe_account:@stripe_account})
      intent.capture
    rescue Stripe::StripeError => e
      OpenStruct.new({success?: false, error: e})
    else
      OpenStruct.new({success?: true, payload: intent})
    end

  end

end
It sounds like a lot, but it happens pretty fast. Capturing the payment is the final step. You technically have up to 24hours to capture the payment after confirming it, but I just have this process happen all at once, at the very end.
After a successful capture, we call another custom JS function terminalFormHandler() to handle the response. We fill in the charge ID into a hidden field, and submit the form.
Summary
It took me about a day to really nail down the process, and I'm pretty happy about the end result. Right now I think there are too many steps, but this is beta so maybe that will change. Have you implemented Stripe Terminal in your web app? What are your thoughts on the start of the ePOS movement?
Updates
Feb 21 2019 - allowed_source_types renamed to payment_method_types per API update 2019-02-19
May 3 2019 - Terminal updates:
- updated the SDK from sdk-b1.js to sdk-rc1.js
- added onUnexpectedReaderDisconnect callback to the Terminal instantiation block
- terminal.confirmPaymentIntent renamed to terminal.processPayment
Dec 15 2019 - Terminal Updates
Stripe Terminal is now out of beta. Only one change necessary per the migration guide and SDK Update Changes.
- updated source of JS SDK script


Top comments (3)
Running into the following issue on the client side but I'm getting a token/secret back,
core.js:6014 ERROR Error: Uncaught (in promise): Error: Invalid Argument: Invalid
onFetchConnectionTokenhandler given.You must pass a function that will retrieve an connection token via your backend using your api secret key.
Error: Invalid Argument: Invalid
onFetchConnectionTokenhandler given.You must pass a function that will retreive an connection token via your backend using your api secret key
Hello Nick,
Can you please help me with the screens which you get while processing payment using verifone p400 developer kit. Because am developing an application in nodeJs and unable to find screens related to payment processing in verfione p400 developer kit.
I can try to help. What screens are you talking about? What step of the process are you currently stopped on?