How to install Etherpad on Ubuntu 20.04
This tutorial exists for these OS versions
- Ubuntu 20.04 (Focal Fossa)
- Ubuntu 18.04 (Bionic Beaver)
On this page
Etherpad is a web-based real-time online editor that allows writers to simultaneously edit a text document and monitor all edits in realtime. It is open-source, customizable and ability to display each author's text in their own color. It also provides a HTTP API that you can integrate with your applications to manage users and groups. It offers several plugins that help you to integrate email notifications, file uploading, video calls in Etherpad. In this tutorial, we will show you how to install Etherpad web-based editor on Ubuntu 20.04 server.
Prerequisites
- A server running Ubuntu 20.04.
- A valid domain name pointed with your server IP.
- A root password is configured the server.
Getting Started
Before starting, you will need to update your system packages to the latest version. You can update them by running the following command:
apt-get update -y
Once all the packages are updated, you will need to install some dependencies in your system. You can install all of them with the following command:
apt-get install gnupg2 git unzip libssl-dev pkg-config gcc g++ make build-essential -y
Once all the packages are installed, you can proceed to the next step.
Install and Configure MariaDB Database
Etherpad uses MariaDB as a database backend. So you will need to install the MariaDB server in your system. You can install it with the following command:
apt-get install mariadb-server -y
After installing MariaDB, log in to the MariaDB shell with the following command:
mysql
After login, create a database and user for Etherpad with the following command:
MariaDB [(none)]> create database etherpad;
MariaDB [(none)]> grant all privileges on etherpad.* to etherpad@localhost identified by 'password';
Next, flush the privileges and exit from the MariaDB with the following command:
MariaDB [(none)]> flush privileges;
MariaDB [(none)]> exit;
At this point, your database is configured for Etherpad. You can now proceed to the next step.
Install Node.js
Etherpad is based on Node.js. So you will need to install Node.js in your system. By default, the latest version of Node.js is not available in the Ubuntu 20.04 standard repository. So you will need to add the Node.js repository to your system. You can add it with the following command:
curl -sL https://deb.nodesource.com/setup_14.x -o nodesource_setup.sh
bash nodesource_setup.sh
Once the repository is added, install the Node.js with the following command:
apt-get install nodejs -y
After installing Node.js, verify the installed version of Node.js with the following command:
node -v
You should get the following output:
v14.15.0
Once you are finished, you can proceed to the next step.
Install and Configure Etherpad
Before, installing Etherpad. It is recommended to run Etherpad as a separate user. You can create a new user for Etherpad with the following command:
adduser --home /opt/etherpad --shell /bin/bash etherpad
You will be asked to set a password as shown below:
Adding user `etherpad' ...
Adding new group `etherpad' (1000) ...
Adding new user `etherpad' (1000) with group `etherpad' ...
Creating home directory `/opt/etherpad' ...
Copying files from `/etc/skel' ...
New password:
Retype new password:
passwd: password updated successfully
Changing the user information for etherpad
Enter the new value, or press ENTER for the default
	Full Name []: Hitesh
	Room Number []: 1
	Work Phone []:
	Home Phone []:
	Other []:
Is the information correct? [Y/n] Y
Next, provide proper permissions to the Etherpad home directory with the following command:
install -d -m 755 -o etherpad -g etherpad /opt/etherpad
Next, switch the user to Etherpad and download the latest version of Etherpad from the Git repository using the following command:
su - etherpad
git clone --branch master https://github.com/ether/etherpad-lite.git
Next, change the directory to the downloaded directory and run the Etherpad using the following command:
cd etherpad-lite
bin/run.sh
This will install all dependencies and start the Etherpad server. Once the server is started successfully, you should get the following output:
[2020-11-11 06:46:44.783] [INFO] console - Your Etherpad version is 1.8.6 (2c8769a)
[2020-11-11 06:46:44.958] [INFO] console - You can access your Etherpad instance at http://0.0.0.0:9001/
[2020-11-11 06:46:44.958] [WARN] console - Admin username and password not set in settings.json.  To access admin please uncomment and edit 'users' in settings.json
[2020-11-11 06:46:44.958] [WARN] console - Etherpad is running in Development mode.  This mode is slower for users and less secure than production mode.  You should set the NODE_ENV environment variable to production by using: export NODE_ENV=production
Next, press CTRL + C to stop the server. Next, you will need to edit the settings.json file and define your database and admin settings:
nano settings.json
Remove the following lines:
"dbType" : "dirty",
  "dbSettings" : {
                   "filename" : "var/dirty.db"
                 },
Change the MySQL settings as shown below:
  "dbType" : "mysql",
  "dbSettings" : {
    "user":     "etherpad",
    "host":     "localhost",
    "port":     3306,
    "password": "password",
    "database": "etherpad",
    "charset":  "utf8mb4"
  },
Change the line trustProxy to true:
"trustProxy": true,
Define a password for the admin user:
  "users": {
    "admin": {
      "password": "adminpassword",
      "is_admin": true
    },
Save and close the file then install the required dependencies with the following command:
./bin/installDeps.sh
Once all the dependencies are installed, exit from the Etherpad user with the following command:
exit
At this point, Etherpad is installed and configured. You can now proceed to the next step.
Create a Systemd Service File for Etherpad
Next, you will need to create a systemd service file to manage the Etherpad service. You can create it with the following command:
nano /etc/systemd/system/etherpad.service
Add the following lines:
[Unit]
Description=Etherpad-lite, the collaborative editor.
After=syslog.target network.target

[Service]
Type=simple
User=etherpad
Group=etherpad
WorkingDirectory=/opt/etherpad/etherpad-lite
Environment=NODE_ENV=production

ExecStart=/usr/bin/node /opt/etherpad/etherpad-lite/src/node/server.js

Restart=always

[Install]
WantedBy=multi-user.target
Save and close the file then reload the systemd daemon by running the following command:
systemctl daemon-reload
Next, start the Etherpad service and enable it to start at system reboot with the following command:
systemctl start etherpad
systemctl enable etherpad
You can also verify the status of Etherpad service with the following command:
systemctl status etherpad
You should see the following output:
? etherpad.service - Etherpad-lite, the collaborative editor.
     Loaded: loaded (/etc/systemd/system/etherpad.service; disabled; vendor preset: enabled)
     Active: active (running) since Wed 2020-11-11 06:50:49 UTC; 4s ago
   Main PID: 12269 (node)
      Tasks: 13 (limit: 4691)
     Memory: 119.1M
     CGroup: /system.slice/etherpad.service
             ??12269 /usr/bin/node /opt/etherpad/etherpad-lite/src/node/server.js
Configure Nginx for Etherpad
At this point, Etherpad is started and listening on port 9001. Next, you will need to install and configure Nginx as a reverse proxy to access the Etherpad. First, install the Nginx with the following command:
apt-get install nginx -y
Next, create a new Nginx virtual host configuration file with the following command:
nano /etc/nginx/sites-available/etherpad.conf
Add the following lines:
upstream etherpad {
   server localhost:9001;
   keepalive 32;
}

server {
   listen 80;
   server_name etherpad.mydomain.com;

   location / {
       client_max_body_size 50M;
       proxy_set_header X-Real-IP $remote_addr;
       proxy_http_version 1.1;
       proxy_pass http://etherpad;
   }
}
Save and close the file then activate the Nginx virtual host configuration file with the following command:
ln -s /etc/nginx/sites-available/etherpad.conf /etc/nginx/sites-enabled/
Next, check Nginx for any syntax error with the following command:
nginx -t
You should get the following output:
nginx: the configuration file /etc/nginx/nginx.conf syntax is ok
nginx: configuration file /etc/nginx/nginx.conf test is successful
Next, restart the Nginx service to apply the changes:
systemctl restart nginx
You can also verify the status of Nginx with the following command:
systemctl status nginx
You should get the following output:
? nginx.service - A high performance web server and a reverse proxy server
     Loaded: loaded (/lib/systemd/system/nginx.service; enabled; vendor preset: enabled)
     Active: active (running) since Wed 2020-11-11 06:53:44 UTC; 6s ago
       Docs: man:nginx(8)
    Process: 12984 ExecStartPre=/usr/sbin/nginx -t -q -g daemon on; master_process on; (code=exited, status=0/SUCCESS)
    Process: 12985 ExecStart=/usr/sbin/nginx -g daemon on; master_process on; (code=exited, status=0/SUCCESS)
   Main PID: 13001 (nginx)
      Tasks: 3 (limit: 4691)
     Memory: 3.5M
     CGroup: /system.slice/nginx.service
             ??13001 nginx: master process /usr/sbin/nginx -g daemon on; master_process on;
             ??13002 nginx: worker process
             ??13003 nginx: worker process

Nov 11 06:53:44 ubuntu2004 systemd[1]: Starting A high performance web server and a reverse proxy server...
Nov 11 06:53:44 ubuntu2004 systemd[1]: Started A high performance web server and a reverse proxy server.
Access Etherpad
Now, open your web browser and type the URL http://etherpad.mydomain.com. You will be redirected to the following page:

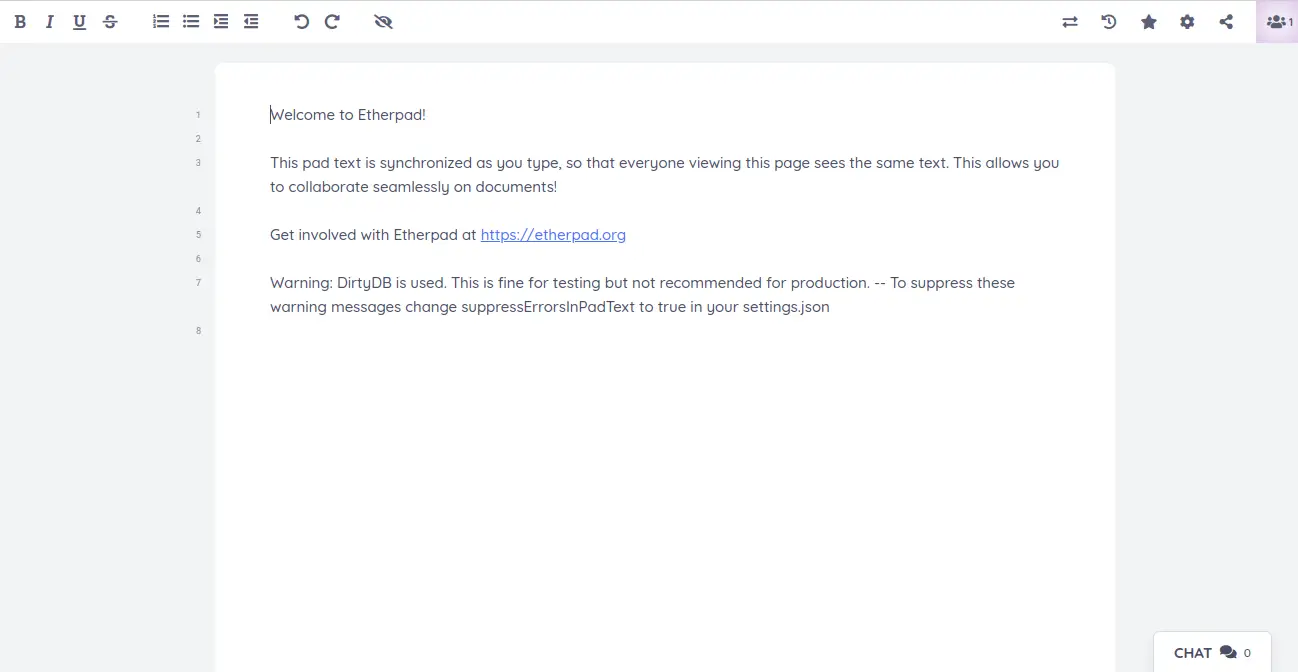
Provide your page name and click on the OK button. You should see your Etherpad dashboard in the following page:
Conclusion
Congratulations! you have successfully installed and configured Etherpad with Nginx as a reverse proxy on Ubuntu 20.04 server. You can the Etherpad in the production environment easily. Feel free to ask me if you have any questions.

