When I started learning front-end development I really hated CSS and design(I still hate design) but my CSS is a little better. One concept I didn’t understand was CSS pseudo-elements ::after and ::before.
In this article I will explain what pseudo-elements are and show some examples on how to use them.
What are Pseudo-elements?
Pseudo-element allow you create/define elements which are not on the DOM. They allow you style a specific part of an element’s content. Pseudo-elements have no element type as far as the document language is concerned because, simply they don't exist in the DOM. And can only be created using CSS.
The awesome thing about pseudo-elements is that they allow you add extra styling to a website without adding extra markup.
Some pseudo-elements are:
-
::first-letter(formerly:first-letter) -
::first-line(formerly:first-line) -
::before(formerly:before) -
::after(formerly:after)
Initially pseudo-elements were made using the single colon convention(i.e :before) but CSS3 introduced a new convention, single colon for pseudo-classes like hover, active e.t.c and double colons for pseudo-elements. This was introduced to differentiate pseudo-classes from pseudo-elements.
Read more about CSS3 Specification here.
There is still browser support for :before and :after but it is advisable to use double colons.
Before Pseudo-element
The Before pseudo element creates a pseudo-element before the first child of the selected element, simply it creates an element before the content of the selected element.
Pseudo elements have a content property which can be used to insert generated content, image or a string. They must have a CSS content attribute else the default value of content is set to none.
Below are some simple demos of the ::before pseudo-element.
In the first example in the demo We used the ::before to add a string before the p tag and also styled it like a normal Html element.
In the second ::before is used to add bullet arrow to the list, the bullet arrow is a Font awesome icon.
After Pseudo-element
The after pseudo element is quite similar to the before, the only difference is its positioning which is after the last child of the selected element/ after the content of the selected element.
The first example uses ::after on the label selector to indicate that an input field is required with an asterisk. While the second example shows how we can add an external link icon to the link.
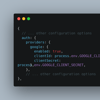
It is also possible to combine pseudo-elements. Note: According to the CSS3 specification only one pseudo-element may appear per selector but you can call the pseudo-elements twice on the same selector. E.g
 selector::before{
    .....
 }

 selector::after{
    .....
 }
A Simple demo demonstrating this is below
We used the pseudo-elements to add quotes to a sentence.
This article is just a simple explanation of what pseudo-elements are and what they do but, they are a lot more powerful than what is shown in the demos above.
If you have any suggestion or saw something wrong in the article please leave a comment below.


Top comments (6)
Thank you simple explanation
Excellent post. I really love the sandbox like examples that let you switch to html, scss and results. This cleared up '::before' and '::after' for me.
Thank you for sharing :)
Thanks brother ...
how we can click on pseudo?
sorry I don't really understand this question?