
by Tristan Ganry
This is a small tutorial project for learning Flask, APIs, and Google App Engine for beginners.
If you want to build web apps in a very short amount of time using Python, then Flask is a fantastic option.
Flask is a small and powerful web framework (also known as “microframework”). It is also very easy to learn and simple to code. Based on my personal experience, it was easy to start as a beginner.
Before this project, my knowledge of Python was mostly limited to Data Science. Yet, I was able to build this app and create this tutorial in just a few hours.
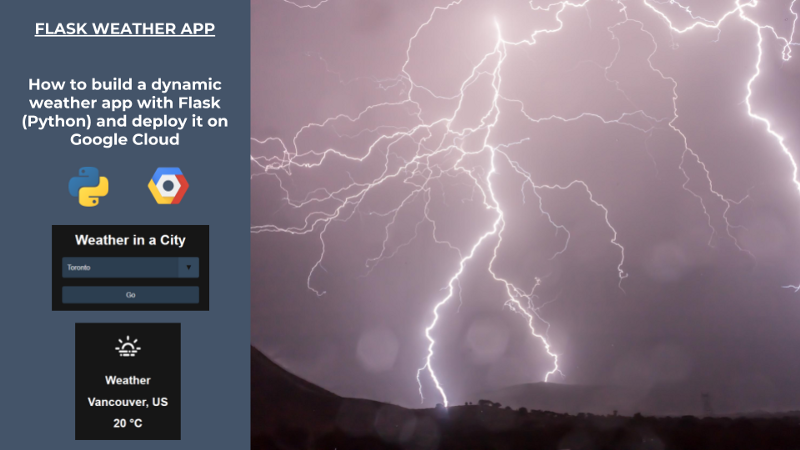
In this tutorial, I’ll show you how to build a simple weather app with some dynamic content using an API. This tutorial is a great starting point for beginners. You will learn to build dynamic content from APIs and deploying it on Google Cloud.
The end product can be viewed here.
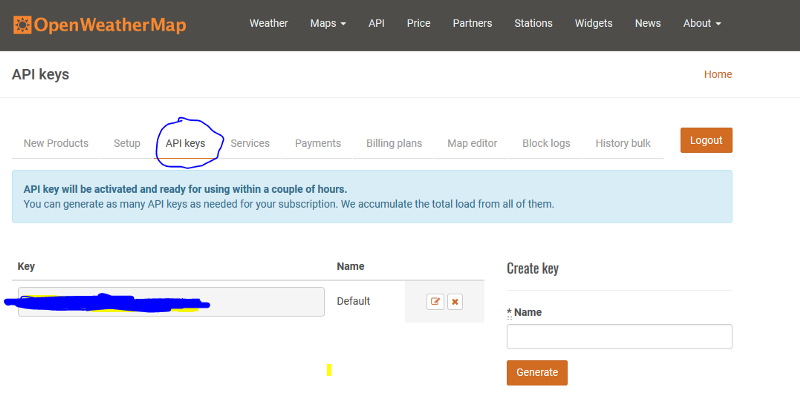
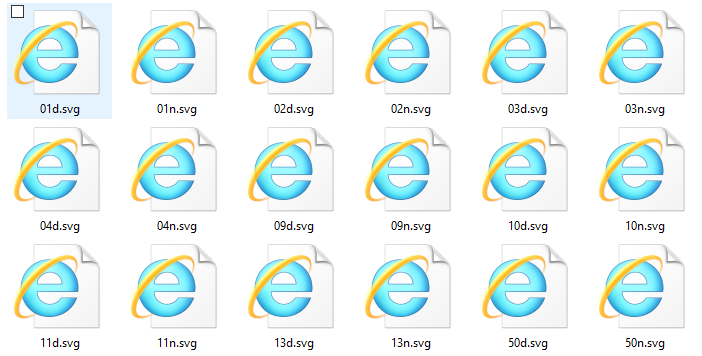
To create a weather app, we will need to request an API key from Open Weather Map. The free version allows up to 60 calls per minute, which is more than enough for this app. The Open Weather Map conditions icons are not very pretty. We will replace them with some of the 200+ weather icons from Erik Flowers instead.
This tutorial will also cover: (1) basic CSS design, (2) basic HTML with Jinja, and (3) deploying a Flask app on Google Cloud.
The steps we’ll take are listed below:
- Step 0: Installing Flask (this tutorial doesn’t cover Python and PIP installation)
- Step 1: Building the App structure
- Step 2: Creating the Main App code with the API request
- Step 3: Creating the 2 pages for the App (Main and Result) with Jinja, HTML, and CSS
- Step 4: Deploying and testing on your local laptop
- Step 5: Deploying on Google Cloud.
Step 0 — Installing Flask and the libraries we will use in a virtual environment.
We’ll build this project using a virtual environment. But why do we need one?
With virtual environments, you create a local environment specific for each projects. You can choose libraries you want to use without impacting your laptop environment. As you code more projects on your laptop, each project will need different libraries. With a different virtual environment for each project, you won’t have conflicts between your system and your projects or between projects.
- Run Command Prompt (cmd.exe) with administrator privileges. Not using admin privileges will prevent you from using pip.

- (Optional) Install virtualenv and virtualenvwrapper-win with PIP. If you already have these system libraries, please jump to the next step.
#Optionalpip install virtualenvwrapper-winpip install virtualenv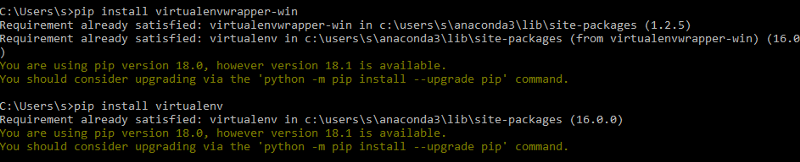
- Create your folder with the name “WeatherApp” and make a virtual environment with the name “venv” (it can take a bit of time)
#Mandatorymkdir WeatherAppcd WeatherAppvirtualenv venv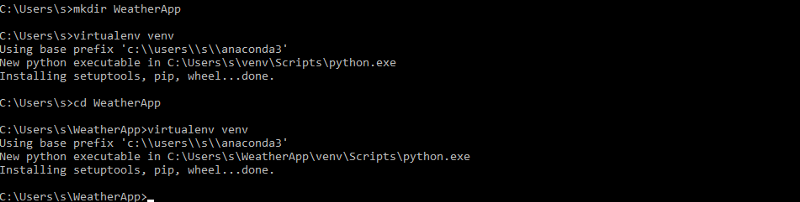
- Activate your virtual environment with “call” on Windows (same as “source” for Linux). This step changes your environment from the system to the project local environment.
call venv\Scripts\activate.bat
- Create a requirements.txt file that includes Flask and the other libraries we will need in your WeatherApp folder, then save the file. The requirements file is a great tool to also keep track of the libraries you are using in your project.
Flask==0.12.3click==6.7gunicorn==19.7.1itsdangerous==0.24Jinja2==2.9.6MarkupSafe==1.0pytz==2017.2requests==2.13.0Werkzeug==0.12.1
- Install the requirements and their dependencies. You are now ready to build your WeatherApp. This is the final step to create your local environment.
pip install -r requirements.txt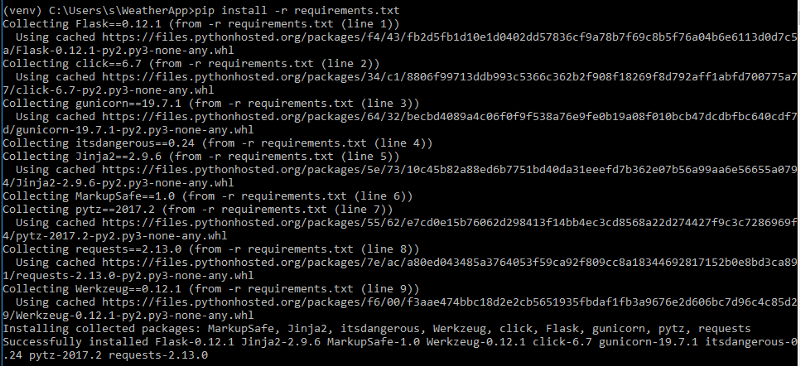
Step 1 — Building the App structure
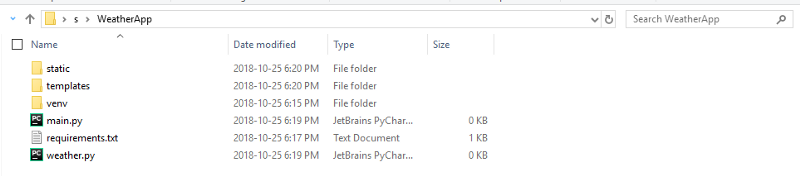
You have taken care of the local environment. You can now focus on developing your application. This step is to make sure the proper folder and file structure is in place. The next step will take care of the backend code.
- Create two Python files (main.py, weather.py) and two folders (static with a subfolder img, templates).
Step 2 — Creating the Main App code with the API request (Backend)
With the structure set up, you can start coding the backend of your application. Flask’s “Hello world” example only uses one Python file. This tutorial uses two files to get you comfortable with importing functions to your main app.
The main.py is the server that routes the user to the homepage and to the result page. The weather.py file creates a function with API that retrieves the weather data based on the city selected. The function populates the resulting page.
- Edit main.py with the following code and save
#!/usr/bin/env pythonfrom pprint import pprint as ppfrom flask import Flask, flash, redirect, render_template, request, url_forfrom weather import query_apiapp = Flask(__name__)@app.route('/')def index(): return render_template( 'weather.html', data=[{'name':'Toronto'}, {'name':'Montreal'}, {'name':'Calgary'}, {'name':'Ottawa'}, {'name':'Edmonton'}, {'name':'Mississauga'}, {'name':'Winnipeg'}, {'name':'Vancouver'}, {'name':'Brampton'}, {'name':'Quebec'}])@app.route("/result" , methods=['GET', 'POST'])def result(): data = [] error = None select = request.form.get('comp_select') resp = query_api(select) pp(resp) if resp: data.append(resp) if len(data) != 2: error = 'Bad Response from Weather API' return render_template( 'result.html', data=data, error=error)if __name__=='__main__': app.run(debug=True)- Request a free API key on Open Weather Map
- Edit weather.py with the following code (updating the API_KEY) and save
from datetime import datetimeimport osimport pytzimport requestsimport mathAPI_KEY = 'XXXXXXXXXXXXXXXXXXXXXXXXXXX'API_URL = ('http://api.openweathermap.org/data/2.5/weather?q={}&mode=json&units=metric&appid={}')def query_api(city): try: print(API_URL.format(city, API_KEY)) data = requests.get(API_URL.format(city, API_KEY)).json() except Exception as exc: print(exc) data = None return dataStep 3 — Creating pages with Jinja, HTML, and CSS (Frontend)
This step is about creating what the user will see.
The HTML pages weather and result are the one the backend main.py will route to and give the visual structure. The CSS file will bring the final touch. There is no Javascript in this tutorial (the front end is pure HTML and CSS).
It was my first time using the Jinja2 template library to populate the HTML file. It surprised me how easy it was to bring dynamic images or use functions (e.g. rounding weather). Definitely a fantastic template engine.
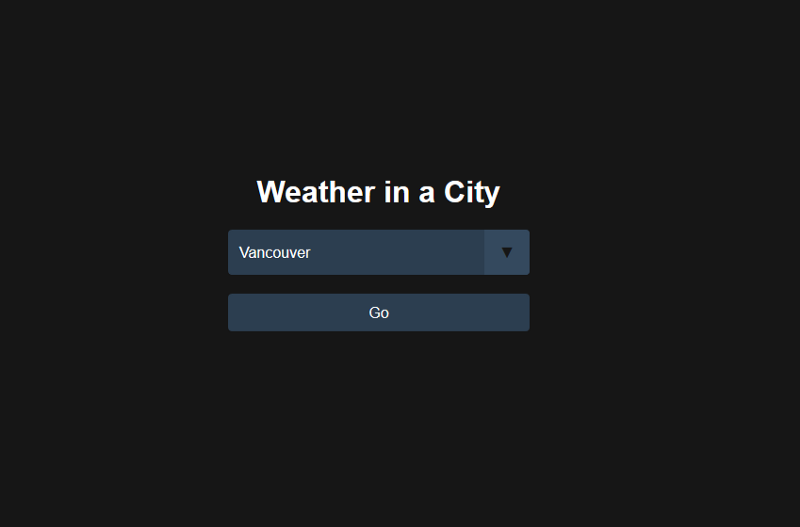
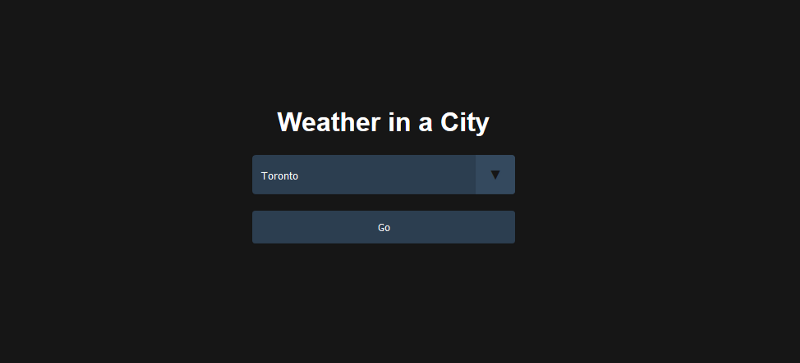
- Create the first HTML file in the templates folder (weather.html)
<!doctype html><link rel="stylesheet" type="text/css" href="{{ url_for('static', filename='style.css') }}"><div class="center-on-page"> <h1>Weather in a City</h1><form class="form-inline" method="POST" action="{{ url_for('result') }}"> <div class="select"> <select name="comp_select" class="selectpicker form-control"> {% for o in data %} <option value="{{ o.name }}">{{ o.name }}</option> {% endfor %} </select> </div> <button type="submit" class="btn">Go</button></form>- Create the second HTML file in the templates folder (result.html)
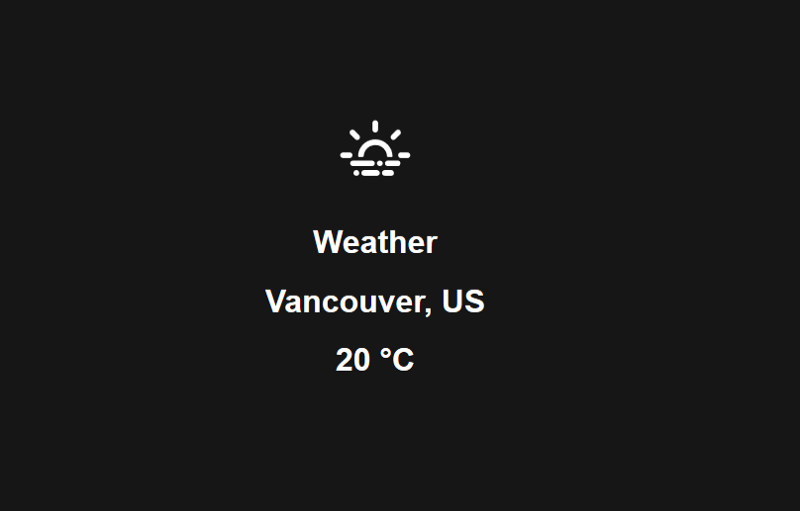
<!doctype html><link rel="stylesheet" type="text/css" href="{{ url_for('static', filename='style.css') }}"><div class="center-on-page">{% for d in data %} {% set my_string = "static/img/" + d['weather'][0]['icon']+ ".svg" %} <h1> <img src="{{ my_string }}" class="svg" fill="white" height="100" vertical-align="middle" width="100"> </h1> <h1>Weather</h1> <h1>{{ d['name'] }}, {{ d['sys']['country'] }}</h1> <h1>{{ d['main']['temp']|round|int}} °C</h1>{% endfor %}
- Add a CSS file in the static folder (style.css)
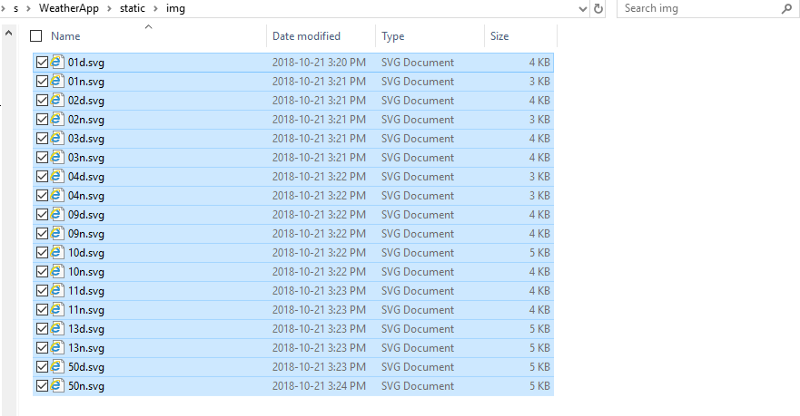
body { color: #161616; font-family: 'Roboto', sans-serif; text-align: center; background-color: currentColor;}.center-on-page { position: absolute; top:50%; left: 50%; transform: translate(-50%,-50%);}h1 { text-align: center; color:#FFFFFF;}img { vertical-align: middle; }/* Reset Select */select { -webkit-appearance: none; -moz-appearance: none; -ms-appearance: none; appearance: none; outline: 0; box-shadow: none; border: 0 !important; background: #2c3e50; background-image: none;}/* Custom Select */.select { position: relative; display: block; width: 20em; height: 3em; line-height: 3; background: #2c3e50; overflow: hidden; border-radius: .25em;}select { width: 100%; height: 100%; margin: 0; padding: 0 0 0 .5em; color: #fff; cursor: pointer;}select::-ms-expand { display: none;}/* Arrow */.select::after { content: '\25BC'; position: absolute; top: 0; right: 0; bottom: 0; padding: 0 1em; background: #34495e; pointer-events: none;}/* Transition */.select:hover::after { color: #f39c12;}.select::after { -webkit-transition: .25s all ease; -o-transition: .25s all ease; transition: .25s all ease;}button{ -webkit-appearance: none; -moz-appearance: none; -ms-appearance: none; appearance: none; outline: 0; box-shadow: none; border: 0 !important; background: #2c3e50; background-image: none; width: 100%; height: 40px; margin: 0; margin-top: 20px; color: #fff; cursor: pointer; border-radius: .25em;}.button:hover{ color: #f39c12;}- Download the images in the img subfolder in static
Link with the images on Github:
Step 4 — Deploying and testing locally
At this stage, you have set up the environment, the structure, the backend, and the frontend. The only thing left is to launch your app and to enjoy it on your localhost.
- Just launch the main.py with Python
python main.py- Go to the localhost link proposed on cmd with your Web Browser (Chrome, Mozilla, etc.). You should see your new weather app live on your local laptop :)

Step 5 — Deploying on Google Cloud
This last step is for sharing your app with the world. It’s important to note that there are plenty of providers for web apps built using Flask. Google Cloud is just one of many. This article does not cover some of the others like AWS, Azure, Heroku…
If the community is interested, I can provide the steps of the other cloud providers in another article and some comparison (pricing, limitations, etc.).
To deploy your app on Google Cloud you will need to 1) Install the SDK, 2) Create a new project, 3) Create 3 local files, 4) Deploy and test online.
- Install the SDK following Google’s instructions
- Connect to your Google Cloud Account (use a $300 coupon if you haven’t already)
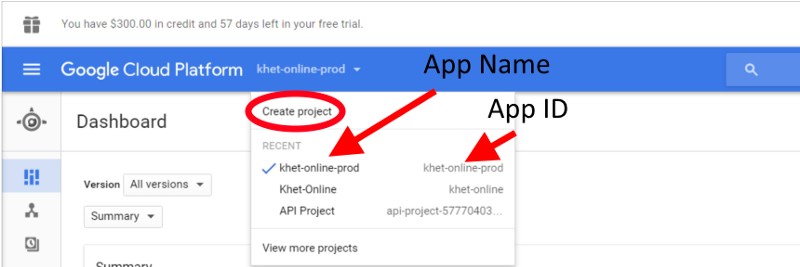
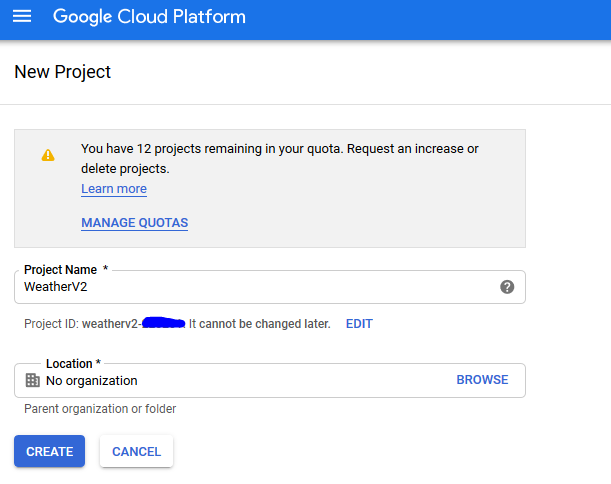
- Create a new project and save the project id (wait a bit until the new project is provisioned)
- Create an app.yaml file in your main folder with the following code:
runtime: python27api_version: 1threadsafe: truehandlers:- url: /static static_dir: static- url: /.* script: main.app libraries: - name: ssl version: latest- Create an appengine_config.py file in your main folder with the following code:
from google.appengine.ext import vendor# Add any libraries installed in the "lib" folder.vendor.add('lib')- Replicate the library’s dependencies in lib folder
pip install -t lib -r requirements.txt- Deploy on Google Cloud using your save project ID (it can take 10 minutes). Use the following steps:
gcloud auth application-default logingcloud config set project <PROJECT_ID>gcloud initgcloud app deploy app.yaml- Enjoy your live web app for free. Mine is here.
The full code is available on Github. Thank you for reading my post. It was my first web app using Flask and first Tutorial on freeCodeCamp. If you found this article helpful, give me some claps ?. It was a lot easier than I thought it would, coming from a Data Science background with Python and R.
Feel free to contact me if you want to make a simple or more complex Flask App.