
Azure Tips and Tricks Part 163 - Provide Static App Settings Values in an ARM Template
ATTENTION: Help shape the future of Azure Tips and Tricks by telling me what you’d like for me to write about! Help me help you by filling out this quick survey.
The Complete List of Azure Tips and Tricks
Azure Tips and Tricks – Copying Application Settings with an ARM Template
Yesterday on Azure Tips and Tricks
Building on my previous Azure Tips and Tricks post about what ARM templates are and why you should care, I wanted to give you a quick recipe for a common development task. You’ve already seen that you can automate deploying a web app (and many other resources), but can you also copy configuration information like app settings with your ARM template? Yes!
Getting Started
Go ahead and click Create a resource inside the Azure Portal and select Web App.
Enter a Name and a Resource Group for your web app and click Automation options at the bottom before you hit Create in order to start creating your ARM template.
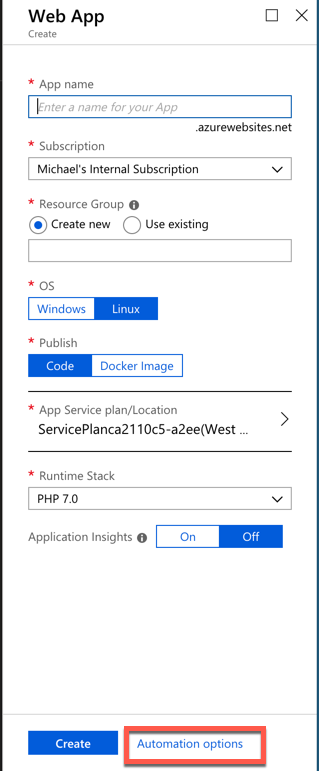
After you click Automation options, then this is what you will see:
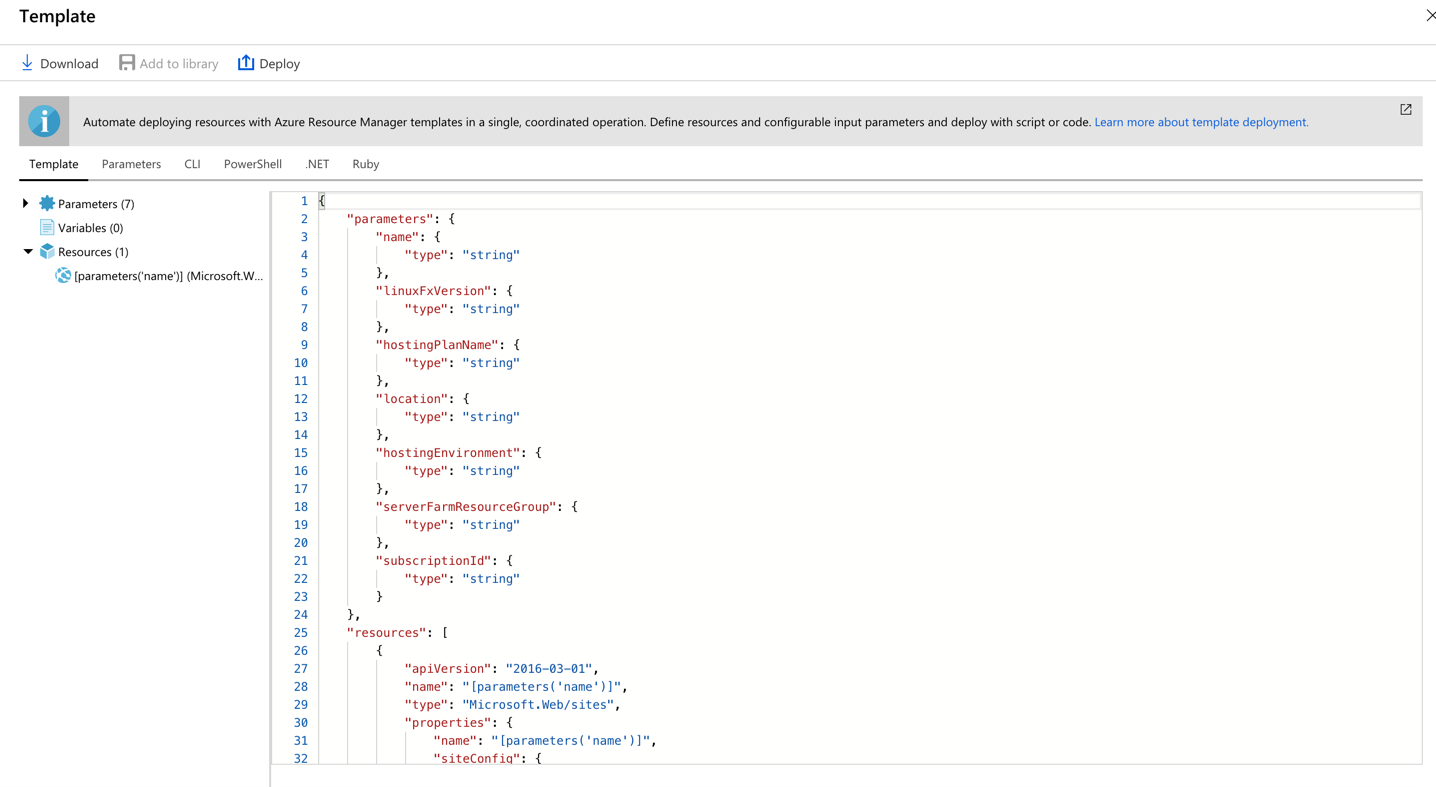
The template to create a web app (or any other Azure resource) is simply a JSON file with multiple values describing how your web app is going to be deployed.
Create Static App Settings for your Azure App Service
To make things as easy as possible, let’s assume for now that you want to add the exact same settings every time you deploy your web app template.
Go to Deploy then Edit Template and paste the following settings fragment overwriting your template’s resource section. (You could, of course, add as many keys as your web app needs.)
Make note that we are adding three names and 3 values for MyFirstName, MyLastName, and MySSN.
  "resources": [
  {
    "apiVersion": "2016-03-01",
    "name": "[parameters('name')]",
    "type": "Microsoft.Web/sites",
    "properties": {
        "name": "[parameters('name')]",
        "siteConfig": {
            "appSettings": [
            {
              "name": "MyFirstName",
              "value": "Michael"
            },
            {
              "name": "MyLastName",
              "value": "Crump"
            },
            {
              "name": "MySSN",
              "value": "355-643-3356"
            }
          ]
        },
        "serverFarmId": "[concat('/subscriptions/', parameters('subscriptionId'),'/resourcegroups/', parameters('serverFarmResourceGroup'), '/providers/Microsoft.Web/serverfarms/', parameters('hostingPlanName'))]",
        "hostingEnvironment": "[parameters('hostingEnvironment')]"
    },
    "location": "[parameters('location')]"
  }],
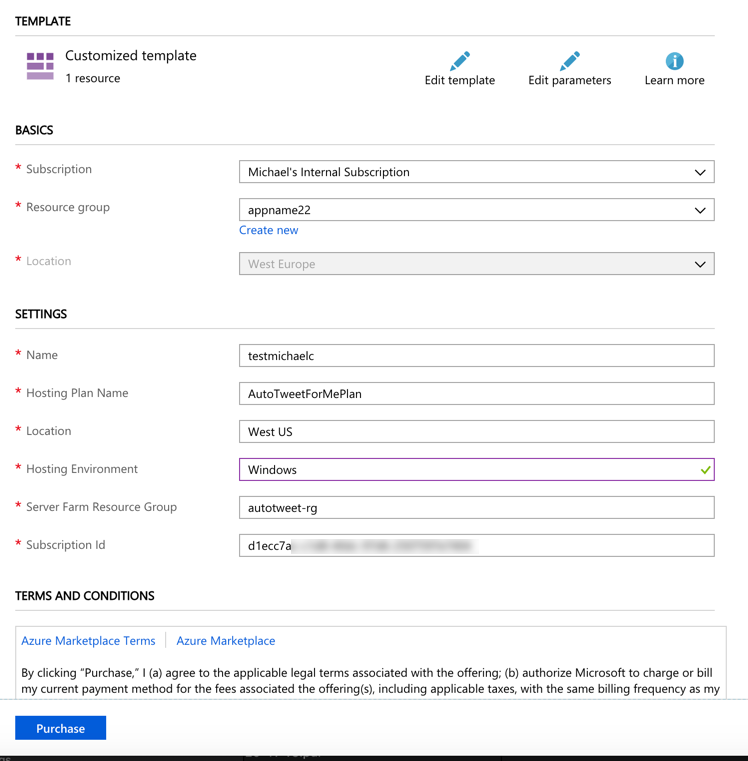
Press Save and ensure the Basic and Settings is filled out. Agree to the terms and check the Purchase option.
Note: If it says failure to deploy, then give it a shot again. I have had this happened but maybe it is only happening since I use the Preview.
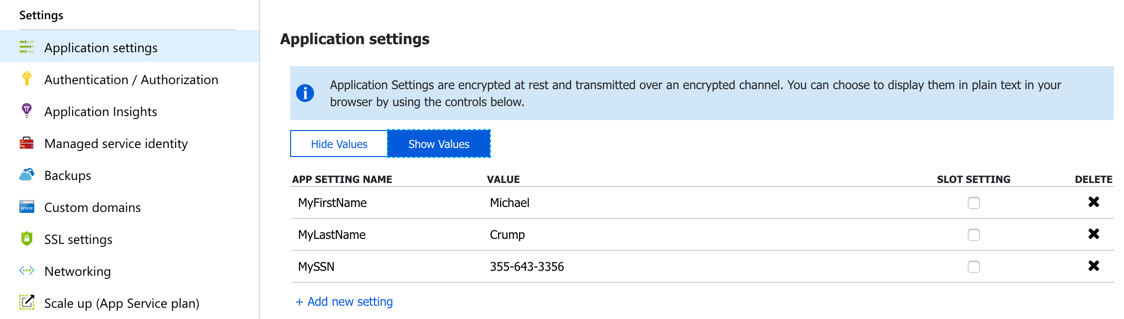
Your Azure App Settings (for MyFirstName, MyLastName, and MySSN) will now be deployed.
After deployment, navigate to your App Service and go to Application Settings and you’ll see your site deployed along with the settings (for MyFirstName, MyLastName, and MySSN) that we specified earlier.
Come back tomorrow and we’ll take a look at adding parameters!
ATTENTION: If you liked this post and want to suggest future topics of Azure Tips and Tricks then complete this survey.
Want more Azure Tips and Tricks?
If you’d like to learn more Azure Tips and Tricks, then follow me on twitter or stay tuned to this blog! I’d also love to hear your tips and tricks for working in Azure, just leave a comment below.
Leave a Comment