
With the growth of the Internet of Things (IoT), developers and engineers have had to rethink how users interact with devices on a day-to-day basis.
While screens work well for websites and most apps, devices that interface with the real world can be a bit more tedious to operate if you have to use multiple buttons or a screen in order to function. One of the ways around this is to enable voice controls on your devices.
In this tutorial you will learn about Google Assistant and how you can add it to your Android Things IoT devices.
If you need a little background on Android Things before you start, check out some of my other posts here on Envato Tuts+.


Assistant SDK
The Google Assistant SDK allows you to add voice controls with key word detection, natural language processing, and other machine learning features to your IoT devices. There's a lot that can be done with the Assistant SDK, but this tutorial will just focus on the basics: how you can include it on your Android Things devices in order to ask questions, get information, and interact with standard "out of the box" Assistant functionality.
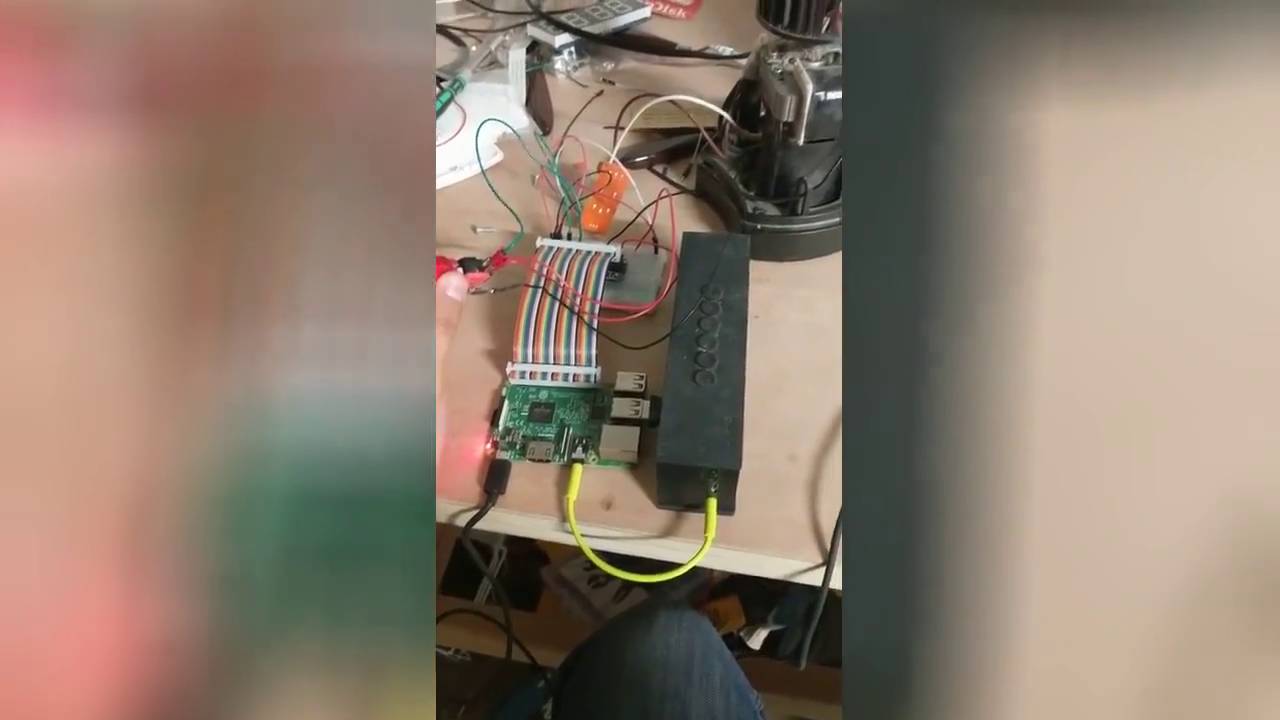
As far as hardware requirements, you have a few options. You can use a Raspberry Pi flashed with Android Things with an AIY Voice Kit.


Or you can use a standard speaker with AUX connector and a USB microphone.


Additionally, you can use any other I²S hardware configuration. While we won't discuss I²S in detail in this tutorial, it's worth noting that the Voice Kit will use this protocol. Once you have a microphone and speaker set up, you will also need to add a button to your device. This button will need to keep track of two states: pressed and released. You can accomplish this with a multi-pronged arcade button, or a standard button with a pull-down resistor attached to one of the poles.
Credentials
Once you have hooked up your hardware, it's time to add the Assistant SDK to your device. First, you will need to create a new credentials file for your device. You can find the instructions for this in the Google Assistant docs. Once you have your credentials.json file, you will need to place it into the res/raw directory of your Android Things module.


After your credentials are created with Google, you will need to declare some permissions for your app. Open the AndroidManifest.xml file and add the following lines within the manifest tag, but before the application tag.
1 |
<uses-permission android:name="android.permission.RECORD_AUDIO" /> |
2 |
<uses-permission android:name="android.permission.MODIFY_AUDIO_SETTINGS" /> |
3 |
<uses-permission android:name="android.permission.INTERNET" /> |
4 |
<uses-permission android:name="com.google.android.things.permission.MANAGE_AUDIO_DRIVERS" /> |
It's worth noting that you will need to restart your device after installing the app with these permissions in order for them to be granted.
Next you will need to copy the gRPC module into your app for communicating with the home device. This gets a little tricky, so the best place to get it is from the Google Assistant Android Things sample app, which can be found in the Android Things GitHub account. You will then need to update your settings.gradle file to reflect the new module.
1 |
include ':mobile', ':things', ':grpc' |
After updating settings.gradle, include the module as a dependency in your things module by including the following line in the things module's build.gradle file and include Google's button driver (you will need this for activating the microphone) and optional Voice Hat driver if you are using that hardware.
1 |
compile project(':grpc') |
2 |
compile 'com.google.android.things.contrib:driver-button:0.4' |
3 |
|
4 |
//optional
|
5 |
compile 'com.google.android.things.contrib:driver-voicehat:0.2' |
You'll also need to include protobuf as a dependency in your project-level build.gradle file.
1 |
classpath "com.google.protobuf:protobuf-gradle-plugin:0.8.0" |
Next, let's include the oauth2 library in our project by opening the things module's build.gradle file and adding the following under the dependencies node:
1 |
compile('com.google.auth:google-auth-library-oauth2-https:0.6.0') { |
2 |
exclude group: 'org.apache.httpcomponents', module: 'httpclient' |
3 |
}
|
You may run into conflicts here if your project has the Espresso dependency, with an error message similar to this:
1 |
Warning:Conflict with dependency 'com.google.code.findbugs:jsr305' in project ':things'. Resolved versions for app (1.3.9) and test app (2.0.1) differ. See http://g.co/androidstudio/app-test-app-conflict for details. |
If so, just remove the Espresso dependency from build.gradle.
After you have synced your project, create a new class named Credentials.java to access your credentials.
1 |
public class Credentials { |
2 |
static UserCredentials fromResource(Context context, int resourceId) |
3 |
throws IOException, JSONException { |
4 |
InputStream is = context.getResources().openRawResource(resourceId); |
5 |
byte[] bytes = new byte[is.available()]; |
6 |
is.read(bytes); |
7 |
JSONObject json = new JSONObject(new String(bytes, "UTF-8")); |
8 |
return new UserCredentials(json.getString("client_id"), |
9 |
json.getString("client_secret"), |
10 |
json.getString("refresh_token") |
11 |
);
|
12 |
}
|
13 |
}
|
14 |
}
|
Embedded Assistant Helper Class
Once your Credentials.java class is created, it's time to create a new class named EmbeddedAssistant.java. This is a helper class that was originally written by engineers at Google to easily wrap the Google Assistant for Android Things. While this class is fairly straightforward to use by just including it into your project, we will want to dive into it and understand how it actually works.
The first thing you will do is create two inner abstract classes that will be used for handling callbacks in the conversation and requests to the Assistant API.
1 |
public class EmbeddedAssistant { |
2 |
|
3 |
public static abstract class RequestCallback { |
4 |
public void onRequestStart() {} |
5 |
public void onAudioRecording() {} |
6 |
public void onSpeechRecognition(String utterance) {} |
7 |
}
|
8 |
|
9 |
public static abstract class ConversationCallback { |
10 |
public void onResponseStarted() {} |
11 |
public void onResponseFinished() {} |
12 |
public void onConversationEvent(EventType eventType) {} |
13 |
public void onAudioSample(ByteBuffer audioSample) {} |
14 |
public void onConversationError(Status error) {} |
15 |
public void onError(Throwable throwable) {} |
16 |
public void onVolumeChanged(int percentage) {} |
17 |
public void onConversationFinished() {} |
18 |
}
|
19 |
}
|
Once your two inner classes are written, go ahead and define the following set of global values at the top of your class. The majority of these will be initialized later in this file. These values are used to keep track of device state and interactions with the Assistant API.
1 |
private static final String ASSISTANT_API_ENDPOINT = "embeddedassistant.googleapis.com"; |
2 |
private static final int AUDIO_RECORD_BLOCK_SIZE = 1024; |
3 |
|
4 |
private RequestCallback mRequestCallback; |
5 |
private ConversationCallback mConversationCallback; |
6 |
|
7 |
//Used for push-to-talk functionality
|
8 |
private ByteString mConversationState; |
9 |
private AudioInConfig mAudioInConfig; |
10 |
private AudioOutConfig mAudioOutConfig; |
11 |
private AudioTrack mAudioTrack; |
12 |
private AudioRecord mAudioRecord; |
13 |
private int mVolume = 100; // Default to maximum volume. |
14 |
|
15 |
private UserCredentials mUserCredentials; |
16 |
|
17 |
private MicrophoneMode mMicrophoneMode; |
18 |
private HandlerThread mAssistantThread; |
19 |
private Handler mAssistantHandler; |
20 |
|
21 |
// gRPC client and stream observers.
|
22 |
private int mAudioOutSize; // Tracks the size of audio responses to determine when it ends. |
23 |
private EmbeddedAssistantGrpc.EmbeddedAssistantStub mAssistantService; |
24 |
private StreamObserver<ConverseRequest> mAssistantRequestObserver; |
Handling API Responses
While the above has a StreamObserver<ConverseRequest> object for requests to the Assistant API, you will also need one for responses. This object will consist of a switch statement that checks the state of the response and then handles it accordingly.
1 |
private StreamObserver<ConverseResponse> mAssistantResponseObserver = |
2 |
new StreamObserver<ConverseResponse>() { |
3 |
@Override
|
4 |
public void onNext(ConverseResponse value) { |
5 |
switch (value.getConverseResponseCase()) { |
The first case checks for the end of a user speaking and uses the ConversationCallback to let the rest of the class know that a response is imminent.
1 |
case EVENT_TYPE: |
2 |
mConversationCallback.onConversationEvent(value.getEventType()); |
3 |
if (value.getEventType() == EventType.END_OF_UTTERANCE) { |
4 |
mConversationCallback.onResponseStarted(); |
5 |
}
|
6 |
break; |
The next case will check and update conversation, volume, and microphone state.
1 |
case RESULT: |
2 |
// Update state.
|
3 |
mConversationState = value.getResult().getConversationState(); |
4 |
|
5 |
// Update volume.
|
6 |
if (value.getResult().getVolumePercentage() != 0) { |
7 |
int volumePercentage = value.getResult().getVolumePercentage(); |
8 |
mVolume = volumePercentage; |
9 |
mAudioTrack.setVolume(AudioTrack.getMaxVolume() |
10 |
* volumePercentage / 100.0f); |
11 |
mConversationCallback.onVolumeChanged(volumePercentage); |
12 |
}
|
13 |
|
14 |
if (value.getResult().getSpokenRequestText() != null && |
15 |
!value.getResult().getSpokenRequestText().isEmpty()) { |
16 |
mRequestCallback.onSpeechRecognition(value.getResult() |
17 |
.getSpokenRequestText()); |
18 |
}
|
19 |
|
20 |
// Update microphone mode.
|
21 |
mMicrophoneMode = value.getResult().getMicrophoneMode(); |
22 |
break; |
The third case will take an audio result and play it back for the user.
1 |
case AUDIO_OUT: |
2 |
if (mAudioOutSize <= value.getAudioOut().getSerializedSize()) { |
3 |
mAudioOutSize = value.getAudioOut().getSerializedSize(); |
4 |
} else { |
5 |
mAudioOutSize = 0; |
6 |
onCompleted(); |
7 |
}
|
8 |
|
9 |
final ByteBuffer audioData = |
10 |
ByteBuffer.wrap(value.getAudioOut().getAudioData().toByteArray()); |
11 |
mAudioTrack.write(audioData, audioData.remaining(), |
12 |
AudioTrack.WRITE_BLOCKING); |
13 |
mConversationCallback.onAudioSample(audioData); |
14 |
break; |
The final case will simply forward errors that occurred during the conversation process.
1 |
case ERROR: |
2 |
mConversationCallback.onConversationError(value.getError()); |
3 |
break; |
The final two methods within this stream handle error states and cleanup on completion of a conversation result.
1 |
@Override
|
2 |
public void onError(Throwable t) { |
3 |
mConversationCallback.onError(t); |
4 |
}
|
5 |
|
6 |
@Override
|
7 |
public void onCompleted() { |
8 |
mConversationCallback.onResponseFinished(); |
9 |
if (mMicrophoneMode == MicrophoneMode.DIALOG_FOLLOW_ON) { |
10 |
// Automatically start a new request
|
11 |
startConversation(); |
12 |
} else { |
13 |
// The conversation is done
|
14 |
mConversationCallback.onConversationFinished(); |
15 |
}
|
16 |
}
|
Streaming Audio
Next, you will need to create a Runnable that will handle audio streaming on a different thread.
1 |
private Runnable mStreamAssistantRequest = new Runnable() { |
2 |
@Override
|
3 |
public void run() { |
4 |
ByteBuffer audioData = ByteBuffer.allocateDirect(AUDIO_RECORD_BLOCK_SIZE); |
5 |
int result = mAudioRecord.read(audioData, audioData.capacity(), |
6 |
AudioRecord.READ_BLOCKING); |
7 |
if (result < 0) { |
8 |
return; |
9 |
}
|
10 |
mRequestCallback.onAudioRecording(); |
11 |
mAssistantRequestObserver.onNext(ConverseRequest.newBuilder() |
12 |
.setAudioIn(ByteString.copyFrom(audioData)) |
13 |
.build()); |
14 |
mAssistantHandler.post(mStreamAssistantRequest); |
15 |
}
|
16 |
};
|
Creating the Assistant
Now that your global values are defined, it's time to go over the framework for creating the EmbeddedAssistant. You will need to be able to retrieve the credentials for your app using the Credentials.java class that was created earlier.
1 |
public static UserCredentials generateCredentials(Context context, int resourceId) |
2 |
throws IOException, JSONException { |
3 |
return Credentials.fromResource(context, resourceId); |
4 |
}
|
In order to instantiate itself, this class uses a private constructor and the builder pattern.
1 |
private EmbeddedAssistant() {} |
2 |
|
3 |
public static class Builder { |
4 |
private EmbeddedAssistant mEmbeddedAssistant; |
5 |
private int mSampleRate; |
6 |
|
7 |
public Builder() { |
8 |
mEmbeddedAssistant = new EmbeddedAssistant(); |
9 |
}
|
The Builder inner class contains multiple methods for initializing the values within the EmbeddedAssistant class, such as sample rate, volume, and user credentials. Once the build() method is called, all of the defined values will be set on the EmbeddedAssistant, global objects necessary for operation will be configured, and an error will be thrown if any necessary data is missing.
1 |
public Builder setRequestCallback(RequestCallback requestCallback) { |
2 |
mEmbeddedAssistant.mRequestCallback = requestCallback; |
3 |
return this; |
4 |
}
|
5 |
|
6 |
public Builder setConversationCallback(ConversationCallback responseCallback) { |
7 |
mEmbeddedAssistant.mConversationCallback = responseCallback; |
8 |
return this; |
9 |
}
|
10 |
|
11 |
public Builder setCredentials(UserCredentials userCredentials) { |
12 |
mEmbeddedAssistant.mUserCredentials = userCredentials; |
13 |
return this; |
14 |
}
|
15 |
|
16 |
public Builder setAudioSampleRate(int sampleRate) { |
17 |
mSampleRate = sampleRate; |
18 |
return this; |
19 |
}
|
20 |
|
21 |
public Builder setAudioVolume(int volume) { |
22 |
mEmbeddedAssistant.mVolume = volume; |
23 |
return this; |
24 |
}
|
25 |
|
26 |
public EmbeddedAssistant build() { |
27 |
if (mEmbeddedAssistant.mRequestCallback == null) { |
28 |
throw new NullPointerException("There must be a defined RequestCallback"); |
29 |
}
|
30 |
if (mEmbeddedAssistant.mConversationCallback == null) { |
31 |
throw new NullPointerException("There must be a defined ConversationCallback"); |
32 |
}
|
33 |
if (mEmbeddedAssistant.mUserCredentials == null) { |
34 |
throw new NullPointerException("There must be provided credentials"); |
35 |
}
|
36 |
if (mSampleRate == 0) { |
37 |
throw new NullPointerException("There must be a defined sample rate"); |
38 |
}
|
39 |
final int audioEncoding = AudioFormat.ENCODING_PCM_16BIT; |
40 |
|
41 |
// Construct audio configurations.
|
42 |
mEmbeddedAssistant.mAudioInConfig = AudioInConfig.newBuilder() |
43 |
.setEncoding(AudioInConfig.Encoding.LINEAR16) |
44 |
.setSampleRateHertz(mSampleRate) |
45 |
.build(); |
46 |
mEmbeddedAssistant.mAudioOutConfig = AudioOutConfig.newBuilder() |
47 |
.setEncoding(AudioOutConfig.Encoding.LINEAR16) |
48 |
.setSampleRateHertz(mSampleRate) |
49 |
.setVolumePercentage(mEmbeddedAssistant.mVolume) |
50 |
.build(); |
51 |
|
52 |
// Construct AudioRecord & AudioTrack
|
53 |
AudioFormat audioFormatOutputMono = new AudioFormat.Builder() |
54 |
.setChannelMask(AudioFormat.CHANNEL_OUT_MONO) |
55 |
.setEncoding(audioEncoding) |
56 |
.setSampleRate(mSampleRate) |
57 |
.build(); |
58 |
int outputBufferSize = AudioTrack.getMinBufferSize(audioFormatOutputMono.getSampleRate(), |
59 |
audioFormatOutputMono.getChannelMask(), |
60 |
audioFormatOutputMono.getEncoding()); |
61 |
mEmbeddedAssistant.mAudioTrack = new AudioTrack.Builder() |
62 |
.setAudioFormat(audioFormatOutputMono) |
63 |
.setBufferSizeInBytes(outputBufferSize) |
64 |
.build(); |
65 |
mEmbeddedAssistant.mAudioTrack.setVolume(mEmbeddedAssistant.mVolume * |
66 |
AudioTrack.getMaxVolume() / 100.0f); |
67 |
mEmbeddedAssistant.mAudioTrack.play(); |
68 |
|
69 |
AudioFormat audioFormatInputMono = new AudioFormat.Builder() |
70 |
.setChannelMask(AudioFormat.CHANNEL_IN_MONO) |
71 |
.setEncoding(audioEncoding) |
72 |
.setSampleRate(mSampleRate) |
73 |
.build(); |
74 |
int inputBufferSize = AudioRecord.getMinBufferSize(audioFormatInputMono.getSampleRate(), |
75 |
audioFormatInputMono.getChannelMask(), |
76 |
audioFormatInputMono.getEncoding()); |
77 |
mEmbeddedAssistant.mAudioRecord = new AudioRecord.Builder() |
78 |
.setAudioSource(AudioSource.VOICE_RECOGNITION) |
79 |
.setAudioFormat(audioFormatInputMono) |
80 |
.setBufferSizeInBytes(inputBufferSize) |
81 |
.build(); |
82 |
|
83 |
return mEmbeddedAssistant; |
84 |
}
|
85 |
}
|
Connecting to the Assistant API
After the EmbeddedAssistant has been created, the connect() method will need to be called in order to connect to the Assistant API.
1 |
public void connect() { |
2 |
mAssistantThread = new HandlerThread("assistantThread"); |
3 |
mAssistantThread.start(); |
4 |
mAssistantHandler = new Handler(mAssistantThread.getLooper()); |
5 |
|
6 |
ManagedChannel channel = ManagedChannelBuilder.forTarget(ASSISTANT_API_ENDPOINT).build(); |
7 |
mAssistantService = EmbeddedAssistantGrpc.newStub(channel) |
8 |
.withCallCredentials(MoreCallCredentials.from(mUserCredentials)); |
9 |
}
|
After you have connected to the API, you will use two methods for starting and stopping conversations. These methods will post Runnable objects to mAssistantHandler in order to pass conversation state objects to the request and response streams.
1 |
public void startConversation() { |
2 |
mAudioRecord.startRecording(); |
3 |
mRequestCallback.onRequestStart(); |
4 |
mAssistantHandler.post(new Runnable() { |
5 |
@Override
|
6 |
public void run() { |
7 |
mAssistantRequestObserver = mAssistantService.converse(mAssistantResponseObserver); |
8 |
ConverseConfig.Builder converseConfigBuilder = ConverseConfig.newBuilder() |
9 |
.setAudioInConfig(mAudioInConfig) |
10 |
.setAudioOutConfig(mAudioOutConfig); |
11 |
if (mConversationState != null) { |
12 |
converseConfigBuilder.setConverseState(ConverseState.newBuilder() |
13 |
.setConversationState(mConversationState) |
14 |
.build()); |
15 |
}
|
16 |
mAssistantRequestObserver.onNext( |
17 |
ConverseRequest.newBuilder() |
18 |
.setConfig(converseConfigBuilder.build()) |
19 |
.build()); |
20 |
}
|
21 |
});
|
22 |
mAssistantHandler.post(mStreamAssistantRequest); |
23 |
}
|
24 |
|
25 |
public void stopConversation() { |
26 |
mAssistantHandler.post(new Runnable() { |
27 |
@Override
|
28 |
public void run() { |
29 |
mAssistantHandler.removeCallbacks(mStreamAssistantRequest); |
30 |
if (mAssistantRequestObserver != null) { |
31 |
mAssistantRequestObserver.onCompleted(); |
32 |
mAssistantRequestObserver = null; |
33 |
}
|
34 |
}
|
35 |
});
|
36 |
|
37 |
mAudioRecord.stop(); |
38 |
mAudioTrack.play(); |
39 |
mConversationCallback.onConversationFinished(); |
40 |
}
|
Shutting Down
Finally, the destroy() method will be used for teardown when your app is closing and no longer needs to access the Assistant API.
1 |
public void destroy() { |
2 |
mAssistantHandler.post(new Runnable() { |
3 |
@Override
|
4 |
public void run() { |
5 |
mAssistantHandler.removeCallbacks(mStreamAssistantRequest); |
6 |
}
|
7 |
});
|
8 |
mAssistantThread.quitSafely(); |
9 |
if (mAudioRecord != null) { |
10 |
mAudioRecord.stop(); |
11 |
mAudioRecord = null; |
12 |
}
|
13 |
if (mAudioTrack != null) { |
14 |
mAudioTrack.stop(); |
15 |
mAudioTrack = null; |
16 |
}
|
17 |
}
|
Using the Assistant
Once your helper classes are fleshed out, it's time to use them. You will do this by editing your Android Things MainActivity class to interact with the EmbeddedAssistant and hardware for controlling the Google Assistant. First, add the Button.OnButtonEventListener interface to your Activity.
1 |
public class MainActivity extends Activity implements Button.OnButtonEventListener { |
Next you will need to add the member variables and constants that will be required by your app. These values will control the debounce of the button that triggers the Assistant, as well as the volume, the audio format, the UserCredentials class that you created earlier, and the hardware for your device.
1 |
private static final int BUTTON_DEBOUNCE_DELAY_MS = 20; |
2 |
private static final String PREF_CURRENT_VOLUME = "current_volume"; |
3 |
private static final int SAMPLE_RATE = 16000; |
4 |
private static final int ENCODING = AudioFormat.ENCODING_PCM_16BIT; |
5 |
private static final int DEFAULT_VOLUME = 100; |
6 |
|
7 |
private int initialVolume = DEFAULT_VOLUME; |
8 |
|
9 |
private static final AudioFormat AUDIO_FORMAT_STEREO = |
10 |
new AudioFormat.Builder() |
11 |
.setChannelMask(AudioFormat.CHANNEL_IN_STEREO) |
12 |
.setEncoding(ENCODING) |
13 |
.setSampleRate(SAMPLE_RATE) |
14 |
.build(); |
15 |
|
16 |
// Hardware peripherals.
|
17 |
private VoiceHat mVoiceHat; |
18 |
private Button mButton; |
19 |
private EmbeddedAssistant mEmbeddedAssistant; |
20 |
private UserCredentials userCredentials; |
Once you have your constants defined, you will need to create a few callback objects that will be used for conversations and requests with the assistant.
1 |
private ConversationCallback mConversationCallback = new ConversationCallback() { |
2 |
@Override
|
3 |
public void onConversationEvent(EventType eventType) {} |
4 |
|
5 |
@Override
|
6 |
public void onAudioSample(ByteBuffer audioSample) {} |
7 |
|
8 |
@Override
|
9 |
public void onConversationError(Status error) {} |
10 |
|
11 |
@Override
|
12 |
public void onError(Throwable throwable) {} |
13 |
|
14 |
@Override
|
15 |
public void onVolumeChanged(int percentage) { |
16 |
SharedPreferences.Editor editor = PreferenceManager |
17 |
.getDefaultSharedPreferences(AssistantActivity.this) |
18 |
.edit(); |
19 |
editor.putInt(PREF_CURRENT_VOLUME, percentage); |
20 |
editor.apply(); |
21 |
}
|
22 |
|
23 |
@Override
|
24 |
public void onConversationFinished() {} |
25 |
};
|
26 |
|
27 |
private RequestCallback mRequestCallback = new RequestCallback() { |
28 |
@Override
|
29 |
public void onRequestStart() { |
30 |
//starting assistant request, enable microphones
|
31 |
}
|
32 |
|
33 |
@Override
|
34 |
public void onSpeechRecognition(String utterance) {} |
35 |
};
|
In mConversationCallback, you will notice that we save a volume change percentage in a shared preference. This allows your device volume to stay consistent for your users, even across reboots.
As the assistant works asynchronously on your device, you will initialize everything for using the Assistant API in onCreate() by calling a set of helper methods that we will define over the rest of this tutorial.
1 |
@Override
|
2 |
protected void onCreate(Bundle savedInstanceState) { |
3 |
super.onCreate(savedInstanceState); |
4 |
|
5 |
initVoiceHat(); |
6 |
initButton(); |
7 |
initVolume(); |
8 |
initUserCredentials(); |
9 |
initEmbeddedAssistant(); |
10 |
}
|
The first helper method is initVoiceHat(). If the Voice Hat shield is attached to a Raspberry Pi, this method will initialize the device so that users can use the attached microphone and speaker. If a Voice Hat is not attached, then a standard AUX speaker and USB microphone can be used and will be routed to automatically. The Voice Hat uses I2S to handle audio peripherals on the bus, and is wrapped by a driver class that was written by Google.
1 |
private void initVoiceHat() { |
2 |
PeripheralManagerService pioService = new PeripheralManagerService(); |
3 |
List<String> i2sDevices = pioService.getI2sDeviceList(); |
4 |
if (i2sDevices.size() > 0) { |
5 |
try { |
6 |
mVoiceHat = new VoiceHat( |
7 |
BoardDefaults.getI2SDeviceForVoiceHat(), |
8 |
BoardDefaults.getGPIOForVoiceHatTrigger(), |
9 |
AUDIO_FORMAT_STEREO
|
10 |
);
|
11 |
mVoiceHat.registerAudioInputDriver(); |
12 |
mVoiceHat.registerAudioOutputDriver(); |
13 |
} catch (IllegalStateException e) {} |
14 |
}
|
15 |
}
|
The assistant will only respond in this sample while a triggering button is held down. This button is initialized and configured like so:
1 |
private void initButton() { |
2 |
try { |
3 |
mButton = new Button(BoardDefaults.getGPIOForButton(), |
4 |
Button.LogicState.PRESSED_WHEN_LOW); |
5 |
mButton.setDebounceDelay(BUTTON_DEBOUNCE_DELAY_MS); |
6 |
mButton.setOnButtonEventListener(this); |
7 |
} catch( IOException e ) {} |
8 |
}
|
When the button is pressed, the assistant will start listening for a new conversation.
1 |
@Override
|
2 |
public void onButtonEvent(Button button, boolean pressed) { |
3 |
if (pressed) { |
4 |
mEmbeddedAssistant.startConversation(); |
5 |
}
|
6 |
}
|
You can find more information about GPIO and Android Things in my tutorial about input and output with Android Things.


Since we stored volume information in our device's SharedPreferences, we can access it directly to initialize the device's volume.
1 |
private void initVolume() { |
2 |
SharedPreferences preferences = PreferenceManager.getDefaultSharedPreferences(this); |
3 |
initialVolume = preferences.getInt(PREF_CURRENT_VOLUME, DEFAULT_VOLUME); |
4 |
}
|
The Assistant SDK requires authentication for use. Luckily we created a method in the EmbeddedAssistant class earlier in this tutorial specifically for this situation.
1 |
private void initUserCredentials() { |
2 |
userCredentials = null; |
3 |
try { |
4 |
userCredentials = EmbeddedAssistant.generateCredentials(this, R.raw.credentials); |
5 |
} catch (IOException | JSONException e) {} |
6 |
}
|
The final helper method that was called in onCreate() will initialize the EmbeddedAssistant object and connect it to the API.
1 |
private void initEmbeddedAssistant() { |
2 |
mEmbeddedAssistant = new EmbeddedAssistant.Builder() |
3 |
.setCredentials(userCredentials) |
4 |
.setAudioSampleRate(SAMPLE_RATE) |
5 |
.setAudioVolume(currentVolume) |
6 |
.setRequestCallback(mRequestCallback) |
7 |
.setConversationCallback(mConversationCallback) |
8 |
.build(); |
9 |
|
10 |
mEmbeddedAssistant.connect(); |
11 |
}
|
The last thing that you will need to do is properly tear down your peripherals by updating the onDestroy() method in your Activity.
1 |
@Override
|
2 |
protected void onDestroy() { |
3 |
super.onDestroy(); |
4 |
if (mButton != null) { |
5 |
try { |
6 |
mButton.close(); |
7 |
} catch (IOException e) {} |
8 |
|
9 |
mButton = null; |
10 |
}
|
11 |
|
12 |
if (mVoiceHat != null) { |
13 |
try { |
14 |
mVoiceHat.unregisterAudioOutputDriver(); |
15 |
mVoiceHat.unregisterAudioInputDriver(); |
16 |
mVoiceHat.close(); |
17 |
} catch (IOException e) {} |
18 |
mVoiceHat = null; |
19 |
}
|
20 |
mEmbeddedAssistant.destroy(); |
21 |
}
|
After all of this, you should be able to interact with your Android Things device as if it were a Google Home!
Conclusion
In this tutorial, you learned about the Google Assistant and how it can be added to your Android Things applications. This feature gives your users a new way of interacting with and controlling your device, as well as access to the many features available from Google. This is only one part of the fantastic features that can go into an Android Things app and allow you to create new and amazing devices for your users.
While you're here, check out some of my other posts on Android Things on Envato Tuts+!


