Azure Tips and Tricks Part 81 - Working with AzCopy and Azure Storage
Azure Developer Guide Book 2nd Edition available now! This free eBook is available now at aka.ms/azuredevebook.
Intro
Most folks aren’t aware of how powerful the Azure platform really is. As I’ve been presenting topics on Azure, I’ve had many people say, “How did you do that?” So I’ll be documenting my tips and tricks for Azure in these posts.
The Complete List of Azure Tips and Tricks
Working with AzCopy and Azure Storage
We’ve reviewed the following options with Azure Storage so far:
- Working with Azure Storage Blobs and Files through the Portal
- Create an Azure Storage Blob Container through C#
- Uploading and Downloading a Stream into an Azure Storage Blob
- Working with Azure Storage Explorer
- Copy Azure Storage Blobs and Files via C#
- Creating an Azure Blob Hierarchy
- Adding Metadata to a file inside Azure Storage Blob Container
- Working with AzCopy and Azure Storage
Today, we are going to look at working with AzCopy to manipulate our Azure Storage container that we’ve been using throughout this series. Feel free to walk through other post in the series to get up to speed.
What is AzCopy? AzCopy is a command-line utility designed for copying data to/from Microsoft Azure Blob, File, and Table storage, using simple commands designed for optimal performance. You can copy data between a file system and a storage account, or between storage accounts. (courtesy of docs)
You can download either the latest version of AzCopy on Windows or Linux.
For this example, I’m going to use Windows. After I downloaded and installed the utility, I navigated inside my command prompt to the following folder %ProgramFiles(x86)%\Microsoft SDKs\Azure\AzCopy and ran the azcopy.exe command to ensure everything was working properly.
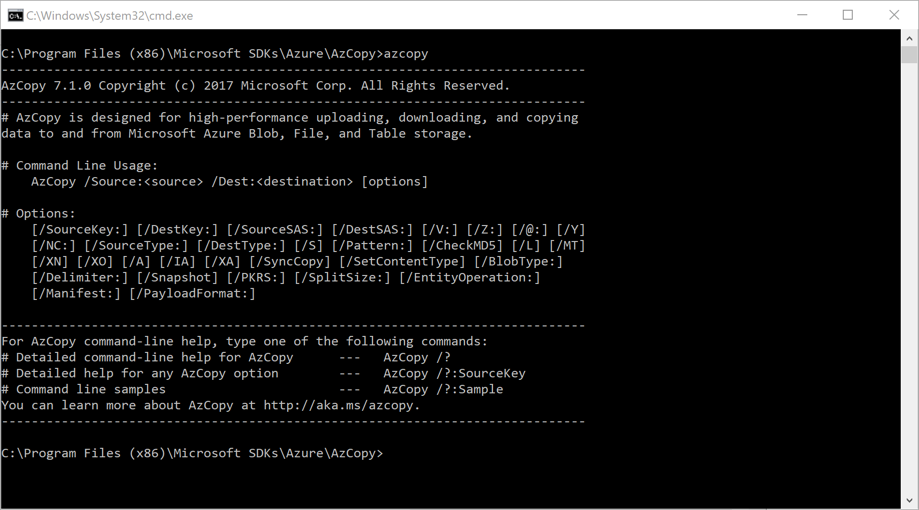
So you may be wondering if you need to do the device login as we did with the Azure CLI. The answer is no, we’ll be using our Azure Storage Access Key.
Getting the Azure Storage Access Key
Go ahead and open the Azure Portal and navigate to the Azure Storage account that we worked with earlier.
Look under Settings, then Access Keys and copy the key1.
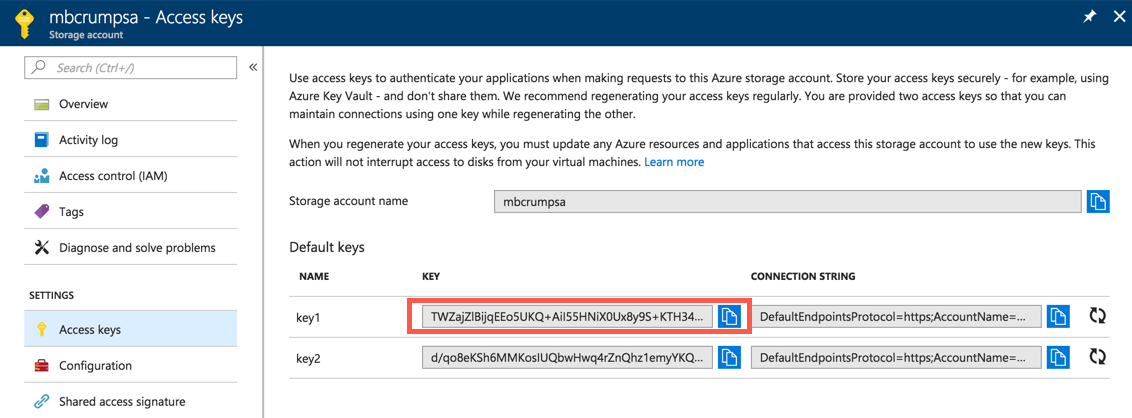
Store the key somewhere that you can retrieve it again.
Kick the tires with a couple of commands.
We can easily download a file from our Azure Storage Blob Container that we’ve been working with earlier with the following command:
AzCopy /Source:https://mbcrumpsa.blob.core.windows.net/images-backup /Dest:C:\mytest /SourceKey:thekeyyoucopiedearlier /Pattern:"mikepic.png"
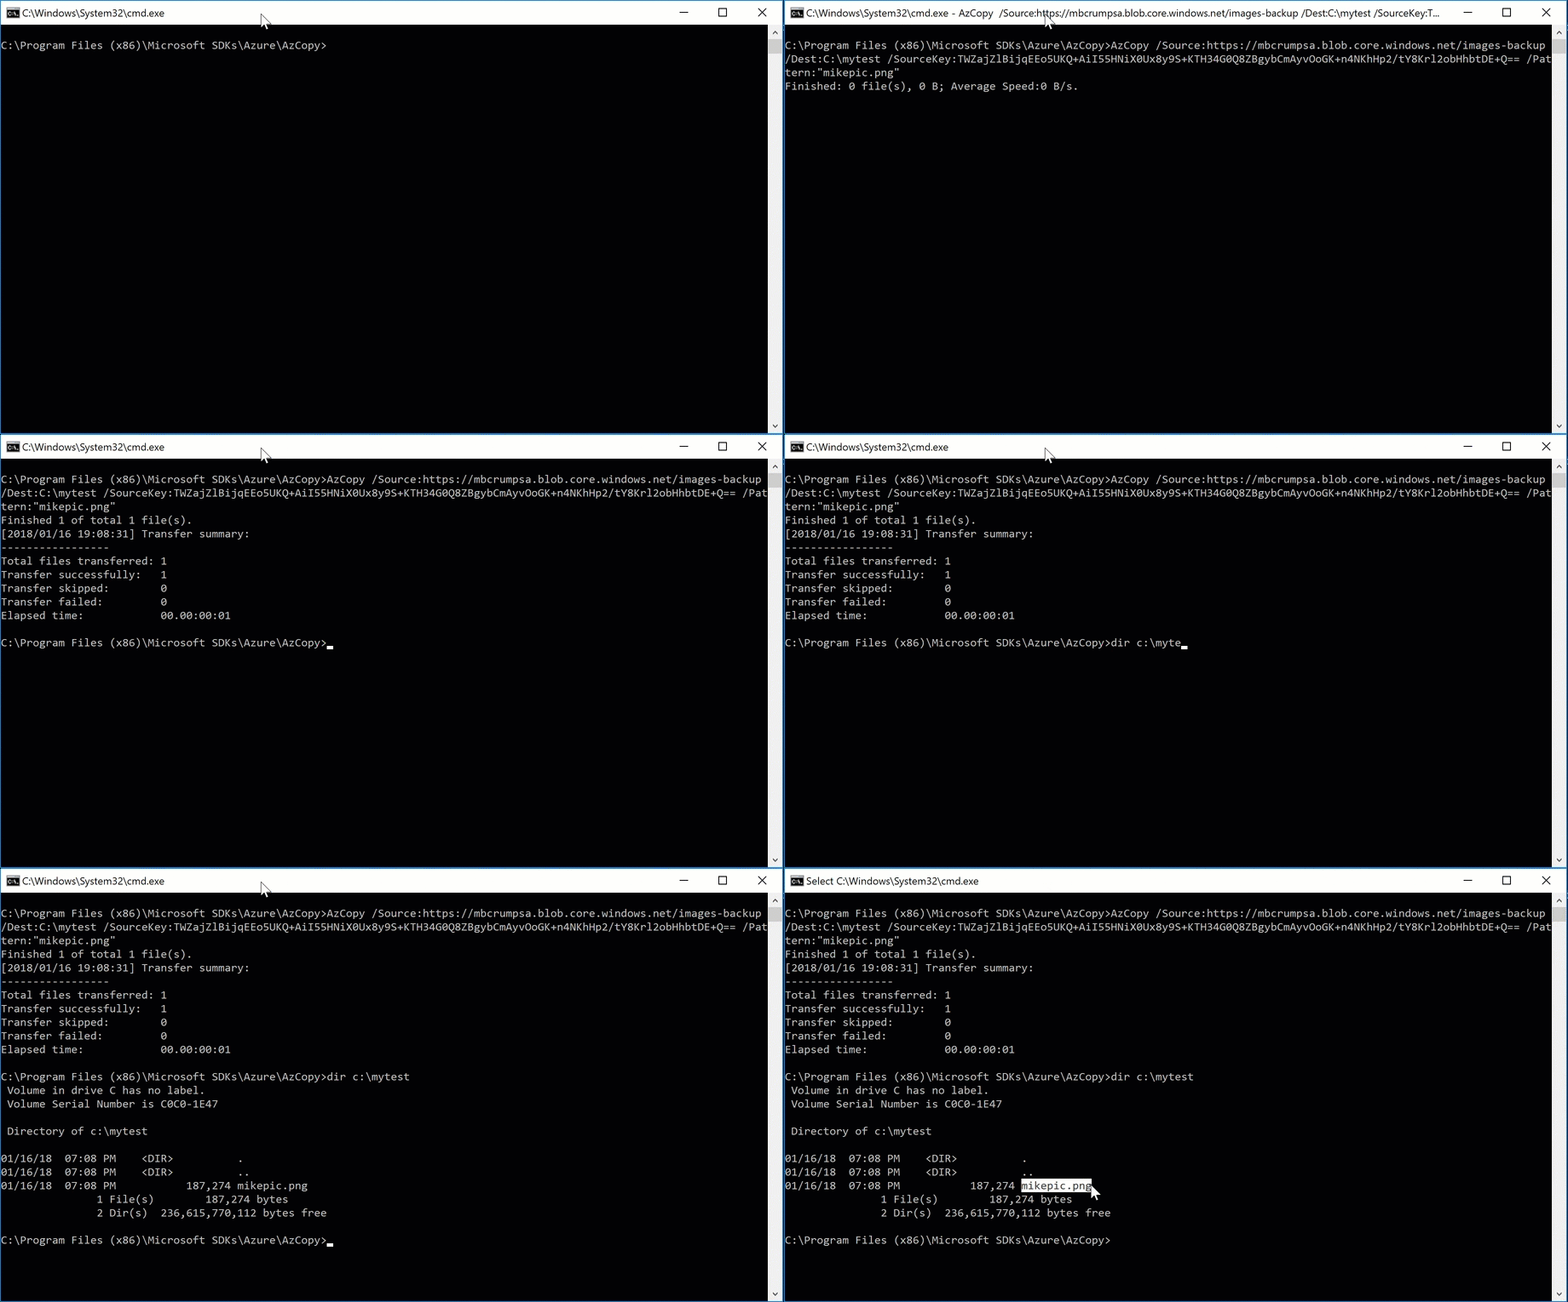
We can do the reverse and upload a file from our hard disk to Azure Storage Blob Container with the following command:
AzCopy /Source:C:\mytest /Dest:https://mbcrumpsa.blob.core.windows.net/images-backup /DestKey:thekeyyoucopiedearlier /Pattern:"mikepicnew.png"
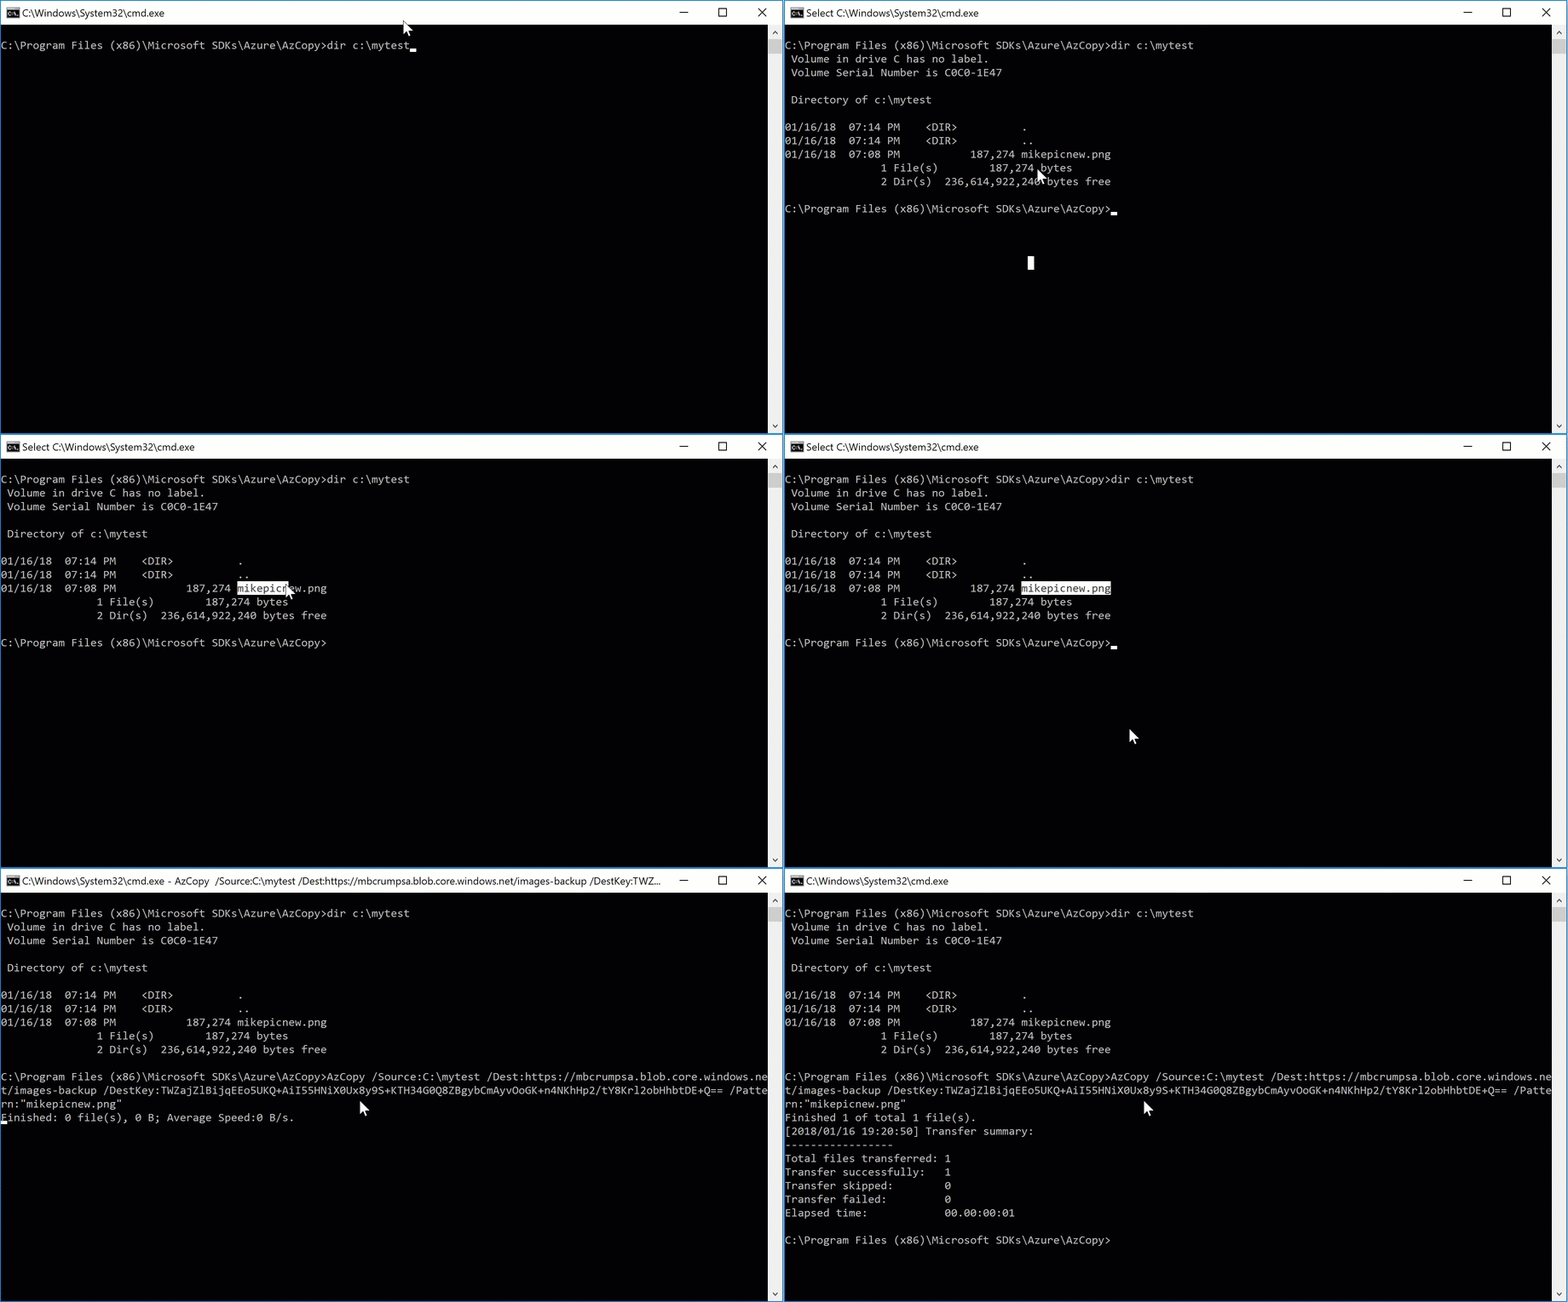
Keep in mind: The main difference between these two commands is the use of SourceKey for downloading and DestKey for uploading. The key that is being used is identical (named key1 from the example above).
Finally, you can copy from one Azure Storage account to another one with the following command:
AzCopy /Source:https://mbcrumpsa.blob.core.windows.net/images-backup /Dest:https://mbcrumpsa.blob.core.windows.net/images /SourceKey:thekeyyoucopiedearlier /DestKey:thekeyyoucopiedearlier /Pattern:"mikepicnew.png"
In this case, I am copying a file named mikepicnew.png from images-backup to images and then I’ll refresh the container.
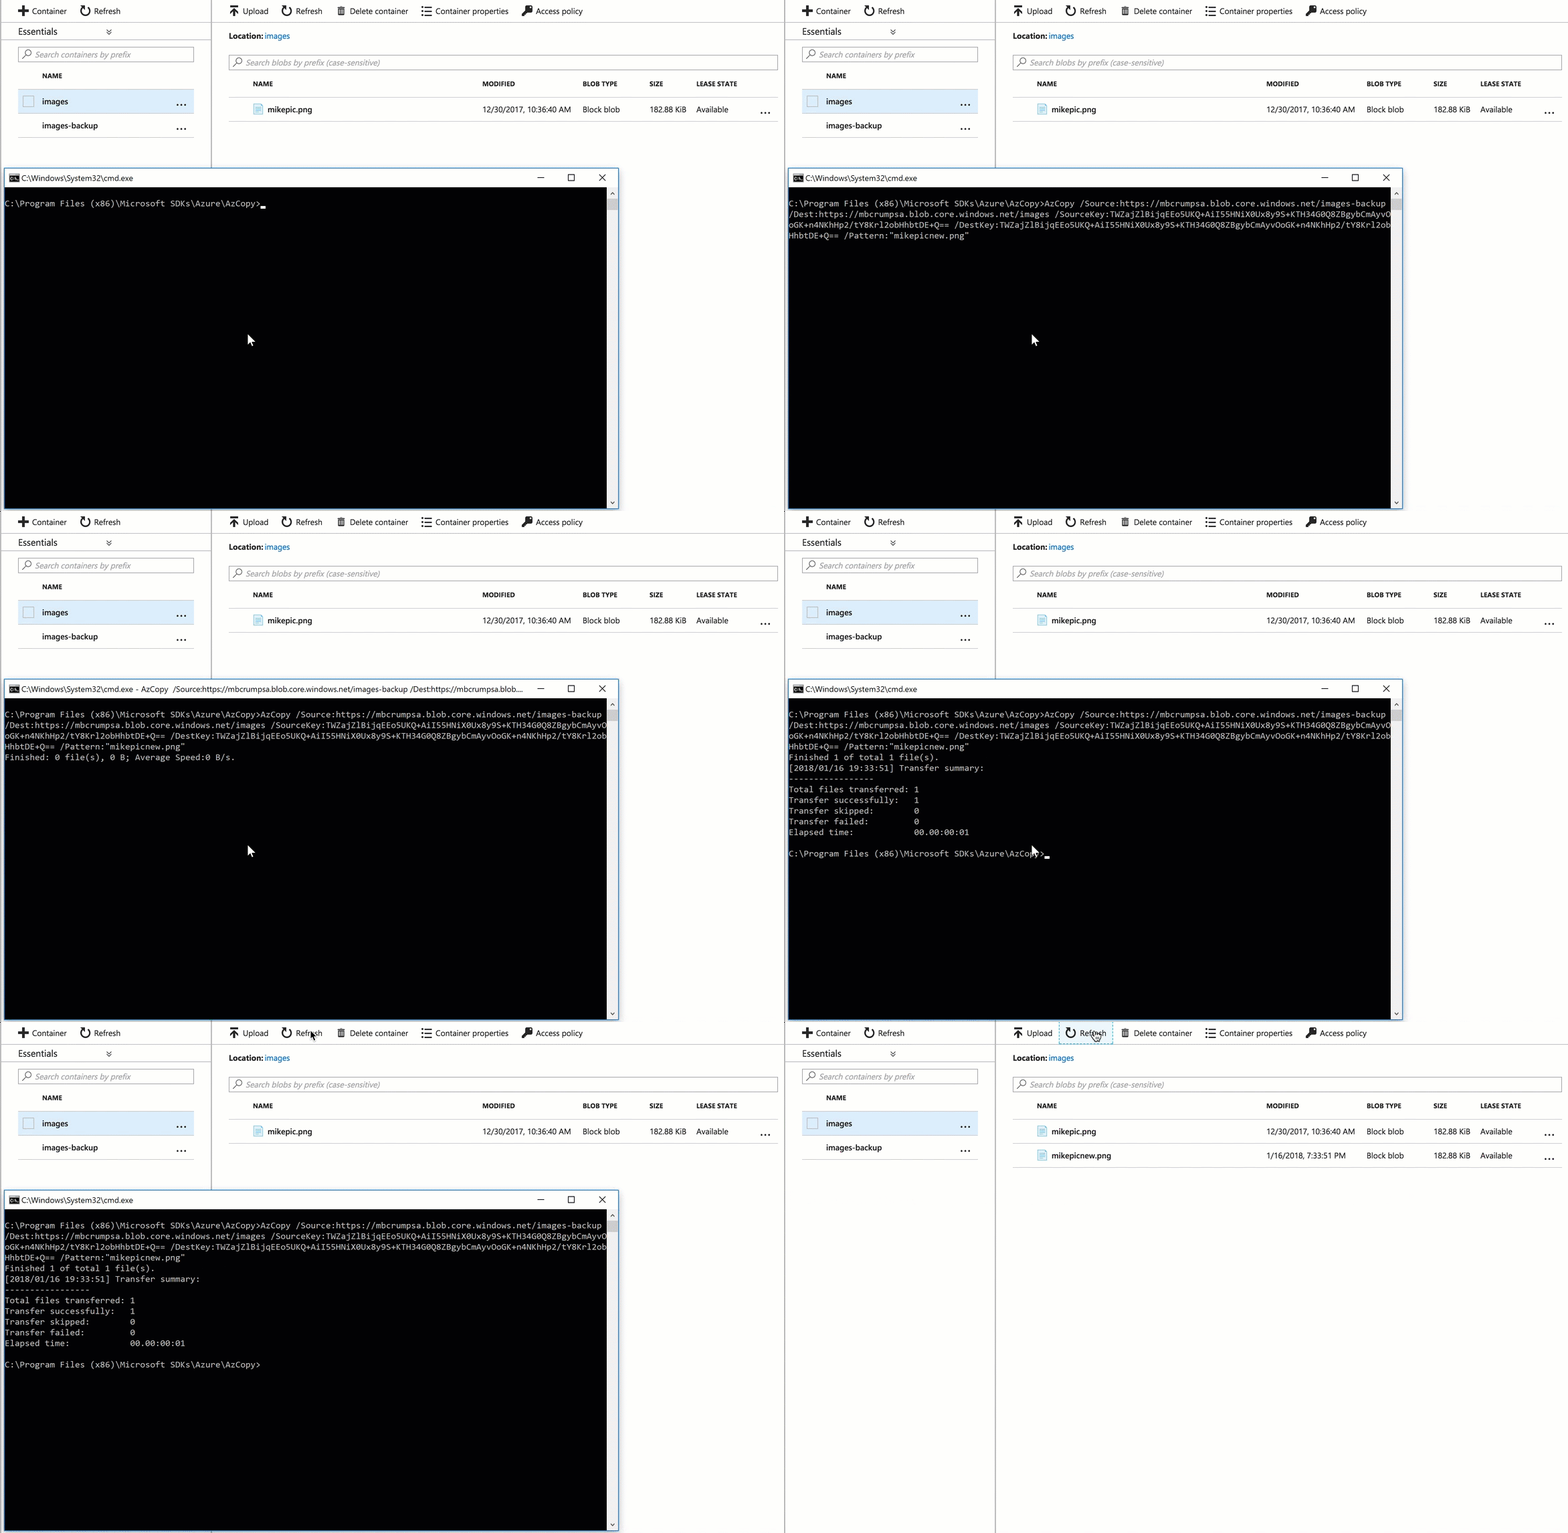
Success! There is a ton more that you can do and you can learn more here.
Want more Azure Tips and Tricks?
If you’d like to learn more Azure Tips and Tricks, then follow me on twitter or stay tuned to this blog! I’d also love to hear your tips and tricks for working in Azure, just leave a comment below.

Leave a Comment