 Some time ago I wrote on using realtime database from firebase and about Firebase Cloud Messaging. In this article we’ll talk about using Firebase Cloud Functions. With Firebase Cloud Functions you get to write your own functions that can execute on firebase servers. In this article we’ll cover three basic scenarios: sending an email to admin, manipulating data in the database and sending push notifications to users when a certain event occurs.
Firebase Cloud Functions
Firebase is a collection of products from Google. The most popular is the Realtime Database and Cloud Messaging. But, you have so many more products under your disposal. Some of them you already know, like Crashlytics. Some of them are still in beta, like Firestore. Obviously, Cloud Functions is one of them and we’ll cover it here.
When people hear the words ‘Firebase’ they associate it with clients that are running backend code. If you’re only using Realtime database or Firestore from Firebase then you will have to run some backend logic on your clients. Unless your app is extremely simple. Imagine a simple scenario. You have an app that’s displaying blog posts. Your users can rate the posts and when the average rating of a post is over 4.0, you want to mark it as a popular post. Every single client would be running the code that’s performing these checks. Now imagine you had a bug in one of the previous versions of your app… You see the problem.
The most elegant solution is to run all the code on the server. You will have a central place where your code will execute. If you have a bug, you will only have to fix it in one place and not worry about versioning. One added benefit is that you’ll reduce the waste because you won’t have to write the same business logic for all the platforms that your app is running on.
Before You Begin
Go to Firebase Console and create a new project for yourself. It can be an iOS app, Android… It doesn’t matter. In this article we’ll only focus on the backend, we won’t cover the frontend. I’ll assume you have some knowledge on how to use Firebase in your iOS projects. If you don’t, no worries, you can read this article on switching from REST to Firebase to get you started.
You will need a code editor to edit your functions. I recommend Visual Studio Code. You might hate Microsoft, but you will love this tool. Guaranteed 🙂 I don’t know how I managed without it 🙂
JavaScript knowledge is preferable, but you can pick it up as you go. Just a disclaimer, I haven’t written a line of JavaScript before starting to play with Cloud Functions. So, if you’re an expert in JavaScript don’t judge me too harshly 🙂
Let us begin…
Set Up Functions
If you open your Firebase project you will see a menu labeled ‘Functions’ on the left. When you select it you will see quick setup instructions:
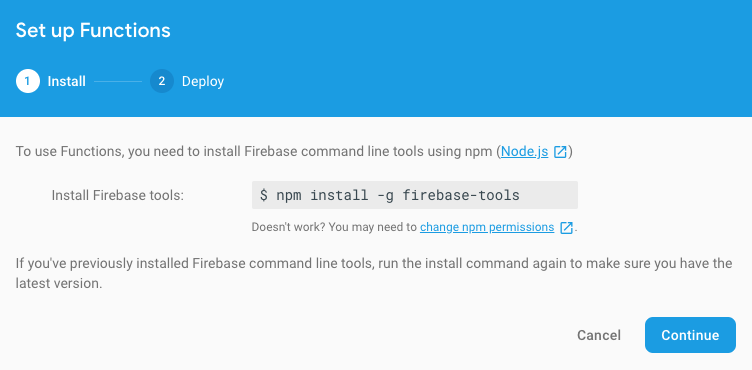
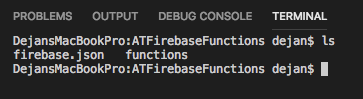
You will need to run this command to install firebase tools on your mac. So, run this command from your terminal. You will only have to install these tools once. When the tools install, create a folder on your mac where you want to save your functions project and navigate to that folder using the terminal. Then run the command:
The setup wizard will ask you some questions like, what firebase feature you want to use:
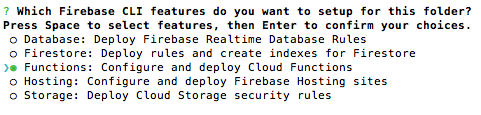
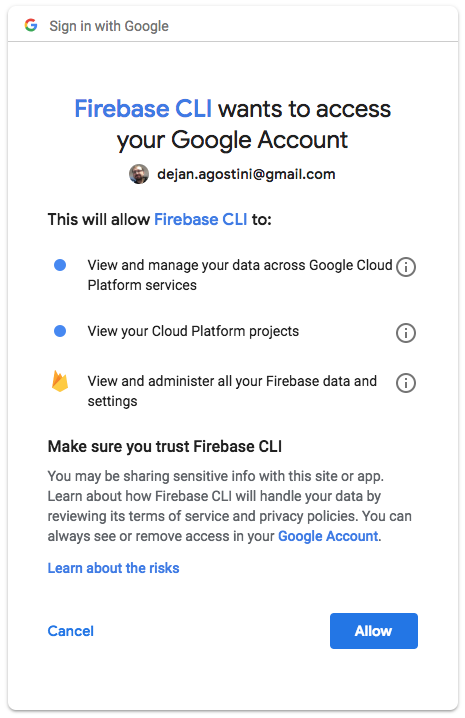
Make sure to select ‘Functions’ in this step. The wizard will also redirect you to your browser where you will have to grant permission to Firebase CLI tools to access your account:
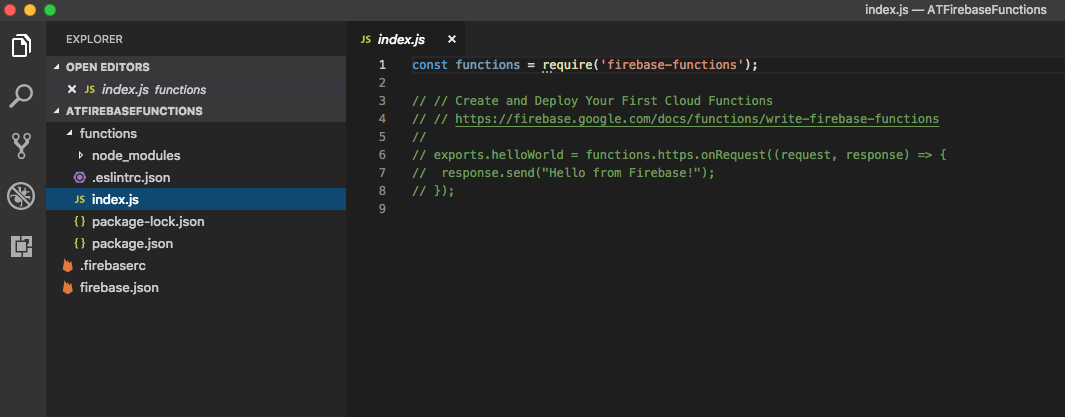
Among other things, the wizard will ask you which language you want to use to write your functions: JavaScript or TypeScript. TypeScript is strongly typed language and it would make development easier for you. But it’s relatively young and you won’t be able to find as many examples on the net. So, if you’re beginning with the functions I recommend you use JavaScript. Once you get more experience with JavaScript you can refactor your code to TypeScript. When the wizard completes it will create a bunch of files in your project folder, along with ‘index.js’ file. Which will be the main file where you will write all your functions:
Visual Studio Code
I’ll be using Visual Studio Code through this article. You can use any editor you want. What I like about VS Code is that it has terminal built-in. You will use terminal a lot to deploy your functions, so make sure it’s visible in your IDE:
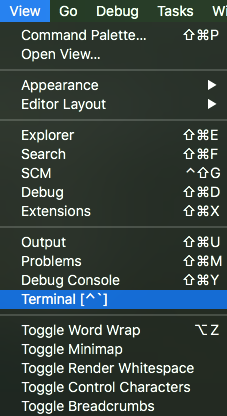
You’ll see it right below the code editor:
Pretty cool, right 🙂
Functions
Let’s start writing some functions. We’ll use the brand new Firestore Database in our examples. And the data that we’ll save in it will be pretty trivial. Just two tables (or collections, if you will). One will store posts with title, description and a rating. While the other one will save popular posts with just an ID of the post and a title.
Functions can have many triggers. Database events and HTTP are one example. HTTP triggers are quite simple. When you create your function that has an HTTP trigger you will get a custom URL. Every time you call that URL your function will get triggered.
Database events, on the other hand, get triggered every time your database gets modified. You can listen for changes on a collection, you simply have to specify the collection path. After which you specify an event handler for that path. For example, you can listen to all the document creations for a specified collection. We’ll be talking about database events in this article.
Send An Email
In our first function we’ll send an email to the administrator every time a new document gets created in our ‘posts’ collection. Before writing the function make sure you have all the imports and create your mail transporter with options:
In the code snippet above ’email username’ and ’email password’ are the username and password for the account you’ll be using to send the email from. You can configure your mail options before you start writing the functions, like in the snippet. In the actual function we’ll only append the message text to the mail options.
Our function will trigger every time a document is created in the ‘posts’ collection and it looks like this:
You can access all the properties of the new document by using the ‘snapshot.data()’ function and accessing the properties by using their names, like in the example above. We’re returning a Promise from a function and sending a mail using the transporter we created. JavaScript promises are beyond the scope of this article. Just remember that a JavaScript Promise is a way to asynchronously execute code in JavaScript.
When you’re done writing the function, you deploy it by calling ‘firebase deploy’ from the terminal. Something like this:
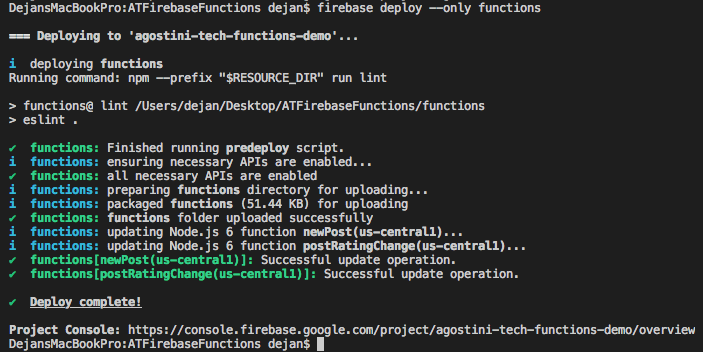
In the screenshot above, we’re deploying two functions. But you output should look the same. When the deploy completes, you can see your new function in the ‘Functions’ section in the Firebase Console:

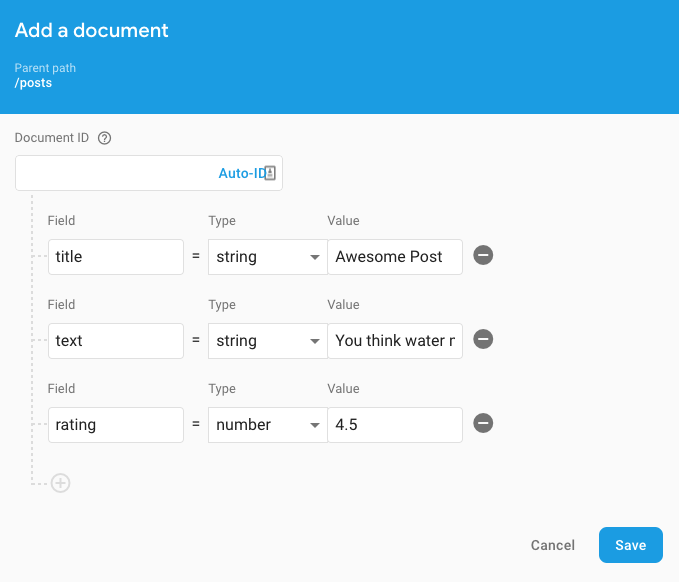
You can test your new function by adding a new document to the ‘posts’ collection directly from Firebase. So go ahead and do it:
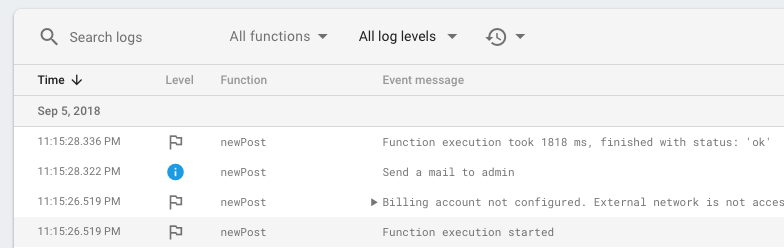
If you go to your ‘Functions > Logs’ section you will see the console output from your functions. You should see the console output we’ve created in our function:
After a couple of moments you’ll get an email:

Pretty cool and pretty simple, right 🙂
Create Documents
Our next function will listen for changes in the ‘posts’ collection and if a post rating goes over 4.0 it will create a new document in ‘popularPosts’ collection:
In this function we’re using the ‘onWrite’ event handler. It’s passing in two objects: ‘change’ and ‘context’. ‘change’ object has two properties: ‘before’ and ‘after’. They contain the data snapshots before and after the change takes place. In our function we want to know what’s the new rating being written for the post. You can see where we’re checking if the new rating is greater or equal to 4.0.
When we registered our ‘onWrite’ handler we registered it for a document path. We used a path ‘posts/{postID}’ . ‘postID’ is just a name that we gave to the variable, it can be what ever you want it to be. This variable will contain the identifier of the document that triggered this handler. We can access this ‘postID’ variable by using the ‘context’. You can see how in the code snippet above.
In the code snippet above, you can see that we’re performing a query on the existing ‘popularPosts’ collection. We don’t want to add the same post twice. So we’re searching the collection for popular posts with the ‘postID’ of the document that triggered the function. If we can’t find any, we write a new document to the ‘popularPosts’.
Writing new documents to a collection is pretty simple. You just write a JSON into a collection. The keys are the document properties, the values are the values 🙂
You can test this function by modifying any existing post and changing the rating to a value above 4.0:

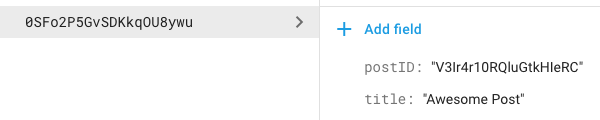
After a few seconds you will see your new document in the ‘popularPosts’ collection:
Sending Push
In our last example we’ll send a push to all our registered users that have opted in to receive push notifications for the ‘popularPosts’. The clients subscribe to receive push notifications for topics by calling this code:
It’s up to you where you want to call this code from in your iOS app, we’ll focus here on the backend.
A function to send a push notification will be similar to the function to send an email to the admin:
Every time a document is created in the ‘popularPosts’ collection a function will trigger. We construct our push payload with a custom message. Don’t forget to set the topic. After all that, we simply send the push using Firebase Cloud Messaging. This push message will be delivered to all your clients, iOS and Android. We’re sending the push in our example in the ‘dry-run’ mode, which means that Firebase will simulate sending a push notification. It’s great for testing to make sure you have everything set up correctly. You can inspect your console output to make sure your function is working properly:

Conclusion
These three examples should be enough to get you started with Firebase Cloud Functions. You know how to send emails and push notifications. You also know how to manipulate the data in your database.
With Firebase Cloud Functions there’s no reason for you to have backend logic running on your clients anymore. They’re simple enough and work pretty well. A lot of people don’t like Firebase because they believed that a serverless backend means that the backend logic needs to run on the clients. Hopefully this article will shed some light on that.
I hope you’ve learned something new today and that you had some fun 🙂 There’s no demo project this time, but you can find the code snippets on GitLab.
Have a nice day 🙂
~D;
Pingback: Using PromiseKit | agostini.tech