
Winds is a popular RSS and Podcast application powered by Stream – a service that allows you to build news and activity feeds in hours instead of months. Winds is 100% open-source and the frontend is easy to install in a local environment or in the cloud – a task that we will cover in this tutorial. To ensure that you make it through the tutorial, please make sure to complete all of the prerequisites.
Prerequisites 📚
As with any tutorial, there are some requirements that come with it. For this post, you’ll need to ensure that you have the following up and running, and ready to go prior to continuing on. If you decide to skip the requirements, you’ll likely get hung up at one spot – and we don’t want that to happen.
- An AWS account with IAM Access to S3 and CloudFront
- AWS CLI installed on your machine and configured
- Have Winds cloned from GitHub to a local directory
Creating a Bucket 🗑
First things first, head on over to the S3 console on AWS and create a bucket. I’m going to name my bucket “winds-2-0-hosted”, however, feel free to name yours anything you’d like! Click next and continue through the steps. We’ll be changing up some of the settings, so be sure to follow along. 😀 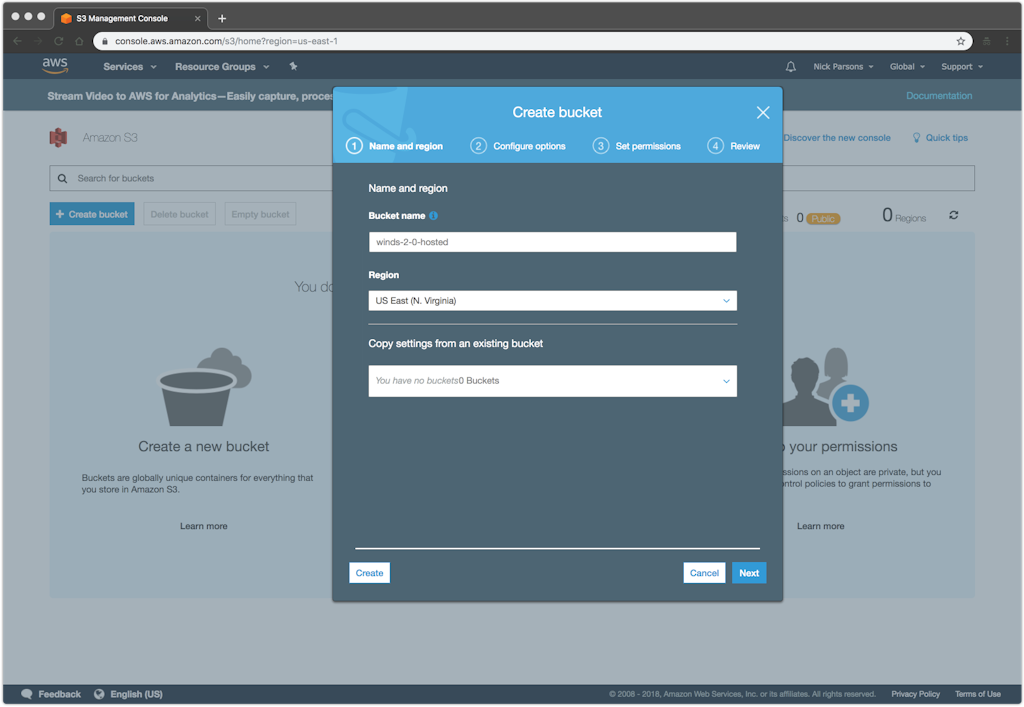 Next, within the “Properties”, open the “Static Website Hosting” tab and select “Enable website”. Fill in index.html for both the Index and Error documents. By specifying index.html as the Error Document, we can allow react-router to handle routes outside of the root.
 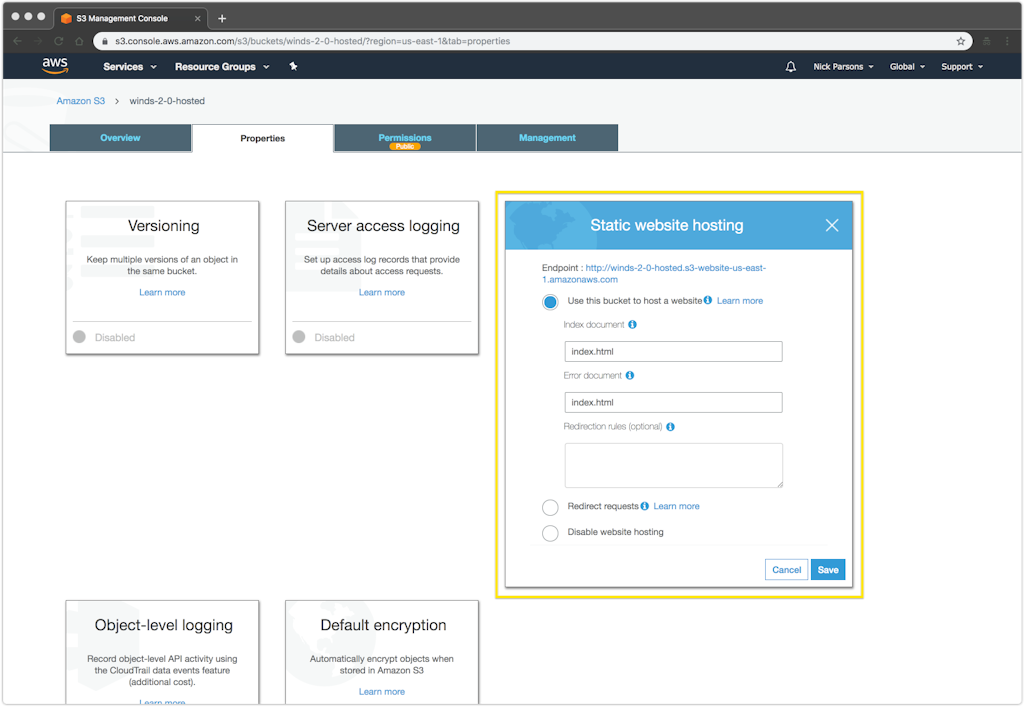 Open the “Permissions” tab and select “Edit Policy”. Here, we’re going to modify the permissions of the bucket to ensure that users can see and load the contents of Winds. The bucket policy can be found below: https://gist.github.com/astrotars/9b8ec67aac15018f04b36b27eaa48396
Setting up CloudFront 💨
CloudFront is the Content Delivery Network (CDN) service offered by AWS. CDNs optimize for speed by pushing your content out to edge locations around the world, making it highly available around the globe. Because Winds is a rather demanding application and has a lot of resources to add, we’re going to take it to the next level with CloudFront. Let’s go ahead and setup CloudFront. Once set up, we’ll then point it to the S3 bucket that we created in the previous step. To get started, head over to the CloudFront console and click “Create Distribution”. You’ll be presented with the following screen. Choose “Get Started” under the “Web” section. 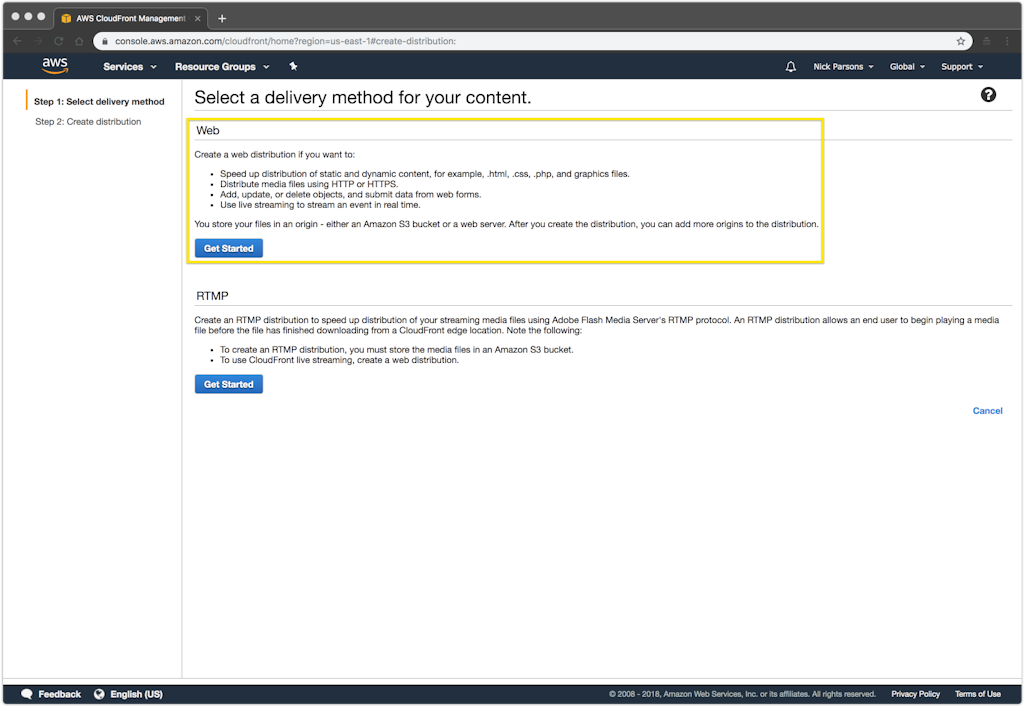 In the drop-down named “Origin Domain Name”, select the S3 bucket that to previously created. In our case, it will be named “winds-2-0-hosted.s3.amazonaws.com”.
 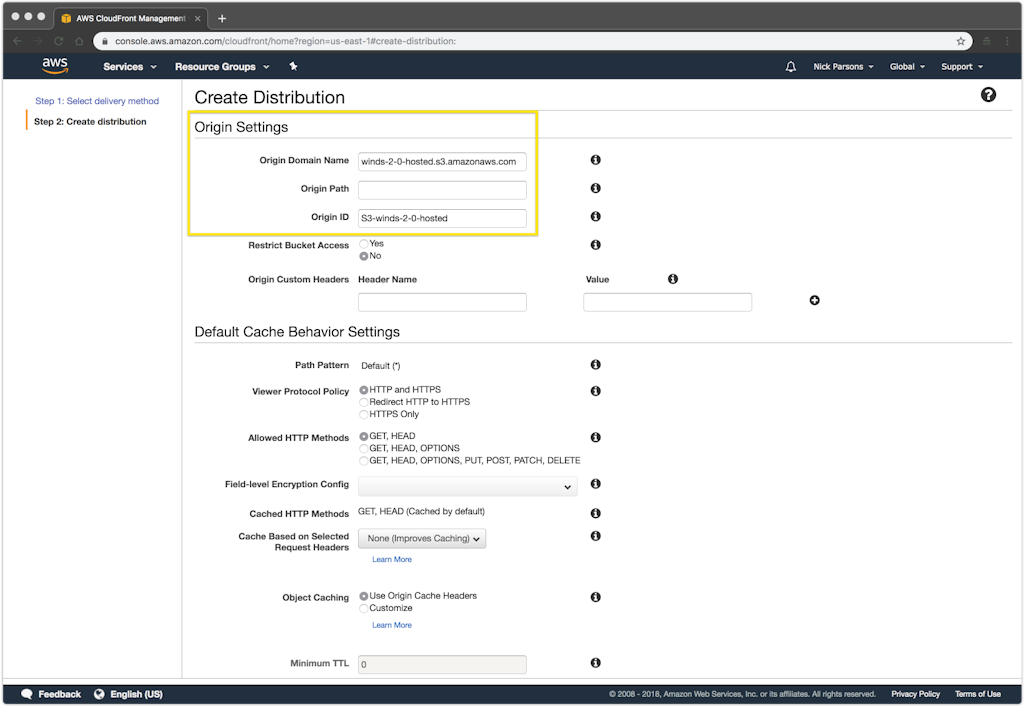 The rest of the settings will be pre-populated with the correct values, so scroll to the bottom and click “Create Distribution”. Your distribution will take a couple of minutes to generate, so be patient. Once generated, click on the CloudFront distribution, followed by the “Distribution” tab. Once that has loaded, click on the “Edit” button and set the “Default Root Object” to index.html and click the “Yes, edit” button at the bottom.
  Now, click the ID of your newly created distribution to reach its settings page, then click on the “Error Pages” tab. Select “Create Custom Error Response”. Select Yes for a custom error response, set “/index.html” for the “Response Page Path” and “200: OK” for the “HTTP Response Code”. This custom error page in the CloudFront distribution is analogous to the Error Document on the S3 bucket. When finished, click Create. You’ll want to create a second error page as well, this time with the “HTTP Error Code” set to “404”, the “Response Page Path” path to “/index.html” (again), and the “HTTP Response Code” to “200: OK”.
 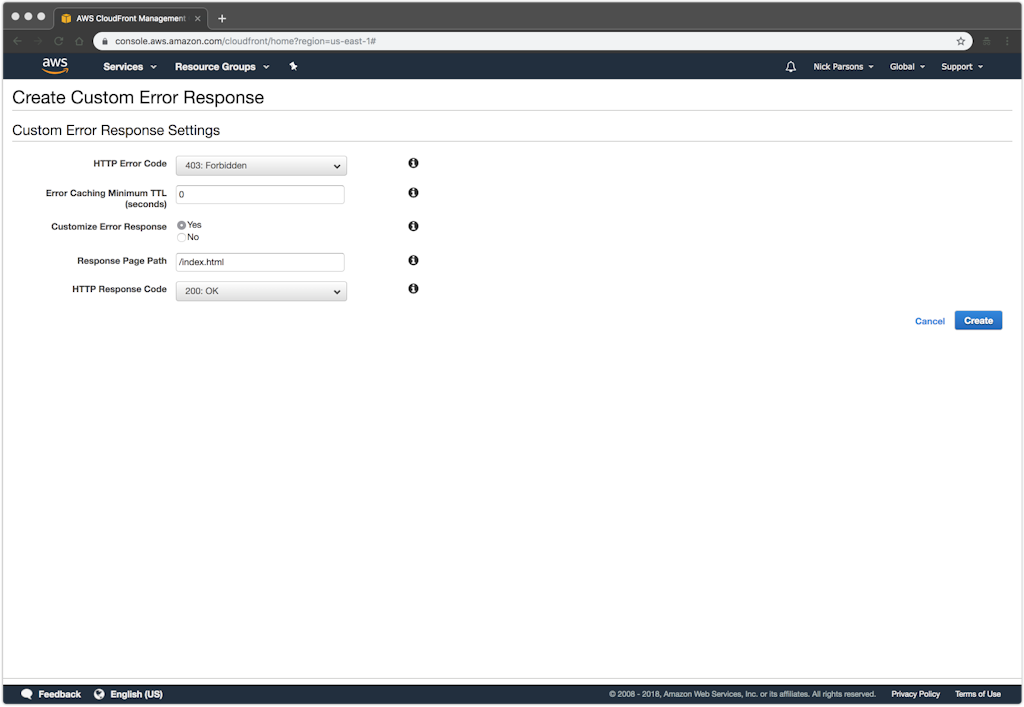 Once that is complete, head back into the settings and click on the “Behaviors” tab. Click “Create Behavior” and select “Redirect HTTP to HTTPS” to force all traffic to HTTPS, as well as “Allowed HTTP Methods” to “GET, HEAD, OPTIONS, PUT, POST, PATCH and DELETE”. Then click “Yes, edit” at the bottom.
 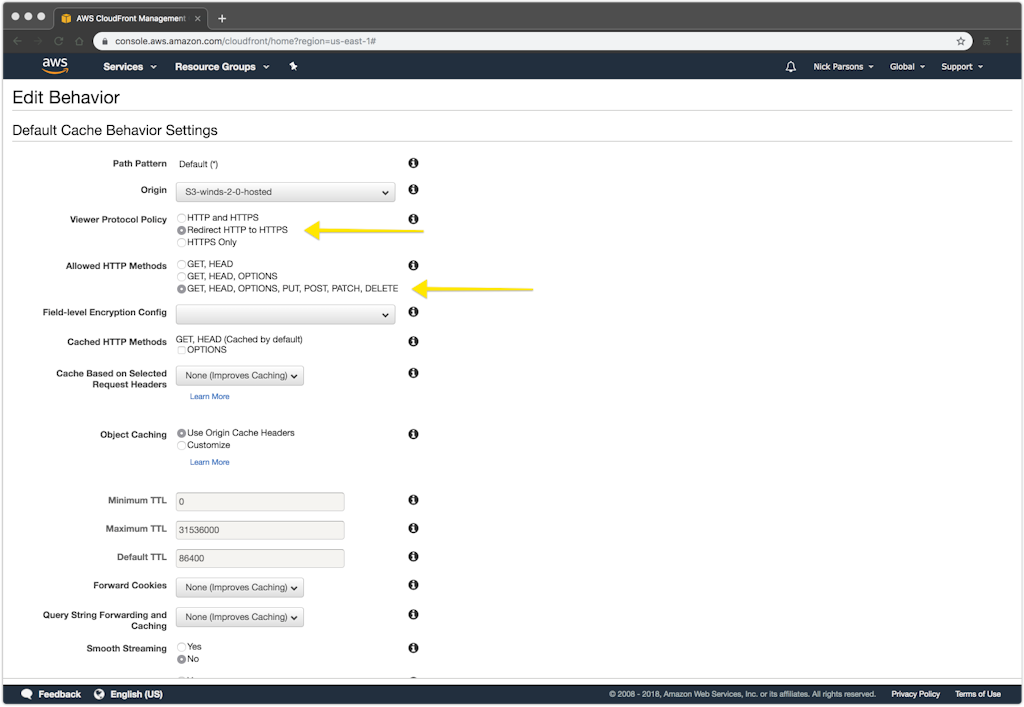 That’s it for now! You can find the URL on the distribution listings page, under the Domain Name column. Let your distribution sit for a couple of minutes to let all of the settings propagate.
Change the API URL 👨🚀
I wanted to quickly note that it’s important to change your API URL as you’ve probably decided to your API elsewhere. To do so, head into the Winds directory and under /app there will be a .env file. Change the REACT_APP_API_ENDPOINT environment variable. Be sure to do this before uploading or your application will not load.
Prepping the Deploy Script 🚀
When deploying Winds on our end, we use a handful of scripts for both the front and backend. Luckily, the frontend only requires one file. This file must be located inside of your Winds directory and have the proper permissions. To create the script, move into the Winds directory and create a file called deploy.sh. Open deploy.sh and paste the following into the file: https://gist.github.com/astrotars/27d557247c8fcc88782e11eef334fd83 Next, let’s set the permissions on the file: https://gist.github.com/astrotars/5be47d808d61eedbb1514ccc0fc43930 Note: You must change the following in order for the deploy script to properly work! 1. On line 16, change the homepage to the Domain Name provided by CloudFront as shown in the screenshot below: 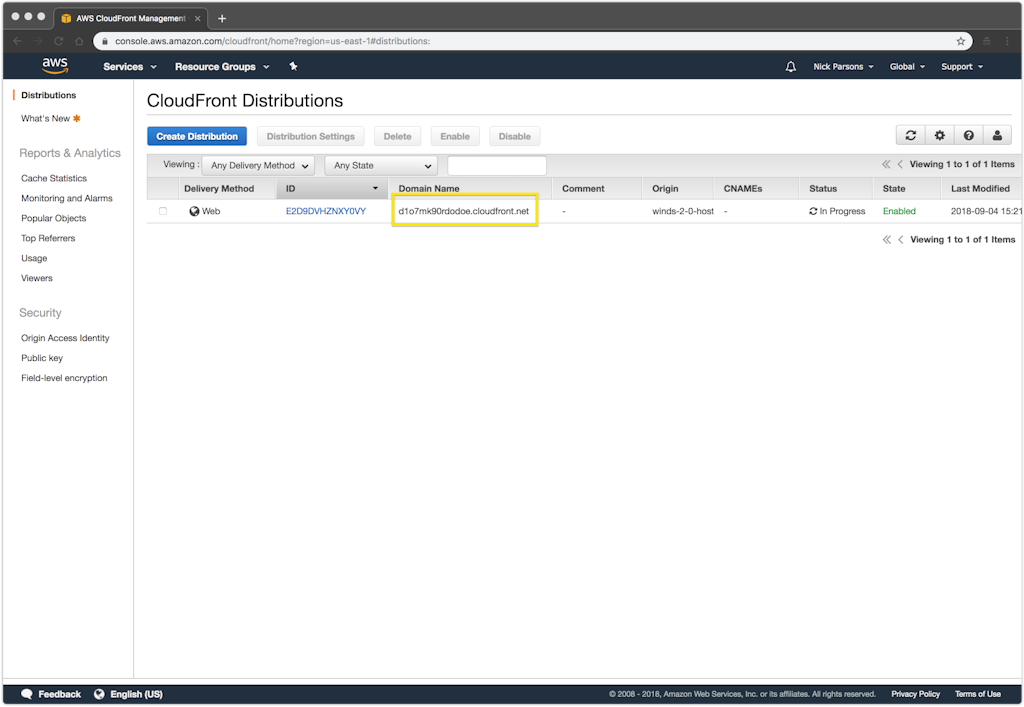 2. On line 20, change the S3 URL to your created S3 bucket URL (e.g. winds-2-0-hosted):
 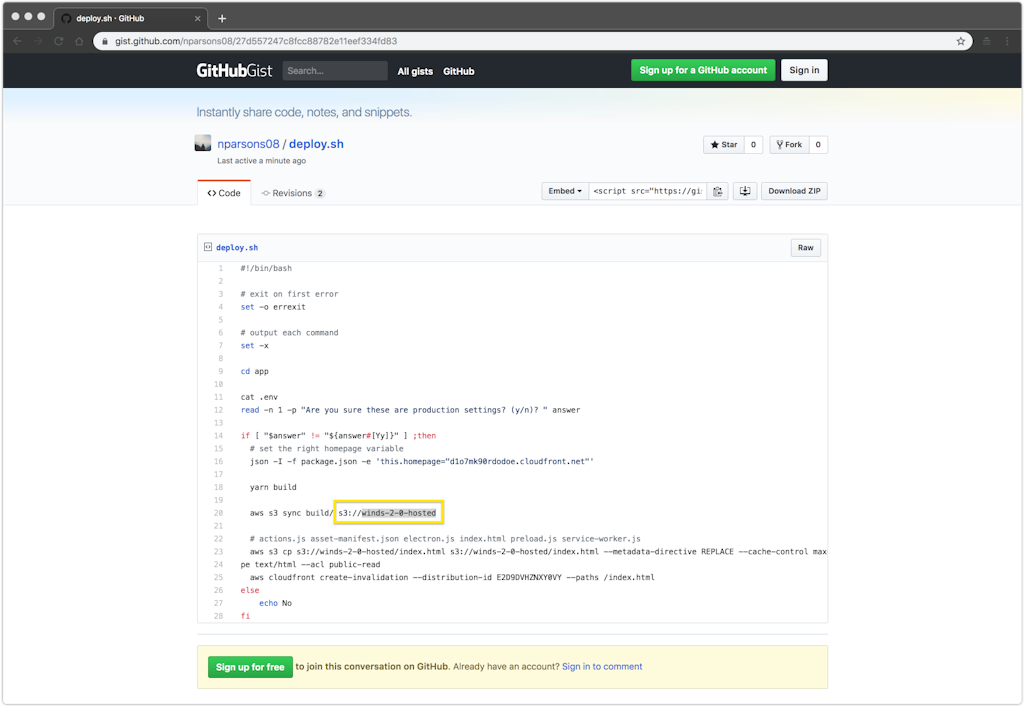 3. On line 23, change the S3 URLs to match your S3 bucket URL (e.g. winds-2-0-hosted) in the two specified locations:
 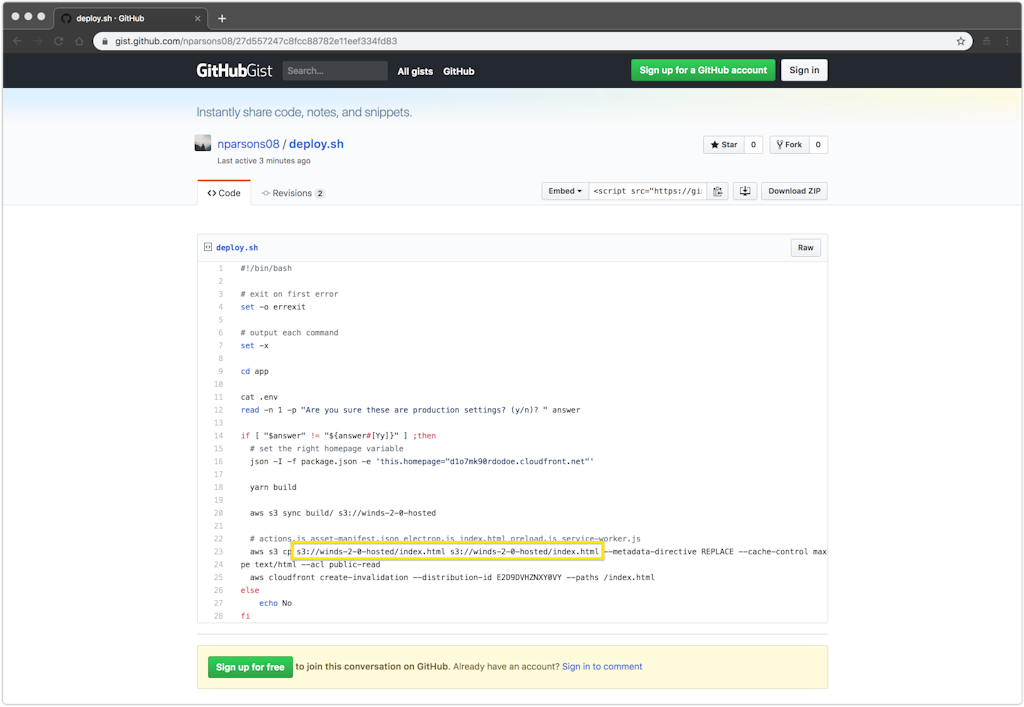 4. Last, on line 25 update your Distribution ID (provided by CloudFront and shown in the following screenshot):
 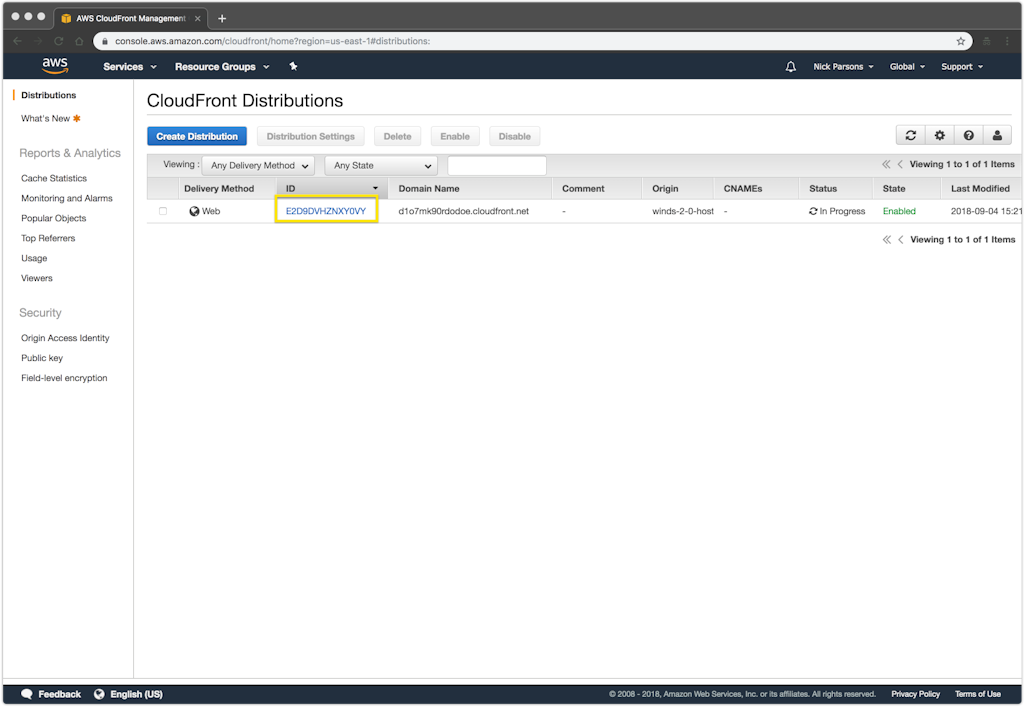 Once the deploy.sh file is properly set up, it will handle the following for you:
-
Verify that you want to actually deploy
-
Move into the /app directory
-
Create a build directory with compiled files and assets
-
Sync the build files and assets to your S3 bucket
-
Sync non-build, but necessary files to S3
-
Invalidate the cache
Deploying to S3 & CloudFront 🤟 Now that everything is created and properly set up, let’s go ahead and give it a shot! Make sure that you are in the Winds directory, and type ./deploy.sh to fire off the script. When it prompts you, press “y” followed by pressing enter. A series of events will happen automatically and you’ll see the output below when the script is complete. 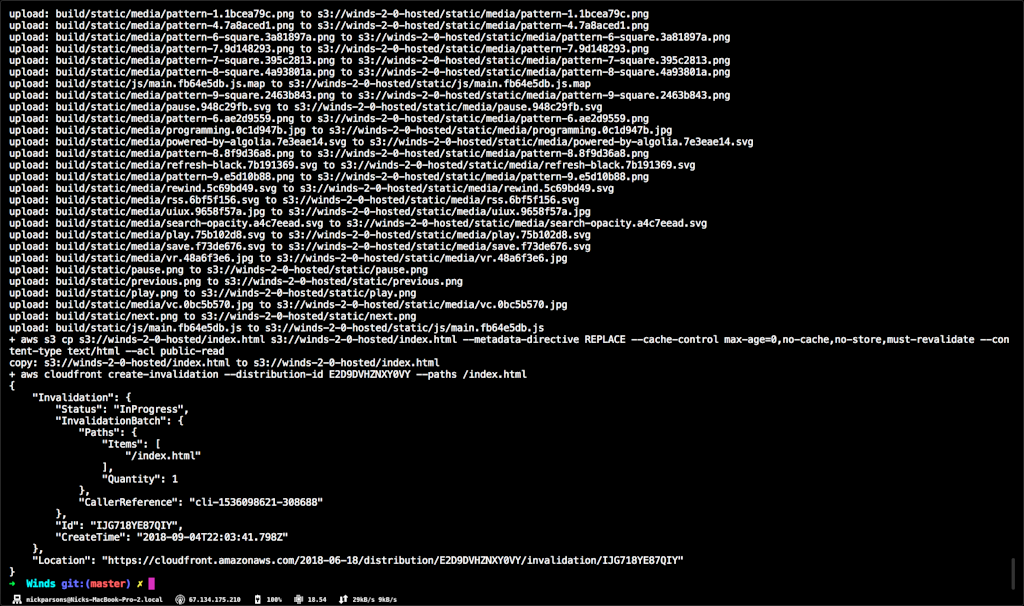 You did it! Your application should now be live at the URL that CloudFront provides.
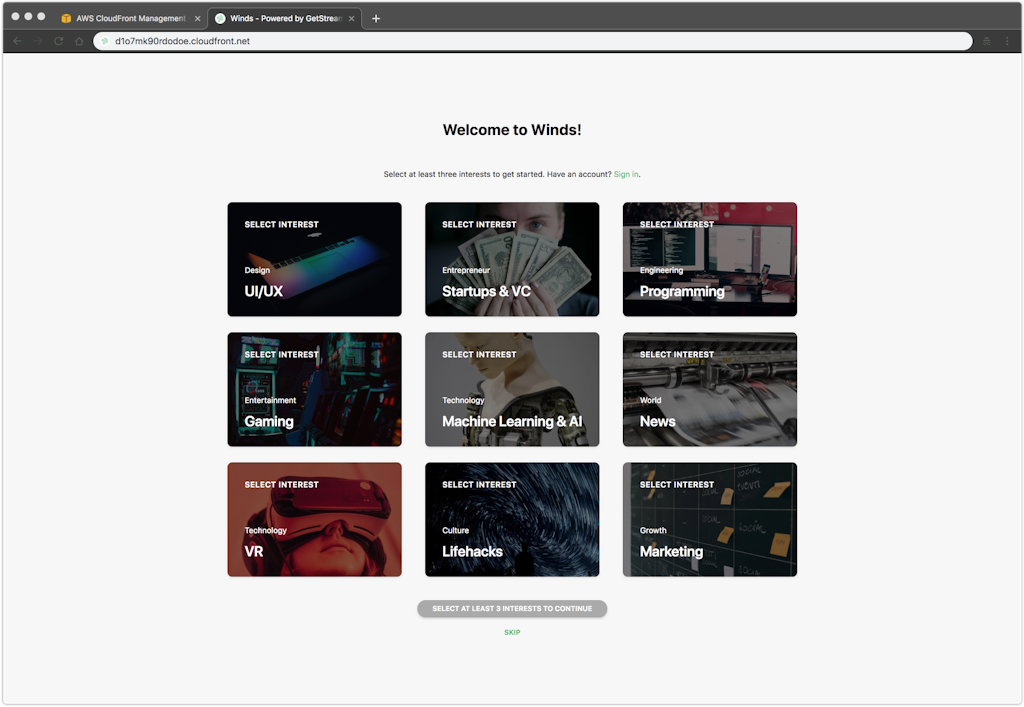
Final Thoughts 🤔
If you’d like to change the URL, I’d recommend taking a look at AWS Route53 for a DNS service. You can map your custom URL to your CloudFront distribution making Winds have a custom domain! If you haven’t had a chance to check out the post on how to deploy the Winds API, you can read it here. As always, if you have any thoughts or comments, please leave them in the comments below! Happy coding! 🎉