by Max Huddleston
How to create your first HoloLens app with Unity
Microsoft’s HoloLens is pretty freaking awesome. I was introduced to it at my internship this summer, and I’ve had a blast developing for it.
HoloLens apps are created using either DirectX with C++ or Unity with C#. I found that it is generally quicker and easier to get an app up and running with Unity.
In this article, we’ll set up Unity for HoloLens development, create an interactive cube, and spin up the HoloLens emulator so you can see your creation. This article is meant for total beginners to Unity, so if you have experience with the editor, I’d recommend going through Microsoft’s tutorials.
Prerequisites
- A Windows 10 PC with the April 2018 update
- The HoloLens Emulator which you can download here
- Visual Studio 2017 — Community edition is fine
- Unity — Make sure you add the Windows .NET scripting backend component during installation
- The HoloToolKit
You can find the full source code here.
Set up
Open up Unity. If this is your first time using the editor, you will be prompted to sign in or sign up. I’d recommend Unity Personal unless you plan on monetizing your app.
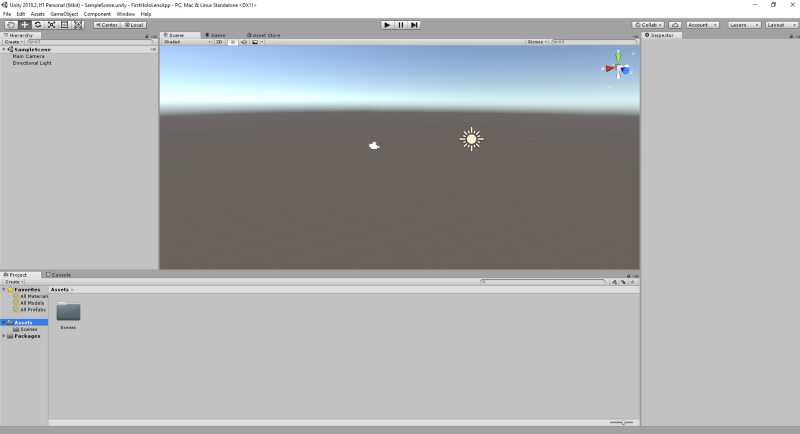
After you sign in, create a new project and enter in a name. You should be greeted with this screen after the project completes the initial setup.
Right click on the Assets folder in the bottom left corner. Navigate to Import Package -> Custom Package, and open the HoloToolKit unity file we downloaded earlier. A Unity popup will appear, click All and import the assets.
Next we’ll create our scene. Select File -> New Scene and save it as Main.
Unity needs a special configuration in order to build a project for HoloLens. Luckily, the HoloToolKit has utility scripts which do this configuration for us. On the top toolbar, select Mixed Reality Toolkit -> Configure -> Apply Mixed Reality Project Settings. Use the default values. After the configuration is finished, apply the Mixed Reality Scene Settings. Delete the Directional Light GameObject.
Awesome! So far we’ve imported the HoloToolKit and set up Unity for HoloLens development. In the next section I’ll introduce you to the basics of Unity, and after that we’ll get a cube to render on screen.
Familiarizing yourself with the editor
This is what the editor should look like at this point. Notice the three boxed-in areas:
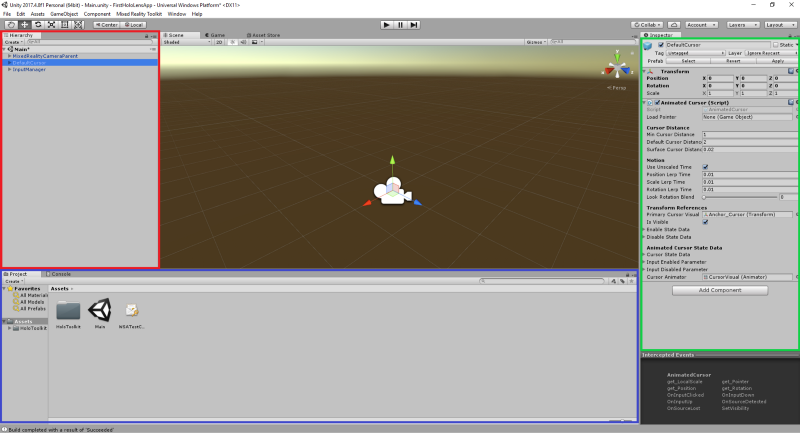
The red area to the left is the scene hierarchy panel. Here we can add new GameObjects, and get a high-level overview of the current application. A GameObject is a base class for all Unity entities. They can be a physical object like a cube, or a collection of scripts like the Input Manager in the scene.
The bottom blue area contains the assets menu and console. The assets menu is exactly what it sounds like — it contains the C# scripts, materials, prefabs, and meshes required to run your app.
The right green area is the inspector menu. Here is where you can add and modify the Components of your GameObjects. Components are what make up the behavior of your GameObjects. They determine the look, interactivity, and physics of their parent.
Creating a cube
Now we’ll get our first GameObject to render on screen. In the scene hierarchy panel, right click and select 3D Object -> Cube. A cube should appear in the editor.
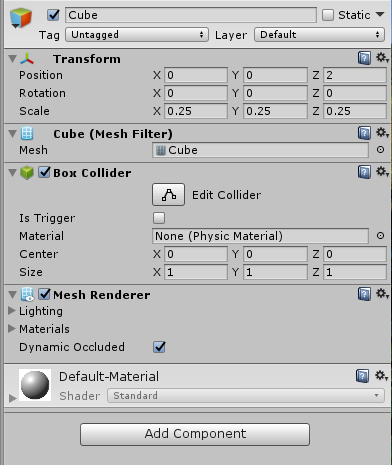
Double click Cube in the in hierarchy panel, and in the right inspector panel change the position to (0,0,2). Set the scale to be (.25, .25, .25). Your inspector panel should look like this:
Nice! Let’s go through the build steps so we can see our cube in the HoloLens emulator.
In Unity, select File->Build Settings. The build popup should appear, so hit the build button. In the folder popup, create a new folder called App and choose it as the build destination.
After the build is completed, open the Visual Studio solution in the App folder. Change the debug options to Release, x86, and target the HoloLens emulator. Your options bar should look like this:

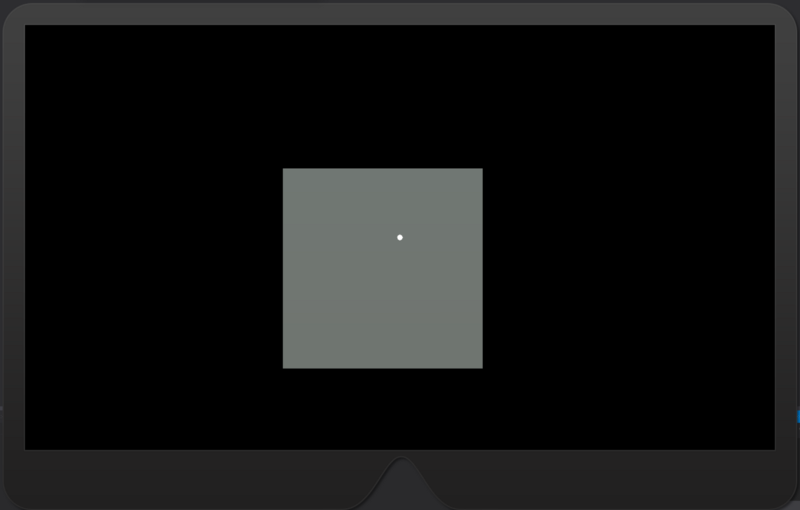
Run the solution, and after the emulator starts up and your application loads, you should see your cube on screen.
Making the cube interactive
Now that we’ve figured out how to get a cube into our application, let’s make the cube actually do something. When we gaze at the cube, it will rotate, and when we click the cube, it will increase in size.
Navigate back to Unity and create a new script in the assets panel called InteractiveCube. To create a new script, right click on the assets panel and select Create -> C# script.
To add the script to the cube, make sure the cube is selected, and drag and drop the script onto the inspector panel. It should look like this:

Double click on the script in the assets tab and a Visual Studio instance should appear.
Import HoloToolkit.Unity.InputModule at the top of our script, and make InteractiveCube extend IFocusable and IInputClickHandler. Our code should look like this:
using HoloToolkit.Unity.InputModule;public class InteractiveCube : MonoBehaviour, IFocusable, IInputClickHandler {...} By extending the IFocuable and IInputClickHandler interfaces, our script component allows the parent GameObject to subscribe to focus and click events.
Let’s make the cube rotate when our gaze is on it. The IFocusable interface requires us to implement two public void methods: OnFocusEnter and OnFocusExit. Create a private boolean field and name it Rotating. When we focus the cube, set it to true, and when our focus exits, set it to false. Our code should look like this:
public bool Rotating;public void OnFocusEnter(){ Rotating = true;}public void OnFocusExit(){ Rotating = false;}We’ll do the actual rotation in Update(). Update() is a special Unity method that is called every frame. To control the speed of the rotation, add a public float field named RotationSpeed. Any public field in a component can be adjusted and initialized in the Unity editor.
public float RotationSpeed;void Update() { if (Rotating) transform.Rotate(Vector3.Up * Time.deltaTime * RotationSpeed);}In Unity, the transform is used to control the physical attributes such as size, rotation, and position of a GameObject. We are rotating the parent GameObject around the y-axis at one degree per second multiplied by the speed.
To make the cube respond to click events, add the OnInputClicked method required by IInputClickHandler. Create a public Vector3 variable called ScaleChange. In the OnInputClicked method, we’ll increase the cube’s scale by ScaleChange.
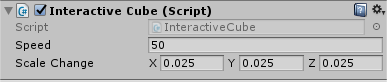
public Vector3 ScaleChange;public void OnInputClicked(InputClickedEventData eventData) { transform.localScale += ScaleChange;}Now that we’re finished with the script, navigate back to Unity. Make sure the Cube object is selected, and set the Speed and ScaleChange variables to 50 and (.025, .025, .025) respectively. Feel free to experiment with different values! Our script should look like this:
Awesome! We’ve finished the InteractiveCube script. Build your app from the Unity editor, and run the solution from Visual Studio.
Summary
In this walkthrough, you learned how to set up Unity for HoloLens development, create an interactive GameObject, and run your application in the emulator.
If you enjoy HoloLens development, I encourage you to go through the Microsoft Academy tutorials. They go over the various HoloLens key concepts in detail and walk you through creating some pretty cool apps.
If you liked the article or have feedback, leave a comment below!