This article was originally published on the Okta Developer Blog. Thank you for supporting the partners who make SitePoint possible.
Progressive Web Applications (PWAs) are the newest technology on the web dev block, and they’ve arrived just in time to solve a growing problem. Many companies are struggling to keep isolated development teams across their organization up-to-date when new features are released. Some companies are even trying to decide if it’s worth the cost to develop both a web app and a mobile application. Not surprisingly, it’s a headache most companies are looking to avoid. PWAs can give companies a lot of the features they need from a mobile app without the need to manage multiple teams and codebases.
A PWA performs spectacularly when on a fast connection, and still performs well when offline or on Wi-Fi that’s not really fast enough to be called Wi-Fi (sometimes called “Lie-Fi”). It does so via caching and a JavaScript “Service Worker” that intercepts server calls and tries to serve the data from cache first, then when the server finally responds, it will replace the cached data with possibly “fresher” data from the server.
Recently, the Ionic team released a new project called Stencil. Stencil is a compiler that generates standards-compliant web components. Unlike most JavaScript frameworks, it doesn’t deliver a “framework” of code to the browser. It simply takes the code you write and uses its compiler to create vanilla components. You can also use Stencil’s compiler with your favorite framework. The Stencil starter project is the easiest way to get started with Stencil and produces a base application that scores nearly a 100% score on Lighthouse’s progressive web app scorecard.
To get started building a PWA using Stencil, clone the starter application and detach it from the GitHub remote.
WARNING: Stencil is not at a 1.0 release yet (as of this writing). So be aware that if you continue, you’re in early-adopter territory. If you find bugs, submit an issue.
Set Up the Starter Application
git clone https://github.com/ionic-team/stencil-starter.git first-stencil
cd first-stencil
git remote rm origin
Then, install all the dependencies that your new Stencil app will need.
npm install
You may see a couple of warnings from node-pre-gyp around fsevents. There’s nothing to see here. This is just to get around a nasty little npm bug.
Next, add the Okta Auth SDK (via CDN) to the bottom of the index.html page, right before the closing </body> tag.
<script src="https://ok1static.oktacdn.com/assets/js/sdk/okta-auth-js/1.8.0/okta-auth-js.min.js" type="text/javascript"></script>
While there is an npm package for Okta’s Auth SDK, Stencil has a hard time compiling it. Overall it works better for now if you just use the CDN to include it.
If you’re like me, the next thing you’ll want to do is run npm start and check the site with Lighthouse. If you do, you’ll notice that the score is kind of low. In particular, it doesn’t register a service worker or return a 200 when offline. That’s because it’s a development build, and generally, you don’t want the service worker intercepting server calls and returning cached data in development.
To ensure an accurate depiction of the kind of PWA you get out of the box with Stencil, make sure to run a production build using npm run build. Once you do, you’ll see a www folder and inside that folder, you’ll see a sw.js file. That’s your service worker!
Set Up Your Okta Application
If you haven’t already done so, create a free-forever developer account.
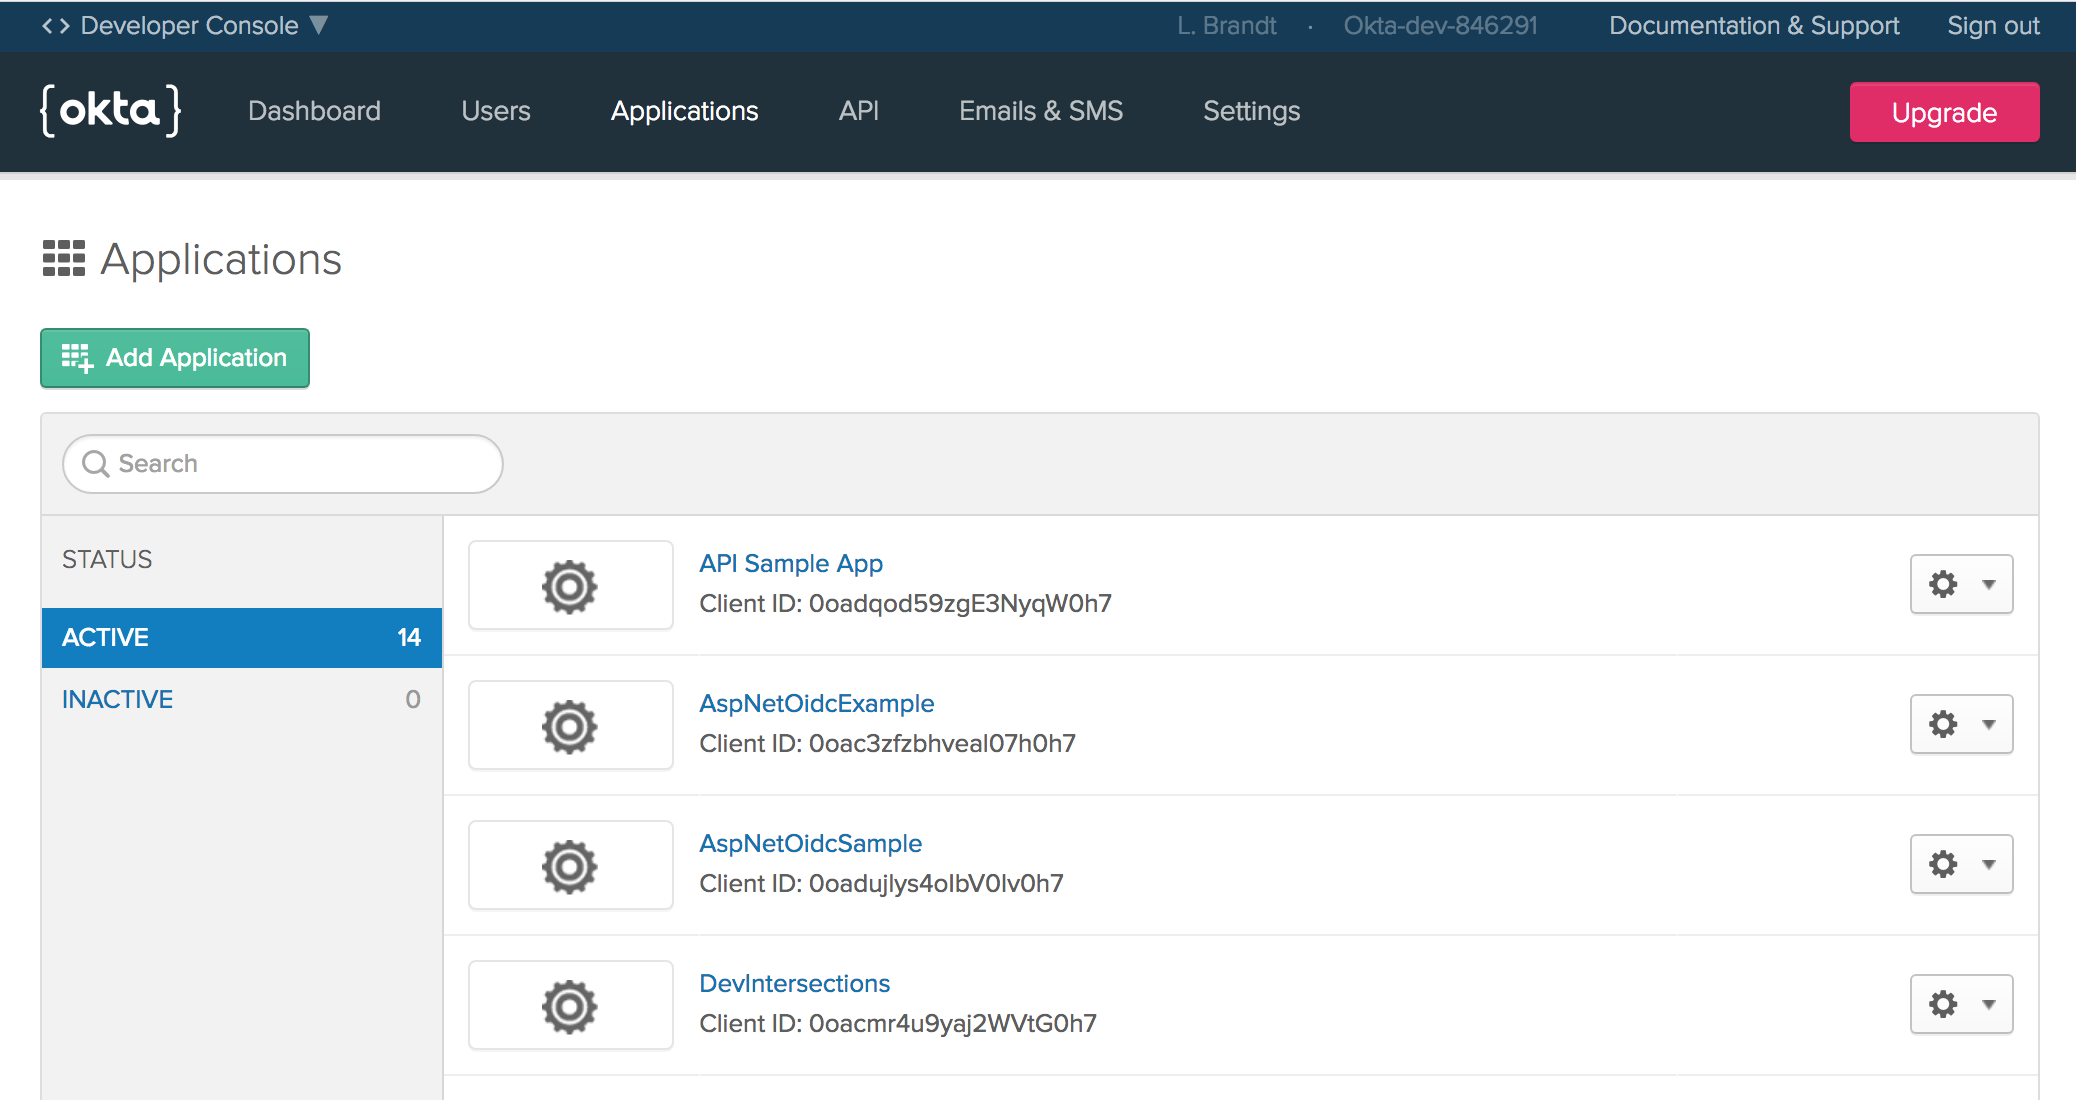
Once you’ve registered, click on Applications in the top menu. Then click Add Application.
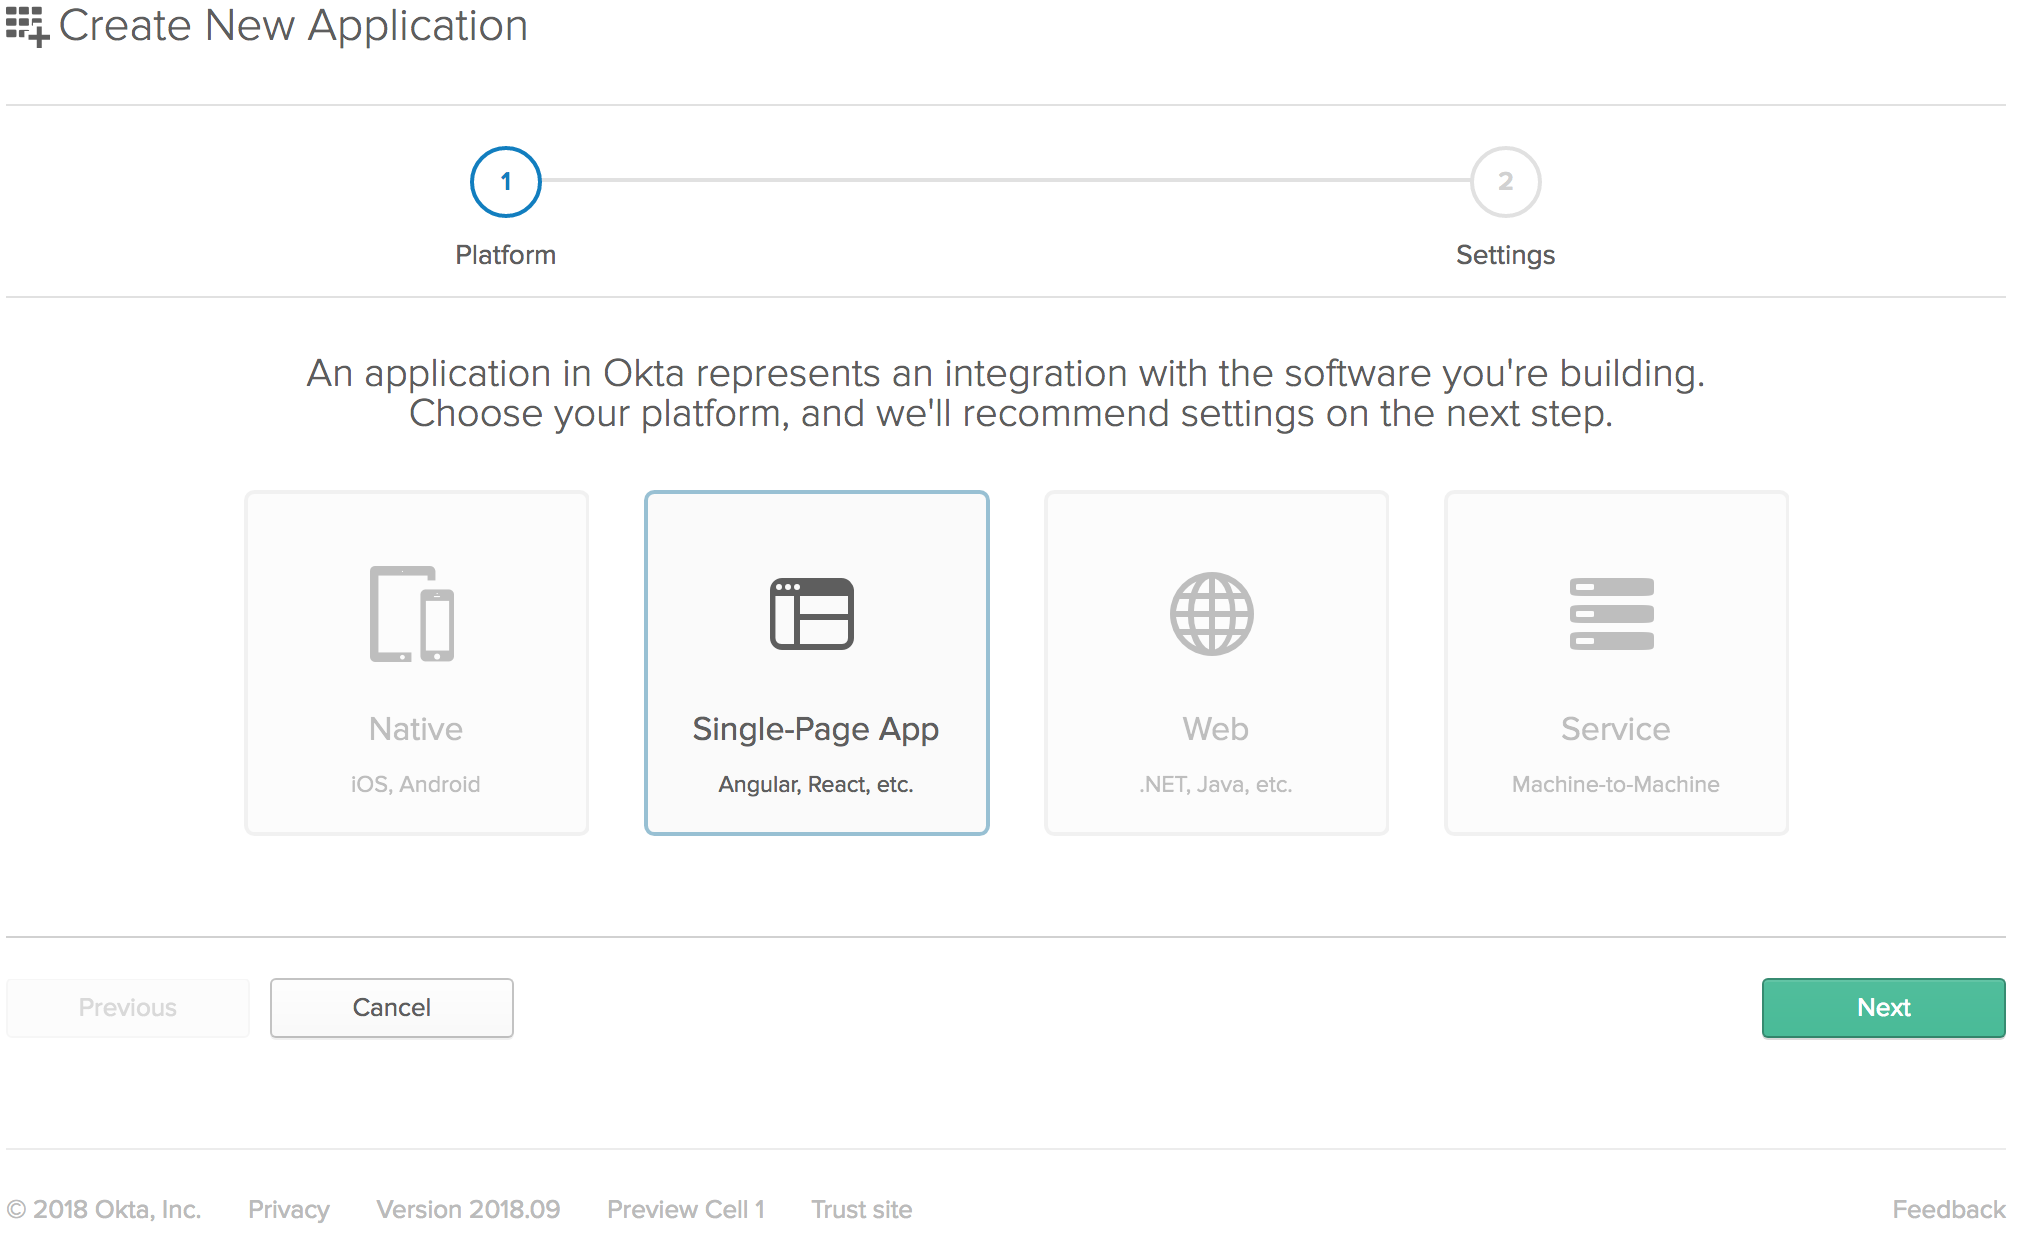
You will then be taken to the application creation wizard. Choose Single-Page App and click Next at the bottom.
On the next screen, you’ll see the default settings provided by the single-page application template. Change the name of the application to something more descriptive, like “Stencil SPA”. Also, change the base URIs and the login redirect URIs settings to use port 3333 because that’s where your application will be running. The rest of the default settings are fine.

Click Done at the bottom.
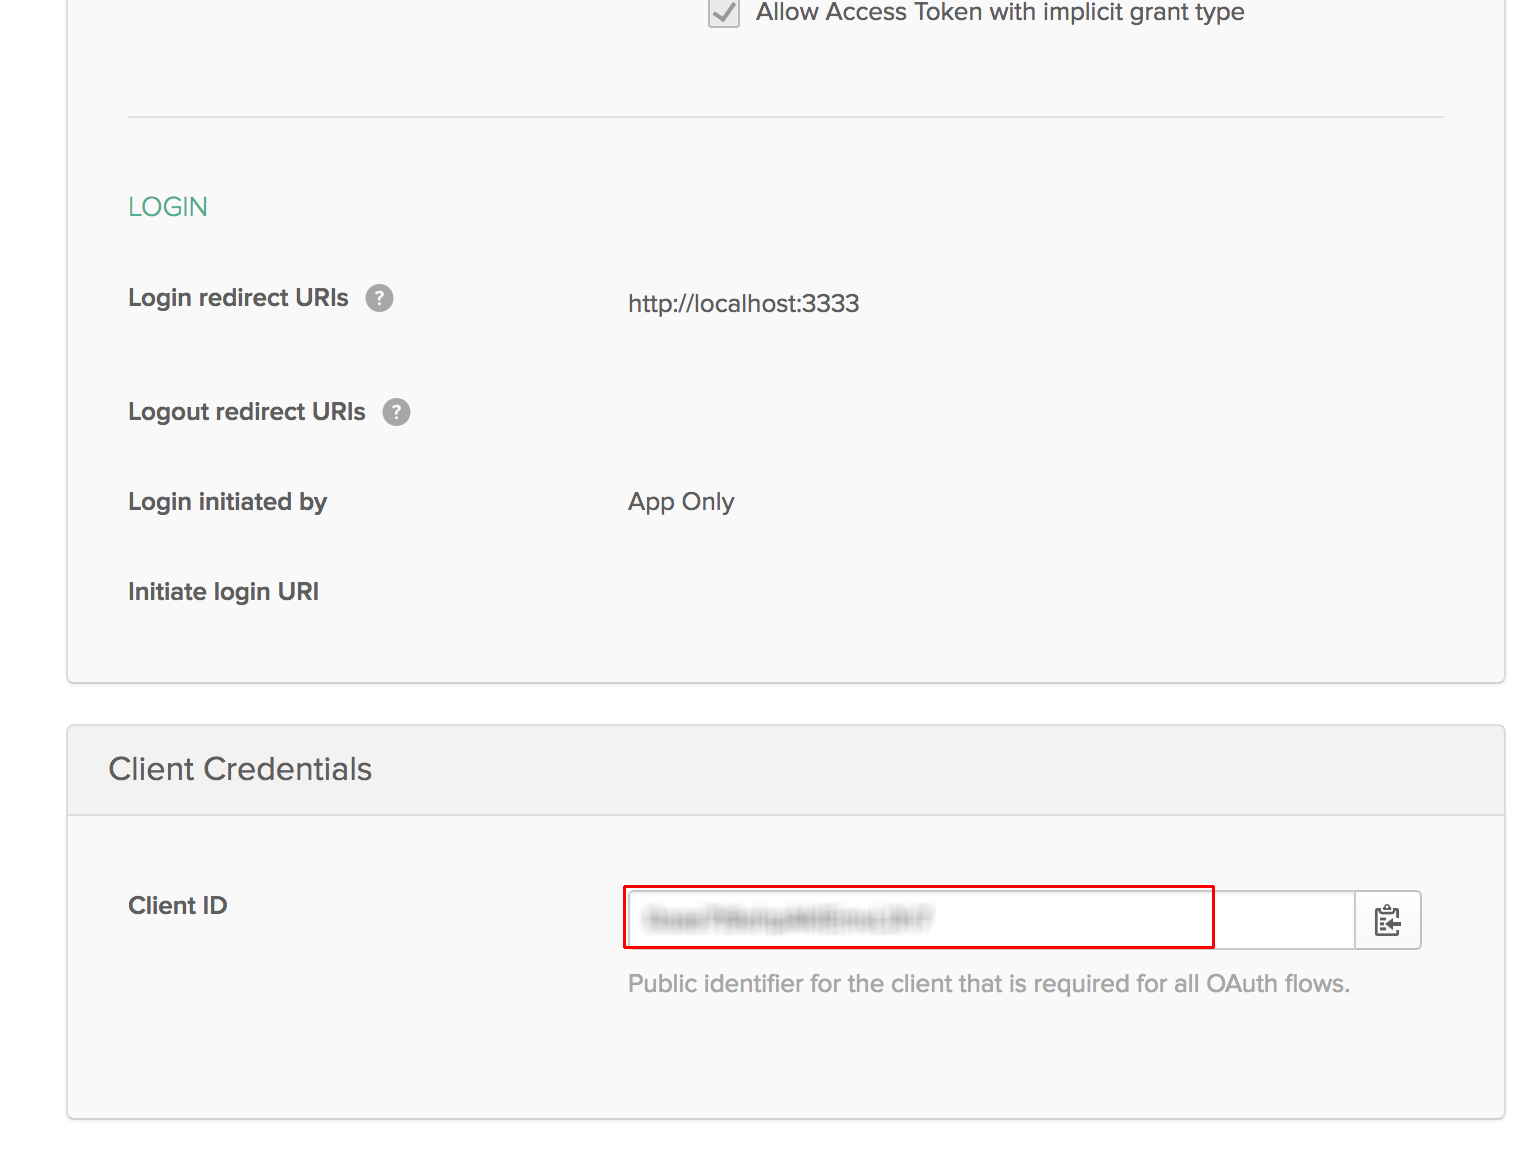
Select your newly created application from the listing, and click on the General tab to view the general settings.

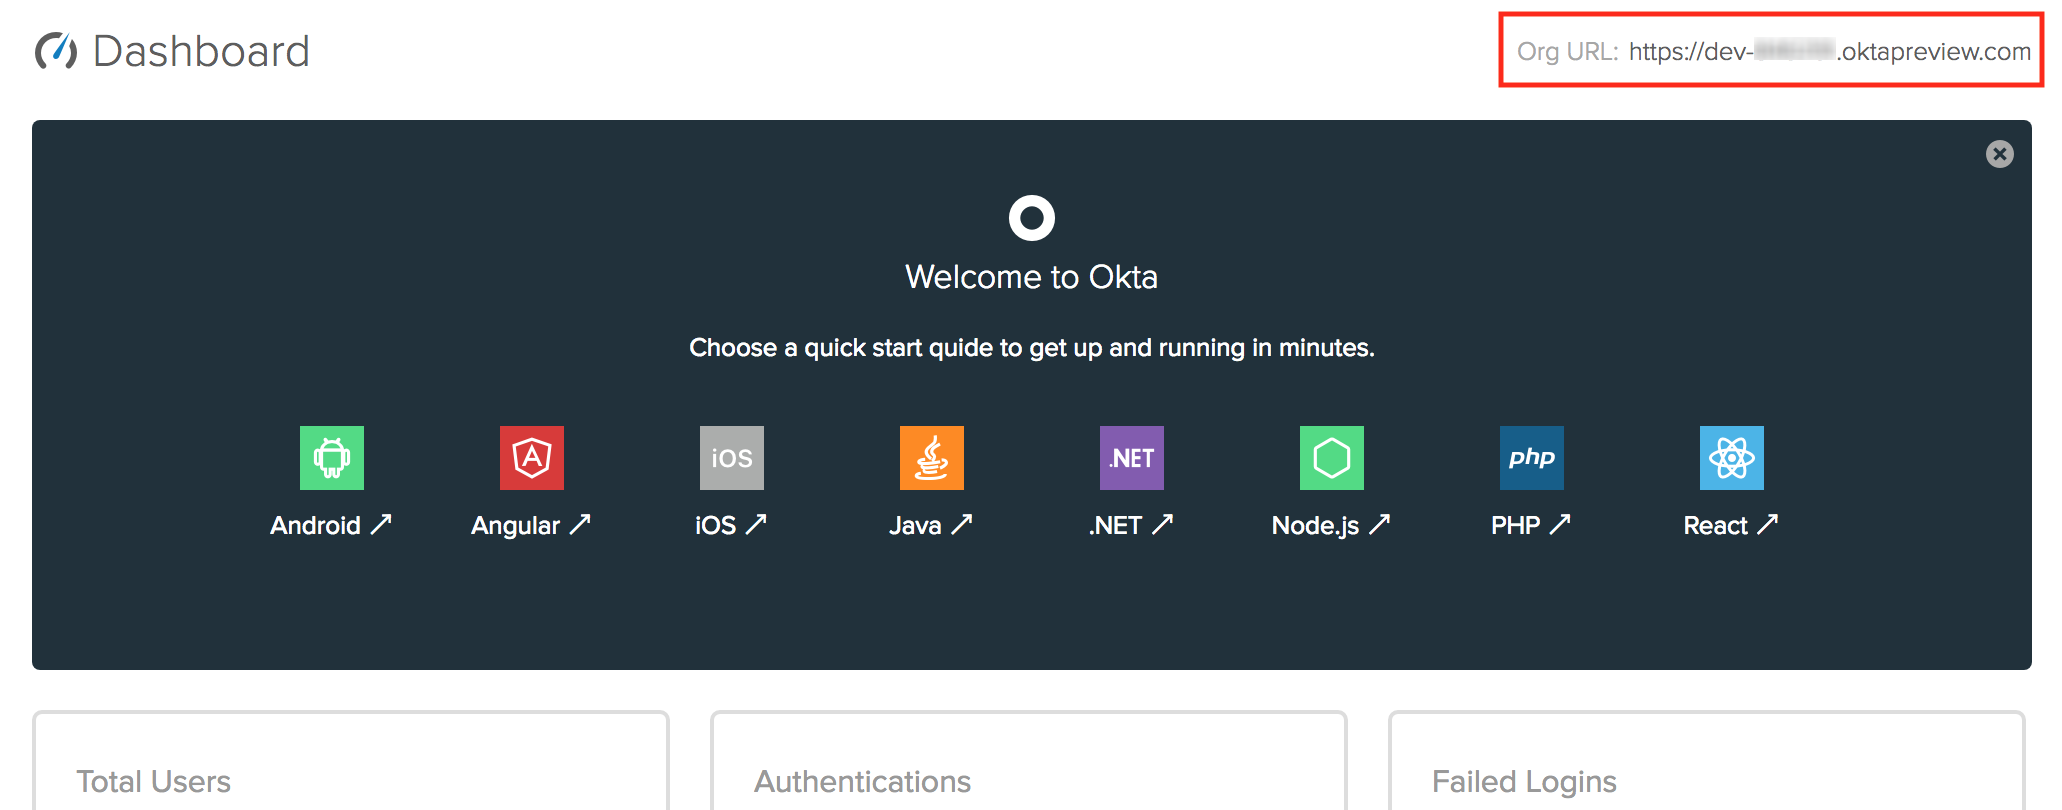
At the bottom, you’ll see a Client ID setting (yours won’t be blurred out, obviously). Copy this to use in your Stencil application. You will also need your Okta organization URL, which you can find at the top right of the dashboard page. It will probably look something like “https://dev-XXXXXX.oktapreview.com”.
Add the Authentication Component
In the components folder, add a new folder called app-auth. This is where your login page component will go. You can call it whatever you want, I’m just following the naming conventions set out by the starter app here. I’d definitely recommend deciding on a naming convention early and sticking with it.
Inside the newly created app-auth folder create two files: app-auth.css and app-auth.tsx. Start by creating the shell of the app-auth.tsx file.
import { Component } from '@stencil/core';

@Component({
  tag: 'app-auth',
  styleUrl: 'app-auth.css'
})
export class AppAuth {
  render() {
    return <div>Hello</div>;
  }
}
If you are like I was, you might be thinking, “What kind of Frankenstein framework is this?”
You’ll notice the @Component decorator over the AppAuth class declaration like Angular, and then a render() method at the bottom like React. To me, that’s the beauty of Stencil. It takes some of the best parts of both popular frameworks and uses them to compile reusable components!
Add a Login Form
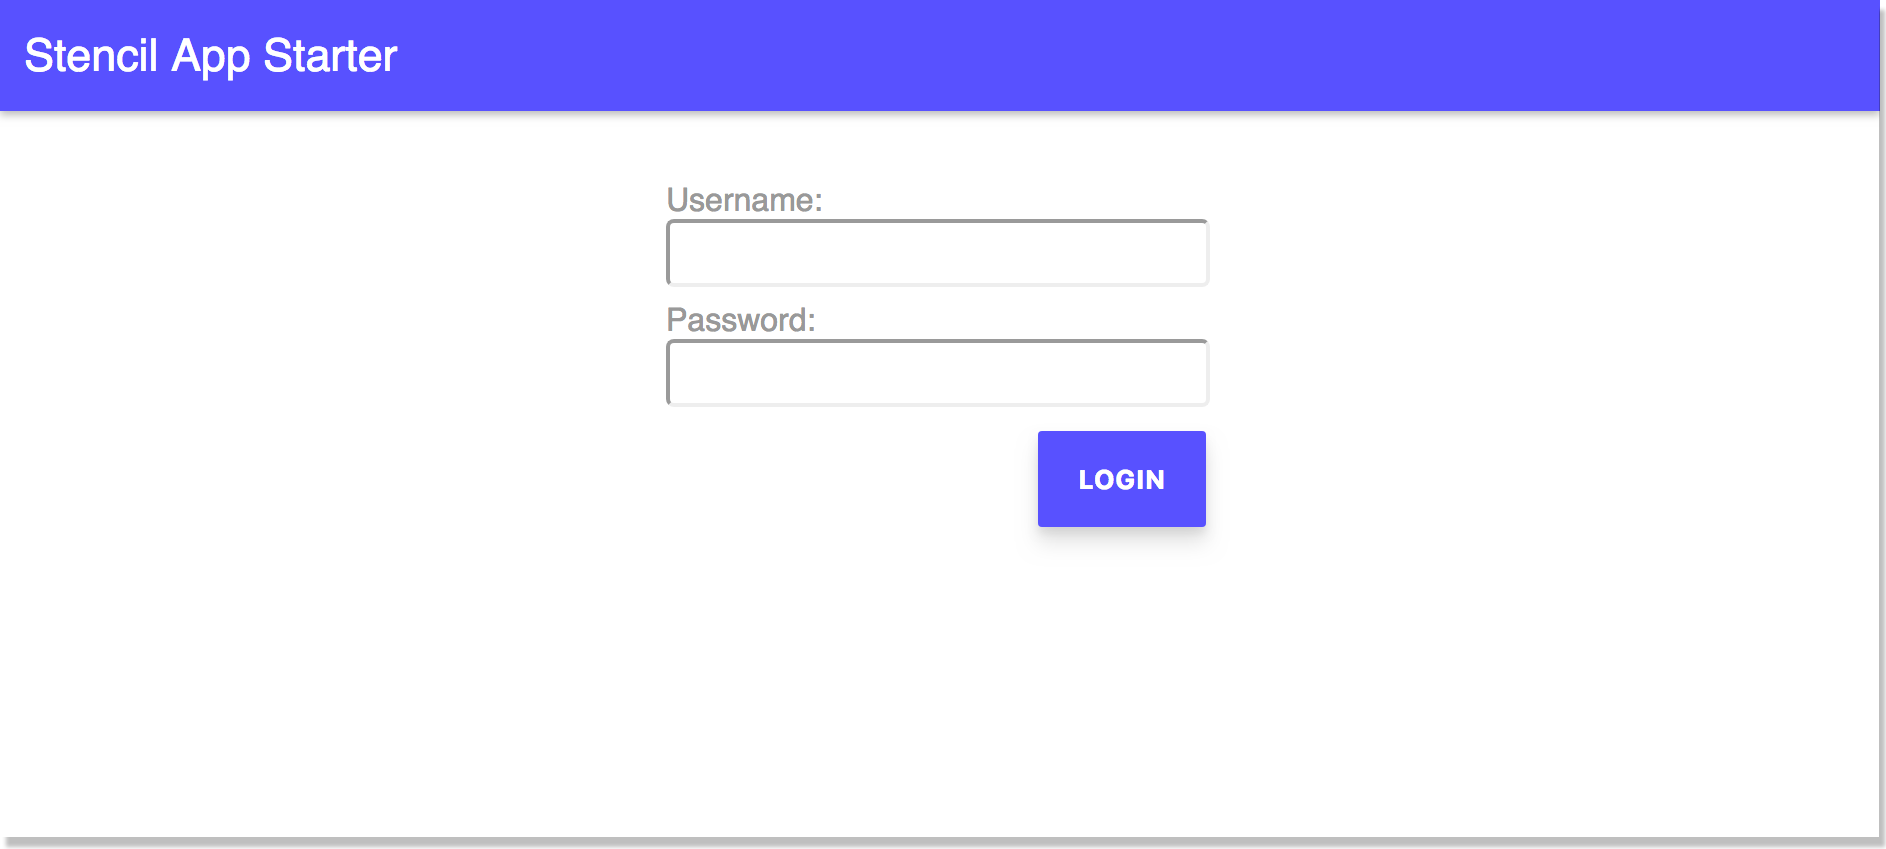
Next, you’ll add the JSX (that’s right, I said it) to the new component. Change the render() method to:
render() {
  return (
    <form class="app-auth">
      <div class="form-item">
        <label>
          Username:
          <input type="text" name="username" autocomplete="username" />
        </label>
      </div>
      <div class="form-item">
        <label>
          Password:
          <input
            type="password"
            name="password"
            autocomplete="current-password"
          />
        </label>
      </div>
      <div class="form-actions">
        <button type="button" onClick={() => this.login()}>
          Login
        </button>
      </div>
    </form>
  );
}
This is just a regular JSX form, but the login button’s onClick event is currently wired to function that doesn’t exist.
Add the Login Method’s Dependencies
Before you create that function, you’ll need to set up the OktaAuth JavaScript object to call the Okta API for authentication. You’ll add the object to the component’s state, so right below the class declaration, add the following line:
@State() authClient: any;
You will also have to import the @State() decorator. This is is used for values related to the internal state of the component. In the first import statement add State to the deconstruction list.
import { Component, State } from '@stencil/core'
You’ll also need to get the username and password values from the form itself, so add an @Element() to the code right below that @State() like you just created, so it read like this:
@State() authClient: any;
@Element() host: HTMLElement;
Then also add the @Element() decorator to the import so it reads:
import { Component, State, Element } from '@stencil/core';
One last thing that the login() function will need is access to the router, so you can redirect the user to their profile page if their authentication is successful. You’ll need a class property, so add it right below the @Element.
@State() authClient: any;
@Element() host: HTMLElement;
@Prop() history: RouterHistory;
To import it, add the @Prop() decorator to the main import and then import the RouterHistory from @stencil/router right below the core import statement. The @Prop decorator is used to define properties that can be passed in to your component. In this case, it’s not a passed in value, but it could be if need be. Your final import section should read:
import { Component, Prop, State, Element, Listen } from '@stencil/core';
import { RouterHistory } from '@stencil/router';
Finally, to use the OktaAuth JavaScript library you brought in from the CDN, add a declaration for it right below the import statements.
declare const OktaAuth: any;
Add the Login Method
Now you included everything you’ll need to get the login function to authenticate users with your Okta organization. First, set up the OktaAuth object in the constructor of the AppAuth class. Right below the property for the RouterHistory object, add:
constructor() {
  this.authClient = new OktaAuth({
    clientId: '{yourClientId}',
    url: 'https://{yourOktaDomain}.com',
    issuer: 'default'
  });
}
You can get your Client ID from that general settings page of your Okta application.
You’ll also need your Okta org URL, from the upper-right side of the Okta dashboard page.
Now everything is set up for the login() function, so you’ll create that next. Right above the render() method, add a login() function.
login() {
  let inputs = this.host.querySelectorAll('input');
  let user = {
    username: inputs[0].value,
    password: inputs[1].value
  };

  return this.authClient.signIn(user)
    .then(res => {
      if (res.status === 'SUCCESS') {
        return this.authClient.token
          .getWithoutPrompt({
            responseType: 'id_token',
            scopes: ['openid', 'profile', 'email'],
            sessionToken: res.sessionToken,
            redirectUri: 'http://localhost:3333'
          })
          .then(token => {
            localStorage.setItem(
              'okta_id_token',
              JSON.stringify(token)
            );
            this.history.push('/profile', {});
          });
      } else {
        throw `Unable to handle ${res.status} status code`;
      }
    })
    .fail(function(err) {
      console.error(err);
    });
}
Since is really the “meat” of the component, I’ll walk you through what’s going on here.
The first thing, is getting all the inputs inside the form element of the component. Then a user object is created with the username and password from their respective inputs.
Next the authClient object is used to call the signIn() method with the user object that was created. It returns a promise, so you handle the then condition by getting the response and check to see if the response’s status is a 200. If it is, call the authClient.token’s getWithoutPrompt() method which also returns a promise. It takes a responseType property which is set to id_token, because that’s what you want to get from Okta. You’ve also asked for three scopes that will give you the openid, profile, and email data associated with the newly authenticated user. The method need the session token returned from the signIn() method’s response. Finally, you’ve told the function to call back to the redirectUri, which was set as a trusted redirect origin in Okta when you created your application.
In the then condition of this promise, you take the id token received and set it in local storage as okta_id_token. If all that worked, the user is redirected to the profile page.
If the response had a status of anything other than 200, it merely throws an error that says it can’t handle any other statuses. Finally, the fail condition for the signIn() method call simply logs any errors to the console.
Simplify Login
While this works, there are two things that would make this component a little nicer: being able to hit enter to log in instead of having to click the login button, and not even showing the login form if the person tries to go the login page when they’re already logged in.
To achieve this, add a method to take the user directly to the profile page if they’re already logged in. Like React components, Stencil components have lifecycle methods. Instead of componentWillMount() for React, Stencil has a componentWillLoad() method, so that’s what you’ll use here.
componentWillLoad() {
  let idToken = localStorage.getItem('okta_id_token');
  if (idToken) {
    this.history.push('/profile', {});
  }
}
Simply put, all you’re doing is reading the token from local storage. If one exists, you’re assuming they are logged in and redirecting them to the profile page.
The last thing that will make this login form easier to use is to add the ability to submit the form with the enter key. Stencil has some built-in listeners for key presses. In this case, use the ‘keydown.enter’ listener. Import the @Listen() decorator in the very top import statement where you imported Component.
import { Component, Prop, State, Element, Listen } from '@stencil/core';
Then add a handler for the ‘keydown.enter’ event just below the componentWillLoad() function.
@Listen('keydown.enter')
handleEnter() {
  this.login();
}
Update the Profile Page
Now that you have a nice login page, update the profile page so that it shows the user’s claims once they’re logged in.
First, you’ll need a type to put the user’s claims in. So create a new file in the app-profile folder called AppUser.tsx. The contents are simple, but long. I simply looked at all the claims in the token stored in localStorage and created an interface that matched it. So the AppUser.tsx file is as follows:
interface AppUser {
  sub: string;
  name: string;
  locale: string;
  email: string;
  ver: number;
  iss: string;
  aud: string;
  iat: number;
  exp: number;
  jti: string;
  amr: string[];
  idp: string;
  nonce: string;
  nickname: string;
  preferred_username: string;
  given_name: string;
  family_name: string;
  zoneinfo: string;
  updated_at: number;
  email_verified: boolean;
  auth_time: number;
}
Once you have a type to declare for your profile’s user object, update the app-profile.tsx file.
The imports at the top should look like:
import { Component, Prop, State } from '@stencil/core';
import { RouterHistory } from '@stencil/router';
Remove the @Prop() line for match and replace is with:
@Prop() history: RouterHistory;
@State() user: AppUser;
@Prop({ context: 'isServer' }) private isServer: boolean;
The isServer property is a special property. Because Stencil supports prerendering and localStorage may not be available during prerender, you’ll need to wrap the localStorage calls in an if(!isServer){} to make sure it will build for production. This shouldn’t stop it from working, it’s just a work around for the build process.
For the componentWillLoad() method, just read in the user information from the ‘okta_id_token’ in local storage:
componentWillLoad() {
  if (!this.isServer) {
    let token = JSON.parse(localStorage.getItem('okta_id_token'));
    if (token) {
      this.user = token.claims;
    } else {
      this.history.push('/login', {});
    }
  }
}
This will be your protector for the profile page as well, it just checks if the token exists. If so, it loads the claims from it. If not, it redirects to the login page.
For the render() method, change it to display the claims in a list.
render() {
  if (this.user) {
  let keys = Object.keys(this.user);
  return <div class="app-profile">
      <h2>User Claims</h2>
      <ul>
        {keys.map(key => <li><span>{key}</span>: {this.user[key]}</li>)}
      </ul>
      <button onClick={this.logout}>
        Logout
      </button>
    </div>;
  }
}
The only thing left is to add the logout() method. This will just remove the token from local storage and reload the page, this will force the componentWillLoad() to redirect the user to the login page.
logout() {
  if (!this.isServer) {
    localStorage.removeItem('okta_id_token');
    location.reload();
  }
}
Set Up the Login Route
The only thing left is to add the route to the login component to the application so that users can get there.
In the components/my-app/my-app.tsx file add the route inside the stencil-router component so that the final section looks like this:
<stencil-router>
  <stencil-route url="/" component="app-home" exact={true} />
  <stencil-route url="/profile" component="app-profile" />
  <stencil-route url="/login" component="app-auth" />
</stencil-router>
You’ll also need to update the route for the link on the home page. In components/app-home/app-home.tsx update the stencil-route-link element’s url to no longer pass in the url parameter.
<stencil-route-link url="/profile">
  <button>
    Profile page
  </button>
</stencil-route-link>
That’s it! You should now be able to run the app, click on the profile page, get redirected to the login page, and be redirected back to the profile page once you’ve logged in. The profile page should show all your claims after you’ve authenticated.
Congratulations, you now have a PWA with authentication in it, ready to go conquer the world!
Add Styles
As extra credit, you might want to add some styling to the login form and the profile page. Below is my style sheet for the login page that goes in app-auth.css:
.app-auth {
  width: 30%;
  margin: 2rem auto;
}
.app-auth .form-item {
  padding: .25rem;
}
.app-auth label {
  width: 100%;
  font-size: 1rem;
  color: #999;
}

.app-auth label input {
  width: 97%;
  border-radius: .25rem;
  font-size: 1.5rem;
}

.app-auth .form-actions {
  text-align: right;
}
Finally, in app-profile.css just some simple styles to bold the label of each item.
.app-profile {
  padding: 10px;
}

.app-profile ul li span {
  font-weight: bold;
}
Now when you run the app, you will see a nicely styled application, ready for the web!
Learn More
To learn more about PWAs, check out Matt Raible’s ultimate guide to PWAs on the Okta developer blog.
If you want to know more about Ionic apps, check out Matt’s blog post about building Ionic apps.
You can learn about building a basic CRUD app with VueJS from Brandon Parise’s post.
Finally, right here you can see how to set up user registration with Node and React!
As always, if you have any questions you can comment below or hit me up on Twitter @leebrandt and don’t forget to follow @OktaDev for great content from our communities + all the news about Okta’s developer platform!
After almost two decades writing software professionally (and a few years unprofessionally before that), Lee Brandt still continues to learn every day. He speaks internationally about software development, from both a technical and business perspective, and loves to teach others what he learns.