Would you like to learn about the most popular computer vision library in the world? You have arrived at the perfect blog for the same. In today’s article, we will learn about the basics of this technology along with its installation and basic usages, such as how we can read, write, or display images in Python using OpenCV. So, let’s get started.
Introduction to OpenCV
Before we delve into its magic and implementations, let’s gain some basic background of OpenCV and see how we can set it up on our system.
Definition
OpenCV, or Open Source Computer Vision Library, is a powerful tool for processing images and videos. It provides functions and algorithms for tasks like object detection, face recognition, and image enhancement. OpenCV is widely used in fields such as robotics, augmented reality, and medical imaging for its versatility and efficiency.
Features
Let’s walk together through some of the specialities of this useful library.
- OpenCV provides a wide range of tools for editing and studying images and videos.
- It has methods for finding and identifying objects in pictures or videos.
- OpenCV works together with machine learning systems to do things like figuring out what’s in an image or making predictions.
- It gives tools to adjust cameras, which is important for getting precise measurements and using computer vision.
- OpenCV has a simple interface that anyone, whether new or experienced, can use.
Installation
Now that you are familiar with the library, let’s see how we can install it on our system. You can put OpenCV on your computer using pip, a popular tool for getting Python stuff. Just open up your terminal or command prompt and type:
pip install opencv-python
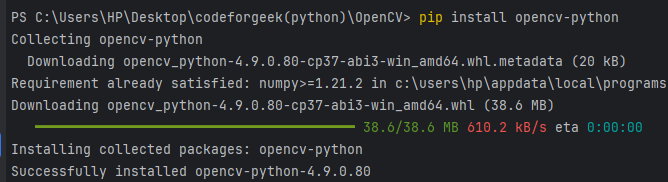
To verify the installation, we can run the provided program to check the version:
import cv2
print(cv2.__version__)

Let’s see how we can implement reading, writing, and displaying images one by one.
Reading Images Using OpenCV cv2.imread()
The imread() function is like a door opener for images in Python. It helps to read an image from your computer and bring it into your code. Once the image is read, you can explore it, edit it, or perform various operations on it using Python.
Let’s understand with an example:
import cv2

image = cv2.imread('puppy.jpg')
print("Image dimensions:", image.shape)
This code loads an image of a puppy named ‘puppy.jpg‘, and then prints its dimensions, giving us information about its width, height, and the number of color channels.
Output:

Writing Images Using OpenCV cv2.imwrite()
The imwrite() function is like a saving button for images in Python. It helps you to save an image processed or created in your code back to your computer. You can specify the file name and format (like JPEG or PNG) to store the image for later use or sharing.
Let’s relate this with an example:
import cv2
# Read an image from file
image = cv2.imread('puppy.jpg')
# Write the image to a new file
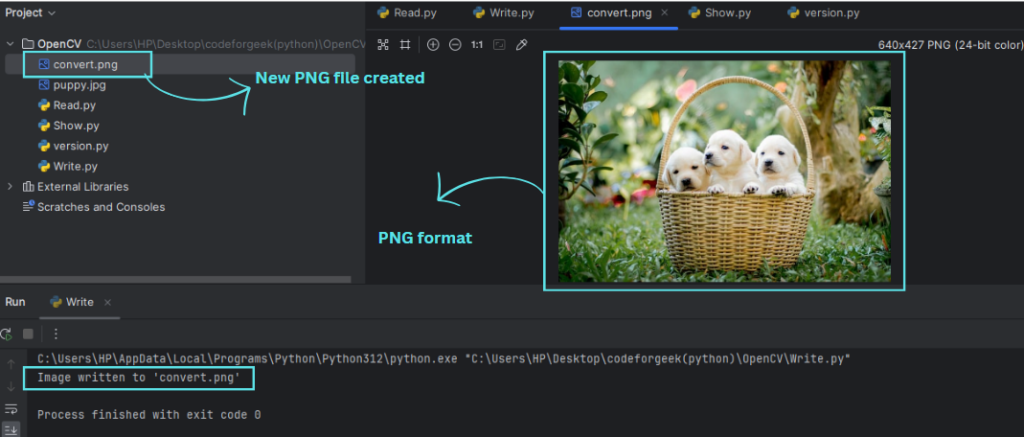
cv2.imwrite('convert.png', image)
print("Image written to 'convert.png'")
This code reads the ‘puppy.jpg‘ and then saves it as ‘convert.png‘, effectively converting the image format from JPEG to PNG.
Output:
Displaying Images Using OpenCV cv2.imshow()
The imshow() function is like a window to view images in Python. It displays the image loaded in your code on your computer screen, allowing you to see the image and any changes you’ve made to it. Once the window appears, you can interact with it or close it as needed.
Let’s look at an example:
import cv2
# Read an image from file
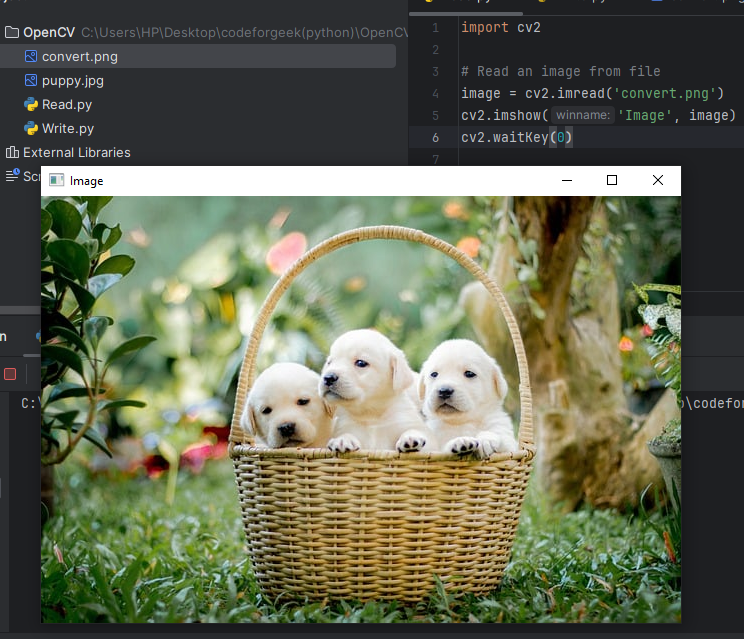
image = cv2.imread('convert.png')
cv2.imshow('Image', image)
cv2.waitKey(0)
This code reads the ‘convert.png‘ and displays it in a window titled ‘Image‘, allowing you to view the image until a key is pressed.
Output:
Summary
And yes, this is it for the first chapter of OpenCV where we covered the basics of reading, writing, and displaying images using it. We have also learned the importance of OpenCV and gained knowledge about how we can install and set it up. Additionally, we explained that using its methods, we can also convert file formats like JPEG to PNG and vice versa. Hope you followed along well.
Read More:
Reference
https://docs.opencv.org/4.9.0/