How to Install sFTPGo on Rocky Linux
sFTPGo is a highly configurable SFTP server with additional secure protocols such as HTTP/S, FTP/S, and WebDAV support. It allows you to create FTP servers with several backends, such as local filesystems, and third-party storage providers such as Amazon S3, Google Storage Engine, and Azure Blog Storage.
FTP provides a secure way for sending and receiving files via multiple protocols. It supports virtual folders, supports database backends such as SQLite, MariaDB, and PostgreSQL, provides REST API, supports two-factor authentications, and many more.
In this tutorial, we will create a secure FTP server with modern FTP server software sFTPGo on a Rocky Linux server. You will also learn how to enable Webdav on sFTPGo.
Prerequisites
You will the following requirements to complete this tutorial:
- A Rocky Linux server - You can use Rocky Linux v8 or v9.
- A non-root user with sudo/root privileges enabled.
- A domain name pointed to the server IP address - especially for the production.
Installing sFTPGo
sFTPGo is modern and fully featured FTP server software that supports multiple security protocols such as FTP/S, Webdav, and HTTP/S. It also supports multiple backend databases that include PostgreSQL, MySQL, and SQLite (default).
sFTPGo also can be integrated with multiple backends to serve files for users, including local filesystems (which can be encrypted), cloud storage services such as Google Cloud Storage, Azure Blob Storage, and Amazon S3.
There are multiple ways to install the sFTPGo to the Rocky Linux server. You can choose one that is suitable for your deployment.
Installing via DNF
The sFTPGo provides its repository for multiple Linux distributions, including Debian, Ubuntu, CentOS/RockyLinux/AlmaLinux.
On Rocky Linux, you can install sFTPGo via the DNF package manager.
Run the following command to add the sFTPGo repository to your Rocky Linux server.
ARCH=`uname -m`
curl -sS https://ftp.osuosl.org/pub/sftpgo/yum/${ARCH}/sftpgo.repo | sudo tee /etc/yum.repos.d/sftpgo.repo
Now, update and refresh your package repository via the dnf command below.
sudo dnf update
Once the package update is installed, run the dnf command below to install the sFTPGo package.
sudo dnf install sftpgo
When prompted to confirm the installation, input Y and press ENTER to proceed.
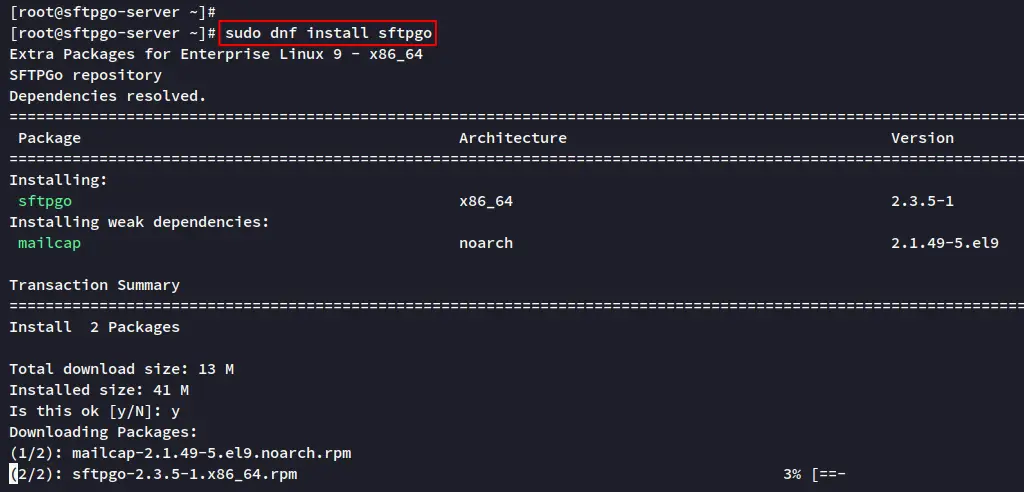
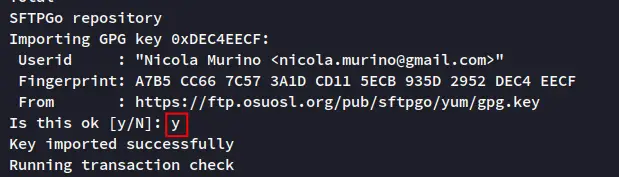
Additionally, if you get the prompt for accepting the GPG keys of the sFTPGo repository, input y again.
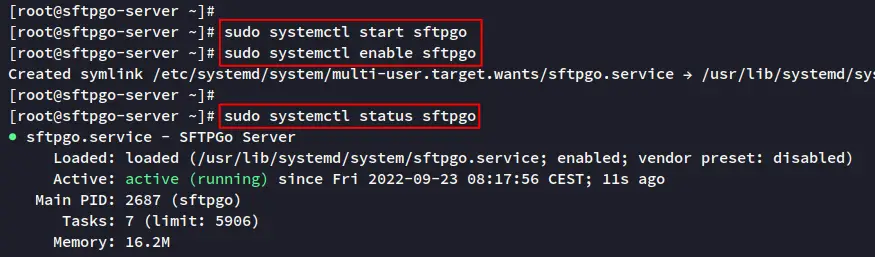
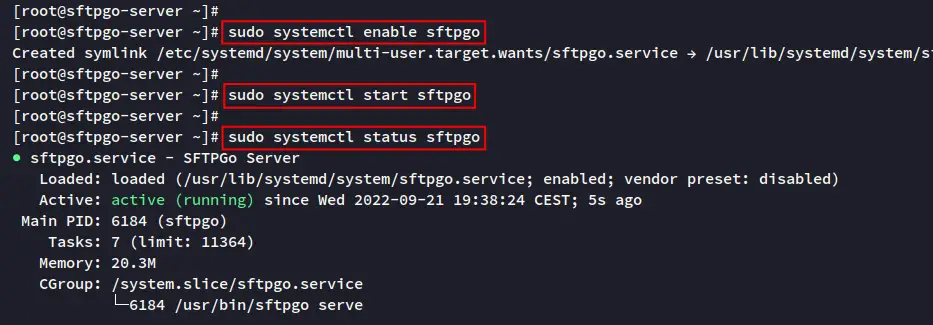
After the sFTPGo is installed, run the following command to start and enable the "sftpgo" service. This will run the sFTPGo service and enable it t run automatically at system boot.
sudo systemctl start sftpgo
sudo systemctl enable sftpgo
Lastly, run the following systemctl command to verify the sFTPGo service. If your installation is successful, you will see the FTP service is running.
sudo systemctl status sftpgo
Installing via RPM
Another way to install the sFTPGo to the Rocky Linux server is by downloading the RPM package of sFTPGo from the GitHub repository and installing it via the RPM command.
The sFTPGo provides binary packages .deb for Debian/Ubuntu users and the binary package .rpm for CentOS/RockyLinux users.
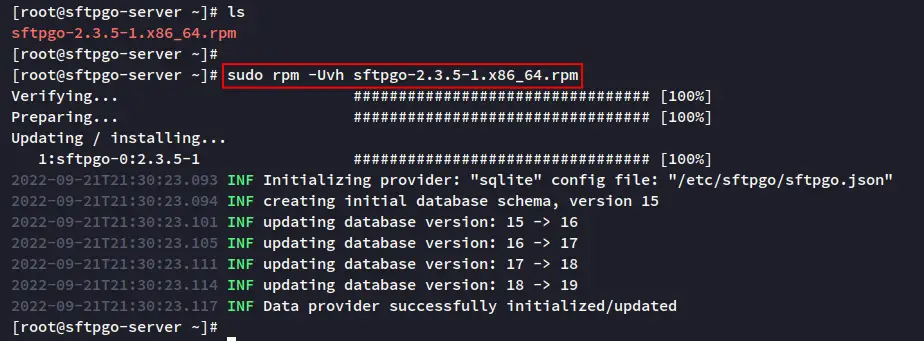
Download the sFTPGo rpm file via the wget command below. The "VER" variable is the latest version of the sFTPGo package.
At the time of this writing, the latest version of sFTPGo is v2.3.5. So you should see the new file "sftpgo-2.3.5-1.x86_64.rpm" on your current working directory.
VER=$(curl -s https://api.github.com/repos/drakkan/sftpgo/releases/latest|grep tag_name | cut -d '"' -f 4 |sed 's/v//g')
wget https://github.com/drakkan/sftpgo/releases/download/v$VER/sftpgo-$VER-1.x86_64.rpm
After downloading sFTPGo, run the following command to install the RPM file "sftpgo-2.3.5-1.x86_64.rpm".
sudo rpm -Uvh sftpgo-2.3.5-1.x86_64.rpm
When the installation is finished, you will see output like the following:
Next, run the systemctl command below to start and enable the sFTPGo service. The service should be running and also will be automatically executed during the system boot.
sudo systemctl enable sftpgo
sudo systemctl start sftpdgo
Now verify the sFTPGo service via the systemcyl command below. You should see the sFTPGo service is running on your Rocky Linux system.
sudo systemctl status sftpdgo
Setting up Firewalld
The sFTPGo is an FTP server software that can be used with multiple protocols. This flexibility allows clients to use their preferred applications to access their files.
Clients can access their files via FTP clients such as FileZilla, or using the web browser via secure HTTP/HTTPS protocol, or their file manager with Webdav protocol.
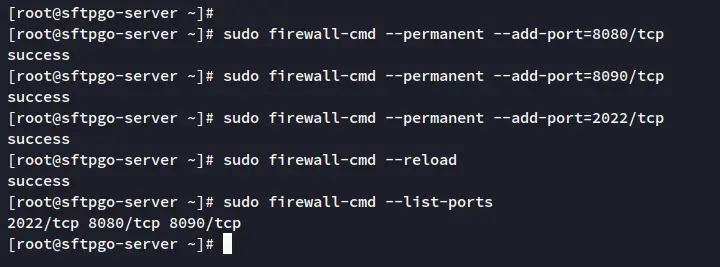
Below are some sFTPGo ports that you need to open for client and administrator access.
Protocol     Port       Access via
-----------------------------------
TCP          8080       HTTP/HTTPS
TCP          2022       SFTP
TCP          8090       Webdav
Run the following firewall-cmd commands to add sFTPGo ports to the firewalld.
sudo firewall-cmd --permanent --add-port=8080/tcp
sudo firewall-cmd --permanent --add-port=8090/tcp
sudo firewall-cmd --permanent --add-port=2022/tcp
Now reload the Firewall rules using the command below.
sudo firewall-cmd --reload
Lastly, verify the sFTPGo ports and make sure ports are added.
sudo firewall-cmd --list-ports
You should see ports for sFTPGo are added.
Setting up sFTPGo
After you have installed the sFTPgo and configured Firewalld, you will set up the sFTPGo installation. This includes enabling protocols like HTTP/HTTPS, SFTP, and WebDAV. Also, the sFTPGo is secured via SSL certificates.
Before you set up sFTPGo, ensure you have the SSL/TLS certificates ready. You can use free SSL from Letsencrypt.
Edit the default sFTPGo config file "/etc/sftpgo/sftpgo.json" using nano editor.
sudo nano /etc/sftpgo/sftpgo.json
The SFTP is enabled by default on the sFTPGo, which will be running on the TCP port 2022.
Move to the "webdavd" option and input the port "8090", enable the HTTP, then input the path SSL certificates. Also, you can change the IP address for the webdavd protocol with your internal IP address.
  "webdavd": {
    "bindings": [
      {
        "port": 8090,
        "address": "",
        "enable_https": true,
        "certificate_file": "/etc/letsencryt/live/sftp.hwdomain.io/fullchain.pem",
        "certificate_key_file": "/etc/letsencryt/live/sftp.hwdomain.io/privkey.pem",
        "min_tls_version": 12,
        "client_auth_type": 0,
        "tls_cipher_suites": [],
        "prefix": "",
        "proxy_allowed": [],
        "client_ip_proxy_header": "",
        "client_ip_header_depth": 0
      }
    ],
Next, move to the "httpd" option and enable the secure HTTPS support, then input the path of SSL certificates. You can also specify the IP address of the "httpd" option if you have multiple IP addresses.
  "httpd": {
    "bindings": [
      {
        "port": 8080,
        "address": "",
        "enable_web_admin": true,
        "enable_web_client": true,
        "enabled_login_methods": 0,
        "enable_https": true,
        "certificate_file": "/etc/letsencryt/live/sftp.hwdomain.io/fullchain.pem",
        "certificate_key_file": "/etc/letsencryt/live/sftp.hwdomain.io/privkey.pem",
        "min_tls_version": 12,
        "client_auth_type": 0,
        "tls_cipher_suites": [],
        "proxy_allowed": [],
        "client_ip_proxy_header": "",
        "client_ip_header_depth": 0,
        "hide_login_url": 0,
        "render_openapi": true,
        "web_client_integrations": [],
Save the file and exit your editor if you are finished.
Lastly, restart the sFTPGo service to apply new changes via the systemctl command below.
sudo systemctl restart sftpgo
You now have the sFTPGo up and running on the Rocky Linux server. And you have enabled multiple protocols for clients, which include the SFTP (enabled by default), WebDAV, and the httpd. All of these protocols are also secured via SSL certificates.
Setting up sFTPGo User
After you finished the sFTPGo installation, you must set up the admin user via the "httpd" protocol that runs on the default port 8080. Also, you will create a new user in sFTPGo via the administration dashboard.
Open the web browser and visit the URL domain name of your sFTPGo installation (i.e: https://sftp.hwdomain.io"8080/).
On the first screen, you will be asked to create a new admin user for sFTPGo. Input the details admin user and password, then click "Create admin".
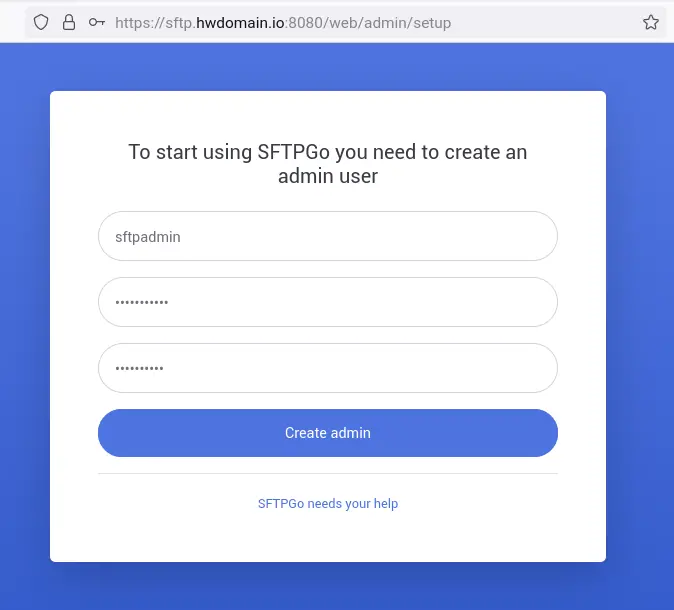
And now you should see the administration dashboard of sFTPGo.
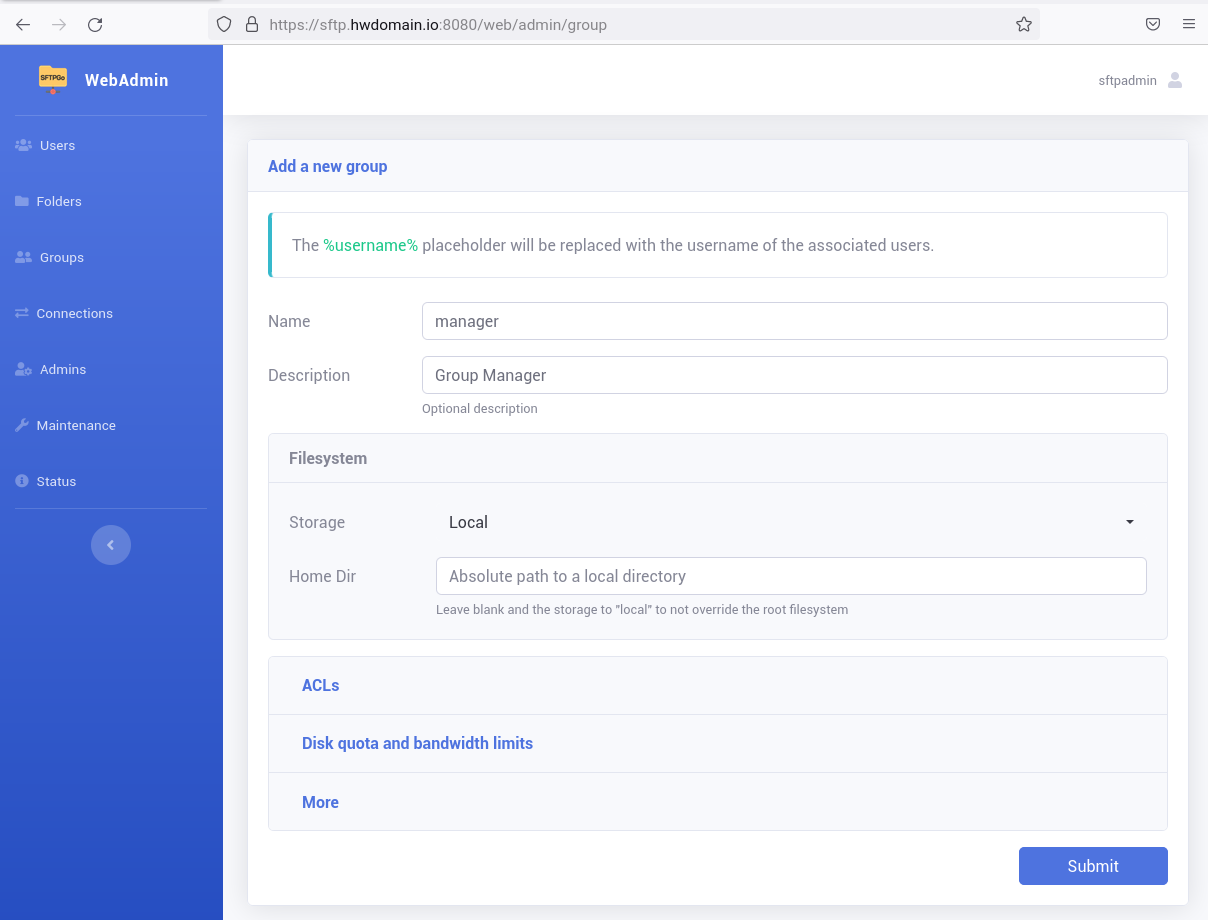
Next, You will create a new group for your sFTPGo users.
Click on the 'Groups" menu on the left side, then input the new group name and description, then click "Submit". In this example, you will create a new group with the name "manager", and also you can add additional configurations such as ACLs (Access Control Lists) and set up specific disk quota and bandwidth for every group.
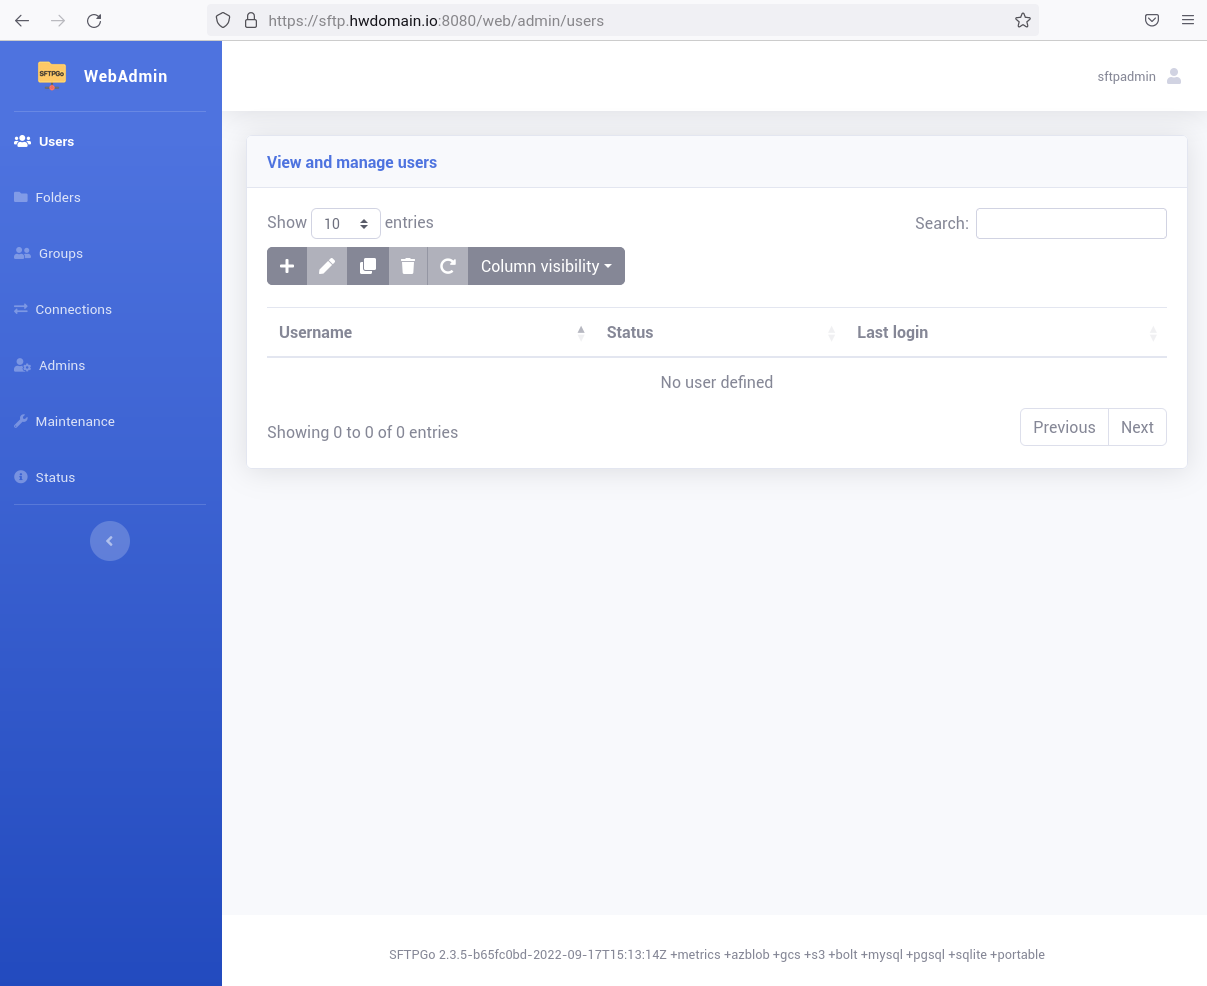
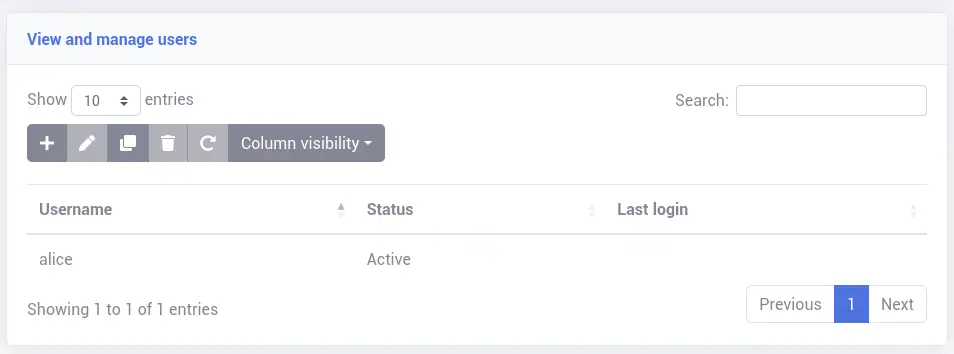
After the group is created, click on the "Users" menu on the left side to create a new user.
Input details username and password and the group, then click "Submit" to proceed. In this example, you will create a new user "alice" with the primary group "manager".

Now, you should see the list of users on the sFTPGo administration dashboard.
Now you have created a sFTPGo user. Next, learn how users can access or upload files to the sFTPGo via multiple clients, which includes the sFTPGo WebClient (via httpd), FileZilla (via SFTP), or using a file manager (via Webdav).
Connecting via SFTP and FileZilla
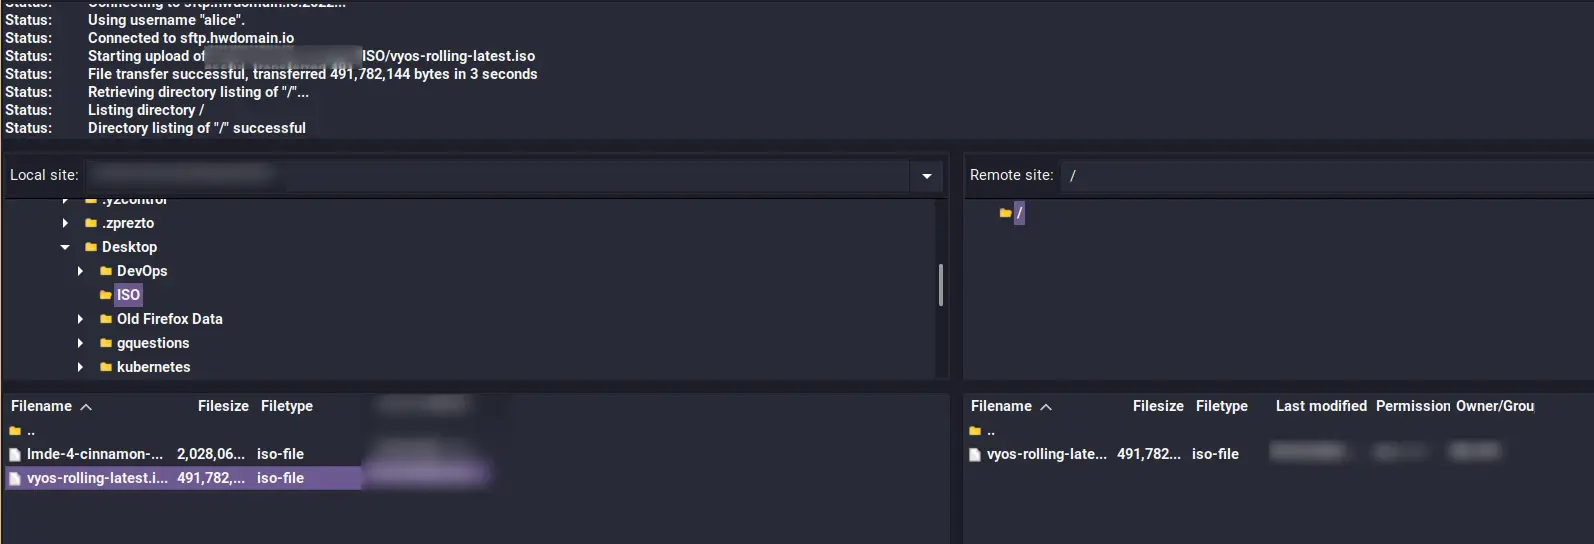
In the first example here, you will learn how to connect as a client to the sFTPGo server via the FileZilla and SFTP protocol. So, before you start, ensure the FTP client FileZilla is installed on your local computer.
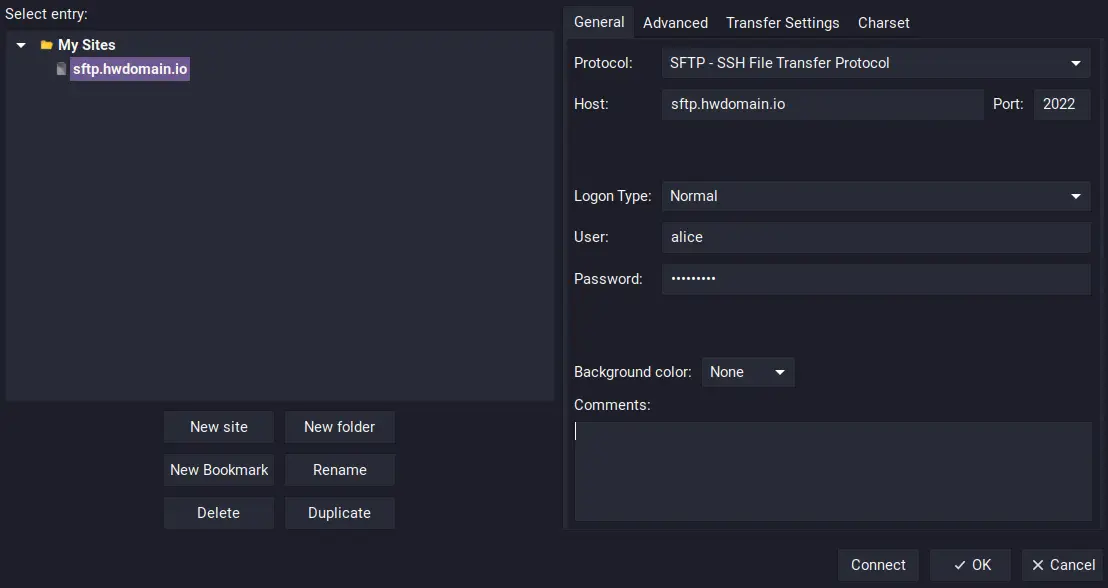
Now open the FileZilla application and click the "File" menu and select "Site Manager" - or you can just press "Ctrl+S".
Click "New site" and input details user, password, and the SFTP server IP address or domain name and the port.
- Protocol: SFTP - SSH File Transfer Protocol
- Host: sftp.hwdomain.io
- Port: 2022
- Logon Type: Normal
- User: alice
- Password: YourPassword
Click "Connect" to confirm and connect to the SFTP server.
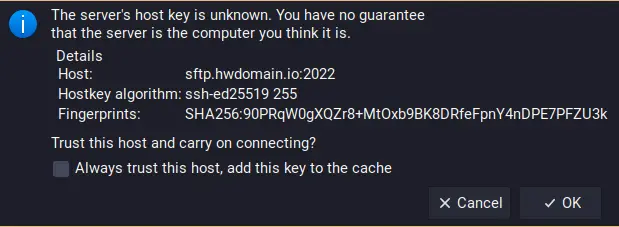
Now you will be prompted to confirm the certificate of your SFTP server, click "OK" to confirm.
After you have connected via SFTP protocol, you can try to upload the file to your sFTPGo server. The example below shows that the ISO file is uploaded to the sFTPGo server via the FileZilla client.
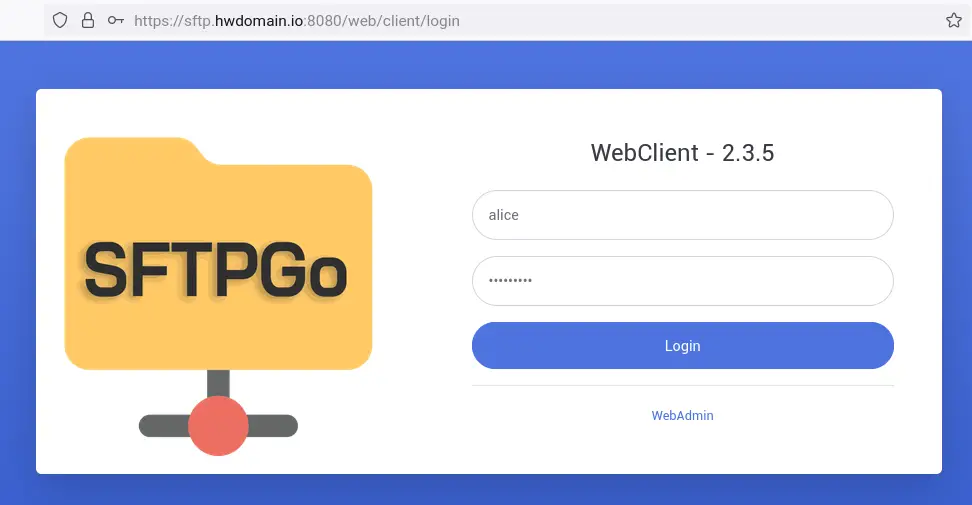
Accessing via sFTPGo WebClient
By default, the sFTPGo provides clients with access via the WebClient that runs on the "httpd" port 8080. With the sFTPGo WebClient, you can upload and manage your files, set up additional two-factor authentication and share files between users within the sFTPGo server.
Open the web browser and visit the domain name of your sFTPGo installation with the httpd port "8080" and path like this (i.e: https://sftp.hwdomain.io:8080/web/client/login). You should get the login page for client access.
Input the username "alice" and password, then click "Login".
If the username and password is correct, you should see the sFTPGo user dashboard. Also, you can see the ISO file that was just uploaded via FileZilla and SFTP before.
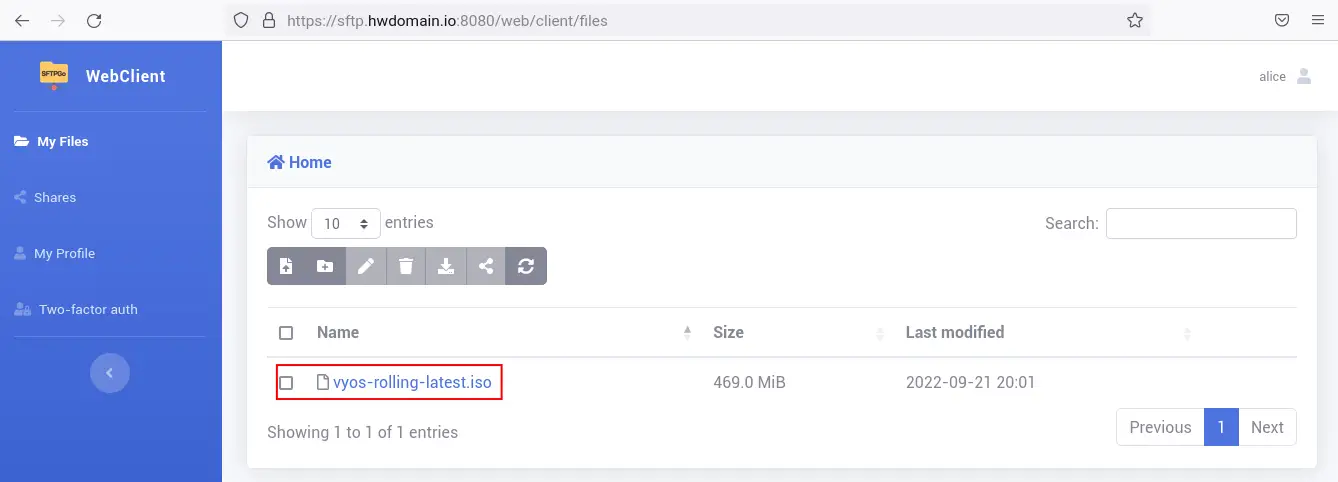
You can also upload files via the WebClient and add additional two-factor authentication or share file with other users via the sFTPGo WebClient.
Connecting to sFTPGo via Webdav
To connect via WebDAV protocol, you can use the file manager on your computer. For Windows, you can use File Explored; for Linux users you can use Nautilus, Thunar, or Dolphin, and for macOS users, you can use the official file manager.
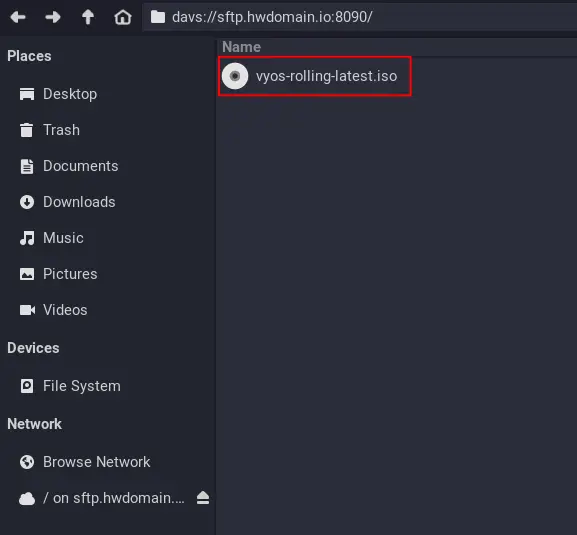
You can use the WebDAV address on the file manager you are using, such as "davs://sftp.hwdomain.io:8090/". The "davs" is the secure version of the "dav" Webdav protocol.
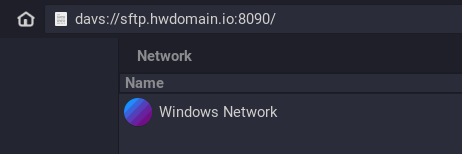
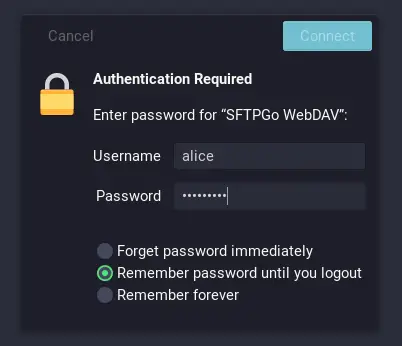
Now you will be prompted for the username and password. Input the user alice with your password, then click "Connect".
Once you are connected, you should see the Webdav protocol is added to the Network section. In this example, you can see the ISO file uploaded via the SFTP protocol and FileZilla.
Conclusion
In this tutorial, you have set up a modern and secure FTP server with sFTPGo on a Rocky Linux server. You also have configured the sFTPGo with multiple protocols, SFTP, httpd, and Webdav, and enabled the secure connections.
Through the end of this tutorial, you also learned how to connect to the sFTPGo server via multiple client applications, using FileZilla with SFTP protocol, using the sFTPGo WebClient with secure HTTPS connections, and using file manager with Webdav/s.

