How to Install and Secure phpMyAdmin on Alma Linux 8
phpMyAdmin is a free and open-source database management application for MySQL and MariaDB. It allows you to manage, perform various database-related tasks, and execute queries from a web-based interface. It is written in PHP and provides a robust and user-friendly interface for managing databases via a web browser. It is cross-platform and can run on many operating systems, including Windows, macOS, Linux, and BSDs.
In this tutorial, you will learn how to install phpMyAdmin on Alma Linux 8.
Prerequisites
- A server running Alma Linux 8.
- Valid domain name pointed with your server IP.
- A root password is configured on the server.
Install LEMP Server
First, install the Nginx web server and MariaDB database server with the following command:
dnf install nginx mariadb -y
Next, install the Remi PHP repository with the following command:
dnf -y install http://rpms.remirepo.net/enterprise/remi-release-8.rpm
Next, disable the default PHP module and enable the Remi PHP module with the following command:
dnf module -y reset php
dnf module install php:remi-7.4 -y
Next, install PHP with other required extensions using the following command:
dnf install php php-cli php-common php-fpm php-curl php-gd php-mbstring php-process php-snmp php-xml php-zip php-memcached php-mysqlnd php-json php-mbstring php-pdo php-pdo-dblib php-xml unzip wget -y
Once all the packages are installed, edit the PHP-FPM configuration file:
nano /etc/php-fpm.d/www.conf
Change the user and group from apache to Nginx:
user = nginx
group = nginx
Save and close the file then start and enable the Nginx, MariaDB, and PHP-FPM services with the following command:
systemctl start nginx php-fpm mariadb
systemctl enable nginx php-fpm mariadb
Create a User for phpMyAdmin
Next, it is recommended to create a separate user for phpMyAdmin to perform all database management tasks. First, secure the MariaDB by running the following command:
mysql_secure_installation
This script will set a root password, remove anonymous users, disallow root login remotely and remove the test database as shown below:
Set root password? [Y/n] n
Remove anonymous users? [Y/n] y
Disallow root login remotely? [Y/n] y
Remove test database and access to it? [Y/n] y
Reload privilege tables now? [Y/n] y
Next, log in to the MariaDB with the following command:
mysql
Once you are logged in, create a database and user with the following command:
MariaDB [(none)]> CREATE DATABASE phpmyadmin CHARACTER SET utf8 COLLATE utf8_unicode_ci;
MariaDB [(none)]> CREATE USER 'phpmyadmin'@'%' IDENTIFIED BY 'password';
Next, grant all privileges to the admin user:
MariaDB [(none)]> GRANT ALL PRIVILEGES ON *.* TO 'phpmyadmin'@'%';
Next, flush the privileges and exit from the MariaDB console with the following command:
MariaDB [(none)]> FLUSH PRIVILEGES;
MariaDB [(none)]> EXIT;
Install phpMyAdmin on Alma Linux 8
Next, download the latest version of phpMyAdmin from their official website:
wget https://files.phpmyadmin.net/phpMyAdmin/5.1.3/phpMyAdmin-5.1.3-all-languages.zip
Once the download is completed, unzip the downloaded file with the following command:
unzip phpMyAdmin-5.1.3-all-languages.zip
Next, move the extracted directory to the Nginx web root directory:
mv phpMyAdmin-5.1.3-all-languages /usr/share/nginx/phpmyadmin
Next, copy the sample configuration file using the following command:
cp /usr/share/nginx/phpmyadmin/config{.sample,}.inc.php
Next, edit the configuration file using the following command:
nano /usr/share/nginx/phpmyadmin/config.inc.php
Define your secret as shown below:
$cfg['blowfish_secret'] = 'securekey';
Save and close the file then change the ownership of the phpMyAdmin directory:
chown -R nginx:nginx /usr/share/nginx/phpmyadmin
chown -R nginx:nginx /var/lib/php/session/
Configure Nginx for phpMyAdmin
Next, you will need to create an Nginx virtual host configuration file for phpMyAdmin. You can create it with the following command:
nano /etc/nginx/conf.d/phpmyadmin.conf
Add the following lines:
server {
    listen       80;
    server_name  phpmyadmin.example.com;
    root         /usr/share/nginx/phpmyadmin;

    access_log /var/log/nginx/phpmyadmin_access.log;
    error_log /var/log/nginx/phpmyadmin_error.log;

    index   index.php;

    location / {
        try_files    $uri $uri/ /index.php?$args;
    }
    location ~ \.php$ {
         try_files $uri =404;
         fastcgi_intercept_errors on;
         include        fastcgi_params;
         fastcgi_param  SCRIPT_FILENAME  $document_root$fastcgi_script_name;
         fastcgi_pass unix:/run/php-fpm/www.sock;
     }
}
Save and close the file then verify the Nginx for any syntax configuration error with the following command:
nginx -t
You will get the following output:
nginx: the configuration file /etc/nginx/nginx.conf syntax is ok
nginx: configuration file /etc/nginx/nginx.conf test is successful
Next, restart the Nginx service to apply the changes:
systemctl restart nginx php-fpm
You can now verify the Nginx status using the following command:
systemctl status nginx
You should see the following output:
? nginx.service - The nginx HTTP and reverse proxy server
   Loaded: loaded (/usr/lib/systemd/system/nginx.service; disabled; vendor preset: disabled)
  Drop-In: /usr/lib/systemd/system/nginx.service.d
           ??php-fpm.conf
   Active: active (running) since Fri 2022-04-15 10:06:39 UTC; 3s ago
  Process: 85445 ExecStart=/usr/sbin/nginx (code=exited, status=0/SUCCESS)
  Process: 85443 ExecStartPre=/usr/sbin/nginx -t (code=exited, status=0/SUCCESS)
  Process: 85442 ExecStartPre=/usr/bin/rm -f /run/nginx.pid (code=exited, status=0/SUCCESS)
 Main PID: 85449 (nginx)
    Tasks: 2 (limit: 11412)
   Memory: 3.8M
   CGroup: /system.slice/nginx.service
           ??85449 nginx: master process /usr/sbin/nginx
           ??85450 nginx: worker process

Apr 15 10:06:39 linux systemd[1]: nginx.service: Succeeded.
Apr 15 10:06:39 linux systemd[1]: Stopped The nginx HTTP and reverse proxy server.
Apr 15 10:06:39 linux systemd[1]: Starting The nginx HTTP and reverse proxy server...
Apr 15 10:06:39 linux nginx[85443]: nginx: the configuration file /etc/nginx/nginx.conf syntax is ok
Apr 15 10:06:39 linux nginx[85443]: nginx: configuration file /etc/nginx/nginx.conf test is successful
Apr 15 10:06:39 linux systemd[1]: nginx.service: Failed to parse PID from file /run/nginx.pid: Invalid argument
Apr 15 10:06:39 linux systemd[1]: Started The nginx HTTP and reverse proxy server.
Configure Firewall
Next, you will need to allow HTTP service through the firewall. You can allow it with the following command:
firewall-cmd --permanent --zone public --add-service http
Next, reload the firewall to apply the changes:
firewall-cmd --reload
Access phpMyAdmin Web UI
Now, open your web browser and access the phpMyAdmin using the URL http://phpmyadmin.example.com. You should see the phpMyAdmin login page:
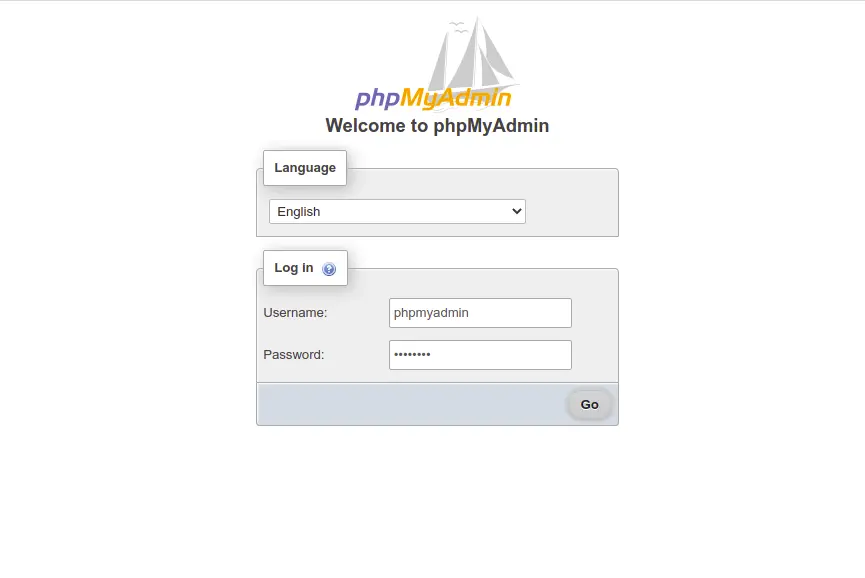
Provide your admin username, password, and click on the Go button. Once you are logged in, you should see the phpMyAdmin dashboard:
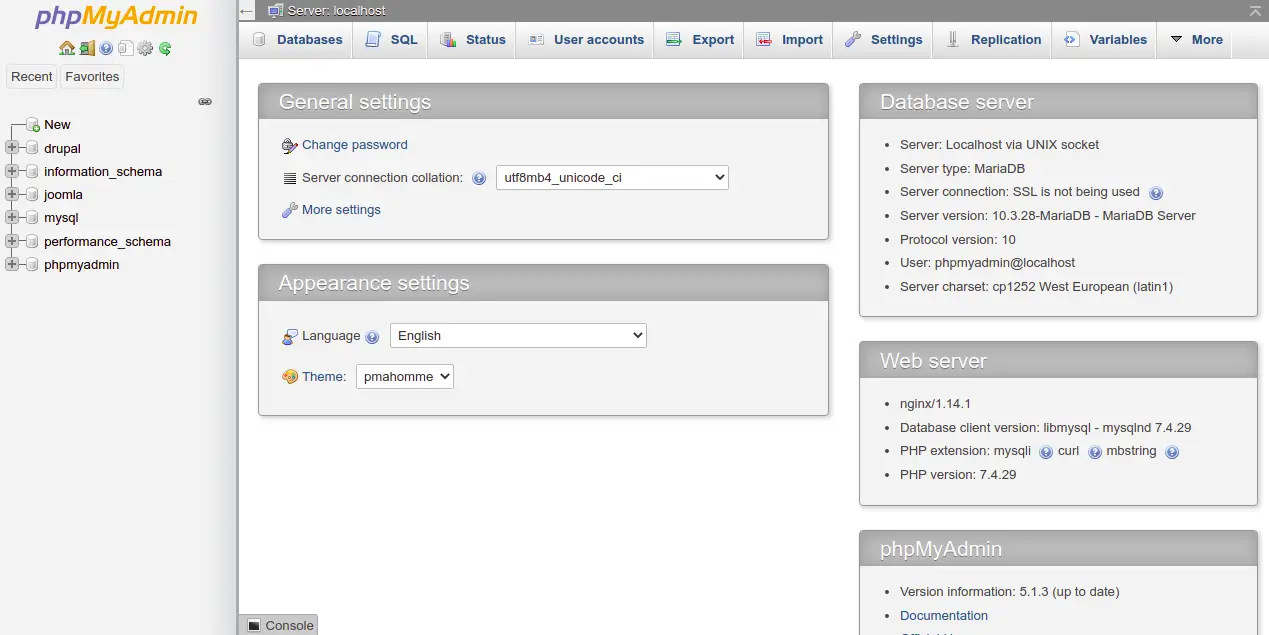
Click on the Databases button. You should see the following page:

Provide the database name that you want to create and click on the Create button.
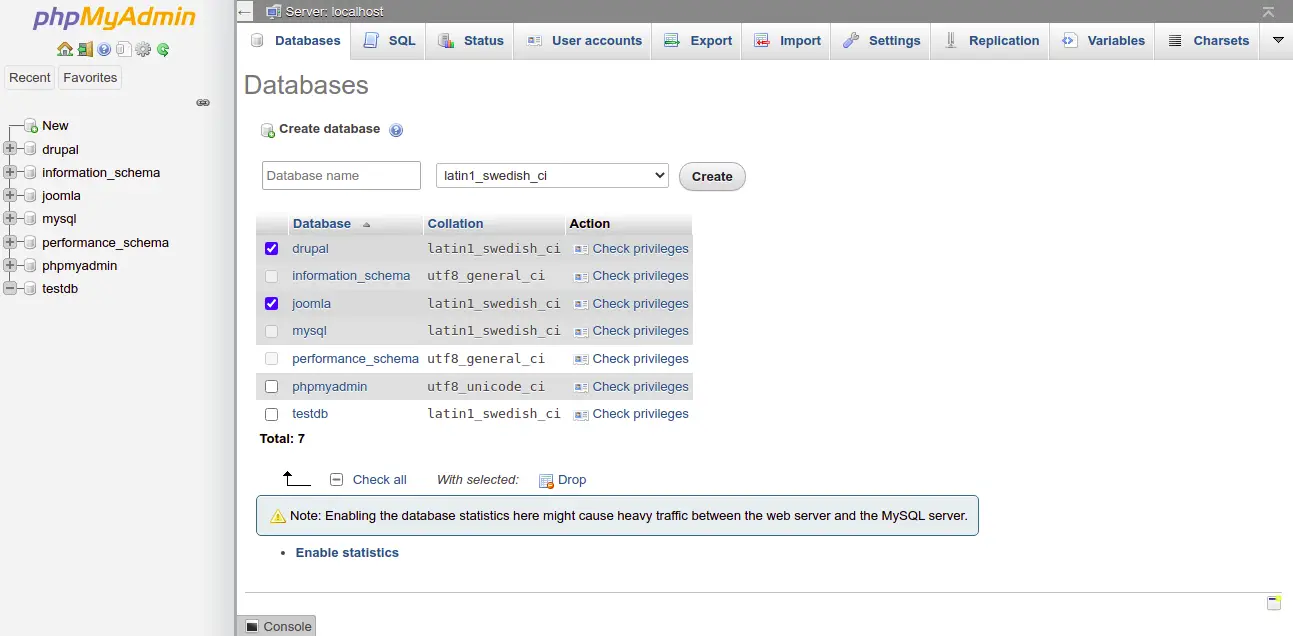
Select the databases you want to delete and click on the Drop button to delete a database. You should see the following page:
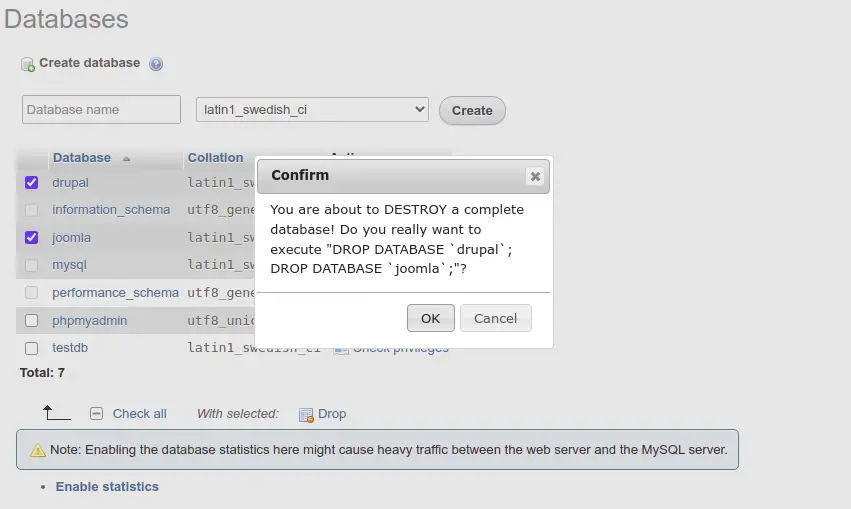
Click on the OK button to confirm and delete the selected databases.
Conclusion
Congratulations! you have successfully installed phpMyAdmin with Nginx on Alma Linux 8. You can now manage your MySQL and MariaDB databases via a web browser. Feel free to ask me if you have any questions.

