Make Lively Movement Animation with PyTweening's Tweening Functions
Tue 20 February 2024 Al Sweigart

Tweening functions allow you to easily add many different styles of natural-seeming movement to the graphics in your program. In this blog post, you'll learn about how tweening functions can make more lively movement animations using Pygame and the PyTweening third-party library. Tweening functions apply to any programming language, but this tutorial has actual Python code for you to run and experiment with. Start by installing these libraries by running pip install pygame and pip install pytweening from the terminal. Then follow along with the code examples.
We won't be looking at "spite animation" where, say, you have several frames of a walking animation that you play in a loop. Instead, we'll focus on making static images move around their window. (Though 2D images are often called "sprites" in a video game context, so that is what this tutorial will call them.) To do this, we move the sprite over a few seconds, draw the sprite to the window, pause for a few milliseconds, and then repeat. This gives the illusion that the sprite is moving around the application's window.
Moving a Sprite
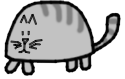
Here's a Python program using the Pygame library named tweening_demo_addition.py that moves a cat image across the window to the right. The cat starts with its left side at X coordinate 50 and top side at Y coordinate 100. The program keeps adding 10 to it, moving the cat to the right by 10 pixels, until the left side is at 400. Download the cat.png file from https://inventwithpython.com/cat.png and save it to the same folder as the following program, tweening_demo_addition.py:

(If you can't download the cat.png image file and/or get the FileNotFoundError: No file 'cat.png' found in working directory error message, just add a # to the beginning of the cat_surface = pygame.image.load('cat.png') line to comment it out. The program will use a generic pink square instead.)
When you run this program, the cat sprite starts at an X coordinate of 50 (in the 600-pixel wide window) and moves to the right by 10 pixels each frame until it reaches the X coordinate 400. (The animation then resets and repeats.) The debug output from the print() calls displays the left and top attributes of the sprite's position:
You can see that the cat's X coordinate increases by 10 for each frame while the Y coordinate stays the same. This is a straightforward way to code movement. But first, it can become tedious to program all sprite movements this way (especially when not moving perfectly horizontally or vertically). Second, the movement looks boring: there's no realistic acceleration or slow down, but rather a machine-like instant start, a constant speed, and an instant stop. We can handle the first case with a linear tweening function.
A tweening function (also called an easing function) is used to give XY coordinates "in between" a start and end point. Originally it was used in traditional cartoon animation, where an animator would draw key frames and pass them on to assistants who would draw the "in between" frames of animation. The tween function itself takes a floating-point number input between 0.0 (the start) and 1.0 (the end) called the interpolation factor and returns a number between 0.0 and 1.0. This can be used to provide a variety of movement animation effects.
Interpolation Between a Start and End Point
Let's imagine the movement from start to finish as a journey of the value in a variable named i (the interpolation factor) from 0.0 (the start) to 1.0 (the end). We can use a couple math equations to interpolate the X and Y coordinates between the start and end points:
x = start_x + (i * (end_x - start_x))
y = start_y + (i * (end_y - start_y))
With these two equations, we can get the XY coordinate of the midpoint between the start and end XY coordinates by setting i to 0.5. These equations work no matter what the start and end XY coordinates are. If you set i to 0.1, then the XY coordinates they give you will be 10% from the starting XY coordinate towards the end XY coordinate. If i is 0.0, the XY coordinates will be identical to the start_x and start_y coordinates. The same goes for setting i to 1.0: you get the end XY coordinates.
Now we don't have to worry about adding/subtracting the correct amount to the sprite's position. Instead, we can calculate each position along the path.
The following tweening_demo_interpolation.py program is similar to the previous program, except now we use the two interpolation equations and only increase the i interpolation factor value:

When you run this program, you'll see the same smooth, constant movement of the cat (though this time at an angle instead of perfectly horizontal.) Try editing the values of the START_X, START_Y, END_X, and END_Y variables to change the start and end position of the sprite. You won't need to change any other code; the same code works for the path from any start to any end. The program can set up random start and end points if you uncomment the code after # Uncomment the following to randomly change the start & stop positions:.
When you run the program with the start point as 50, 100 and end point as 370, 250, the debugging output is:
Linear Tween
We can enhance the interpolation equations into something a bit more exciting with tweening functions. We'll start with a boring example of the linear tween function that produces the same behavior as our interpolation code. The PyTweening library It's boring because the returned output is the same as the input: pytweening.linear(0.0) returns 0.0 and pytweening.linear(1.0) returns 1.0. Run the following code to verify this:
The output of this is:
As you can see, the output number is the same as the input. But this linear tweening function will make our animation program easy to understand at first. Later, all we need to do is swap out a different tweening function from PyTweening to get different effects.
If you look at the source of the Pytweening library, you'll notice the code for pytweening.linear() (minus the docstring) is just one line code:
While the linear tween is the simplest of all tweening functions, the others aren't much more complicated:
They are very math-y, but we'll look at them in detail later. Run the following code with pytweening.easeOutQuad() instead of the previous example's pytweening.linear():
The output of this is:
Notice that while easeOutQuad()'s numbers are different from linear()'s numbers, note that the outputs are both 0.0 when the interpolation factor (the input) is 0.0 and 1.0 when the interpolation factor is 1.0. This is common for almost every tweening function so that puts the sprite at the starting XY position at the start of the movement and the ending XY position at the end of the movement. It's the numbers in between that give different movement behavior.
Let's swap out our interpolation code with code that uses PyTweening's tweening functions. The following is tweening_demo_pytweening.py, which has the same behavior as the previous tweening_demo_interpolation.py program but uses the PyTweening library instead:
The debug output from this program looks like this:
Instead of using the interpolation factor i variable directly in the interpolation code, this program passes i to pytweening.linear() to get the "tweened" interpolation factor for the ti variable. This ti variable is used in the familiar interpolation code instead of i.
This doesn't make a difference for a linear tween because ti is always the same as i. But now we can swap out tweening functions in the PyTweening library to select what kind of movement behavior we want. For example, let's use the pytweening.easeOutQuad() function by commenting out the ti = pytweening.linear(i) and then uncommenting the # ti = pytweening.easeOutQuad(i) line from this part of the tweening_demo_pytweening.py program:
# Uncomment one of these lines to select a different tweening function:
ti = pytweening.linear(i)  # Same speed throughout
# ti = pytweening.easeOutQuad(i)  # Starts fast, slows to stop
# ti = pytweening.easeInQuad(i)  # Starts slow, accelerates, then decelerates
# ti = pytweening.easeInOutQuad(i)  # Starts and ends slow
# ti = pytweening.easeOutBounce(i)  # Ends with a bounce
# ti = pytweening.easeInOutElastic(i)  # Start and end with a stretchy animation
With this one-line code change, you've changed the machine-like constant speed movement to a more natural, starts-fast-then-slows-to-a-stop movement. It's small details like this that can give the sprite movement a much more polished presentation. This concept is sometimes called "juice", and there is a great talk by Martin Jonasson and Petri Purho from Nordic Game Jam called "Juice It or Lose It" that explains several simple ways (including tweening functions) to improve your video games and animation.
These short videos also have great tips for adding polish to your games and animations:
- Tips & Tricks for Juicy Games by Skinner Space
- BETTER 2D visuals in 7 EASY TIPS by MrEliptik
- 5 tips for better platformer controls by The Shaggy Dev
- The Secrets That Make Platformers Feel Good || Metroidvania Devlog by nextProgram
- Creating SMART enemies from scratch! | Devlog by Challacade
Try uncommenting other lines and re-running the program to see the effect of different tweens. Notice that the easeOutBounce() tween produces output that reverses direction to give a bouncy effect, while the easeInOutElastic() function produces output that is less than 0.0 and greater than 1.0 as the animation briefly shoots past the endpoint in an elastic rubber band effect.
If you want to tightly control the value of the i interpolation factor, try the following tweening_demo_all.py program, which displays six cats using six different tweening functions from the PyTweening library. As you move the mouse cursor from the left edge of the window to the right edge, the interpolation factor goes from 0.0 to 1.0:

You can use the tweening_demo_all.py program to explore the different tweening functions in a way that you can physically control by moving the mouse.
For further information check out the PyPI page for PyTweening (which contains graphs of each tweening function) and the PyTweening source code on GitHub.