How to Install and Configure Zabbix Server and Client on Rocky Linux 9
On this page
- Prerequisites
- Step 1 - Configure Firewall
- Step 2 - Set SELinux to permissive mode
- Step 3 - Configure Nginx and PHP repository
- Step 4 - Install Zabbix Server
- Step 5 - Install and Configure PostgreSQL
- Step 6 - Configure PHP
- Step 7 - Install SSL
- Step 8 - Configure Nginx
- Step 9 - Access Zabbix Frontend
- Step 10 - Configure SELinux
- Step 11 - Install Zabbix Agent on a remote system
- Step 11.1 - Configure Firewall on Remote system
- Step 11.2 - Install Zabbix Agent
- Step 11.3 Configure Zabbix Agent
- Step 11.4 - Start Zabbix Agent
- Step 12 - Add Zabbix Client to the Zabbix frontend for monitoring
- Step 13 - Configure Email Notifications
- Step 14 - Create a new user
- Step 15 - Send a Test alert
- Step 16 - Configure Auto registration for Linux Nodes
- Conclusion
Zabbix is a free and open-source monitoring solution for IT infrastructure such as networks, servers, virtual machines, and cloud services. Its core is written in C and Java with the frontend written in PHP. The front end provides a web-based interface to track and monitor metrics such as network utilization, CPU load, disk space, etc., and send notifications based on customized triggers.
Zabbix operates as a Client/Server model. The clients or agents available for various operating systems contact the server to send the data. For systems without an agent, Zabbix provides the option of using generic monitoring protocols such as Simple Network Management Protocol (SNMP) or Intelligent Platform Management Interface (IPMI).
In this tutorial, you will learn how to install the Zabbix Server and client on a Rocky Linux 9 server.
Prerequisites
-
Two servers running Rocky Linux 9. One will function as the server and the other one will be the client which we will monitor using the server.
-
A non-root user with sudo privileges.
-
A Fully Qualified Domain Name (FQDN) like
zabbix.example.compointing to your server. -
An SMTP account with an email service like Amazon SES or Mailgun.
-
Everything is updated.
$ sudo dnf update
-
A few essential packages are required for the tutorial and Zabbix Server to run. Some of these will already be on your server.
$ sudo dnf install wget curl nano unzip yum-utils policycoreutils-python-utils -y
Step 1 - Configure Firewall
The first step is to configure the firewall. Rocky Linux uses Firewalld Firewall. Check the firewall's status.
$ sudo firewall-cmd --state
running
The firewall works with different zones, and the public zone is the default one that we will use. List all the services and ports active on the firewall.
$ sudo firewall-cmd --permanent --list-services
It should show the following output.
cockpit dhcpv6-client ssh
Open ports 10050 and 10051 are required by the Zabbix server to connect with the agent.
$ sudo firewall-cmd --add-port={10051/tcp,10050/tcp} --permanent
Allow HTTP and HTTPS ports.
$ sudo firewall-cmd --permanent --add-service=http
$ sudo firewall-cmd --permanent --add-service=https
Recheck the status of the firewall.
$ sudo firewall-cmd --permanent --list-all
You should see a similar output.
public
  target: default
  icmp-block-inversion: no
  interfaces:
  sources:
  services: cockpit dhcpv6-client http https ssh
  ports: 10051/tcp 10050/tcp
  protocols:
  forward: yes
  masquerade: no
  forward-ports:
  source-ports:
  icmp-blocks:
  rich rules:
Reload the firewall to enable the changes.
$ sudo firewall-cmd --reload
Step 2 - Set SELinux to permissive mode
Configure SELinux to work in permissive mode. In this mode, SELinux won't block any process but will log everything to the audit log file. We will use this later to set up SELinux rules.
$ sudo setenforce 0 && sudo sed -i 's/^SELINUX=.*/SELINUX=permissive/g' /etc/selinux/config
Check the SELinux status.
$ sestatus
SELinux status:                 enabled
SELinuxfs mount:                /sys/fs/selinux
SELinux root directory:         /etc/selinux
Loaded policy name:             targeted
Current mode:                   permissive
Mode from config file:          permissive
Policy MLS status:              enabled
Policy deny_unknown status:     allowed
Memory protection checking:     actual (secure)
Max kernel policy version:      33
Step 3 - Configure Nginx and PHP repository
Zabbix package will automatically install PHP and Nginx. But it will grab older versions of them. Therefore, we need to make sure the process installs the latest available version.
Create and open the file /etc/yum.repos.d/nginx.repo for editing.
$ sudo nano /etc/yum.repos.d/nginx.repo
Paste the following code in it.
[nginx-stable]
name=nginx stable repo
baseurl=http://nginx.org/packages/centos/$releasever/$basearch/
gpgcheck=1
enabled=1
gpgkey=https://nginx.org/keys/nginx_signing.key
module_hotfixes=true

[nginx-mainline]
name=nginx mainline repo
baseurl=http://nginx.org/packages/mainline/centos/$releasever/$basearch/
gpgcheck=1
enabled=0
gpgkey=https://nginx.org/keys/nginx_signing.key
module_hotfixes=true
Once you are finished, save the file by pressing Ctrl + X and entering Y when prompted.
Enable the Nginx mainline repository.
$ sudo dnf config-manager --enable nginx-mainline
Next, we need to configure the PHP repository.
The first step is to grab the Epel repository.
$ sudo dnf install epel-release -y
Next, install the Remi repository.
$ sudo dnf install https://rpms.remirepo.net/enterprise/remi-release-9.rpm
Check for available PHP streams.
$ dnf module list php -y
Name    Stream              Profiles                                      Summary
php     8.1                 common [d], devel, minimal                    PHP scripting language

Remi's Modular repository for Enterprise Linux 9 - x86_64
Name    Stream              Profiles                                      Summary
php     remi-7.4            common [d], devel, minimal                    PHP scripting language
php     remi-8.0            common [d], devel, minimal                    PHP scripting language
php     remi-8.1            common [d], devel, minimal                    PHP scripting language
php     remi-8.2            common [d], devel, minimal                    PHP scripting language
php     remi-8.3            common [d], devel, minimal                    PHP scripting language

Hint: [d]efault, [e]nabled, [x]disabled, [i]nstalled
The default version is 8.1. At the time of writing this tutorial, Zabbix is compatible with PHP 8.2. Therefore, enable Remi's PHP 8.2 repository. The next version of Zabbix will support PHP 8.3 so you can enable that if your Zabbix version is 6.0.26 or above.
$ sudo dnf module reset php -y
$ sudo dnf module enable php:remi-8.2
Now, we can proceed with installing Zabbix.
Step 4 - Install Zabbix Server
Zabbix packages are provided by default in the EPEL repository. Before proceeding with our installation, we need to disable them. Open the /etc/yum.repos.d/epel.repo for editing and add the following line under the [epel] section.
[epel]
...
excludepkgs=zabbix*
Save the file by pressing Ctrl + X and entering Y when prompted.
Zabbix's latest version is 6.4.x but we will stick to using the LTS (Long-term support) release which is much more stable for a production environment.
Install Zabbix's repository.
$ sudo rpm -Uvh https://repo.zabbix.com/zabbix/6.0/rhel/9/x86_64/zabbix-release-6.0-4.el9.noarch.rpm
Remove all the RPM cache.
$ sudo dnf clean all
Install Zabbix server, frontend, and agent. We will be using the PostgreSQL server for our purpose and therefore we need the zabbix-web-pgsql package. If you are using MySQL/MariaDB/Percona server then you will need to install the zabbix-web-mysql package.
$ sudo dnf install zabbix-server-pgsql zabbix-web-pgsql zabbix-nginx-conf zabbix-sql-scripts zabbix-selinux-policy zabbix-agent
Step 5 - Install and Configure PostgreSQL
Zabbi works with PostgreSQL 13 and above. Rocky Linux 9 ships with PostgreSQL 13 by default. However, we will use PostgreSQL 16 for our tutorial.
Install the PostgreSQL repository RPM file.
$ sudo dnf install -y https://download.postgresql.org/pub/repos/yum/reporpms/EL-9-x86_64/pgdg-redhat-repo-latest.noarch.rpm
Disable the built-in PostgreSQL module.
$ sudo dnf -qy module disable postgresql
Now, you can install PostgreSQL using the command below.
$ sudo dnf install -y postgresql16-server postgresql16-contrib
Initialize the database.
$ sudo /usr/pgsql-16/bin/postgresql-16-setup initdb
Enable the PostgreSQL service.
$ sudo systemctl enable postgresql-16
Start the PostgreSQL service.
$ sudo systemctl start postgresql-16
Check the status of the PostgreSQL service.
$ sudo systemctl status postgresql-16
? postgresql-16.service - PostgreSQL 16 database server
     Loaded: loaded (/usr/lib/systemd/system/postgresql-16.service; enabled; preset: disabled)
     Active: active (running) since Thu 2024-01-18 14:54:46 UTC; 10s ago
       Docs: https://www.postgresql.org/docs/16/static/
    Process: 3407 ExecStartPre=/usr/pgsql-16/bin/postgresql-16-check-db-dir ${PGDATA} (code=exited, status=0/SUCCESS)
   Main PID: 3412 (postgres)
      Tasks: 7 (limit: 24694)
     Memory: 17.4M
        CPU: 117ms
     CGroup: /system.slice/postgresql-16.service
             ??3412 /usr/pgsql-16/bin/postgres -D /var/lib/pgsql/16/data/
             ??3413 "postgres: logger "
             ??3414 "postgres: checkpointer "
             ??3415 "postgres: background writer "
             ??3417 "postgres: walwriter "
             ??3418 "postgres: autovacuum launcher "
             ??3419 "postgres: logical replication launcher "
Create the Zabbix database user.
$ sudo -u postgres createuser --pwprompt zabbix
You will be prompted for the password.
Enter password for new role:
Enter it again:
Create the Zabbix database.
$ sudo -u postgres createdb -O zabbix zabbix
Import the Initial schema and database data. You will again be prompted for your password.
$ zcat /usr/share/zabbix-sql-scripts/postgresql/server.sql.gz | sudo -u zabbix psql zabbix
This process can take a couple of minutes to finish.
Open the file /etc/zabbix/zabbix_server.conf for editing.
$ sudo nano /etc/zabbix/zabbix_server.conf
Find the variable DBPassword, uncomment it by removing the hash (#) in front of it, and setting its value to the password chosen in the previous step.
DBPassword=psqlpassword
Save the file by pressing Ctrl + X and entering Y when prompted.
Start and enable the Zabbix server and agent services.
$ sudo systemctl enable zabbix-server zabbix-agent --now
Step 6 - Configure PHP
Zabbix installs PHP and Nginx configuration files which we will use. However, we need to make a few edits before we can use them.
First, we need to open /etc/php-fpm.d/zabbix.conf for editing.
$ sudo nano /etc/php-fpm.d/zabbix.conf
Change the values of user = apache, and group = apache to nginx as shown below.
user = nginx
group = nginx
This is because since we are using Nginx from its official repository, it runs under nginx user and not apache which is what the distribution copy of Nginx runs under.
You can also edit any other PHP-related values or add any custom definitions here. Once finished, save the file by pressing Ctrl + X and entering Y when prompted.
Start and enable the PHP-FPM service.
$ sudo systemctl enable php-fpm --now
Step 7 - Install SSL
We need to install Certbot to generate the SSL certificate. We will use the Snapd package installer for that. Since Rocky Linux doesn't ship with it, install the Snapd installer. It requires the EPEL (Extra Packages for Enterprise Linux) repository to work. But since we already installed it in step 3, we can directly move ahead.
Install Snapd.
$ sudo dnf install -y snapd
Enable and Start the Snap service.
$ sudo systemctl enable snapd --now
Install the Snap core package, and ensure that your version of Snapd is up to date.
$ sudo snap install core && sudo snap refresh core
Create necessary links for Snapd to work.
$ sudo ln -s /var/lib/snapd/snap /snap
$ echo 'export PATH=$PATH:/var/lib/snapd/snap/bin' | sudo tee -a /etc/profile.d/snapd.sh
Install Certbot.
$ sudo snap install --classic certbot
Use the following command to ensure that the Certbot command can be run by creating a symbolic link to the /usr/bin directory.
$ sudo ln -s /snap/bin/certbot /usr/bin/certbot
Verify if Certbot is functioning correctly.
$ certbot --version
certbot 2.8.0
Run the following command to generate an SSL Certificate.
$ sudo certbot certonly --nginx --agree-tos --no-eff-email --staple-ocsp --preferred-challenges http -m [email protected] -d zabbix.example.com
The above command will download a certificate to the /etc/letsencrypt/live/zabbix.example.com directory on your server.
Generate a Diffie-Hellman group certificate.
$ sudo openssl dhparam -dsaparam -out /etc/ssl/certs/dhparam.pem 4096
Check the Certbot renewal scheduler service.
$ sudo systemctl list-timers
You will find snap.certbot.renew.service as one of the services scheduled to run.
NEXT                        LEFT          LAST                        PASSED       UNIT                        ACTIVATES                 -------------------------------------------------------------------------------------------------------------------------------------
Sat 2024-01-20 10:04:02 UTC 1min 32s left Sat 2024-01-20 08:52:11 UTC 1h 10min ago dnf-makecache.timer         dnf-makecache.service
Sun 2024-01-21 00:00:00 UTC 13h left      Sat 2024-01-20 00:00:10 UTC 10h ago      logrotate.timer             logrotate.service
Sat 2024-01-20 21:13:00 UTC 11h left      Sat 2024-01-20 08:19:11 UTC 1h 43min ago snap.certbot.renew.timer    snap.certbot.renew.service
Do a dry run of the process to check whether the SSL renewal is working fine.
$ sudo certbot renew --dry-run
If you see no errors, you are all set. Your certificate will renew automatically.
Step 8 - Configure Nginx
Zabbix installs a default Nginx configuration file. We need to edit to add the code for enabling SSL certificates. We also need to change the listen port and add code for redirecting HTTP links to HTTPS.
Open the file /etc/nginx/conf.d/zabbix.conf for editing.
$ sudo nano /etc/nginx/conf.d/zabbix.conf
Edit out the code so that the file looks like the following.
server {
    listen 443 ssl;
    listen [::]:443 ssl;
    http2 on;

    root /usr/share/zabbix;

    index index.php;

    access_log  /var/log/nginx/zabbix.access.log;
    error_log   /var/log/nginx/zabbix.error.log;

    ssl_certificate      /etc/letsencrypt/live/zabbix.example.com/fullchain.pem;
    ssl_certificate_key  /etc/letsencrypt/live/zabbix.example.com/privkey.pem;
    ssl_trusted_certificate /etc/letsencrypt/live/zabbix.example.com/chain.pem;

    ssl_session_timeout  5m;
    ssl_session_cache shared:MozSSL:10m;
    ssl_session_tickets off;

    ssl_protocols TLSv1.2 TLSv1.3;
    ssl_prefer_server_ciphers on;
    ssl_ciphers ECDHE-ECDSA-AES128-GCM-SHA256:ECDHE-RSA-AES128-GCM-SHA256:ECDHE-ECDSA-AES256-GCM-SHA384:ECDHE-RSA-AES256-GCM-SHA384:ECDHE-ECDSA-CHACHA20-POLY1305:ECDHE-RSA-CHACHA20-POLY1305:DHE-RSA-AES128-GCM-SHA256:DHE-RSA-AES256-GCM-SHA384;
    ssl_ecdh_curve X25519:prime256v1:secp384r1:secp521r1;
    ssl_stapling on;
    ssl_stapling_verify on;
    ssl_dhparam /etc/ssl/certs/dhparam.pem;

    location = /favicon.ico {
        log_not_found   off;
    }

    location / {
        try_files $uri $uri/ =404;
    }

    location /assets {
        access_log off;
        expires 10d;
    }

    location ~ /\.ht {
        deny all;
    }

    location ~ /(api\/|conf[^\.]|include|locale) {
        deny            all;
        return          404;
    }

    location /vendor {
        deny            all;
        return          404;
    }

    location ~ [^/]\.php(/|$) {
        fastcgi_pass    unix:/run/php-fpm/zabbix.sock;
        fastcgi_split_path_info ^(.+\.php)(/.+)$;
        fastcgi_index   index.php;

        fastcgi_param   DOCUMENT_ROOT   /usr/share/zabbix;
        fastcgi_param   SCRIPT_FILENAME /usr/share/zabbix$fastcgi_script_name;
        fastcgi_param   PATH_TRANSLATED /usr/share/zabbix$fastcgi_script_name;

        include fastcgi_params;
        fastcgi_param   QUERY_STRING    $query_string;
        fastcgi_param   REQUEST_METHOD  $request_method;
        fastcgi_param   CONTENT_TYPE    $content_type;
        fastcgi_param   CONTENT_LENGTH  $content_length;

        fastcgi_intercept_errors        on;
        fastcgi_ignore_client_abort     off;
        fastcgi_connect_timeout         60;
        fastcgi_send_timeout            180;
        fastcgi_read_timeout            180;
        fastcgi_buffer_size             128k;
        fastcgi_buffers                 4 256k;
        fastcgi_busy_buffers_size       256k;
        fastcgi_temp_file_write_size    256k;
    }
}

# enforce HTTPS
server {
    listen 80;
    listen [::]:80;
    server_name  zabbix.example.com;
    return 301   https://$host$request_uri;
}
Once finished, save the file by pressing Ctrl + X and entering Y when prompted.
Open the file /etc/nginx/nginx.conf for editing.
$ sudo nano /etc/nginx/nginx.conf
Add the following line before the line include /etc/nginx/conf.d/*.conf;.
server_names_hash_bucket_size 64;
Save the file by pressing Ctrl + X and entering Y when prompted.
Verify your Nginx configuration.
$ sudo nginx -t
Start and enable the Nginx service.
$ sudo systemctl enable nginx --now
Step 9 - Access Zabbix Frontend
Before installing the Zabbix frontend, set the permission on the /etc/zabbix/web directory so that Nginx can access it.
$ sudo chown -R nginx:nginx /etc/zabbix/web
Open the URL https://zabbix.example.com in your browser and you will get the following screen.
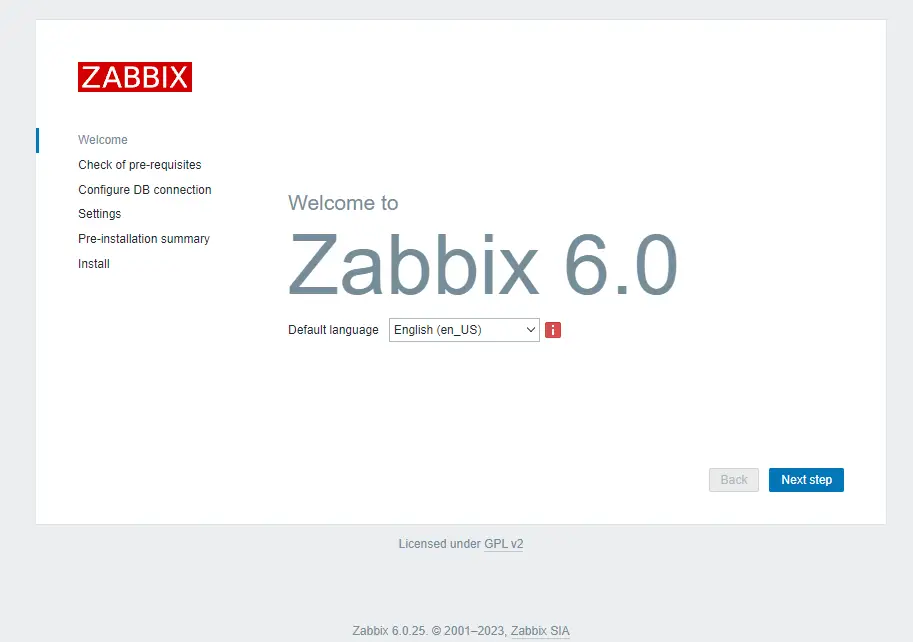
Click the Next step button to finish installing Zabbix. The next page checks for system requirements and if they are all satisfied.
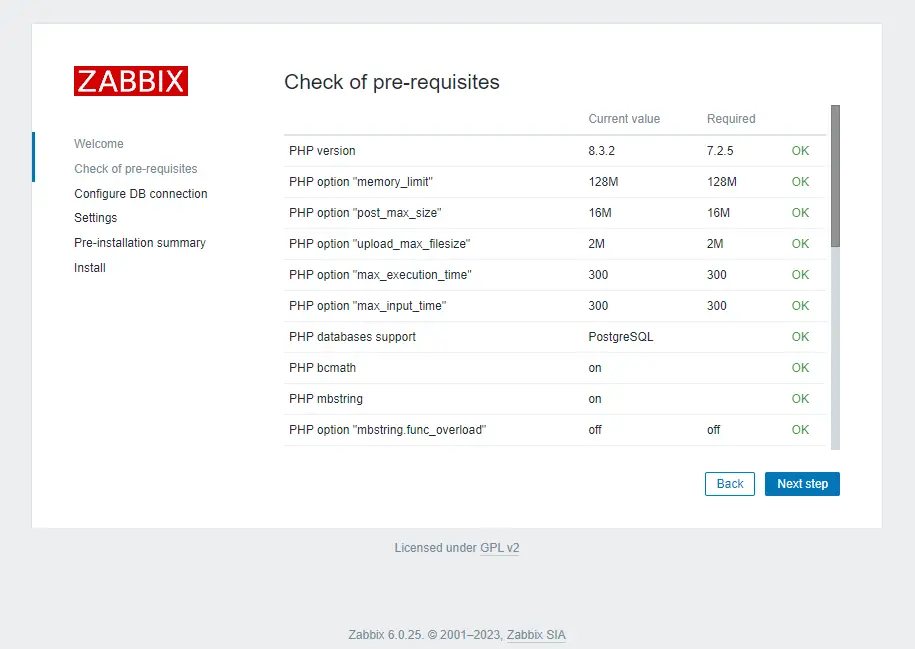
If there is no issue, click the Next step button to proceed. Next, you will be asked to enter your database credentials. Uncheck the Database TLS encryption option since we haven't configured it.
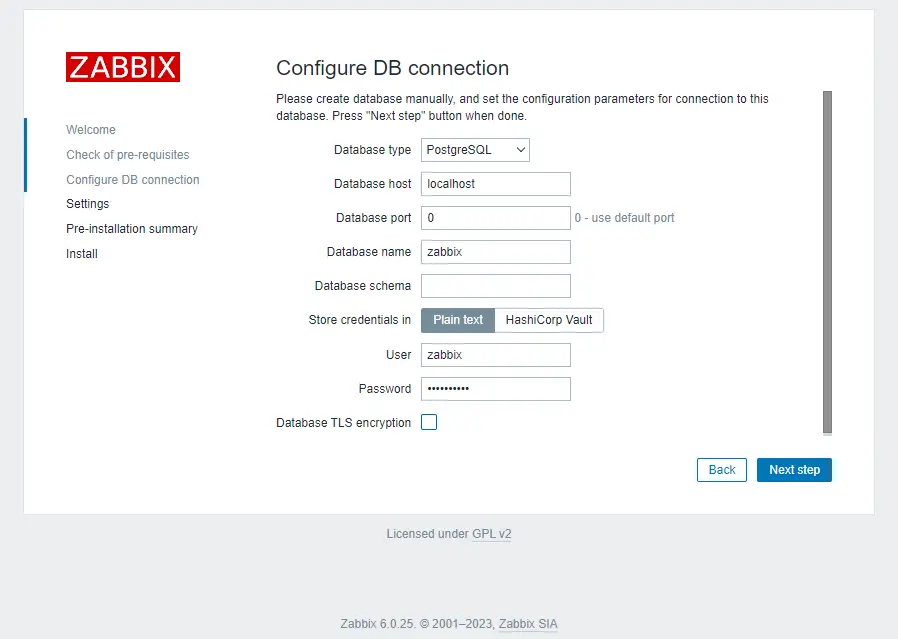
Press the Next step button to proceed. Enter the name of your Zabbix server. It is however optional, but if configured, it will be displayed in the menu bar and page titles.
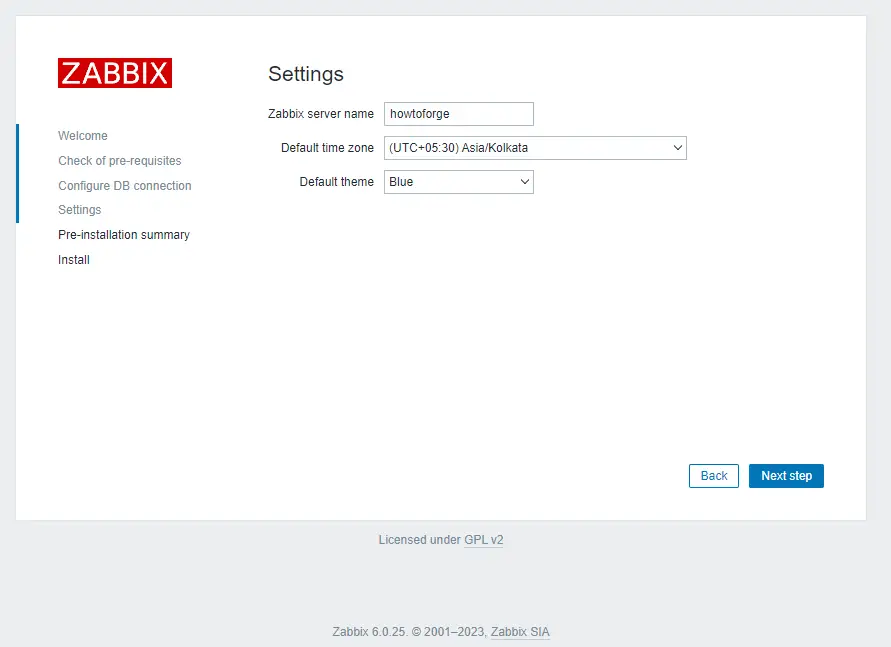
Press the Next step button to proceed. You will be asked to confirm all the settings.

If everything is okay, press the Next step button to proceed. You should see the message informing you that the installation is successful.
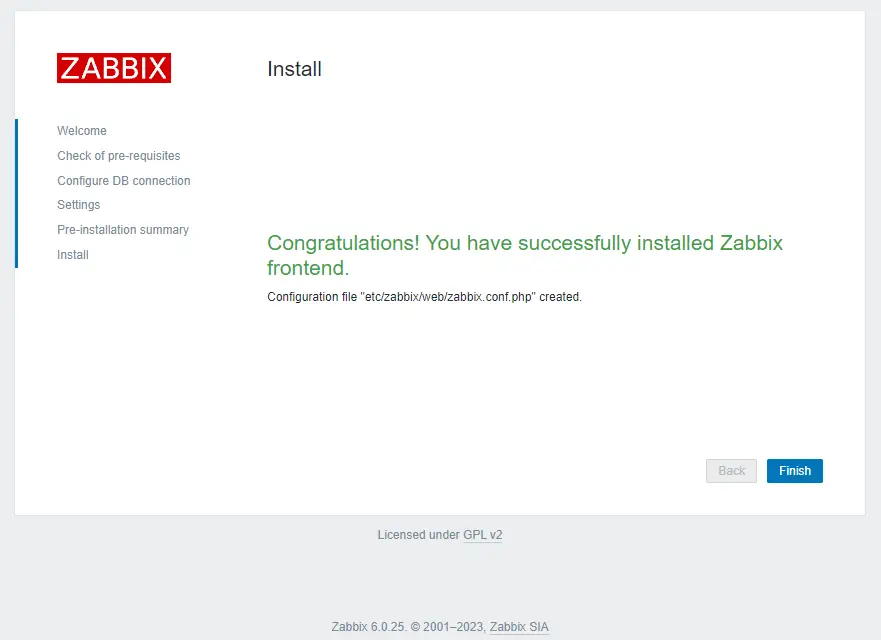
Click the Finish button to complete the process. You will be taken to the login page.
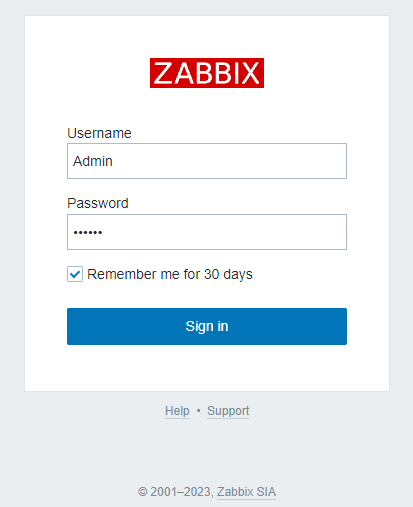
The default username is Admin and the password is zabbix. Enter the login information and click the Sign in button to access the Zabbix dashboard.

Step 10 - Configure SELinux
Enable the HTTP daemon to connect to Zabbix.
$ sudo setsebool -P httpd_can_connect_zabbix 1
Allow Zabbix to connect to all the TCP ports.
$ sudo setsebool -P zabbix_can_network on
Enable the daemons_enable_cluster_mode to avoid the HA manager errors.
$ sudo setsebool -P daemons_enable_cluster_mode on
Create a custom SELinux policy package using the audit log.
$ sudo grep "denied.*zabbix" /var/log/audit/audit.log | audit2allow -M zabbix_policy
******************** IMPORTANT ***********************
To make this policy package active, execute:

semodule -i zabbix_policy.pp
Install the custom SELinux policy package created.
$ sudo semodule -i zabbix_policy.pp
Run the command to check for database errors.
$ sudo sealert -a /var/log/audit/audit.log
It will suggest you a lot of rules to apply.
Run the following commands.
$ sudo ausearch -c 'php-fpm' --raw | audit2allow -M my-phpfpm
$ sudo semodule -X 300 -i my-phpfpm.pp
$ sudo ausearch -c 'zabbix_agentd' --raw | audit2allow -M my-zabbixagentd
$ sudo semodule -X 300 -i my-zabbixagentd.pp
Apply the policy to allow Nginx to give access to PostgreSQL.
$ sudo setsebool -P httpd_can_network_connect_db 1
Apply the policy to allow connections to be made to outside hosts.
$ sudo setsebool -P httpd_can_network_connect 1
Set SELinux to enforcing mode.
$ sudo setenforce 1 && sudo sed -i 's/^SELINUX=.*/SELINUX=enforcing/g' /etc/selinux/config
Step 11 - Install Zabbix Agent on a remote system
The main job of the Zabbix agent is to gather information from the system and send it to the central Zabbix server for analysis. We will install the agent on a Rocky Linux 9 system but you can do that on any distribution.
Step 11.1 - Configure Firewall on Remote system
Open port 10050 to allow the Zabbix agent to connect to the server.
$ sudo firewall-cmd --add-port=10050/tcp --permanent --zone=public
$ sudo firewall-cmd --reload
Step 11.2 - Install Zabbix Agent
You need to repeat step 4 except the last install statement. That means, editing the /etc/yum.repos.d/epel.repo file and add the following line in the [epel] section.
[epel]
...
excludepkgs=zabbix*
Next, install the Zabbix repository and clean the RPM cache.
$ sudo rpm -Uvh https://repo.zabbix.com/zabbix/6.0/rhel/9/x86_64/zabbix-release-6.0-4.el9.noarch.rpm
$ sudo dnf clean all
Install the Zabbix agent.
$ sudo dnf install zabbix-agent
Step 11.3 Configure Zabbix Agent
Zabbix supports certificate-based encryption but for the sake of simplicity of this tutorial, we will however use pre-shared keys(PSK) to secure the connection between the server and agent.
Generate a PSK file.
$ sudo sh -c "openssl rand -hex 32 > /etc/zabbix/zabbix_agentd.psk"
Show the key for copying.
$ cat /etc/zabbix/zabbix_agentd.psk
797c84746dfe86f71b0f207785906d2bb886be27149b296d86df6b1ec9de6bbe
Copy this key because we will need it later.
Zabbix agent stores its configuration in the /etc/zabbix/zabbix-agentd.conf file. Open it for editing.
$ sudo nano /etc/zabbix/zabbix_agentd.conf
Uncomment the following variables and update their values as shown below.
Server=<zabbix_server_IP>
ServerActive=<zabbix_server_IP>
HostMetadata=ZabbixLinuxClient
Hostname=zabbixclient.example.com
Put your Zabbix server's IP address as the value for the Server and ServerActive variables. The HostMetadata variable can be anything that you can use to identify the system. It is also used in the auto-registration process on the Zabbix frontend which we will talk about later. The Hostname item refers to the system hostname of the Zabbix agent node.
You can find out the hostname using the following command.
$ cat /etc/hostname
Next, find the section that configures a secure connection between the server and the agent. Find the variable TLSConnect and change its value from unencrypted to psk as shown below.
...
### Option: TLSConnect
#       How the agent should connect to server or proxy. Used for active checks.
#       Only one value can be specified:
#               unencrypted - connect without encryption
#               psk         - connect using TLS and a pre-shared key
#               cert        - connect using TLS and a certificate
#
# Mandatory: yes, if TLS certificate or PSK parameters are defined (even for 'unencrypted' connection)
# Default:
# TLSConnect=psk
...
Next, locate the TLSAccept section and change its value to psk as shown below.
...
### Option: TLSAccept
#       What incoming connections to accept.
#       Multiple values can be specified, separated by comma:
#               unencrypted - accept connections without encryption
#               psk         - accept connections secured with TLS and a pre-shared key
#               cert        - accept connections secured with TLS and a certificate
#
# Mandatory: yes, if TLS certificate or PSK parameters are defined (even for 'unencrypted' connection)
# Default:
# TLSAccept=psk
...
Next, find the TLSPSKIdentity section and change its value to PSK 001 as shown.
...
### Option: TLSPSKIdentity
#       Unique, case sensitive string used to identify the pre-shared key.
#
# Mandatory: no
# Default:
# TLSPSKIdentity=PSK 001
...
This is the PSK ID that you will use to add the host through the Zabbix web front end.
Finally, locate the TLSPSKFile section and change its value to the location of the PSK file as shown.
...
### Option: TLSPSKFile
#       Full pathname of a file containing the pre-shared key.
#
# Mandatory: no
# Default:
# TLSPSKFile=/etc/zabbix/zabbix_agentd.psk
...
Once finished, save the file by pressing Ctrl + X and entering Y when prompted.
Step 11.4 - Start Zabbix Agent
Start and enable the Zabbix agent service.
$ sudo systemctl enable zabbix-agent --now
Step 12 - Add Zabbix Client to the Zabbix frontend for monitoring
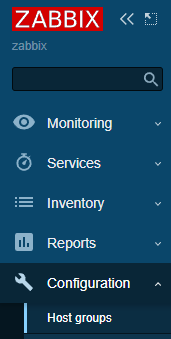
We can add a new host to the existing defined host groups or create a new host group. Host groups allow you to categorize the types of nodes you are monitoring. To create a new host group, open the Host groups option under the Configuration menu.
Add the name of the group in the box and click the Apply button to create the group.
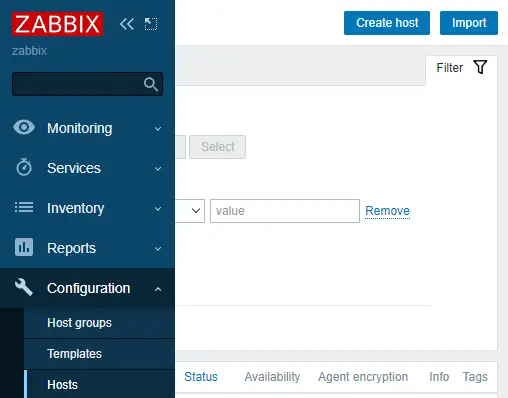
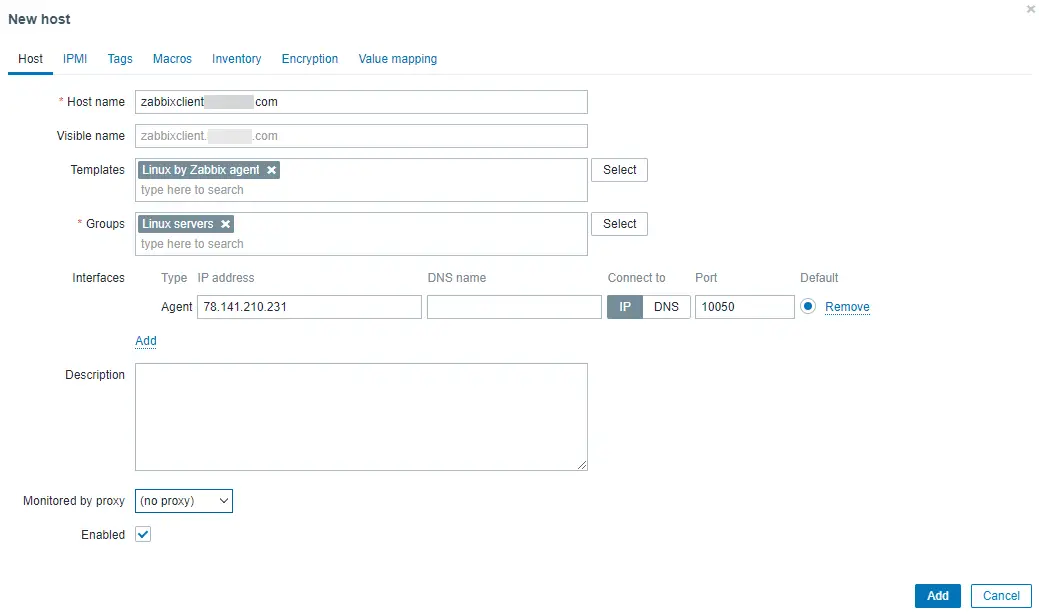
To create a new host, click the Hosts option under the Configuration menu, and click the Create host button on the top right.
Add the hostname of the Zabbix node.
Type Linux by Zabbix agent in the Templates section and select the template from the dropdown.

Similarly, type Linux Servers under the Groups section and select it.

Click the Add button under the Interfaces section and select Agent.

Then add the IP address of the Zabbix client node. Once you are finished, the complete New host popup should look like the following.
Next, switch to the Encryption tab. Select PSK for both Connections to host and Connections from host options. Set the PSK Identity to PSK 001 which is the value we set in step 11.3 for the variable TLSPSKIdentity before. Then set the PSK value as the key you generated on the agent machine before.

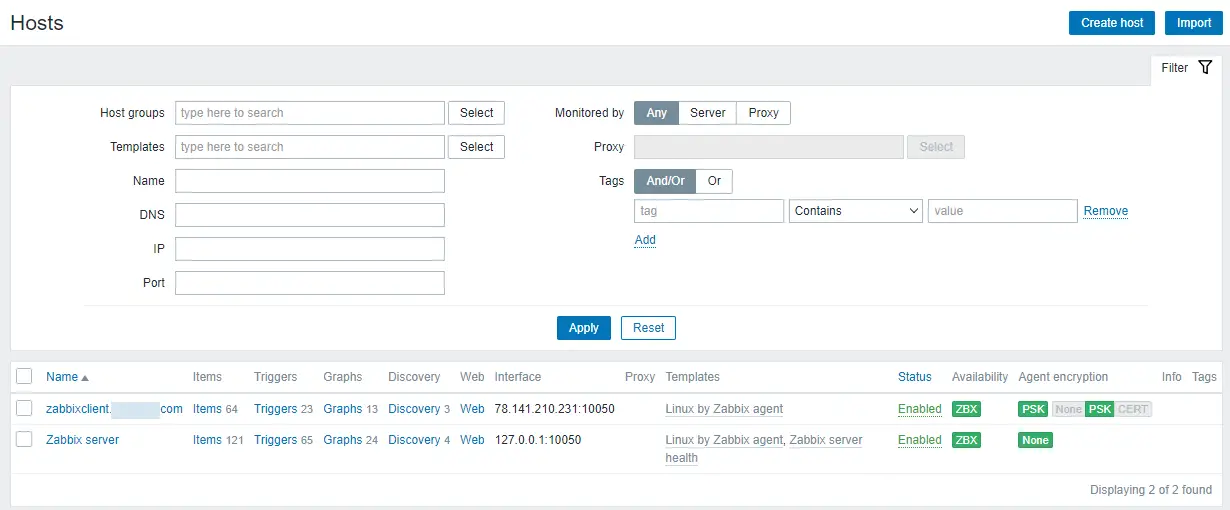
Once finished, click the Add button to finish adding the host.
You should see the new host in the list with a green label indicating that the agent is connected to the server and it is working as expected.
Step 13 - Configure Email Notifications
Zabbix supports many types of notifications like email, Slack, Telegram, SMS, etc. For the purpose of our tutorial, we will configure email notifications. Visit the Zabbix front end, click on Administration, and then Media types in the left menu. You will see two email types, one for plaintext email and the other one for HTML email.
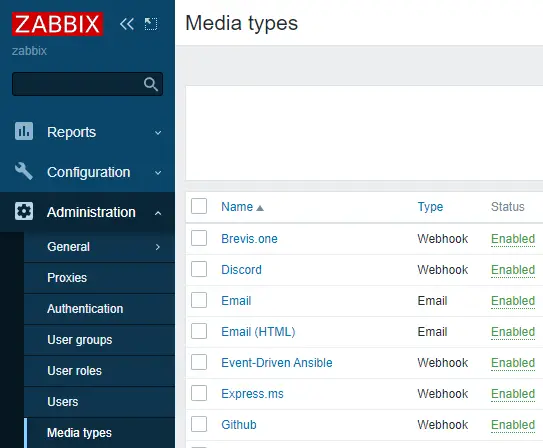
Click on the Email (HTML) option and you will get the following page.
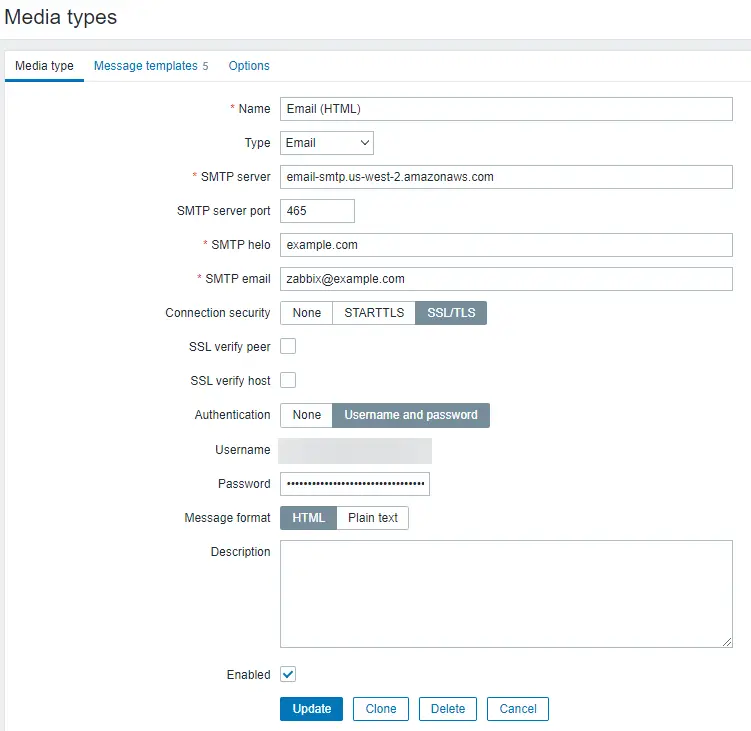
Enter your SMTP server details. For our tutorial, we are using the Amazon SES service. Click the Update button once finished to save the details. You will be taken back to the Media types page. Click the Test button on the page to test the email settings. It will create a popup. Fill in your email address and click the Test button to send a test email.
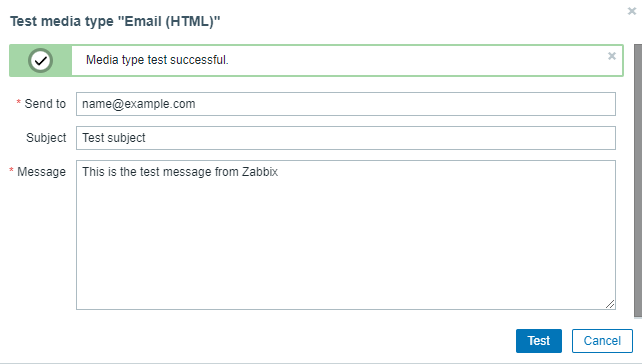
You should see a successful message on the popup notifying that it worked fine and you should get the following email in your inbox. Close the popup by clicking the Cancel button.

Step 14 - Create a new user
The default Zabbix user is not configured to receive any sort of notification. While we can do so, the default user is also unsafe to use. The best option is to create a new user and then disable the default user.
Visit the Administration >> Users section of the menu and click the Create user button on the top right to open the following page.
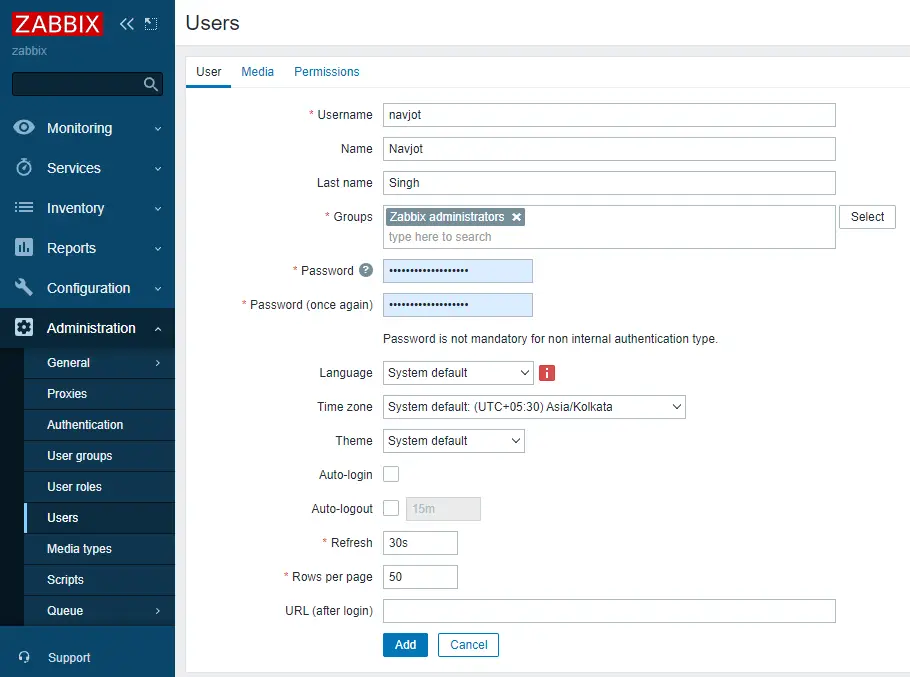
Fill in the user details. Select Zabbix administrators as the user group. Once finished, click the Media tab. Click the Add button and select Email (HTML) as the type.
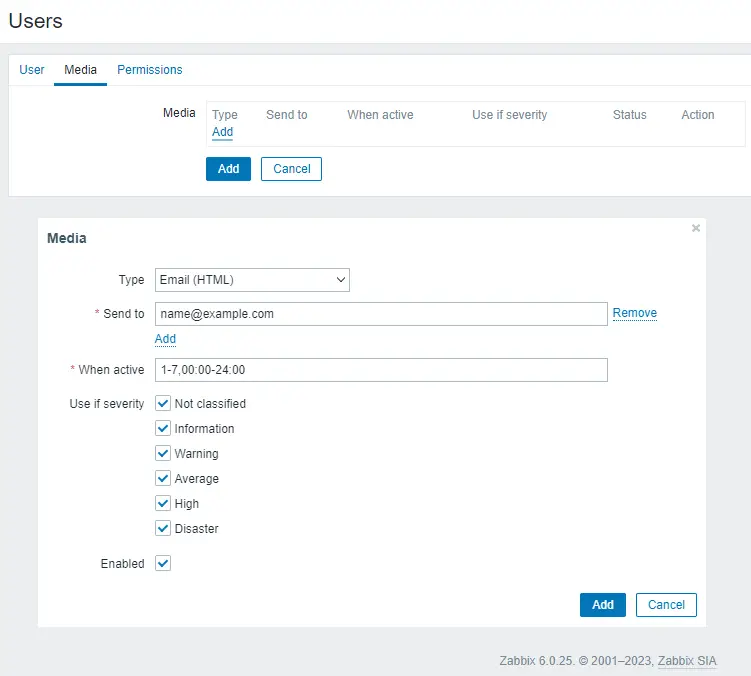
Enter your email address in the Send to field and click the Add button to add the email option. Next, switch to the Permissions tab and click the Select button to add the Super admin role.

Click the Add button to finish adding the user. Next, you need to log out of the front end, log in back as the new user, and come back to the user's page. Click the Admin user, select the Disabled group, and update the user. This will disable the default user from being used.
Step 15 - Send a Test alert
By default, Zabbix tracks the amount of free space on the server. It detects all disk mounts and performs checks regularly.
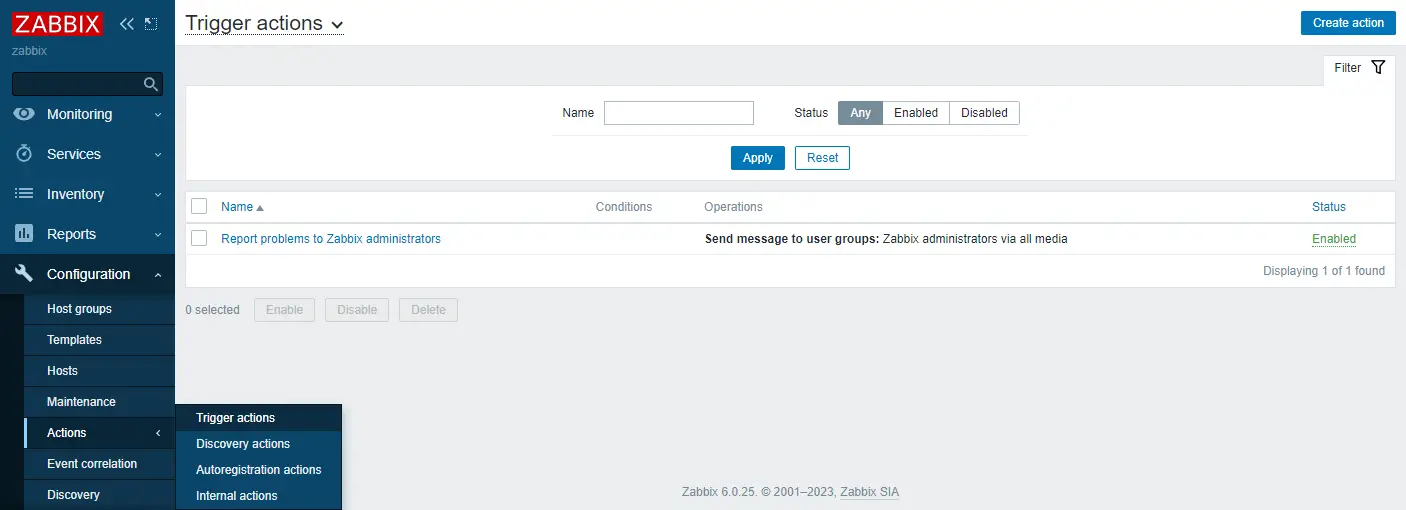
The first step is to enable the notification trigger which allows Zabbix to send notifications to all the administrators. Zabbix has the default trigger already configured. We need to enable it to work. Visit Configuration >> Actions >> Trigger actions and click the Disabled status to change it to Enabled as shown.
Next, log in to the Zabbix node and create a temporary file large enough to trigger a disk usage alert.
First, determine the free space on the server.
$ df -h
Filesystem      Size  Used Avail Use% Mounted on
devtmpfs        4.0M     0  4.0M   0% /dev
tmpfs           2.0G     0  2.0G   0% /dev/shm
tmpfs           780M   51M  730M   7% /run
/dev/vda2        94G   12G   78G  13% /
/dev/vda1       260M  7.0M  253M   3% /boot/efi
tmpfs           390M  4.0K  390M   1% /run/user/1001
This shows we have around 78 GB of free space. Next, use the fallocate command to pre-allocate more than 80% of the disk space. It is big enough to trigger the alert.
$ fallocate -l 74G /tmp/temp.img
Check the disk usage again.
$ df -h
Filesystem      Size  Used Avail Use% Mounted on
devtmpfs        4.0M     0  4.0M   0% /dev
tmpfs           2.0G     0  2.0G   0% /dev/shm
tmpfs           780M   54M  726M   7% /run
/dev/vda2        94G   86G  3.9G  96% /
/dev/vda1       260M  7.0M  253M   3% /boot/efi
tmpfs           390M  4.0K  390M   1% /run/user/1001
Zabbix will trigger an alert about the disk space and send an email alert regarding the same. The email will look like the following.
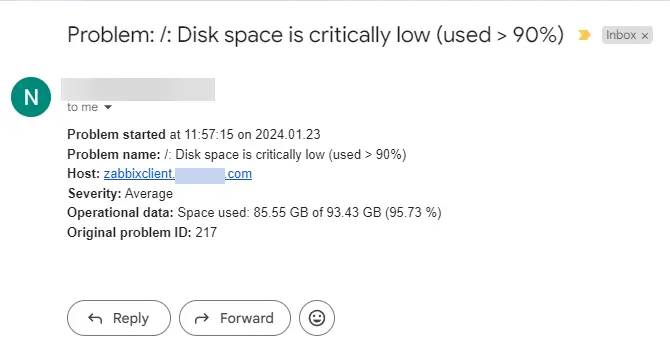
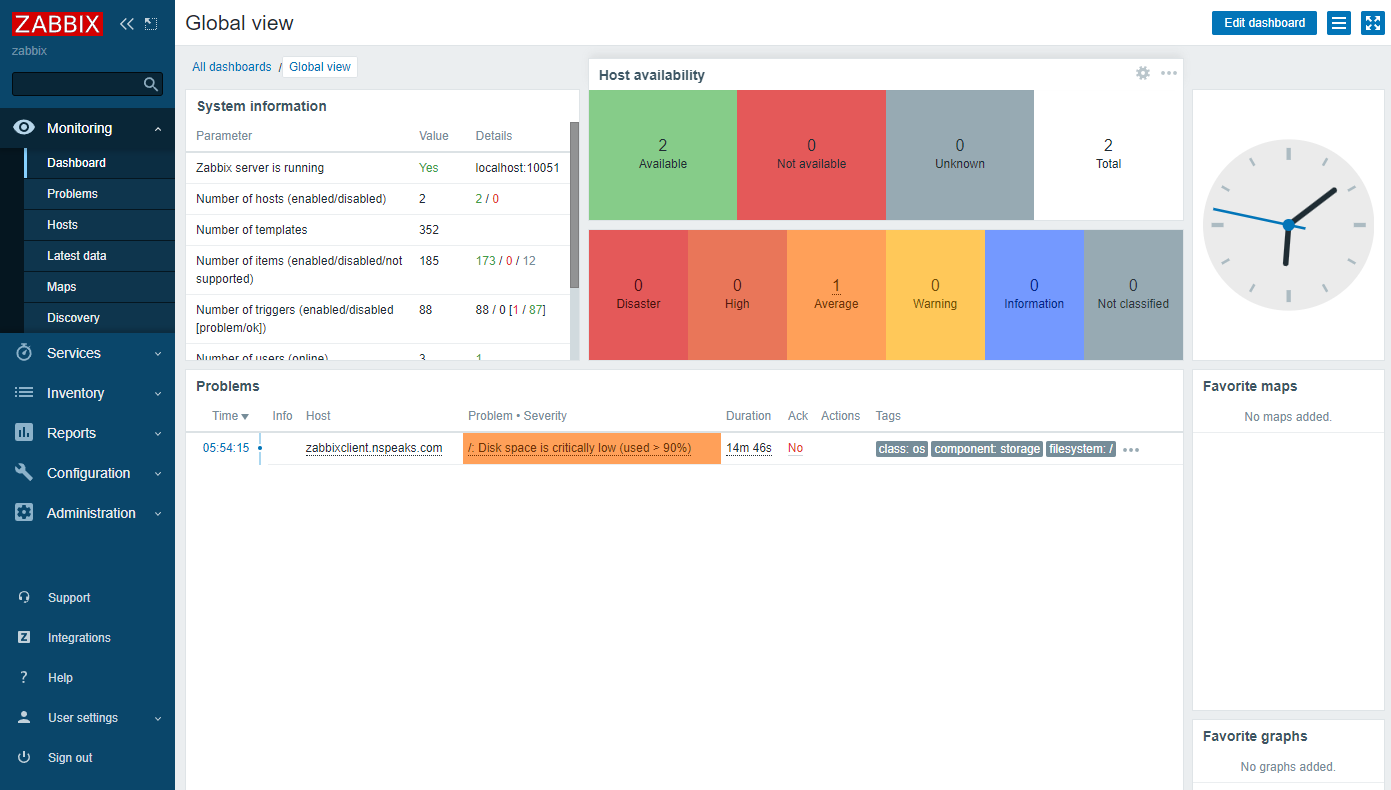
You can also check the dashboard for the alert which should appear within seconds.
Delete the temporary file when you are done.
$ rm -f /tmp/temp.img
You should receive another email notifying you that the issue has been resolved.

Step 16 - Configure Auto registration for Linux Nodes
When you have to add multiple nodes to the Zabbix server, the process can become a bit tedious. Fortunately, Zabbix frontend allows you to automate the process using Auto registration.
Visit Actions >> Autoregistration actions and click the Create action button on the top right.

Once on the new screen, give a name (Auto registration of Linux servers) to the action.
Click the Add button below Conditions to add a condition and choose Host metadata as the type, contains as the operator, and Linux as the value.

Click Add to proceed and the create action page should look like the following.

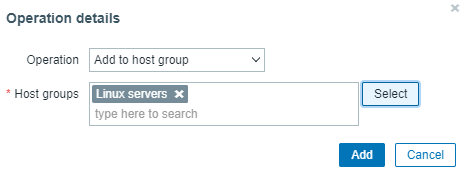
Click the Operations tab, select Add to host group as the Operation, and select Linux servers as the Host groups. Click the Add button to finish.
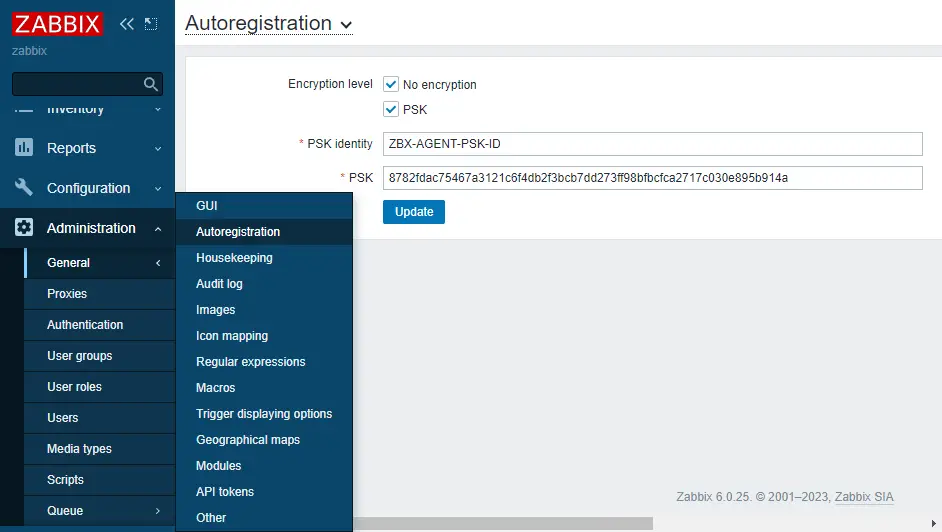
If you want to use PSK encryption, you can configure that as well. Visit Administration >> General >> Autoregistration menu and enable both encryption options. Enter a PSK ID and a PSK key created on the Zabbix server. You can use this PSK ID and key on every node and they will be encrypted using these values.
From hereon, every time you install and configure the Zabbix agent on a Linux server, it will automatically be added to the Zabbix front end.
Conclusion
This concludes our tutorial on installing and configuring a Zabbix server on a Rocky Linux 9 system. We also installed a Zabbix agent on a remote server to connect with the server. If you have any questions, post them in the comments below.

