How to Install CSF (Config Server Firewall) on Debian 12
This tutorial exists for these OS versions
- Debian 12 (Bookworm)
- Debian 11 (Bullseye)
On this page
CSF or Config Server Firewall is a Stateful Packet Inspection (SPI) firewall based on IPtables and Perl. it provides a daemon process that will monitor your services for failure authentication and also provides Web UI integration for web-based server management such as Webmin, cPanel, and DirectAdmin.
In this tutorial, we'll walk you through the installation process of CSF (Config Server Firewall) on the Debian 12 server. You will also learn the basic configuration of CSF, blocking IP addresses using two different methods, and setting up CSF Web UI for ease of management and monitoring.
Prerequisites
To begin with this tutorial, ensure you have the following:
- A Debian 12 server.
- A non-root user with administrator privileges.
Preparing System
Before installing CSF, you must ensure that dependencies are installed. This includes packages such as Perl and iptables. Also, when you've another firewall running such as UFW (Uncomplicated Firewall), you need to disable it.
To get started, run the following command to update your Debian repository.
sudo apt update

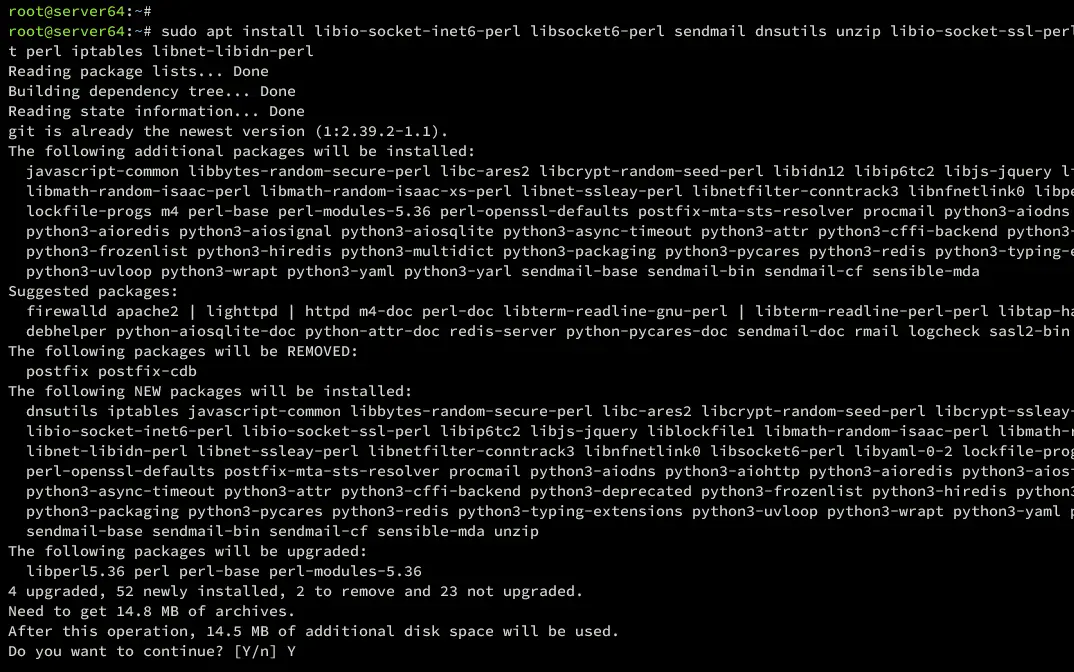
Once the repository is updated, install the following dependencies for CSF using the command below.
sudo apt install libio-socket-inet6-perl libsocket6-perl sendmail dnsutils unzip libio-socket-ssl-perl libcrypt-ssleay-perl git perl iptables libnet-libidn-perl libwww-perl liblwp-protocol-https-perl libgd-graph-perl
Type Y and press ENTER to proceed.
Lastly, you must disable UFW if you've it on your Debian server. CSF by default uses iptables as firewall and packet filter.
sudo ufw disable
Downloading and Installing CSF
In the following section, you will download and install CSF (Config Server Firewall) manually from the source. So, let's get started.
Download the CSF source code using the wget command below. You will see the file csf.tgz.
wget http://download.configserver.com/csf.tgz
Now extract the csf.tgz file using the tar command below. The CSF source code will be available in the csf directory.
sudo tar -xvzf csf.tgz
Next, move to the csf directory and execute install.sh script to start the installation.
cd csf; sh install.sh
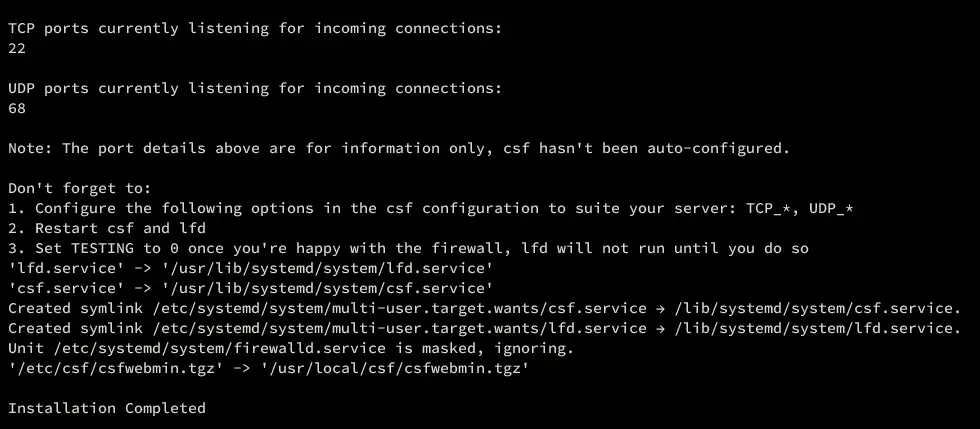
When installation is started, you should get the following:

When the process is finished, you should get an output 'Installation Completed'.
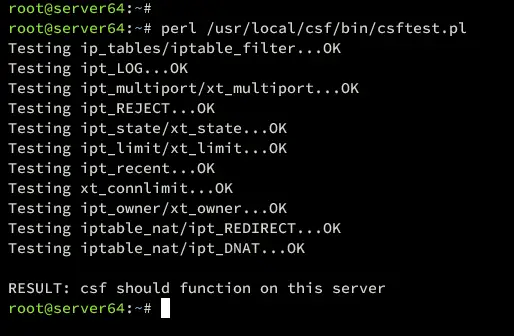
Now that CSF is installed, verify it using the command below.
perl /usr/local/csf/bin/csftest.pl
Ensure the output is OK from each feature test.
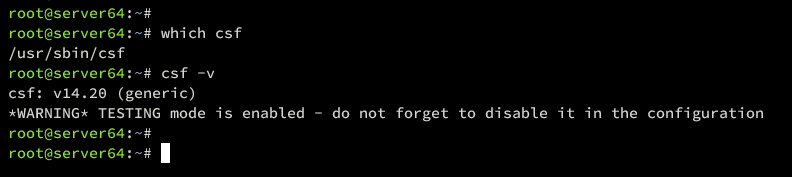
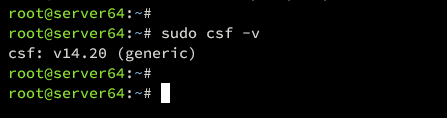
Lastly, run the following command to verify the CSF binary location and version.
which csf
csf -v
In the following output, you can see CSF v14.20 is installed in /usr/sbin/csf.
Configuring CSF
After you've installed CSF, you will learn some basic configurations of CSF (Config Server Firewall). The main configuration directory for CSF is the /etc/csf directory, you will find the main CSF configuration file csf.conf.
Use the following nano editor command to open the CSF config file /etc/csf/csf.conf.
sudo nano /etc/csf/csf.conf
Allow Traffic via CSF
Find TCP_* and UDP_* options and add your ports.
# Allow incoming TCP ports
TCP_IN = "20,21,22,25,53,853,80,110,143,443,465,587,993,995"

# Allow outgoing TCP ports
TCP_OUT = "20,21,22,25,53,853,80,110,113,443,587,993,995"

# Allow incoming UDP ports
UDP_IN = "20,21,53,853,80,443"

# Allow outgoing UDP ports
# To allow outgoing traceroute add 33434:33523 to this list
UDP_OUT = "20,21,53,853,113,123"
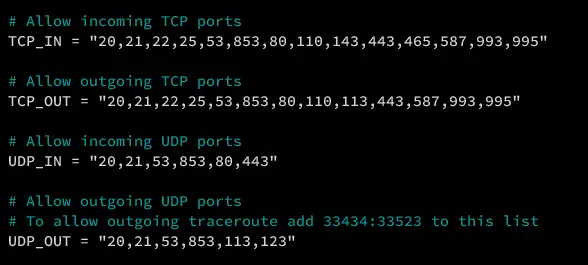
Detailed options:
- TCP_IN: allow incoming traffic to TCP ports.
- TCP_OUT: allow outgoing traffic to specific TCP ports.
- UDP_IN: allow incoming traffic to UDP ports.
- UDP_OUT: allow outgoing traffic to specific UDP ports.
Allow/Deny Ping or ICMP Requests
If you really need to disable Ping or ICMP 'IN and OUT', use the following options. The 'ICMP_IN = 1' means ping will be allowed, and the 'ICMP_OUT = 1' means the server can ping to another network.
# Allow incoming PING. Disabling PING will likely break external uptime
# monitoring
ICMP_IN = "1"
...
# Allow outgoing PING
#
# Unless there is a specific reason, this option should NOT be disabled as it
# could break OS functionality
ICMP_OUT = "1"

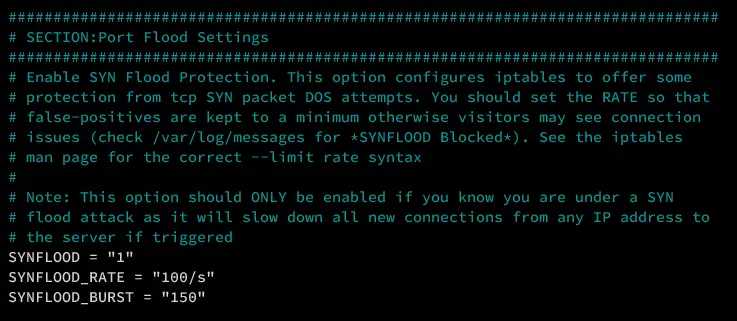
Synflood Protection
ONLY ENABLE this option when needed, for example against DOS attacks on your server.
###############################################################################
# SECTION:Port Flood Settings
###############################################################################
# Enable SYN Flood Protection. This option configures iptables to offer some
# protection from tcp SYN packet DOS attempts.
...
SYNFLOOD = "0"
SYNFLOOD_RATE = "100/s"
SYNFLOOD_BURST = "150"
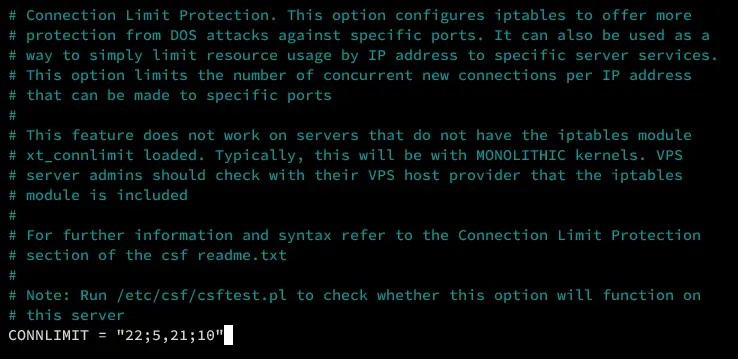
Limiting Concurrent Connections
Next, use the option 'CONNLIMIT' to limit the concurrent connections for specific ports. The format is 'PORT;LIMIT', so, for example, configuration '22;5' will limit the SSH port to only 5 concurrent connections.
# Connection Limit Protection. This option configures iptables to offer more
# protection from DOS attacks against specific ports. It can also be used as a
# way to simply limit resource usage by IP address to specific server services.
# Note: Run /etc/csf/csftest.pl to check whether this option will function on
# this server
CONNLIMIT = "22;5,21;10"
Disable TESTING Mode and Restric Access Syslog
Now if you have configured everything and added your ports, change the 'TESTING' to '1' and restrict access to rsyslog sockets with 'RESTRICT_SYSLOG= "3"'.
# lfd will not start while this is enabled
TESTING = "0"

...
# 0 = Allow those options listed above to be used and configured
# 1 = Disable all the options listed above and prevent them from being used
# 2 = Disable only alerts about this feature and do nothing else
# 3 = Restrict syslog/rsyslog access to RESTRICT_SYSLOG_GROUP ** RECOMMENDED **
RESTRICT_SYSLOG = "3"
When everything is finished, save the file and exit the editor.

Testing and Starting CSF Service
Now run the csf command below to verify your configuration. If you have proper CSF configuration, you will see the CSF output. In contrast, you will see the detailed error when your configuration is incorrect.
csf -v
Next, run the systemctl command below to start the csf and lfd service.
sudo systemctl start csf lfd
Once csf service is running, you will be disconnected automatically from the server. You can log in again to the server, then verify both csf and lfd service using the command below.
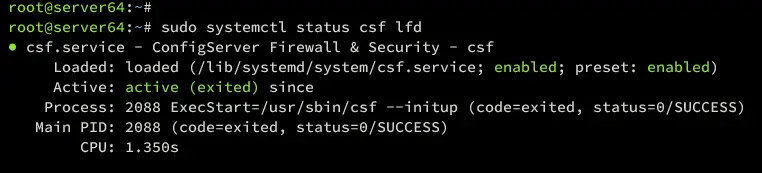
sudo systemctl status csf lfd
You can see csf service is running.
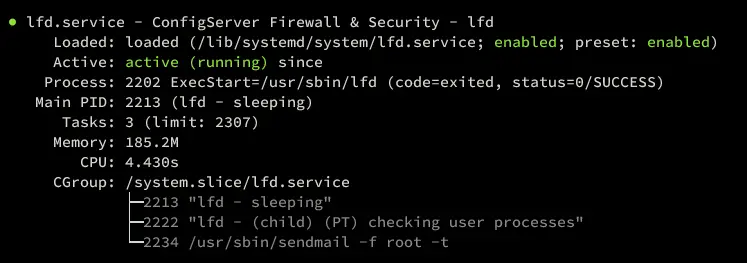
Also, you can see the lfd service is running.
Blocking via CSF
At this point, you've learned the basic configuration for CSF (Config Server Firewall). Now let's take a look at blocking IP addresses via CSF.
Blocking IP addresses via IP BLOCK Lists
Open the default IP BLOCk lists configuration /etc/csf/csf.blocklists using the nano editor command below.
sudo nano /etc/csf/csf.blocklists
Uncomment the following lines to block IP addresses from the Spamhaus database.
# Spamhaus Don't Route Or Peer List (DROP)
# Details: http://www.spamhaus.org/drop/
SPAMDROP|86400|0|http://www.spamhaus.org/drop/drop.txt

# Spamhaus IPv6 Don't Route Or Peer List (DROPv6)
# Details: http://www.spamhaus.org/drop/
SPAMDROPV6|86400|0|https://www.spamhaus.org/drop/dropv6.txt

# Spamhaus Extended DROP List (EDROP)
# Details: http://www.spamhaus.org/drop/
SPAMEDROP|86400|0|http://www.spamhaus.org/drop/edrop.txt
Save the file and exit the editor when finished.

Below are some details options:
- SPAMDROP: name of the block which will be used as iptables chan name. Use only UPPERCASE with max 25 characters.
- 86400: refresh interval to download and renew block lists IP addresses.
- MAX: maximum IP addresses that will be used from the list. A value of 0, means all IPs will be included.
- URL: the download URL of block lists IP addresses.
Blocking IP Addresses via GeoIP
Another method to block an IP address is via GeoIP, which allows you to block incoming traffic from a specific country.
Use the following nano editor command to open CSF configuration '/etc/csf/csf.conf'.
sudo nano /etc/csf/csf.conf
Find the CC_DENY and CC_ALLOW parameters to set up blocking per country via GeoIP.
# Each option is a comma-separated list of CC's, e.g. "US,GB,DE"
CC_DENY = "RU,CN"
CC_ALLOW = "US,GB,DE,NL,SG"
By default, CSF uses the database GeoIP from db-ip, ipdeny, and iptoasn. But, you can also change it via the MaxMind GeoIP database. To use the MaxMind database, change the 'CC_SRC' to '1', then input your MaxMind license key to 'MM_LICENSE_KEY' option.
# MaxMind License Key:
MM_LICENSE_KEY = ""

...

# Set the following to your preferred source:
#
# "1" - MaxMind
# "2" - db-ip, ipdeny, iptoasn
#
# The default is "2" on new installations of csf, or set to "1" to use the
# MaxMind databases after obtaining a license key
CC_SRC = "1"
Save the file and exit the editor when you're done.
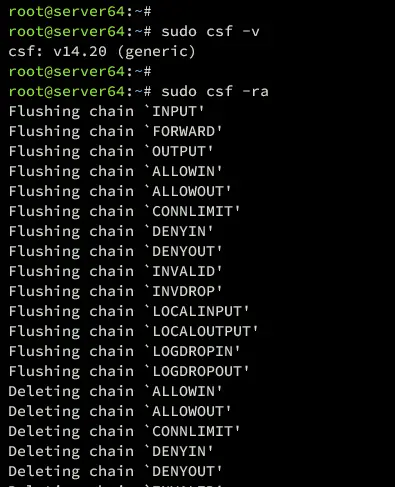
Now, run the following command to verify the CSF configuration. If no error, you should get the CSF version.
sudo csf -v
Next, restart both the csf and lfd services using the following command.
sudo csf -ra
You should see an output like the following:
To ensure both csf and lfs are running, use the following command to verify both services.
sudo systemctl status csf lfd
Enable CSF Web UI
In the following section, you will learn how to enable CSF Web UI for monitoring via a web browser.
Open the CSF configuration using the following nano editor.
sudo nano /etc/csf/csf.conf
Change the 'UI' option to '1' and enable CSF Web UI. Then, adjust the UI_PORT, UI_IP, UI_USER, and the UI_PASS with your details.
#
# 1 to enable, 0 to disable
UI = "1"

...

# Do NOT enable access to this port in TCP_IN, instead only allow trusted IPs
# to the port using Advanced Allow Filters (see readme.txt)
UI_PORT = "1048"

...

# If the server is configured for IPv6 but the IP to bind to is IPv4, then the
# IP address MUST use the IPv6 representation. For example, 1.2.3.4 must use
# ::ffff:1.2.3.4
#
# Leave blank to bind to all IP addresses on the server
UI_IP = "127.0.0.1"

...

# This should be a secure, hard to guess username
#
# This must be changed from the default
UI_USER = "alice"
...
# numbers and non-alphanumeric characters
#
# This must be changed from the default
UI_PASS = "passw0rd"
Save the file and exit the editor when finished.
Now find your public IP address using the command below.
curl https://ipinfo.io/
Add your IP address to the '/etc/csf/csf.allow' and '/etc/csf/ui/ui.allow' configurations. This will whitelist your public IP address and allow you to access CSF Web UI and the server.
# single ip
192.168.5.1

# subnet
192.168.5.0/24
After that, run the command below to verify the CSF configuration and restart both the csf and lfd services.
sudo csf -v
sudo csf -ra
Next, verify the list of whitelisted IP addresses on CSF using the command below. Find the iptables chain ALLOWIN and ALLOWOUT, and you should see your whitelist IP addresses.
sudo csf -l

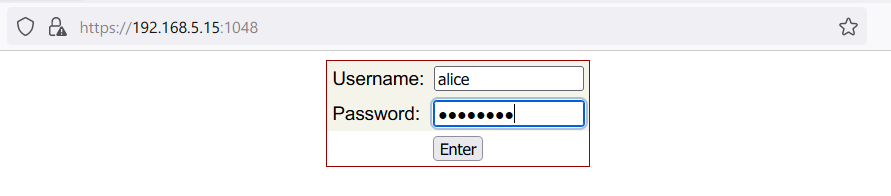
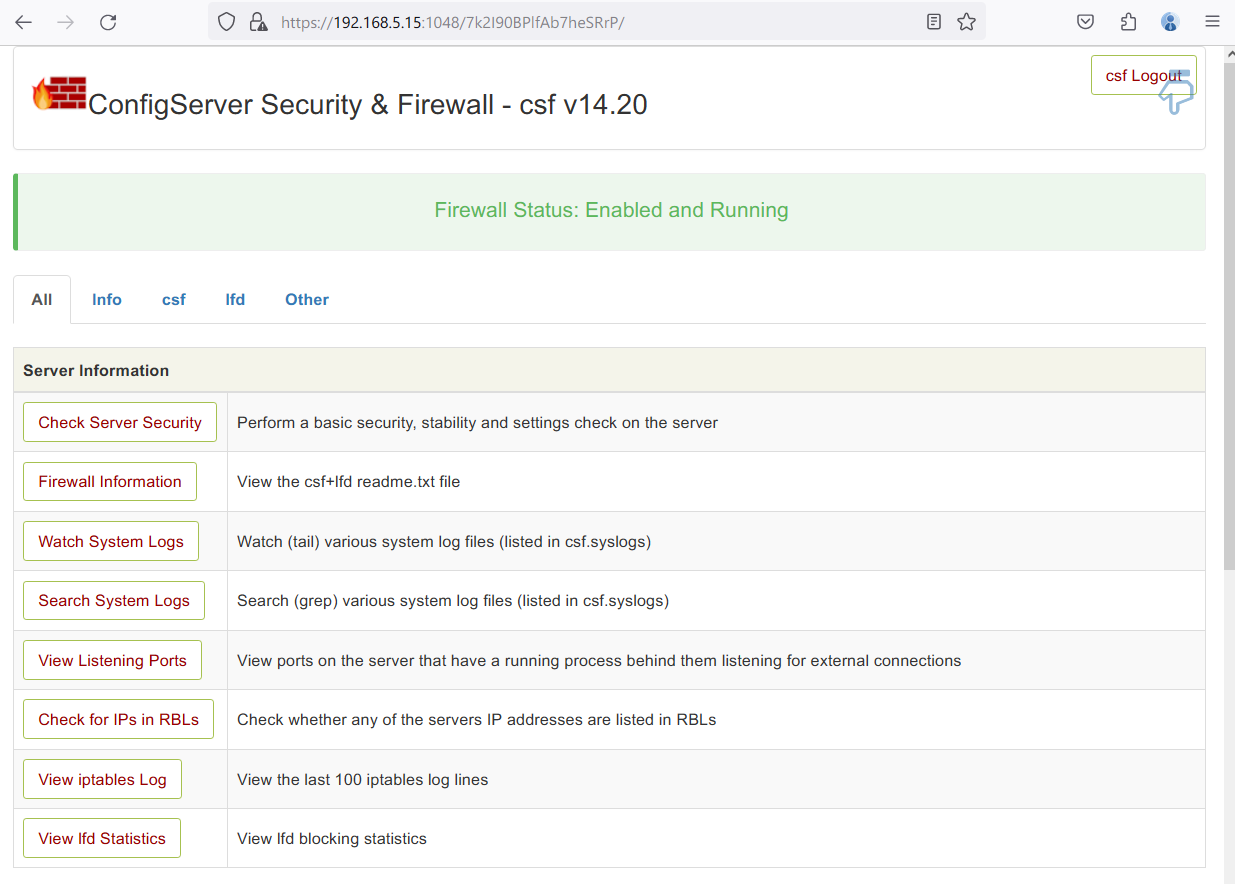
Now open up your web browser and visit the server IP address followed by the CSF Web UI port (i.e: https://192.168.5.15:1048). If your configuration is successful, you should see the CSF login page.
Input your admin user and password, then click ENTER.
You should see the CSF dashboard like the following:
Conclusion
Congratulations! You've now successfully installed CSF (Config Server Firewall) on the Debian 12 server. you've also learned the basic usage of CSF for allowing traffics to a specific port, disabling ping or ICMP, and setting up connection limit for ports.
In addition to that, you've also learned how to block IP addresses with CSF by utilizing IP BLOCK Lists and GeoIP. Also, you've enabled CSF Web UI for ease of management and monitoring of your CSF server.

