
Kimin Ryu is an Android app developer who uses the Stream Chat SDK to build applications in Android and Compose. Ryu originally chose Stream for his company's app because of its customizability and open-source SDK code.
Access to the source code allowed him to resolve queries and efficiently communicate with Stream developers about bugs. Ryu immersed himself in open-source culture, contributed to various open-source projects, including Stream's SDK, and even released a Compose library.
After integrating the chat SDK, Ryu was inspired and found the various clone projects using Stream's SDK very helpful. When Stream released its Video API and Video SDKs, he thought it would be wonderful to provide that same inspiration and help to others.
This post introduces cloning the Google Meet app using the Android Video SDK.
Features to Implement
I decided to create a Google Meet app. After using Google Meet, I determined the features to implement as follows. While there are many more features, I focused primarily on key functions related to video calling:
- Meeting room list screen
- Joining a meeting with a room id
- Creating a new meeting room
- Lobby screen
- Real-time meeting room
Implementation
In this section, you'll learn how each feature of the Google Meet Clone app was developed. Each step will be broken down in detail so you are welcomed to create a project and follow along in building the project.
Installation
Currently, Stream offers two types of artifacts:
For this project, I used the UI components library. It gives us all of the default compontents you would expect to have in a video calling application already pre-configured and optimized to handle layout, retries, background track handling and more.
Their tutorial provides detailed instructions on how to import the SDK into your Android projects. Thier Video API like their Chat service is free for developers to use in their application. Each month, developers on their Video platform recieves a $50 monthly credit.
Initialization
To use the Stream Video SDK, you must set up a video client. I implemented StreamVideoHelper, which initializes the video client based on the official documentation and demo. When the app is launched, it initializes the video client using saved user information. If no user information is saved, it redirects to the login screen.
The user data is stored using a data store library provided by the SDK. Initialization of the video client requires User, Token, etc., and this library facilitates convenient management of these requirements.
A token is essential for initializing the video client and must be issued server-side. However, apps in development can use the DevToken provided by the SDK. This project used DevToken due to the absence of a separate backend.
Meeting List

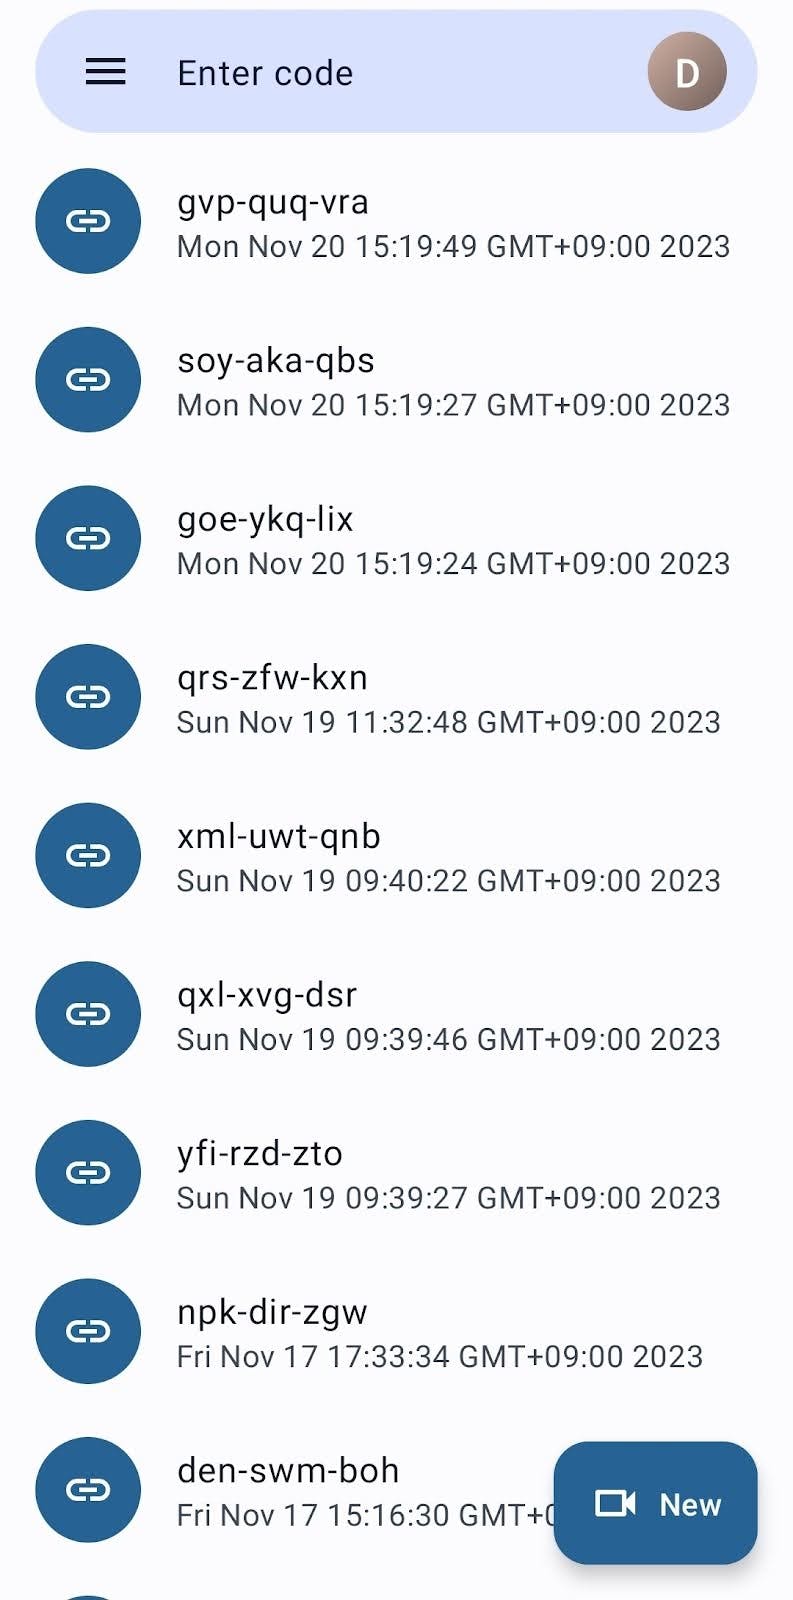
For the meeting list implementation, I used the video client's queryCalls method.
Following the guide, I added filter and sorting options. In this project, I set these options to load the most recent calls created by the user.
val result = streamVideo.queryCalls(
  filters = mapOf("created_by_user_id" to userId),
  sort = listOf(SortField.Desc("created_at"))
)
result.onSuccess { (calls) ->
  _uiState.update { it.copy(calls = calls) }
}
When a new call is created, the call list needs to be refreshed. Stream provides an interface for subscribing to various events. Accordingly, I subscribed to the CallCreatedEvent to reload the list.
streamVideo.subscribeFor<CallCreatedEvent> { event ->
  if (event.call.createdBy.id == streamVideo.userId) {
    load()
  }
}
Join with a Code

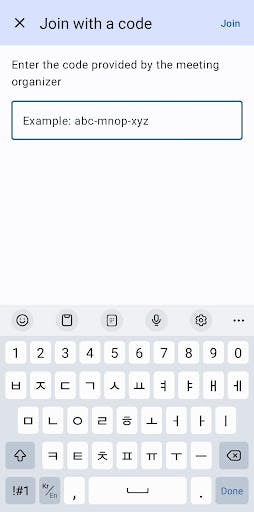
You can check for a call with a specific id using the video client. The app checks if a call with the entered code exists and directs the user to the lobby of that call.
Create a New Meeting
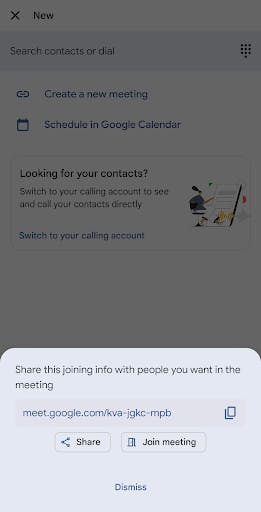
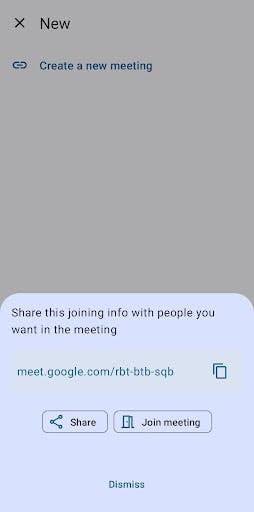
To create a call, you need a type and id. Stream provides four predefined call types (default, audio room, livestream, and development), and you can also create your own call type. As the names suggest, the predefined call types come with settings suitable for each type's purpose. In this project, I used the default type. For the id, you can specify a specific id or, if not specified, a general uuid generated by Stream's uuid generator. Once you have the type and id, you can easily create a new call using the video client.
val callId = StreamCallId("default", MeetingIdGenerator.generate())
val call = streamVideo.call(callId.type, callId.id)
val result = call.create()
result.onSuccess {
  _uiState.update { it.copy(createdCallId = callId) }
}
Meeting Lobby

Stream Video SDK's UI components include a composable called CallLobby. It looks basic and supports some customization of the UI.

Although I wanted to use CallLobby, I had to implement it myself due to differences with Google Meet's lobby screen. It seemed like a difficult task, but all UI components were separated down to a low level, making them easy to reuse and allowing me to quickly implement my lobby.
Additionally, it provides a method for requesting Android Runtime Permission, making it easy to obtain camera and microphone permissions.
Meeting

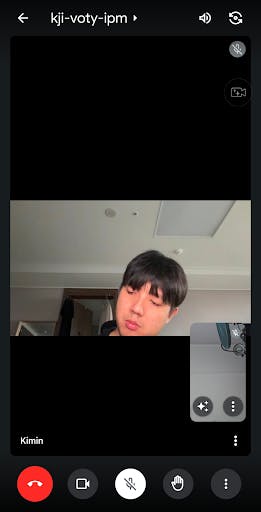

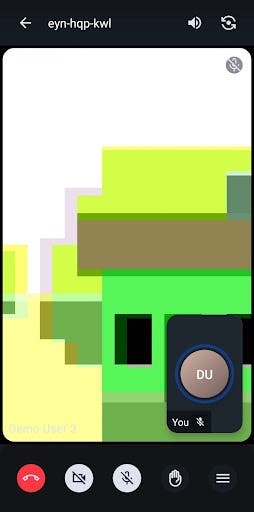
The Meeting is a screen where participants gather to make calls.

Although I can quickly compose a UI using Stream Video SDK's CallContent composable, I implemented it myself due to differences with Google Meet, like with the lobby. This screen required various actions, and I could easily implement them by referring to existing composable code and guide documents.

In this project, only Picture in Picture (pip) was applied, but the SDK also provides various additional features such as Screen Sharing, CallLobby, Screenshot, Recording. I was impressed that the user experience, familiar with Google Meet, Zoom, etc., could be so easily implemented.
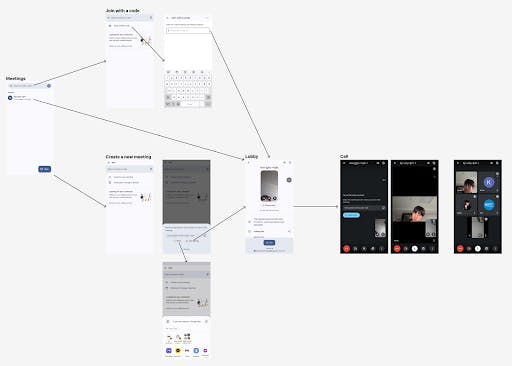
All Screenshots

Conclusion
My Google Meet project was a simple demo project to try out Stream's Video SDK. As I felt when using the Chat SDK, having all the code open-sourced is really helpful. Since the code is open, it was easier to resolve any curiosities or bugs that arose. I also learned a lot by examining the internal implementation of various features. I encountered big and small problems while developing this clone app, and plan to suggest and improve upon these issues. This process will also be a mutually beneficial and memorable experience.
Using Stream's high-quality Jetpack Compose SDK and examining its internal implementation was very helpful for me. The SDK provided most of the necessary UI components, allowing me to quickly implement core functions.
Stream's UI components mostly support customization, and by referring to the implementation of low-level components, I could easily write my components.
Seeing that the total number of end users of services operated by Stream's SDK exceeds one billion, I could see the effort made to meet various requirements. It gave me hints on how to design reusable components in the future.
If you're interested in Stream's video SDK, please apply for the beta test here.
Follow Kimin Ryu: https://www.linkedin.com/in/kimin-ryu-731579b9/
