
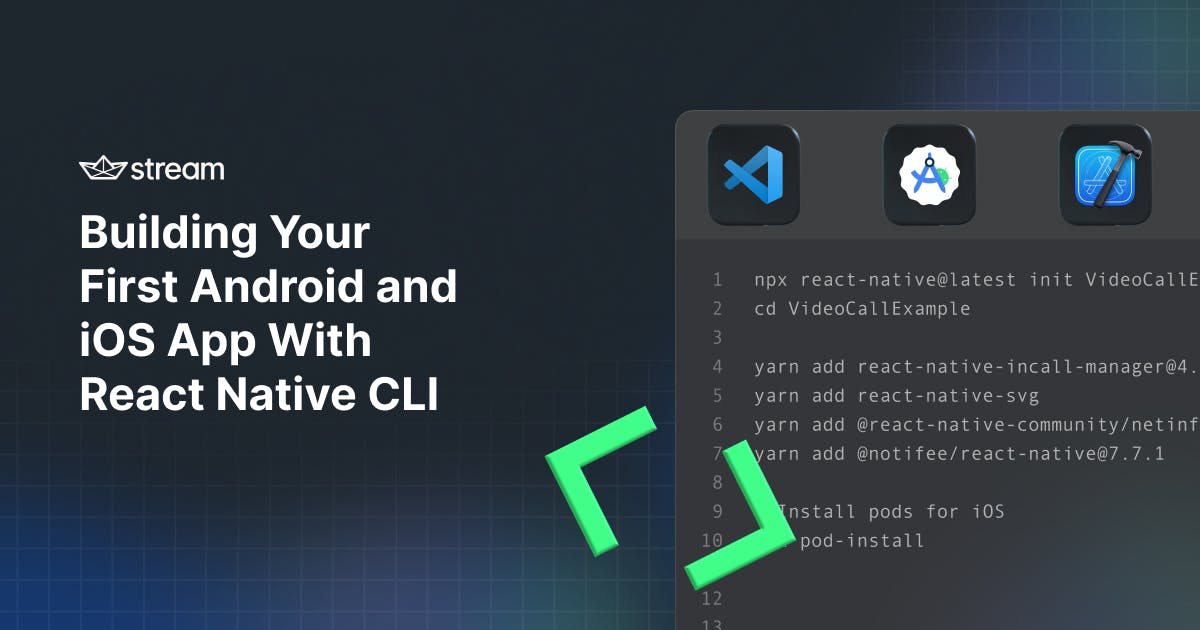
Setting up the React Native Command Line Interface (CLI) to prepare your development environment for Android and iOS projects requires many phases. These phases include platform-specific settings for iOS and Android, Xcode, and Android Studio configurations. Continue reading to learn how to prepare and run your React Native projects smoothly on iOS and Android devices.
Note: This article focuses on using macOS to configure React Native development for Android and iOS.
If you want to follow this tutorial, the completed project and code can be found on our GitHub. Don’t be shy to share or leave a ⭐.
Prerequisites
Although you can test the final project using simulators, our primary focus is running your React Native projects with real devices. It requires actual Android and iOS devices for testing. To complete the tutorial successfully, you should have the latest macOS version Ventura or Sonoma. The following applications are also required:
- VS Code: The actual development environment.
- Terminal: A command line interface built-in into macOS.
- Xcode: For configuring the iOS version of the app.
- Android Studio: For configuring the necessary dependencies for Android.
Getting Started With React Native
The React Native documentation provides two official ways to get started.
- Expo Go Quickstart: The most straightforward and quickest way to set up React Native for iOS and Android development.
- React Native Command Line Interface (CLI) Quickstart: Requires extra setup to get up and running with React Native.
When planning to build a React Native app, it is essential to think of whether the project will require a custom native code implementation or not. If no native code is needed, then the Expo Go Quickstart option is the excellent and easiest way to begin. It provides development tools like Snack, Go, and many features to build and test React Native projects on actual iOS and Android devices.
In this tutorial, we want to build a video-calling app using Stream's React Native Video SDK. In the context of our calling app, we will need a custom native code implementation that goes beyond the native modules usage the Expo SDK supports. Therefore, the React Native CLI Quickstart is the best option for our calling app.
Add Dependencies
Getting started with React Native CLI development requires the installation of the following dependencies for Android and iOS:
- React Native CLI: A built-in build tool for React Native. It does not require a separate installation.
- Node: A multi-platform and open-source JavaScript runtime environment. If you already have Node installed on your macOS, update it to version 16 or later.
- Watchman: An open-source service that watches and records files for changes. Installing Watchman ensures a better performance of changes in your project's file system.
Step 1: Install Node and Watchman
Before we can start writing our React Native application, we must ensure that our machine has the appropriate tooling to build our app.
As we are using React Native, we need to have NodeJS installed as well as Watchman to rebuild our application on code changes.
brew install node watchmanNote: We use Homebrew on MacOS to manage our NodeJS install. If you don’t have Homebrew installed, it can be downloaded from here.
Step 2: Install iOS Dependencies
This section assumes you have already downloaded and installed Xcode and the other tools outlined in the prerequisites section. The project in this article uses Xcode version 15. However, you can use version 13 or later. The iOS dependency for running React Native projects has three main configurations.
- Install Xcode Command Line Tools and Cocoapods: Running the React Native project on iOS requires Xcode Command Line Tools and dependency manager (Cocoapods). Open Terminal and run
xcode-select --installto start the installation. The above command also installs Cocoapods. Usepod --versionto verify the Cocoapods installation in the Terminal or install it withsudo gem install cocoapods. The command above uses the RubyGems package management framework to install Cocoapods. Launch Xcode, go to Settings... -> Locations to check the version of Command Line Tools installed.

- Install Xcode simulators and devices: To prepare your React Native project to run on iOS, you should install simulators and configure actual iOS devices to run the project. Check which simulators and devices you have set up for the development with the Xcode shortcut
shift + cmd + 2or click Window -> Devices and Simulators in the Xcode toolbar.

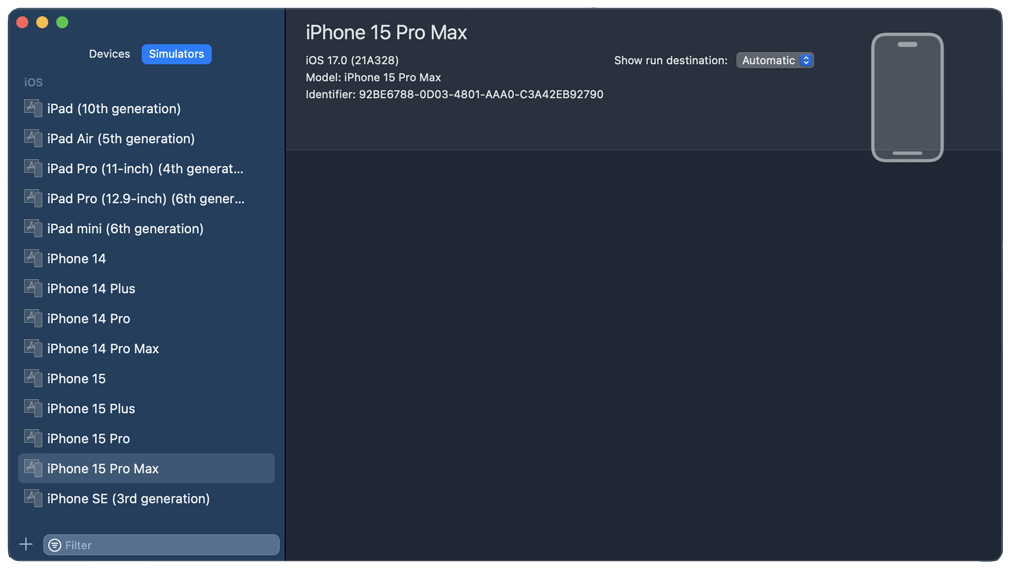
If you still need to install iOS simulators, opening Xcode will prompt you and give instructions to install them.
- Set the project's Bundle Identifier in Xcode: To be able to run the React Native project on iOS, the app should be uniquely identified by Xcode when you run it. You can add this configuration by setting the project's Team and Bundle Identifier in Xcode. The section Create a New React Native Project of this article shows you how to create the project with the name NativeCall. Let’s use it for demonstration. When you create a React Native project, it generates an iOS version in the iOS folder. You can open this iOS version of the project in Xcode by navigating to the iOS folder and clicking the
.xcworkspacefile. For the demo project in this article, we haveNativeCall.xcworkspace. When you open it in Xcode, you can set the team and bundle identifiers for the app and test targets, as shown in the images below.

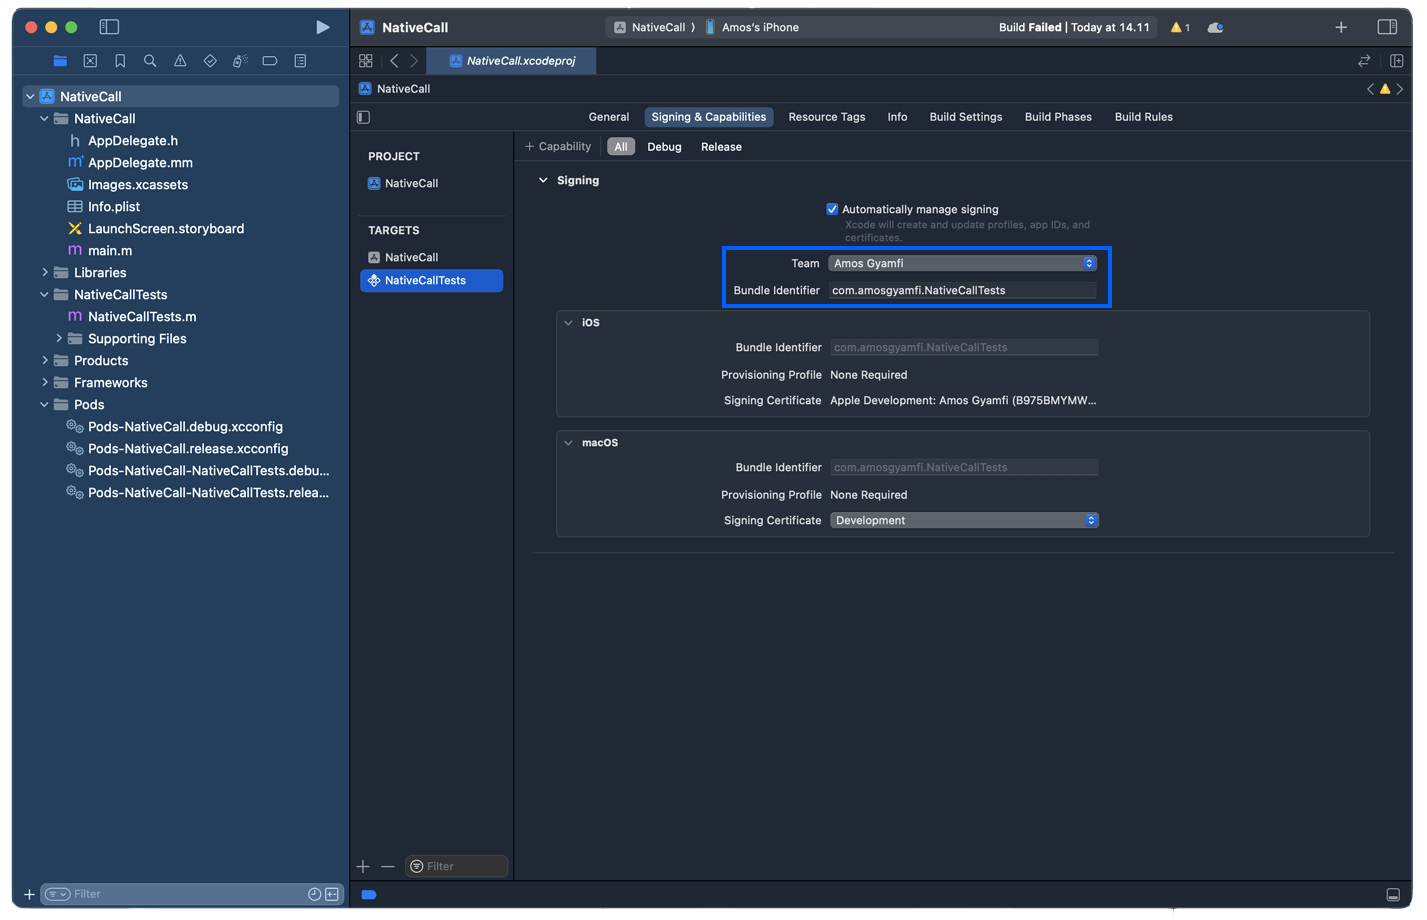
First, select the project's name (NativeCall) in the left Navigator and head to Signing & Capabilities. Under TARGETS, you should choose the generated targets. In this context, set your team and bundle identifiers for NativeCall and NativeCallTests.
Note: The team and bundle identifiers must be the same for the app and test targets.
Step 3: Install Android Dependencies
Running React Native projects on Android requires Java Development Kit as a dependency. The OpenJDK's Azul Zulu build is recommended and can be downloaded with Homebrew using the following commands.
# Tap into homebrew/cask-versions
brew tap homebrew/cask-versions

# Install the Zulu OpenJDK 17
brew install --cask zulu17

# Get the installation’s location and post-installation instructions
brew info --cask zulu11
Configure Your Android Development Environment
This section requires the installation of Android Studio and setting it up for React Native. We will use Android Studio Giraffe, but feel free to download any latest version. Once you have the newest version of Android Studio installed, you should also install the required Android SDK that supports adding native code for building React Native apps.
Install the Android 13 Tiramisu SDK
Adding native Android code for React Native projects requires the Android 13 Tiramisu SDK. Launch and add this dependency in Android Studio by clicking the More button and selecting SDK Manager, as shown in the image below.

From the SDK Manager window, click Show Package Details, select all the options highlighted in the image below, and click Apply.

The action performed here will install the Android 13 Tiramisu SDK with the required selected dependencies.
Add the ANDROID_HOME Environment Variable To Your .zshrc

Another requirement for using native Android code for React Native Apps is to add the ANDROID_HOME environment variable to the systems .zshrc file.
Note: The .zshrc file is hidden on macOS by default. You can use several Terminal commands to edit. However, we will open it with TextEdit and add the following.
export ANDROID_HOME=$HOME/Library/Android/sdk
export PATH=$PATH:$ANDROID_HOME/emulator
export PATH=$PATH:$ANDROID_HOME/platform-tools
You can locate the .zshrc file in the user account directory on macOS.

You can show this hidden file with command + shift + .. Right-click to open it with TextEdit and add the above three commands. This action will add the ANDROID_HOME environment variable to your system's path.
Step 4: Create a New React Native Project
- Launch your favorite command line tool, Terminal or Warp, and add the following command and specify the location you want to store the project. NativeCall is your project’s name.
npx react-native@latest init NativeCall
The command above uses the built-in React Native command line interface to generate a new project, NativeCall.
- We will use VS Code as our code editor. Launch it and drag the base folder of the React Native project, NativeCall, to the blank VS Code window to open it.
Building Our App
For fun, let’s create a simple calling app using Stream’s newly released React Native SDK. We will build a simple VoIP app to easily call between Android and iOS devices. You don’t need any experience with Stream or working with VoIP on React Native, as we will cover each step in detail.
If you would like to learn more about Stream Video for React Native, please check out the documentation or tutorials on our website.
Open the NativeCall project created in the previous step in VS Code. Go to the toolbar and click Terminal -> New Terminal. Add the following command.
yarn add @stream-io/video-react-native-sdk @stream-io/react-native-webrtcThe command above fetches Strream's React Native Video SDK and its components. The SDK uses WebRTC under the hood.
Install the Video SDK’s Peer Dependencies
The Stream's React Native Video SDK uses the following peer dependencies for its operations.
- Notifee: A fully featured React Native notification library.
- NetInfo: An open-source, cross-platform API that provides information about the app's network type and connection status.
- React Native SVG: An open-source, cross-platform SVG library for React Native.
- React Native Incall Manager: It is responsible for handling audio/video call-related events, such as automatic routing of audio to devices, turning microphone and video camera on and off, and playing ringtones during outgoing or incoming calls.
Use the compound command below to install the above dependencies.
yarn add react-native-incall-manager@4.1.0 react-native-svg @react-native-community/netinfo@9.3.9 @notifee/react-native@7.7.1Set Camera and Microphone Usage Permissions

Since our audio/video calling app requires access to the users' camera and microphone on iOS and Android, we must configure permissions for both platforms. When users try to use the app for the first time, they will be prompted to allow or disallow the camera and microphone usage.
iOS: Set Camera and Microphone Permissions
In the VS Code project, please find the Objective C file AppDelegate.mm under the iOS folder and add the code snippet below to set the permissions declaration.
#import "StreamVideoReactNative.h"

@implementation AppDelegate

- (BOOL)application:(UIApplication *)application didFinishLaunchingWithOptions:(NSDictionary *)launchOptions
{
  // highlight-next-line
  [StreamVideoReactNative setup];

  // the rest..
}
Open Info.plist from the iOS folder and add the code snippet below under the dict tag to set the permissions for iOS.
<key>CFBundleName</key>
  <string>$(PRODUCT_NAME)</string>
  // highlight-start
  <key>NSCameraUsageDescription</key>
  <string>$(PRODUCT_NAME) would like to use your camera</string>
  <key>NSMicrophoneUsageDescription</key>
  <string>$(PRODUCT_NAME) would like to use your microphone</string>
Android: Set Camera and Microphone Permissions
Find the MainApplication.java file in the Android folder and substitute its content with the following sample code to declare camera and microphone permissions for Android.
import com.streamvideo.reactnative.StreamVideoReactNative;

public class MainApplication extends Application implements ReactApplication {

  @Override
  public void onCreate() {
    super.onCreate();
    // highlight-next-line
    StreamVideoReactNative.setup();
    // the rest..
  }
}
Also, open AndroidManifest.xml and add the permissions with this code snippet.
<manifest xmlns:android="http://schemas.android.com/apk/res/android">
  // highlight-start
  <uses-feature android:name="android.hardware.camera" />
  <uses-feature android:name="android.hardware.camera.autofocus" />
  <uses-feature android:name="android.hardware.audio.output" />
  <uses-feature android:name="android.hardware.microphone" />

  <uses-permission android:name="android.permission.CAMERA" />
  <uses-permission android:name="android.permission.RECORD_AUDIO" />
  <uses-permission android:name="android.permission.ACCESS_NETWORK_STATE" />
  <uses-permission android:name="android.permission.CHANGE_NETWORK_STATE" />
  <uses-permission android:name="android.permission.MODIFY_AUDIO_SETTINGS" />
  // highlight-end
  <uses-permission android:name="android.permission.INTERNET" />
  ...
  <application
    ...
  />
  </application>
</manifest>
Android: Specify Java Version Compile Options
Open android/app/build.gradle and add the code snippet below. There are two build.gradle files, so open the one under the app folder and add it to the android section.
android {
  compileOptions {
    sourceCompatibility JavaVersion.VERSION_1_8
    targetCompatibility JavaVersion.VERSION_11
  }
}
Android: Disable Java Newer Versions
Add android.enableDexingArtifactTransform.desugaring=false
in the grade properties file under the android folder android/gradle.properties to turn off desugaring. Doing so will turn off the use of newer Java APIs and libraries.
Step 5: Run the App on iOS
To run the app on an iOS simulator, enter the yarn ios command in the VS Code's Terminal. Alternatively, you can navigate to the project's ios folder, open the .xcworkspace file in Xcode, and run it with a simulator. In the context of this app, the workspace file is NativeCall.xcworkspace. For example, to run the project on an iPhone, click the device options in the Xcode's toolbar and choose iPhone instead of the simulator.
Step 6: Run the App on Android

To run the app with an Android simulator, open the Terminal in VS Code and add the yarn android command. To display the app, an Android virtual device should already be running before you run the above command. You can launch Android Studio, click the More button on the top-right, and select Virtual Device Manager. You can duplicate the virtual Android device that shows or create a new one to run the app.

Tapping the Play button on the top right will launch the Android emulator.

To run the app on an Android device, navigate to the android folder of the React Native project and open it in Android Studio. Attach an Android device to your computer. It will appear under devices and simulators in the toolbar. You can now select it to run the app instead of using the simulator.
Congratulations! The video below demonstrates the app running on iOS (left) and Android (right) devices. Download the finished project from GitHub to test and explore the iOS and Android source codes.
What's Next?
Setting up a React Native project using the Expo framework is excellent if your app does not need to implement a custom native code. One reason is that it provides developers with all the tools and requirements to start quickly and iterate on creating universal native apps for iOS, Android, and the web.
This article showed you how to install and configure the necessary dependencies to get started with React Native on iOS and Android without using Expo. In particular, we created and configured React Native for a video calling app requiring a custom native code.
Head to the related links section to discover and integrate video calling, audio room, and livestreaming into your React Native apps. We have comprehensive tutorials available to get you started with livestreaming, audio rooms and video calling as well.
