
Angular 17 and Kendo UI Scheduler: Building an Interactive Course Calendar

See how to build an interactive course calendar with Kendo UI for Angular Scheduler using all the latest from the Angular 17 release.
When faced with a new challenge, organizing and scheduling your learning plan is essential. You may structure this plan daily, weekly or monthly.
But what if your company needs you to arrange and schedule a series of courses on a calendar, incorporating the latest Angular features for team learning?
Constructing an application with Google Calendar or Outlook integration isn’t something you can achieve overnight. However, what if I told you that you could create your own scheduling application using Angular 17 and the Progress Kendo UI for Angular Scheduler, complete with unique features, in just a few minutes?
- Users select a course and its duration.
- The app automatically generates an event, using the course duration to reserve that time in your calendar.
- It offers the flexibility to view events by month or week, or in an agenda format.
How about this fun idea? Let’s bring it to life together and get to know Angular 17 and the Kendo UI Scheduler!
Setting up Angular 17
To begin, install Angular 17 on your machine. This can be done easily using the following command in your terminal or command prompt:
npm install -g @angular/cli
This command installs the Angular CLI globally on your machine, allowing you to create and manage Angular projects from anywhere.
Once the installation is complete, confirm that everything is set up correctly by running ng version:
ng version
This will display the version of Angular CLI installed and ready to use for your project.
ng version

     _                      _                 ____ _     ___
    / \   _ __   __ _ _   _| | __ _ _ __     / ___| |   |_ _|
   / △ \ | '_ \ / _` | | | | |/ _` | '__|   | |   | |    | |
  / ___ \| | | | (_| | |_| | | (_| | |      | |___| |___ | |
 /_/   \_\_| |_|\__, |\__,_|_|\__,_|_|       \____|_____|___|
                |___/


Angular CLI: 17.0.0
Node: 18.16.1
Package Manager: npm 9.5.1
OS: darwin arm64

Angular:
...

Package                      Version
------------------------------------------------------
@angular-devkit/architect    0.1700.0 (cli-only)
@angular-devkit/core         17.0.0 (cli-only)
@angular-devkit/schematics   17.0.0 (cli-only)
@schematics/angular          17.0.0 (cli-only)
We’re on the right track. To create your new Angular project named “learn-schedule,” run the command ng new learn-schedule:
ng new learn-schedule
? Which stylesheet format would you like to use? SCSS   [
https://sass-lang.com/documentation/syntax#scss                ]
? Do you want to enable Server-Side Rendering (SSR) and Static Site Generation
(SSG/Prerendering)? No
✔ Packages installed successfully.
    Successfully initialized git.
dany ~/Desktop  $
After that’s finished, go to the directory and run ng -serve -o to see your first Angular 17 project ready!
This is just the beginning, and you can now start developing your “learn-schedule” application.
Setting up Kendo UI Scheduler
Before we dive into the installation, let’s talk about what the Kendo UI for Angular Scheduler is and why we’d pick it for this project.
Let’s say you have a list of courses about Angular 17 and you want to manage them effortlessly. This is where the Kendo UI Scheduler comes in! It’s part of Kendo UI for Angular, specially designed for scheduling and showing off your events in different styles. Whether you need to edit events, play with time zone settings or set up recurring events, Kendo UI Scheduler has got you covered.
We could spend another hour talking about all the features, so you can read all about the Scheduler and how to get started here.
Ready to Install? Let’s Go!
Open your terminal and run this command to add Kendo UI Scheduler to your project:
Cd
ℹ Using package manager: npm
✔ Found compatible package version: @progress/kendo-angular-scheduler@14.1.0.
✔ Package information loaded.

The package @progress/kendo-angular-scheduler@14.1.0 will be installed and
 executed.
Would you like to proceed? Yes
✔ Packages successfully installed.
Make it look pretty with the Kendo UI Default theme and update your angular.json to include that stylish Kendo UI theme:
npm install --save @progress/kendo-theme-default
Now point to those styles in your angular.json file:
"build": {
          "builder": "@angular-devkit/build-angular:application",
          "options": {
            "outputPath": "dist/learn-schedule",
            "index": "src/index.html",
            "browser": "src/main.ts",
            "polyfills": ["zone.js"],
            "tsConfig": "tsconfig.app.json",
            "inlineStyleLanguage": "scss",
            "assets": ["src/favicon.ico", "src/assets"],
            "styles": [
              "src/styles.scss",
              "node_modules/@progress/kendo-theme-default/dist/all.css"
            ],
            "scripts": []
          },
The Kendo UI Scheduler needs the angular/localize, so add that package by running the command:
ng add @angular/localize
With these steps completed, you are equipped with Kendo UI Scheduler. Let’s get started creating the component course calendar!
Creating the Courses Calendar Component
Generate the course-calendar component using Angular CLI. This component will receive a list of courses as input.
Run this command in your terminal:
ng g c components/course-calendar
CREATE src/app/components/course-calendar/course-calendar.component.scss (0 bytes)
CREATE src/app/components/course-calendar/course-calendar.component.html (30 bytes)
CREATE src/app/components/course-calendar/course-calendar.component.spec.ts (653 bytes)
CREATE src/app/components/course-calendar/course-calendar.component.ts (330 bytes)
With Angular 17, components are generated as standalone by default. To utilize the Kendo UI Scheduler, you need to import the Kendo UI SchedulerModule in the component’s imports section:
import { Component } from '@angular/core';
import { CommonModule } from '@angular/common';
import { SchedulerModule } from '@progress/kendo-angular-scheduler';

@Component({
  selector: 'app-course-calendar',
  standalone: true,
  imports: [CommonModule, SchedulerModule],
  templateUrl: './course-calendar.component.html',
  styleUrl: './course-calendar.component.scss'
})
export class CourseCalendarComponent {

}
In the component’s template, add the kendo-scheduler component. We’ll provide a few views for the scheduler, such as day, week and month views:
<kendo-scheduler>
  <kendo-scheduler-day-view/>
  <kendo-scheduler-week-view/>
  <kendo-scheduler-month-view/>
</kendo-scheduler>
Before integrating the course-calendar component, we need to set up an area where users can select the course they wish to enroll in. Let’s create that component next!
Creating the Course Form
Before proceeding, we’ll create the types and sample course data to use in the application.
Define two types of courses and declare an array containing a list of these courses in a new file named courses.ts. For better organization, place this file in the new directory entities, creating a path like entities/courses.ts:
export type Course = {
  title: string;
  duration: number;
  description: string;
};

export type BookedCourse = Course & {
  when: Date;
};

export const ANGULAR_V17_FEATURES : Array<Course> = [
    {
      title: 'New Control Flow',
      description: 'New Control Flow Syntax @for and more',
      duration: 2,
    },
    {
      title: 'Deferred Views',
      description: 'Deferred Views',
      duration: 6,
    },
    {
      title: 'Hydration',
      description: 'Hydration',
      duration: 4,
    },
    {
      title: 'SSR',
      description: 'SSR',
      duration: 8,
    },
  ];
Next, generate the course component using the angular/cli:
ng g c components/course
CREATE src/app/components/course/course.component.scss (0 bytes)
CREATE src/app/components/course/course.component.html (21 bytes)
CREATE src/app/components/course/course.component.spec.ts (596 bytes)
CREATE src/app/components/course/course.component.ts (295 bytes)
Building UI with Kendo UI Components
In the Course component, we’re leveraging Kendo UI components to create a user-friendly interface for course selection and scheduling and bind with the following variables:
courseList: Holds the list of available coursesselectedCourse: Keeps track of the currently selected courseselectedDate: Stores the date and time chosen by the userdateTimeFormat: Specifies the format for displaying dates and times
courseList: Array<Course> = ANGULAR_V17_FEATURES;

public selectedDate: Date = new Date();
public selectedCourse = this.courseList[0];
public dateTimeFormat = 'MM/dd/yyyy HH:mm';

addToCalendar() {

}
Remember import ANGULAR_V17_FEATURES and Course from entities/courses.
We always want to save time and, with the Kendo UI components and variable bindings, your form is not only functional but also aesthetically pleasing and easy to use.
The
<kendo-dropdownlist>is used for course selection. It binds toselectedCourseusing two-way data binding with[(ngModel)]in[data]attribute is bound tocourseList, with the array of course options.The
<kendo-datetimepicker>allows users to select a date and time for taking the course. It binds theselectedDatevariable using the[(value)]attribute and[format]todateTimeFormatto display the date and time in a specific format.The button with the kendoButton directive allows users to confirm their selection and add the course to their calendar. The
(click)event is bound to theaddToCalendar()method, which will handle the logic to add the selected course and date to the calendar.
The final markup looks like:
<h1>Prepare your Angular RoadMap </h1>
  <div class="course-form">
    <kendo-label text="To Learn ?">
      <kendo-dropdownlist [(ngModel)]="selectedCourse" [data]="courseList" id="courses" textField="title"
        valueField="description">
      </kendo-dropdownlist>
    </kendo-label>
    <kendo-label text="When ?">
      <kendo-datetimepicker [(value)]="selectedDate" [format]="dateTimeFormat"></kendo-datetimepicker>
    </kendo-label>
  </div>
<button (click)="addToCalendar()" kendoButton>Book it!</button>
</div>
OK, we have the list of components, but how do we communicate with the components? Well, the course component will emit an event with the selected course and bind it to the app.component, letting you handle the selected course.
Imports for our Standalone Components
At this point, you are probably getting errors in your course and course calendar components that they do not recognize kendo-label or kendo-scheduler. Our app has these dependencies but our standalone components don’t. You simply need to provide each component with the missing imports. Check out my finished app on GitHub if you need help configuring your imports.
Here are the imports you should need at this point in the app for your calendar component:
import { Component, EventEmitter, Output } from '@angular/core';
import { CommonModule } from '@angular/common';

import { ANGULAR_V17_FEATURES, BookedCourse } from '../entities/course';

import { FormsModule } from '@angular/forms';
import { ButtonModule } from '@progress/kendo-angular-buttons';
import { DateInputsModule } from '@progress/kendo-angular-dateinputs';
import { DropDownListModule } from '@progress/kendo-angular-dropdowns';
import { InputsModule } from '@progress/kendo-angular-inputs';
import { LabelModule } from '@progress/kendo-angular-label';

@Component({
selector: 'app-course',
standalone: true,
imports: [
CommonModule,
    DateInputsModule,
    DropDownListModule,
    InputsModule,
    ButtonModule,
    LabelModule,
    FormsModule
],
templateUrl: './course.component.html',
styleUrl: './course.component.scss'
})
export class CourseComponent {
...
}
And the imports for your course-calendar component:
import { Component } from '@angular/core';
import { CommonModule } from '@angular/common';
import {
MonthViewModule,
SchedulerModule,
} from '@progress/kendo-angular-scheduler';


...

@Component({
selector: 'app-course-calendar',
standalone: true,
imports: [CommonModule, MonthViewModule, SchedulerModule],
templateUrl: './course-calendar.component.html',
styleUrl: './course-calendar.component.scss'
})
export class CourseCalendarComponent {

}
Handling the Selected Course
We must declare an event emitter to send the selected course data to parent components.
@Output() addCourse = new EventEmitter<BookedCourse>();
In the addToCalendar method,in the course component gather the values from the selected course and emit the event:
addToCalendar() {

    const bookedCourse: BookedCourse = {
      when: this.selectedDate,
      title: this.selectedCourse.title,
      description: this.selectedCourse.description,
      duration: this.selectedCourse.duration,
    };
    this.addCourse.emit(bookedCourse);
  }
With this setup, the course component is now ready to interact with the app.component.
Before using the course component in your application, ensure that animations are enabled, as both the calendar and time picker from Kendo UI for Angular depend on them. In Angular 17, this is done in the app.config.ts file:
import { ApplicationConfig } from '@angular/core';
import { provideAnimations } from '@angular/platform-browser/animations';

export const appConfig: ApplicationConfig = {
  providers: [provideAnimations()],
};
Integrating in the Application
In app.component.ts, declare an array to store the booked courses:
bookedCourses: BookedCourse[] = [];

addBookedCourse(course: BookedCourse) {
  this.bookedCourses = [...this.bookedCourses, course];
}
In your application’s HTML, listen for the addCourse event and bind it to the addBookedCourse method:
<app-course (addCourse)="addBookedCourse($event)"></app-course>
<app-course-calendar></app-course-calendar>
Make sure you import them in your TypeScript file, too!
import { CourseCalendarComponent } from './components/course-calendar/course-calendar.component';
import { CourseComponent } from './components/course/course.component';

@Component({
selector: 'app-root',
standalone: true,
imports: [CommonModule, RouterOutlet, CourseCalendarComponent, CourseComponent],
...
The Business Case
Before finalizing the binding in the course-calendar component, remember the following business case specifics:
- Courses have a set duration, necessitating scheduling within that timeframe.
- The Scheduler component expects a Schedule Event type, not a Course event.
Therefore, additional steps are needed to transform the course data into a format suitable for the Scheduler component.
Transforming Input for the Course-Calendar Component
From Angular version 16.1 onwards, a feature is provided for transforming inputs. This allows for converting the course BookedCourse into the expected format for the Kendo UI Scheduler. Let’s use that feature.
Transform Courses to Schedule Event
To properly display our courses in the Kendo UI Scheduler, we need to transform our course data into a format that the scheduler can understand. We’ll use two functions for this purpose:
calculateCourseEndTime: This function calculates the end time of a course based on its start time and duration.mapCoursesToSchedulerEvents: This function transforms an array ofBookedCourseinto an array ofSchedulerEventobjects suitable for the Kendo UI Scheduler.
Create a new file utils.ts, it provide the previous functions, to save time add the following snippet:
'import { BookedCourse } from '../entities/course';
import { SchedulerEvent } from '@progress/kendo-angular-scheduler';

export function calculateCourseEndTime(
  courseDate: Date,
  duration: number,
): Date {
  let courseEndTime = new Date(courseDate.getTime());
  courseEndTime.setHours(courseEndTime.getHours() + duration);
  return courseEndTime;
}

export function mapCoursesToSchedulerEvents(
  courses: BookedCourse[],
): SchedulerEvent[] {
  return courses.map((course) => ({
    title: course.title,
    description: course.description,
    start: course.when,
    end: calculateCourseEndTime(course.when, course.duration),
    isAllDay: false,
  }));
}
Perfect. Let’s move to the final step:
Integrating the Course Calendar Component
In the course-calendar component, add an input property named courses. This property will take an array of BookedCourse. The transform option in the @Input decorator uses our mapCoursesToSchedulerEvents function to automatically transform the input data into the format required by the Kendo UI Scheduler.
@Input({ transform: mapCoursesToSchedulerEvents }) courses: BookedCourse[] = [];
Finally bind the courses using the kendoSchedulerBinding directive to apply the transformed courses array to the Kendo UI Scheduler.
<kendo-scheduler [kendoSchedulerBinding]="courses">
Displaying the Kendo UI Scheduler Using Angular’s @if Directive
Finally, we only want to show the calendar if we have courses. Using the new control flow syntax @if is a great way to dynamically display components based on certain conditions.
We use @if to conditionally render the Kendo UI Scheduler in the course calendar component. Place the @if directive within your component’s template.
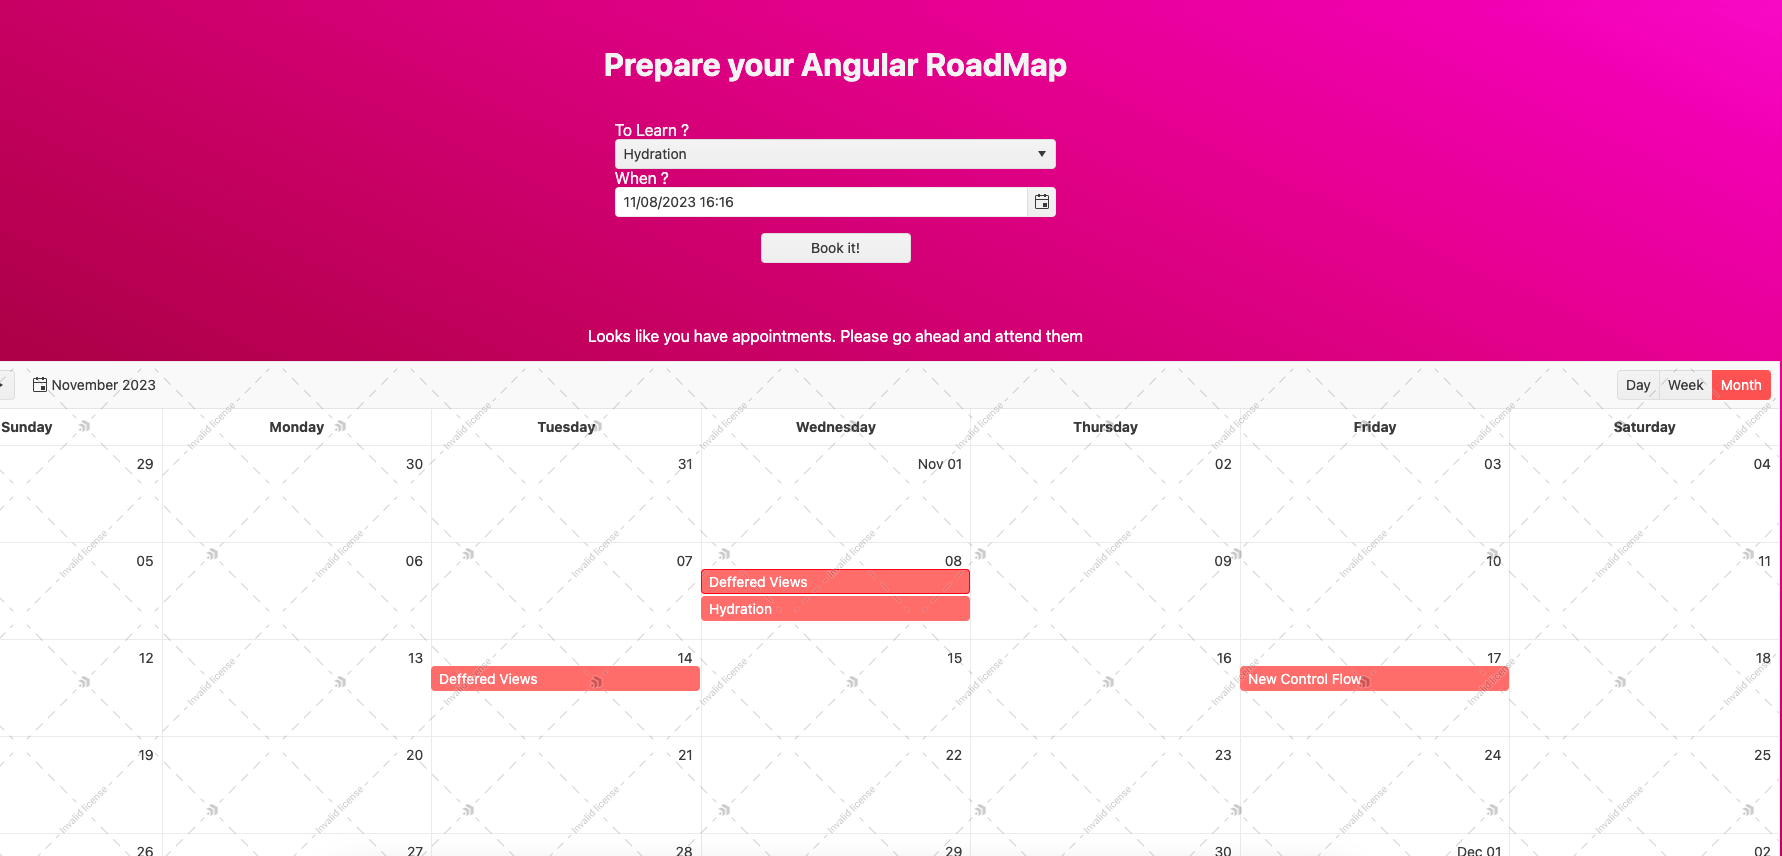
@if (courses.length > 0 ) {
<p>Looks like you have appointments. Please go ahead and attend them</p>
<kendo-scheduler [editable]="true" [kendoSchedulerBinding]="courses">
<kendo-scheduler-day-view>
</kendo-scheduler-day-view>
<kendo-scheduler-week-view>
</kendo-scheduler-week-view>
<kendo-scheduler-month-view></kendo-scheduler-month-view>
</kendo-scheduler>
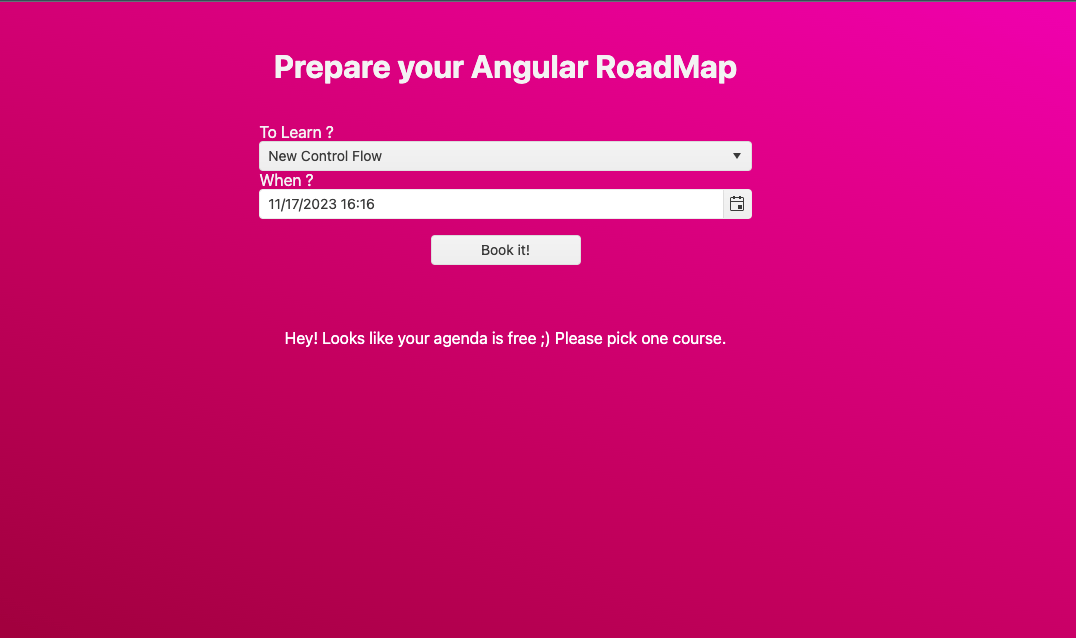
} @else {
<p>Hey! Looks like your agenda is free ;) Please pick one course.</p>
}
This directive will check if the courses array has any entries. If it does (i.e., courses.length > 0), it will display the Kendo UI Scheduler with the courses. Otherwise, it will show a message indicating that the agenda is free.
Finally, back to app.component and bind the bookedCourses to the calendar:
<app-calendar [courses]="bookedCourses"/>
Save changes, reload, and congratulations! You have an application that allows you to book courses and perform calculations based on the course duration. It also displays courses in an elegantly arranged schedule with Angular 17 and the Kendo UI for Angular Scheduler.
Recap
We have successfully built a scheduling application using Angular 17 and the Kendo UI Scheduler, covering the setup, installation, integration of other Kendo UI components, and data transformation.
I greatly enjoyed learning how to construct a calendar, tweaking the data using Angular’s powerful features, and implementing business logic before binding the events. I sincerely hope this helps you in your upcoming scheduling projects. 😊 Don’t hesitate to schedule a demo of Kendo UI or try it for free today.

Dany Paredes
Dany Paredes is a Google Developer Expert on Angular and Progress Champion. He loves sharing content and writing articles about Angular, TypeScript and testing on his blog and on Twitter (@danywalls).
Related Posts
Comments
All articles
Topics

Latest Stories
in Your Inbox
Subscribe to be the first to get our expert-written articles and tutorials for developers!
All fields are required