How to Install and Configure Config Server Firewall (CSF) on Rocky Linux 9
On this page
- Prerequisites
- Step 1 - Disable Firewalld firewall
- Step 2 - Install Required Perl Modules
- Step 3 - Download and Install CSF
- Step 4 - Configure CSF
- Step 5 - Configure Ports
- Step 6 - Additional CSF Settings
- Step 7 - Allow and Block IP addresses
- Step 8 - Protection against DDoS Attacks
- Step 9 - Commonly used CSF Commands
- Step 10 - Enable CSF GUI
- Step 11 - Install and Configure Let's Encrypt SSL
- Step 12 - Access CSF Web Panel
- Step 13 - Uninstall CSF
- Conclusion
Config Server Security and Firewall (CSF) is an iptables-based firewall that provides high level security to the Linux system. It does so by doing a stateful packet inspection (SPI).
It comes with many features, such as IP blocking, port blocking, and DDoS protection. It also supports rate limiting, connection tracking, and SSH login detection. It also includes tools for system and file integrity checking. It comes with a GUI dashboard, which can be used to manage its settings. You can also integrate CSF with control panels like DirectAdmin, cPanel, Cyberpanel, Vesta, and Webmin.
This tutorial teaches you how to install and manage CSF on a Rocky Linux 9 server.
Prerequisites
-
A server running Rocky Linux 9 with a minimum of 1 GB of RAM.
-
A non-root user with sudo privileges.
-
A Fully Qualified Domain Name (FQDN) like
csf.example.compointing to your server. -
Everything is updated.
$ sudo dnf update
-
A few essential packages are required for the tutorial and Craft CMS to run. Some of these will already be on your server.
$ sudo dnf install wget curl nano unzip yum-utils policycoreutils-python-utils -y
Step 1 - Disable Firewalld firewall
Rocky Linux uses Firewalld Firewall by default. We need to disable it first so that it doesn't interfere with the CSF.
Check the status of the Firewalld firewall first.
$ sudo systemctl status firewalld
? firewalld.service - firewalld - dynamic firewall daemon
     Loaded: loaded (/usr/lib/systemd/system/firewalld.service; enabled; preset: enabled)
     Active: active (running) since Tue 2023-12-05 07:00:53 UTC; 40s ago
       Docs: man:firewalld(1)
   Main PID: 58756 (firewalld)
      Tasks: 2 (limit: 4424)
     Memory: 25.9M
        CPU: 496ms
     CGroup: /system.slice/firewalld.service
             ??58756 /usr/bin/python3 -s /usr/sbin/firewalld --nofork --nopid

Dec 05 07:00:52 csf.example.com systemd[1]: Starting firewalld - dynamic firewall daemon...
Dec 05 07:00:53 csf.example.com systemd[1]: Started firewalld - dynamic firewall daemon.
Stop and Disable the Firewalld service.
$ sudo systemctl stop firewalld
$ sudo systemctl disable firewalld
Step 2 - Install Required Perl Modules
CSF requires certain Perl modules to run. But first, we need the EPEL repository. Install it.
$ sudo dnf install epel-release
Install them using the following command.
$ sudo dnf install perl-core perl-libwww-perl.noarch perl-LWP-Protocol-https.noarch perl-GDGraph -y
Step 3 - Download and Install CSF
CSF is not available in the Rocky Linux repository. Therefore, we need to install it manually.
Download the latest version of the CSF archive from their website.
$ wget https://download.configserver.com/csf.tgz
Extract the archive.
$ tar xzf csf.tgz
Switch to the extracted directory.
$ cd csf
Install CSF by calling the installer script.
$ sudo ./install.sh
You should get the following output.
...............
Don't forget to:
1. Configure the following options in the csf configuration to suite your server: TCP_*, UDP_*
2. Restart csf and lfd
3. Set TESTING to 0 once you're happy with the firewall, lfd will not run until you do so
'lfd.service' -> '/usr/lib/systemd/system/lfd.service'
'csf.service' -> '/usr/lib/systemd/system/csf.service'
Created symlink /etc/systemd/system/multi-user.target.wants/csf.service → /usr/lib/systemd/system/csf.service.
Created symlink /etc/systemd/system/multi-user.target.wants/lfd.service → /usr/lib/systemd/system/lfd.service.
Unit /etc/systemd/system/firewalld.service is masked, ignoring.
The unit files have no installation config (WantedBy=, RequiredBy=, Also=,
Alias= settings in the [Install] section, and DefaultInstance= for template
units). This means they are not meant to be enabled or disabled using systemctl.

Possible reasons for having this kind of units are:
• A unit may be statically enabled by being symlinked from another unit's
  .wants/ or .requires/ directory.
• A unit's purpose may be to act as a helper for some other unit which has
  a requirement dependency on it.
• A unit may be started when needed via activation (socket, path, timer,
  D-Bus, udev, scripted systemctl call, ...).
• In case of template units, the unit is meant to be enabled with some
  instance name specified.
'/etc/csf/csfwebmin.tgz' -> '/usr/local/csf/csfwebmin.tgz'

Installation Completed
Check if the required iptables modules are available.
$ sudo perl /usr/local/csf/bin/csftest.pl
You should see the following output.
Testing ip_tables/iptable_filter...OK
Testing ipt_LOG...OK
Testing ipt_multiport/xt_multiport...OK
Testing ipt_REJECT...OK
Testing ipt_state/xt_state...OK
Testing ipt_limit/xt_limit...OK
Testing ipt_recent...OK
Testing xt_connlimit...OK
Testing ipt_owner/xt_owner...OK
Testing iptable_nat/ipt_REDIRECT...OK
Testing iptable_nat/ipt_DNAT...OK

RESULT: csf should function on this server
Verify the CSF version.
$ sudo csf -v
csf: v14.20 (generic)
*WARNING* TESTING mode is enabled - do not forget to disable it in the configuration
Step 4 - Configure CSF
CSF stores its configuration in the /etc/csf/csf.conf file. Open the file for editing.
$ sudo nano /etc/csf/csf.conf
The first step is to disable the testing mode. Change the value of the TESTING variable from 1 to 0.
TESTING = "0"
Find the line RESTRICT_SYSLOG = "0" and change its value to 3. This means only members of the RESTRICT_SYSLOG_GROUP can access the syslog/rsyslog files. The RESTRICT_SYSLOG_GROUP by default contains the root, mysql, rpc, daemon, dbus, and several cPanel and DirectAdmin users. You can add more users by editing the file /etc/csf/csf.syslogusers file.
Step 5 - Configure Ports
CSF by default keeps the following ports open.
# Allow incoming TCP ports
TCP_IN = "20,21,22,25,53,853,80,110,143,443,465,587,993,995"

# Allow outgoing TCP ports
TCP_OUT = "20,21,22,25,53,853,80,110,113,443,587,993,995"

# Allow incoming UDP ports
UDP_IN = "20,21,53,853,80,443"

# Allow outgoing UDP ports
# To allow outgoing traceroute add 33434:33523 to this list
UDP_OUT = "20,21,53,853,113,123"
Services using these ports are:
- Port 20: FTP data transfer
- Port 21: FTP control
- Port 22: Secure shell (SSH)
- Port 25: Simple mail transfer protocol (SMTP)
- Port 53: Domain name system (DNS)
- Port 80: Hypertext transfer protocol (HTTP)
- Port 110: Post office protocol v3 (POP3)
- Port 113: Authentication service/identification protocol
- Port 123: Network time protocol (NTP)
- Port 143: Internet message access protocol (IMAP)
- Port 443: Hypertext transfer protocol over SSL/TLS (HTTPS)
- Port 465: URL Rendezvous Directory for SSM (Cisco)
- Port 587: E-mail message submission (SMTP)
- Port 993: Internet message access protocol over SSL (IMAPS)
- Port 995: Post office protocol 3 over TLS/SSL (POP3S)
If you don't need all these ports open, you can remove some of them to improve security. If you are using IPv6 for your services, you will need to configure the TCP6_IN, TCP6_OUT, UDP6_IN, and UDP6_OUT ports as shown.
# Allow incoming IPv6 TCP ports
TCP6_IN = "20,21,22,25,53,853,80,110,143,443,465,587,993,995"

# Allow outgoing IPv6 TCP ports
TCP6_OUT = "20,21,22,25,53,853,80,110,113,443,587,993,995"

# Allow incoming IPv6 UDP ports
UDP6_IN = "20,21,53,853,80,443"

# Allow outgoing IPv6 UDP ports
# To allow outgoing traceroute add 33434:33523 to this list
UDP6_OUT = "20,21,53,853,113,123"
Change the ports as per your requirement.
Step 6 - Additional CSF Settings
There are a lot of settings to configure. Let us go through some of the commonly used ones.
ICMP_IN - setting this variable to 1 allows pings to your server and 0 refuses such requests. It is recommended to allow ICMP requests if you are hosting public services so that it can be determined whether your service is available.
ICMP_IN_LIMIT - sets the number of requests allowed from a single IP address within a specified amount of time. It is recommended to keep the value unchanged.
DENY_IP_LIMIT - restricts the number of IP addresses that are blocked by the CSF. If the number of blocked IPs exceeds this number, CSF will unblock the oldest IP which will be the first entry in the /etc/csf/csf.deny file. Setting this number too high can slow down the server. Choose the number according to your server resources.
DENY_TEMP_IP_LIMIT - same thing as above but for temporary IP address blocks.
PACKET_FILTER - filters invalid, unwanted, and illegal traffic packets.
CONNLIMIT - limits the number of concurrent active connections allowed on a single port. You can set it as follows.
CONNLIMIT = "22;5;443;20"
The above value means that only 5 concurrent connections will be allowed on port 22 per IP address and only 20 concurrent connections will be allowed on port 443 per IP address.
PORTFLOOD - limits the number of connections per time interval that new connections can be made to specific ports. You can set it as follows.
PORTFLOOD = "22;tcp;5;250"
The above value will block the IP address if more than 5 connections are established on port 22 using TCP protocol within 250 seconds. The block will get reset after 250 seconds. You can add more ports by adding commas.
PORTFLOOD = "22;tcp;5;250,80;tcp;10;300"
Once finished, save the file by pressing Ctrl + X and entering Y when prompted.
Start and enable the CSF and LFD services.
$ sudo systemctl start csf lfd
$ sudo systemctl enable csf lfd
Check the status of the CSF service.
$ sudo systemctl status csf
? csf.service - ConfigServer Firewall & Security - csf
     Loaded: loaded (/usr/lib/systemd/system/csf.service; enabled; preset: disabled)
     Active: active (exited) since Tue 2023-12-05 13:57:59 UTC; 2min 7s ago
   Main PID: 11050 (code=exited, status=0/SUCCESS)
        CPU: 1.192s

Dec 05 13:57:59 csf.example.com csf[11050]: ACCEPT  all opt    in * out lo  ::/0  -> ::/0
Dec 05 13:57:59 csf.example.com csf[11050]: LOGDROPOUT  all opt    in * out !lo  ::/0  -> ::/0
Dec 05 13:57:59 csf.example.com csf[11050]: LOGDROPIN  all opt    in !lo out *  ::/0  -> ::/0
Dec 05 13:57:59 csf.example.com csf[11050]: csf: FASTSTART loading DNS (IPv4)
Dec 05 13:57:59 csf.example.com csf[11050]: csf: FASTSTART loading DNS (IPv6)
Dec 05 13:57:59 csf.example.com csf[11050]: LOCALOUTPUT  all opt -- in * out !lo  0.0.0.0/0  -> 0.0.0.0/0
Dec 05 13:57:59 csf.example.com csf[11050]: LOCALINPUT  all opt -- in !lo out *  0.0.0.0/0  -> 0.0.0.0/0
Dec 05 13:57:59 csf.example.com csf[11050]: LOCALOUTPUT  all opt    in * out !lo  ::/0  -> ::/0
Dec 05 13:57:59 csf.example.com csf[11050]: LOCALINPUT  all opt    in !lo out *  ::/0  -> ::/0
Dec 05 13:57:59 csf.example.com systemd[1]: Finished ConfigServer Firewall & Security - csf.
Check the open ports when CSF is running.
$ sudo csf -p
Ports listening for external connections and the executables running behind them:
Port/Proto Open Conn  PID/User             Command Line                            Executable
22/tcp     4/6  2     (863/root)           sshd: /usr/sbin/sshd -D [listener] 0... /usr/sbin/sshd
111/tcp    -/-  -     (1/root)             /usr/lib/systemd/systemd --switched-... /usr/lib/systemd/systemd
111/tcp    -/-  -     (642/rpc)            /usr/bin/rpcbind -w -f                  /usr/bin/rpcbind
111/udp    -/-  -     (1/root)             /usr/lib/systemd/systemd --switched-... /usr/lib/systemd/systemd
111/udp    -/-  -     (642/rpc)            /usr/bin/rpcbind -w -f                  /usr/bin/rpcbind
323/udp    -/-  -     (679/chrony)         /usr/sbin/chronyd -F 2                  /usr/sbin/chronyd
AUTO_UPDATES - The value 0 disables automatic updates. Change it to 1 if you want automatic updates. This will create a cron job which will run once a day to perform automatic updates and will restart the csf and lfd services.
ETH_DEVICE - By default, CSF filters traffic on all network cards, except for the loopback card. If you want the rules to apply only to the eth0 card, then set its value to eth0.
LF_DAEMON - set its value to 1 to activate the Login fail detection feature of CSF.
LF_CSF - set its value to 1 to activate the auto-restart feature of CSF. It will wait every 300 seconds to perform the check.
LF_SELECT - setting its value to 1 means when the IP address violates the LFD rules, it will only block traffic to the service that this IP login fails on instead of blocking all the traffic.
LF_SSHD - sets the number of times after which the wrong SSH connection is blocked.
CT_LIMIT - limits the number of connections from a single IP address to the server. If the number of connections exceeds the set value, then the IP is blocked temporarily.
Step 7 - Allow and Block IP addresses
Blocking and allowing IP addresses is one of the most basic abilities of a firewall. CSF allows you to deny (blacklist), allow (whitelist), or ignore IP addresses using the configuration files csf.deny, csf.allow, and csf.ignore.
Open the csf.deny file for editing.
$ sudo nano /etc/csf/csf.deny
Blocked IP addresses or ranges need to be added in one line. For example, if you want to block the IP address 1.2.3.4 as well as the range 2.3.*.*, add them as follows.
1.2.3.4 2.3.0.0/16
Once finished, save the file by pressing Ctrl + X and entering Y when prompted.
The allowed IP addresses need to be configured using the csf.allow file. The allowed IP addresses are allowed even if they are blocked in the csf.deny file so you need to take care of that.
Open the csf.allow file for editing.
$ sudo nano /etc/csf/csf.allow
The IP addresses need to be added in the same way as they were added in the block file.
Ignored IP addresses are excluded from the firewall filters. They can be only blocked if they are listed in the csf.deny file. Open the csf.ignore file for editing.
$ sudo nano /etc/csf/csf.ignore
Once you have made all the necessary changes, you need to restart the firewall. Use the following command to do it.
$ sudo csf -r
Step 8 - Protection against DDoS Attacks
Let us cover how CSF can help protect against Distributed Denial of Service (DDoS) attacks by implementing the following configurations.
SYN Flood Protection
This is a type of DDoS Attack where an attacker sends a large number of SYN packets to a server. To enable protection against such attacks, enable the following settings in the /etc/csf/csf.conf file.
SYNFLOOD = "1"
SYNFLOOD_RATE = "100/s"
SYNFLOOD_BURST = "150"
This will enable SYN flood protection and configure the rate and burst limits for incoming attacks. These options should be enabled only if you are under an SYN attack because it will slow down all new connections from any IP address.
Blocklists
CSF integrates with various IP-based blocklists to prevent malicious IP addresses from connecting to the server. CSF already stores configuration for popular blocklists like Spamhaus, Project Honey Pot, BruteForceBlocker, Blocklist.de, Stop Forum Spam, etc. in the /etc/csf/csf.blocklists file. Open the file for editing.
$ sudo nano /etc/csf/csf.blocklists
Uncomment the following sections to enable the Spamhaus Blocklists.
# Spamhaus Don't Route Or Peer List (DROP)
# Details: http://www.spamhaus.org/drop/
SPAMDROP|86400|0|http://www.spamhaus.org/drop/drop.txt

# Spamhaus IPv6 Don't Route Or Peer List (DROPv6)
# Details: http://www.spamhaus.org/drop/
SPAMDROPV6|86400|0|https://www.spamhaus.org/drop/dropv6.txt

# Spamhaus Extended DROP List (EDROP)
# Details: http://www.spamhaus.org/drop/
SPAMEDROP|86400|0|http://www.spamhaus.org/drop/edrop.txt
Once finished, save the file by pressing Ctrl + X and entering Y when prompted. You can add your blocklist as well. The format for including a new list is the following.
NAME|INTERVAL|MAX|URL
NAME - is the list name with all uppercase characters with no spaces and a maximum of 25 characters.
INTERVAL - refresh interval to download the list. Should be a minimum of 3600 seconds.
MAX - maximum number of IP addresses to use from the list. A value of 0 means all IP addresses.
URL - the URL to download the list from.
Country Level Blocking
CSF allows you to block access from specific countries. It can be useful when you want to restrict access from countries known for launching DDoS Attacks. There are two methods for CSF to match IP addresses to countries. The default method uses DB-IP, ipdeny.com, and iptoasn.com as sources. They are free and don't require a license key but can be unreliable. If you want accurate blocking, you need a MaxMind license key. MaxMind does provide a free license as well. You can use them. Once you have the license key, configure the following two settings in the /etc/csf/csf.conf file.
MM_LICENSE_KEY = "XXXXXXXXXXX"
CC_SRC = "1"
Once you have configured that, use the following configuration to block IP addresses from Russia.
CC_DENY = "RU"
You can use the following setting to allow connections only from specific countries.
CC_ALLOW_FILTER = "IN,GB"
This setting configures connections only from India, and the United Kingdom (UK). Save and close the file when finished.
Restart the firewall once you have finished configuring.
$ sudo csf -r
There are other ways to prevent DDoS Attacks like Port Flooding and Connection limit which we already discussed in step 6.
Step 9 - Commonly used CSF Commands
Enables and starts CSF.
$ sudo csf -e
Disables CSF.
$ sudo csf -x
Start the firewall rules.
$ sudo csf -s
Flush/stop the firewall rules.
$ sudo csf -f
Restart the firewall.
$ sudo csf -r
Adds the IP address to the temporary ban list. (/var/lib/csf/csf.tempban)
$ sudo csf -td 1.2.3.4
Removes the IP address from the temporary ban list.
$ sudo csf -tr 1.2.3.4
Deletes all the IP addresses from the temporary entries.
$ sudo csf -tf
Adds the IP address to the deny list.
$ sudo csf -d 1.2.3.4
Remove the IP address from the deny list.
$ sudo csf -dr 1.2.3.4
Removes all the IP addresses from the deny list.
$ sudo csf -dr
Allows an IP address.
$ sudo csf -a 1.2.3.4
Removes an IP address from the allow list.
$ sudo csf -ar 1.2.3.4
Searches the iptables and ip6tables rules for an IP address, CIDR, and port number.
$ sudo csf -g 1.2.3.4
$ sudo csf -g 80
Step 10 - Enable CSF GUI
CSF comes with a web-based interface to manage the firewall. It is disabled by default. Before enabling the GUI, we need to install a few more Perl modules.
$ sudo dnf install perl-IO-Socket-SSL.noarch perl-Net-SSLeay perl-IO-Socket-INET6 perl-Socket6 -y
Open the CSF configuration file.
$ sudo nano /etc/csf/csf.conf
Find the line UI = "0" and change its value as below.
UI = "1"
Change the port at which the web panel is accessible. CSF uses port 6666 by default but it is blocked by the Chrome browser as it terms it as an unsafe port. Therefore, we need to change its value to something else. Choose any port greater than 1024. For our tutorial, we will be using port 1037.
UI_PORT = "1037"
Use the following variable to allow only select IP addresses to bind to the web panel. Leave it blank to bind to all the IP addresses on the server.
UI_IP = "1.2.3.4"
Configure the credentials for the web panel.
UI_USER = "username"
UI_PASS = "password"
By default, CSF allows web panel access only from the IP addresses listed in the file /etc/csf/ui/ui.allow file. If you want it to be accessible from all the IP addresses, set the variable UI_ALLOW to 0.
UI_ALLOW = "0"
Once finished, save the file by pressing Ctrl + X and entering Y when prompted.
Similarly, the banned IP addresses need to be added to the /etc/csf/ui/ui.ban file.
CSF web panel uses self-signed certificates. You can also use Let's Encrypt SSL certificates for it.
Step 11 - Install and Configure Let's Encrypt SSL
We need to install Certbot to generate the SSL certificate. We will use the Snapd package installer for that. Since Rocky Linux doesn't ship with it, install the Snapd installer. It requires the EPEL (Extra Packages for Enterprise Linux) repository to work. But since we already installed it in step 2, we can directly move ahead.
Install Snapd.
$ sudo dnf install -y snapd
Enable and Start the Snap service.
$ sudo systemctl enable snapd --now
Install the Snap core package, and ensure that your version of Snapd is up to date.
$ sudo snap install core && sudo snap refresh core
Create necessary links for Snapd to work.
$ sudo ln -s /var/lib/snapd/snap /snap
$ echo 'export PATH=$PATH:/var/lib/snapd/snap/bin' | sudo tee -a /etc/profile.d/snapd.sh
Install Certbot.
$ sudo snap install --classic certbot
Use the following command to ensure that the Certbot command can be run by creating a symbolic link to the /usr/bin directory.
$ sudo ln -s /snap/bin/certbot /usr/bin/certbot
Verify if Certbot is functioning correctly.
$ certbot --version
certbot 2.7.4
Run the following command to generate an SSL Certificate.
$ sudo certbot certonly --standalone --agree-tos --no-eff-email --staple-ocsp --preferred-challenges http -m [email protected] -d csf.example.com
The above command will download a certificate to the /etc/letsencrypt/live/csf.example.com directory on your server.
Rename the old self-signed certificates.
$ sudo mv /etc/csf/ui/server.crt /etc/csf/ui/server.crt.old
$ sudo mv /etc/csf/ui/server.key /etc/csf/ui/server.key.old
Copy the generated SSL certificates to the /etc/csf/ui directory.
$ sudo cp /etc/letsencrypt/live/csf.example.com/fullchain.pem /etc/csf/ui/server.crt
$ sudo cp /etc/letsencrypt/live/csf.example.com/privkey.pem /etc/csf/ui/server.key
Restart CSF and LFD services.
$ sudo systemctl restart csf lfd
There is one more thing we need to configure. The SSL certificate will auto-renew every 90 days which means you will need to copy the certificates manually. We can however automate that.
Create the file /etc/csf/certcopy.sh to copy the certificates after every renewal and open it for editing.
$ sudo nano /etc/csf/certcopy.sh
Paste the following code in it.
#!/bin/sh
cp -f /etc/letsencrypt/live/csf.example.com/fullchain.pem /etc/csf/ui/server.crt
cp -f /etc/letsencrypt/live/csf.example.com/privkey.pem /etc/csf/ui/server.key
Once finished, save the file by pressing Ctrl + X and entering Y when prompted. Make the file executable.
$ sudo chmod +x /etc/csf/certcopy.sh
Open the file /etc/letsencrypt/renewal/csf.example.com.conf for editing.
$ sudo nano /etc/letsencrypt/renewal/csf.example.com.conf
Add the following line at the bottom.
post_hook = /etc/csf/certcopy.sh
Once finished, save the file by pressing Ctrl + X and entering Y when prompted. The post_hook option runs the certcopy.sh script after every renewal eliminating the need to copy the certificates manually.
Check the Certbot renewal scheduler service.
$ sudo systemctl list-timers
You will find snap.certbot.renew.service as one of the services scheduled to run.
NEXT                        LEFT         LAST                        PASSED     UNIT                      ACTIVATES
---------------------------------------------------------------------------------------------------------------------------
Wed 2023-12-06 07:23:57 UTC 18min left Wed 2023-12-06 06:04:46 UTC 1h 0min ago dnf-makecache.timer          dnf-makecache.service
Wed 2023-12-06 07:24:15 UTC 40min left Wed 2023-12-06 00:00:01 UTC 6h ago      logrotate.timer              logrotate.service
Wed 2023-12-06 18:39:00 UTC 10h left   Wed 2023-12-06 03:25:07 UTC 2h 4min ago snap.certbot.renew.timer     snap.certbot.renew.service
Do a dry run of the process to check whether the SSL renewal is working fine.
$ sudo certbot renew --dry-run
If you see no errors, you are all set. Your certificate will renew automatically. The certificates will be copied and you can check them by verifying the listing of the /etc/csf/ui directory.
$ sudo ls /etc/csf/ui -al
drw-------. 3 root root  130 Dec  6 05:57 .
drw-------. 4 root root 4096 Dec  6 06:09 ..
drw-------. 3 root root 4096 Dec  6 00:06 images
-rw-r--r--. 1 root root 5242 Dec  6 06:09 server.crt
-rw-------. 1 root root 1220 Jun 17  2020 server.crt.old
-rw-------. 1 root root  241 Dec  6 06:09 server.key
-rw-------. 1 root root 1704 Jun 17  2020 server.key.old
-rw-------. 1 root root   15 Dec  5 23:34 ui.allow
-rw-------. 1 root root    0 Feb  1  2013 ui.ban
Step 12 - Access CSF Web Panel
Visit the URL https://csf.example.com:1037 and you will be greeted by the following login page.
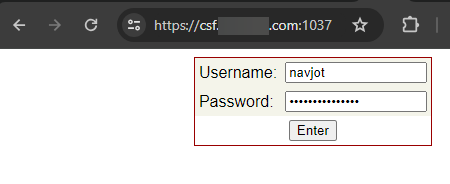
Enter your credentials and click the Enter key to log in and you will get the following page.
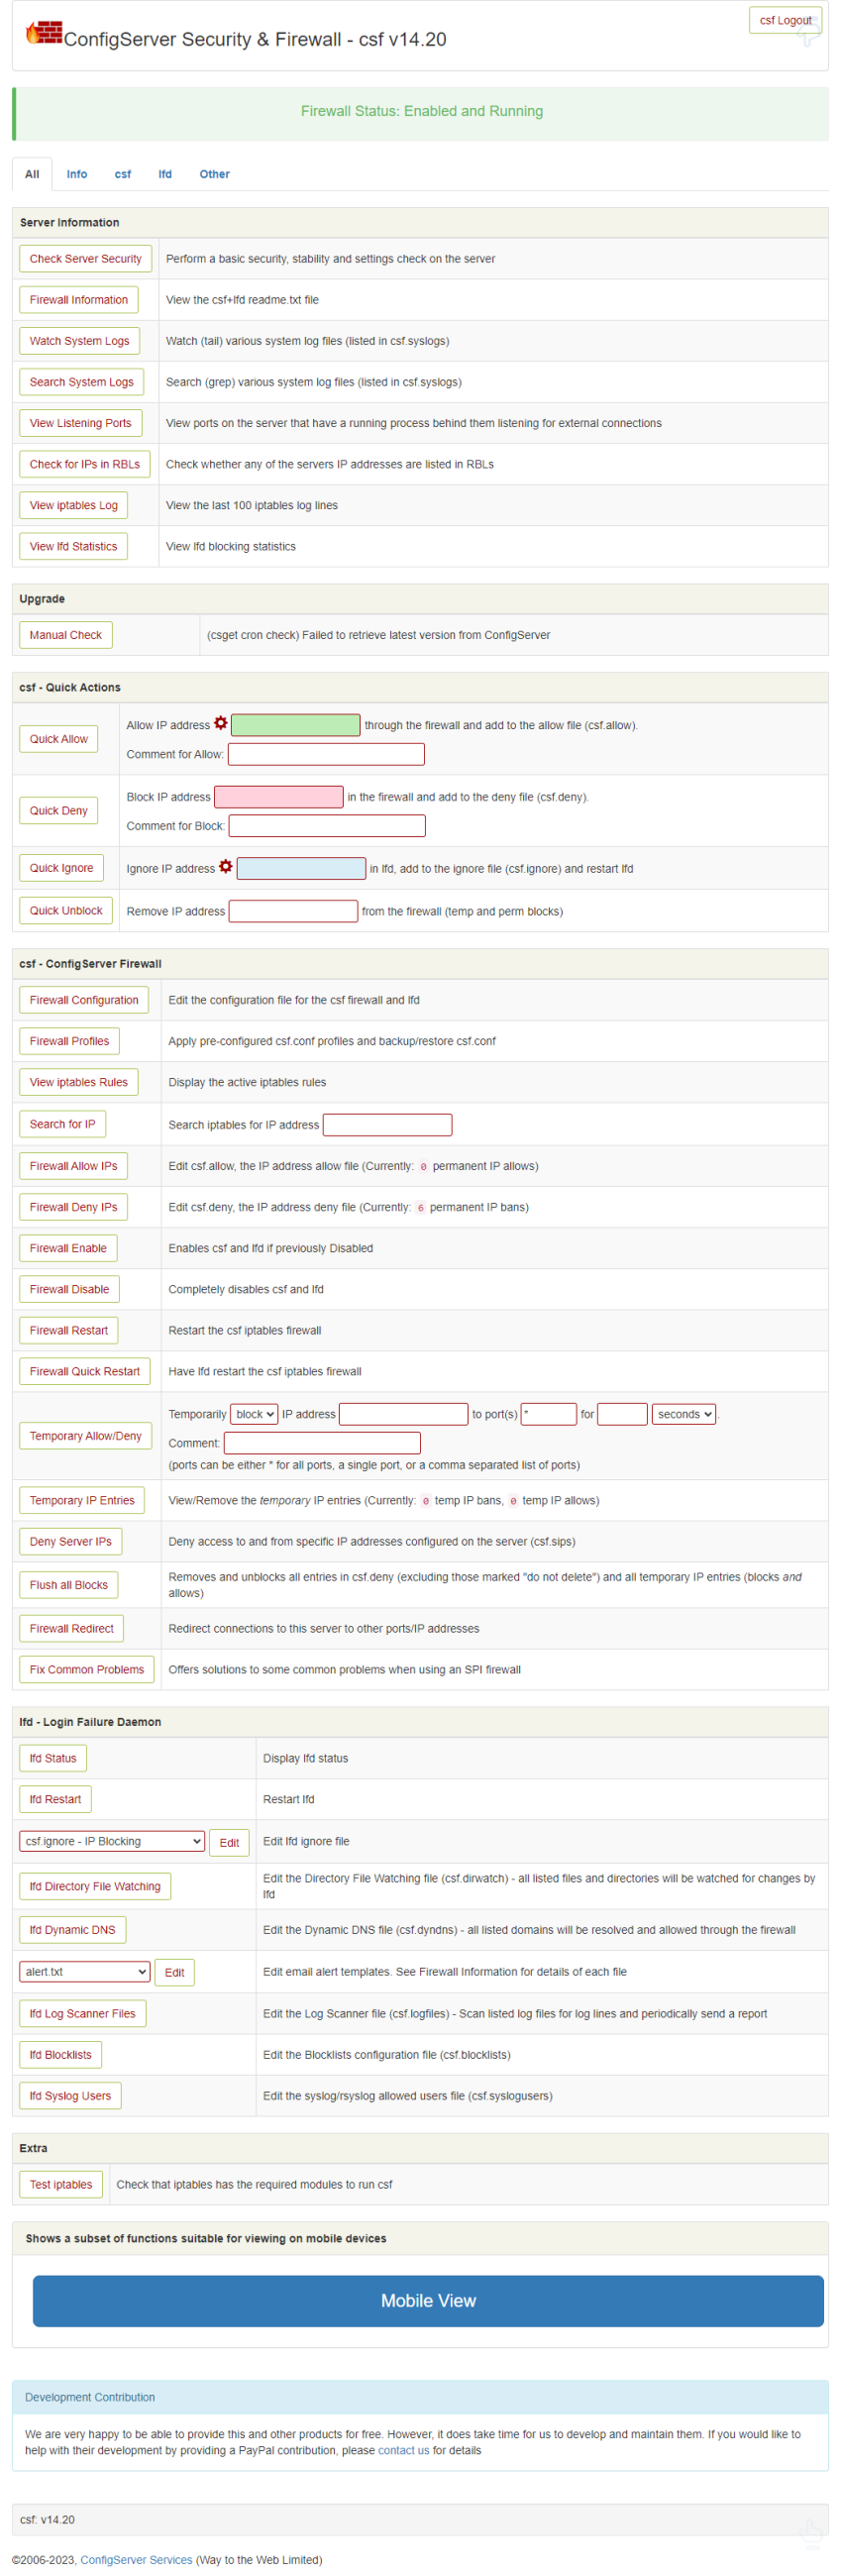
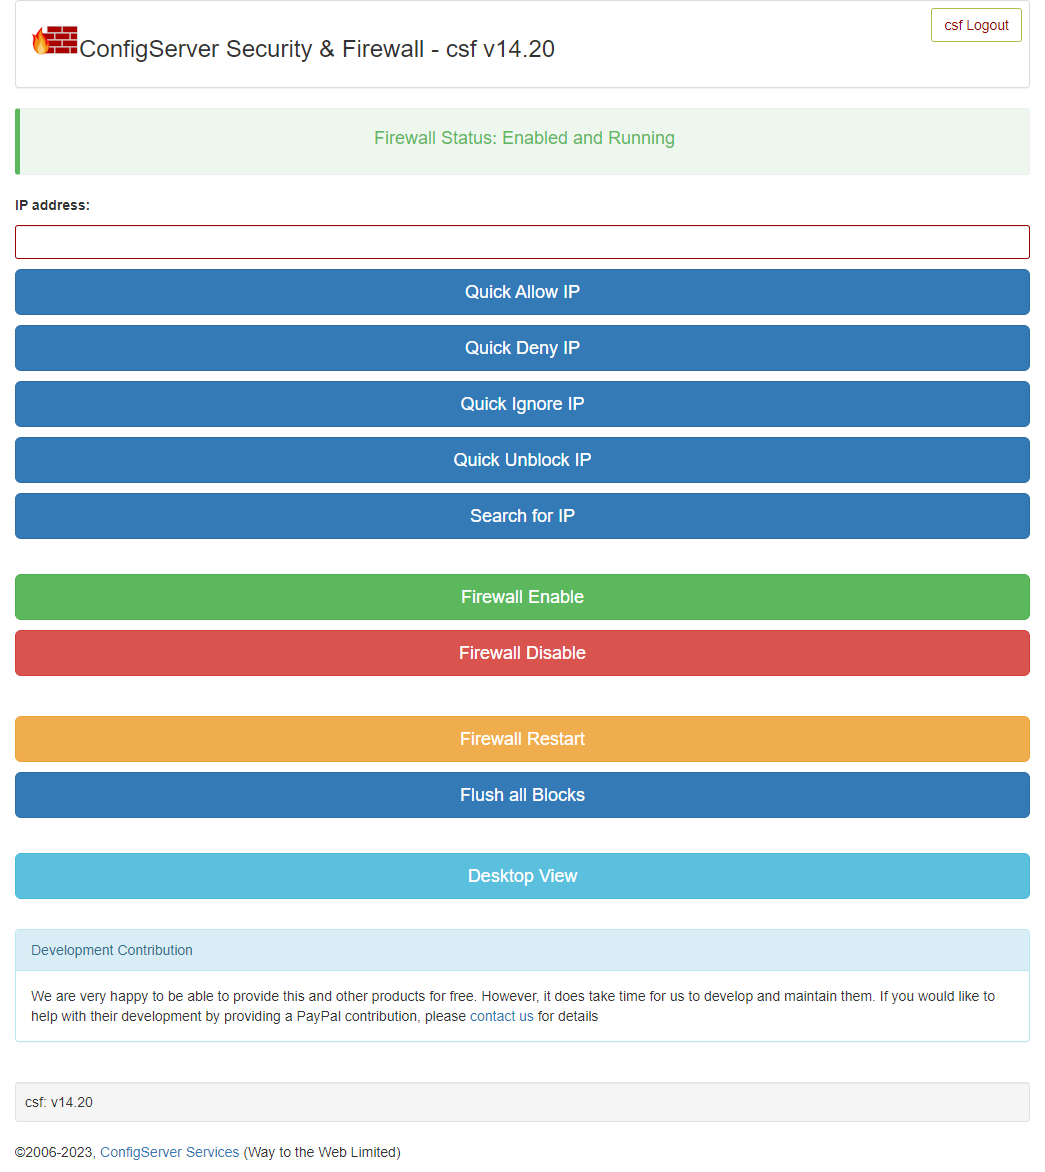
It even comes with a mobile view which you can switch to using the Mobile View button.
The web panel allows you to configure all the firewall settings. This web panel integrates well with other control panels.
Step 13 - Uninstall CSF
If for some reason you want to remove CSF, you can run the following command to run the uninstaller script.
$ sudo sh /etc/csf/uninstall.sh
Enable and start the Firewalld firewall.
$ sudo systemctl enable firewalld --now
Conclusion
This concludes the tutorial on installing and configuring the Config Server Firewall (CSF) on a Rocky Linux 9 server. If you have any questions, post them in the comments below.

