Review: ZSA Voyager, split, mechanical keyboard
This is a review of the Voyager from ZSA. It is a mechanical keyboard that costs over $350. It only has 52 keys, you can’t use MX switches in it, it doesn’t use Choc switch spacing, and it’s not even wireless.
But I absolutely love it.
By the way, you can view the video version of this here
Incredible Hardware
This Voyager is an absolutely impeccably made piece of hardware. I’m going to bore you with some of the lovely touches shortly but first, here is a quick rundown of what you need to know about the Voyager:
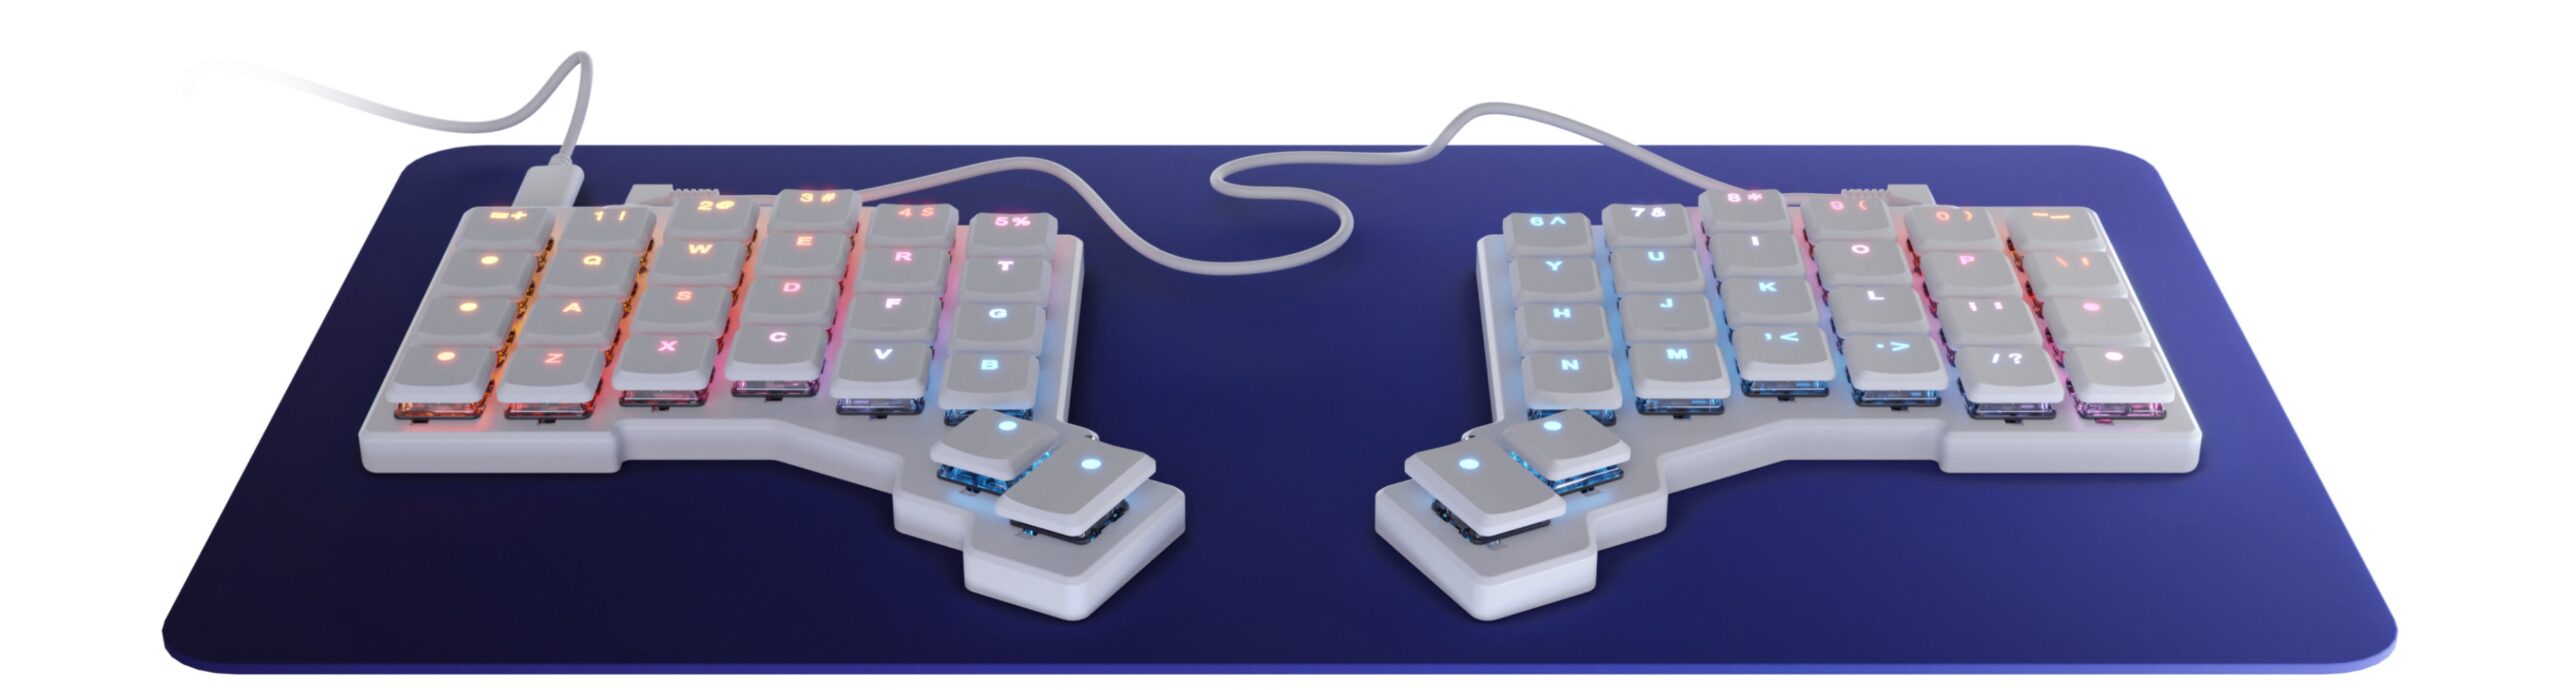
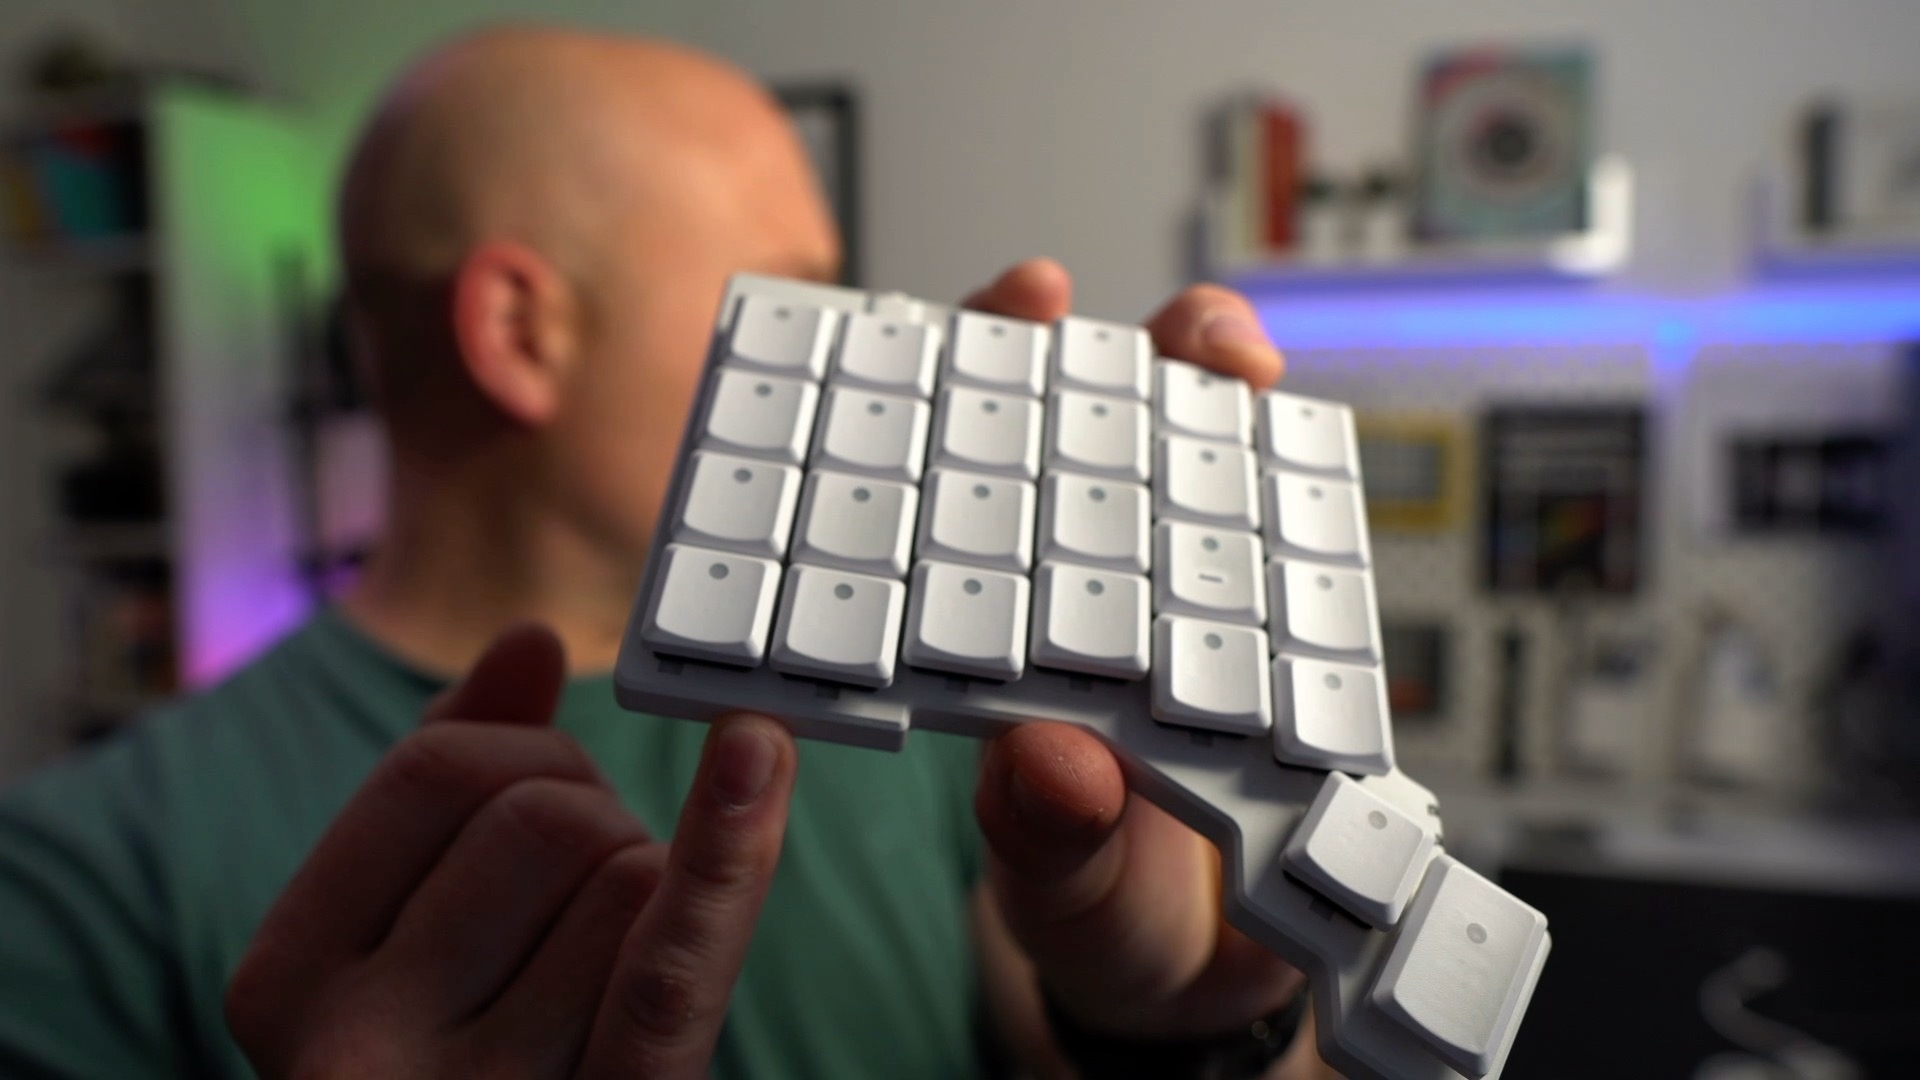
The Voyager is a 52 key, hotswap, wired only, split mechanical keyboard. You can get it in black or white, with US style, international or blank keys caps. In terms of the key switches you can use, it takes choc low profile, and you can choose between tactile brown, linear red, or clicky white when you order. I opted for the white board for reviewing, with blank keycaps and red switches.
It’ll set you back $365 including shipping and comes with a 2 year warranty. Shipping is UPS Express, so assuming they have stock when you order, 3-4 days after you have ordered it will be in your hands.
What you get in the box
I’ve come to think of ZSA as the Apple of the split mechanical keyboard world, and the Voyager proves why. Beautiful presentation, spare keycaps and switches. A number of different USB to USB lead lengths. You also get a switch puller and USB A to C adapter. Just a very complete and impeccably presented package.
It also comes with a neoprene carry case with a couple of zip compartments to fit the power and TRRS cables in, and a metal tag in the centre which stores the little feet. When you flip that metal tag over, it has a nice Voyager logo on too. I love that. This is indicative of the quality and thoroughness throughout. There was no necessity what so ever to have that logo there but it is, just because.
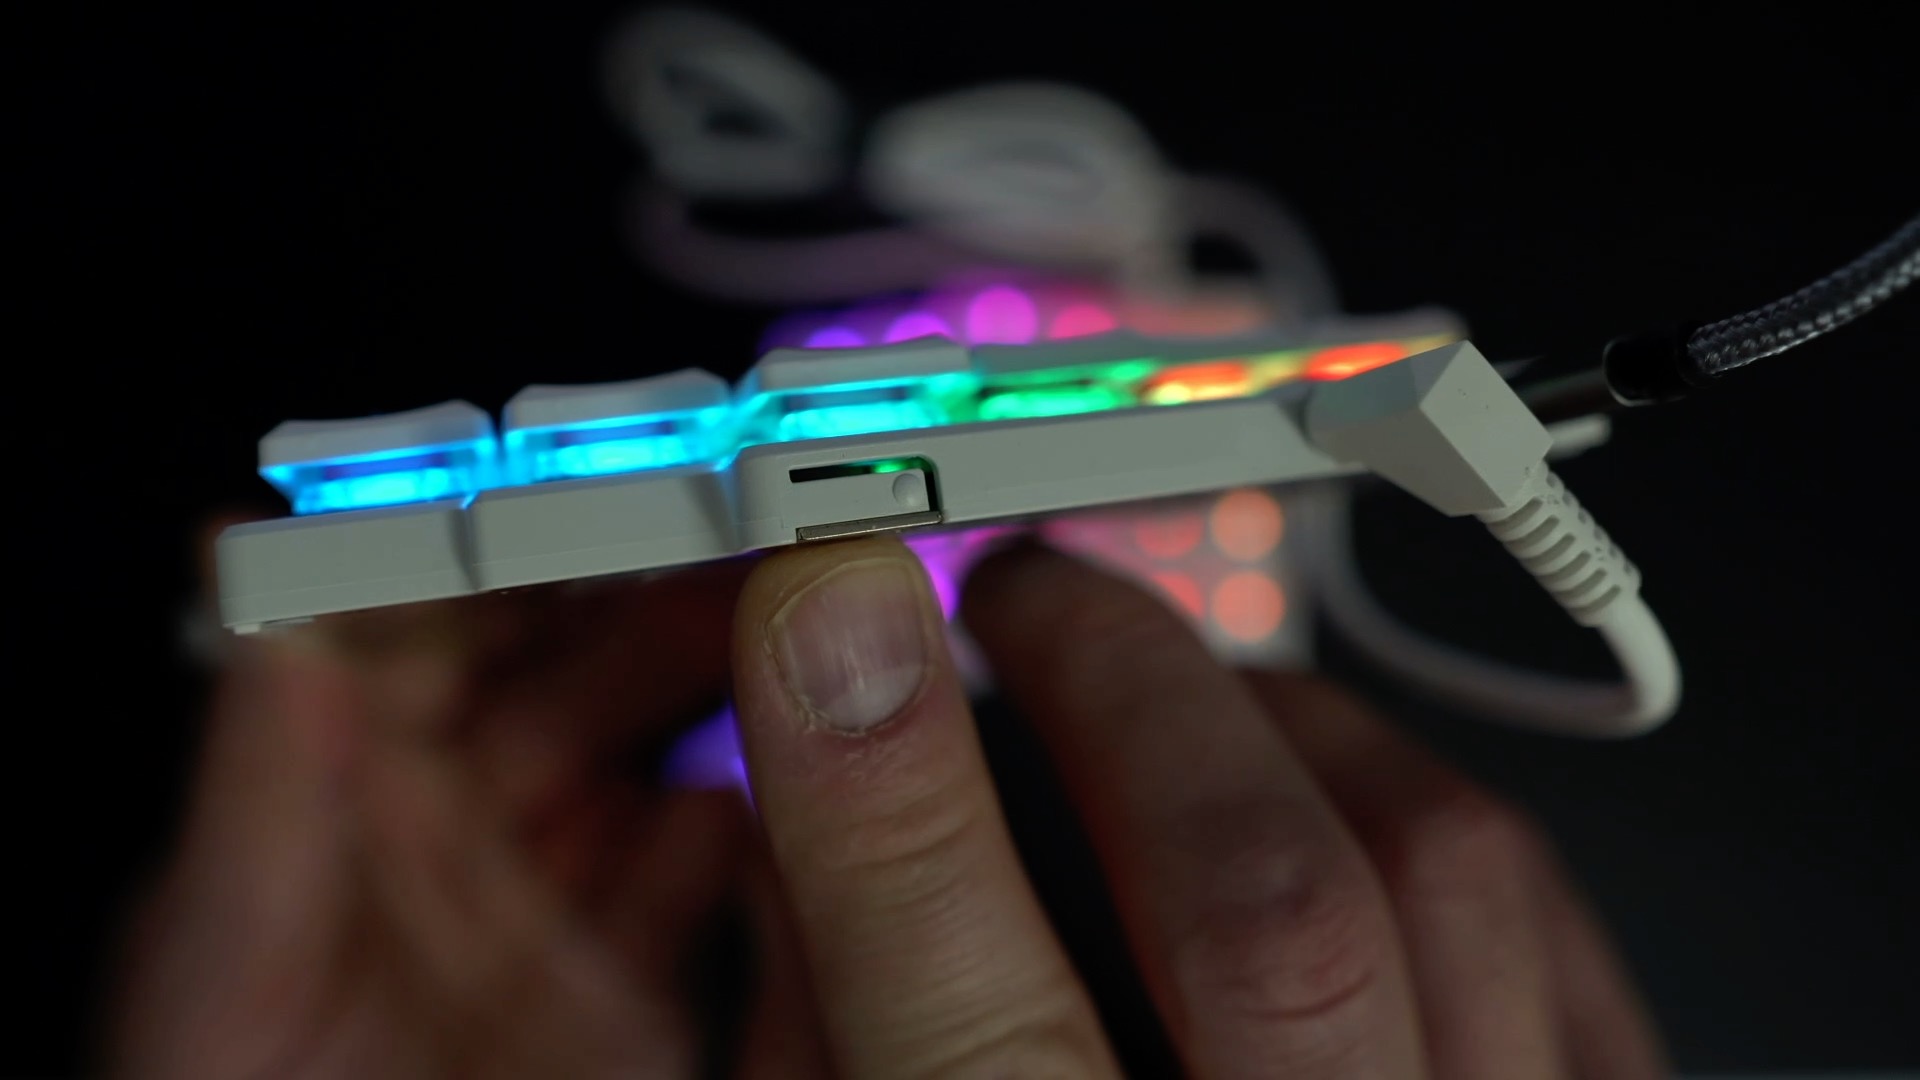
Now before I tell you about those little feet, I just want to highlight a few other wonderful details off the board. First, the keycaps are fantastic; PBT which is my favourite material for keycaps, and they have these little windows here to let the light through so I can take a money shot like this:
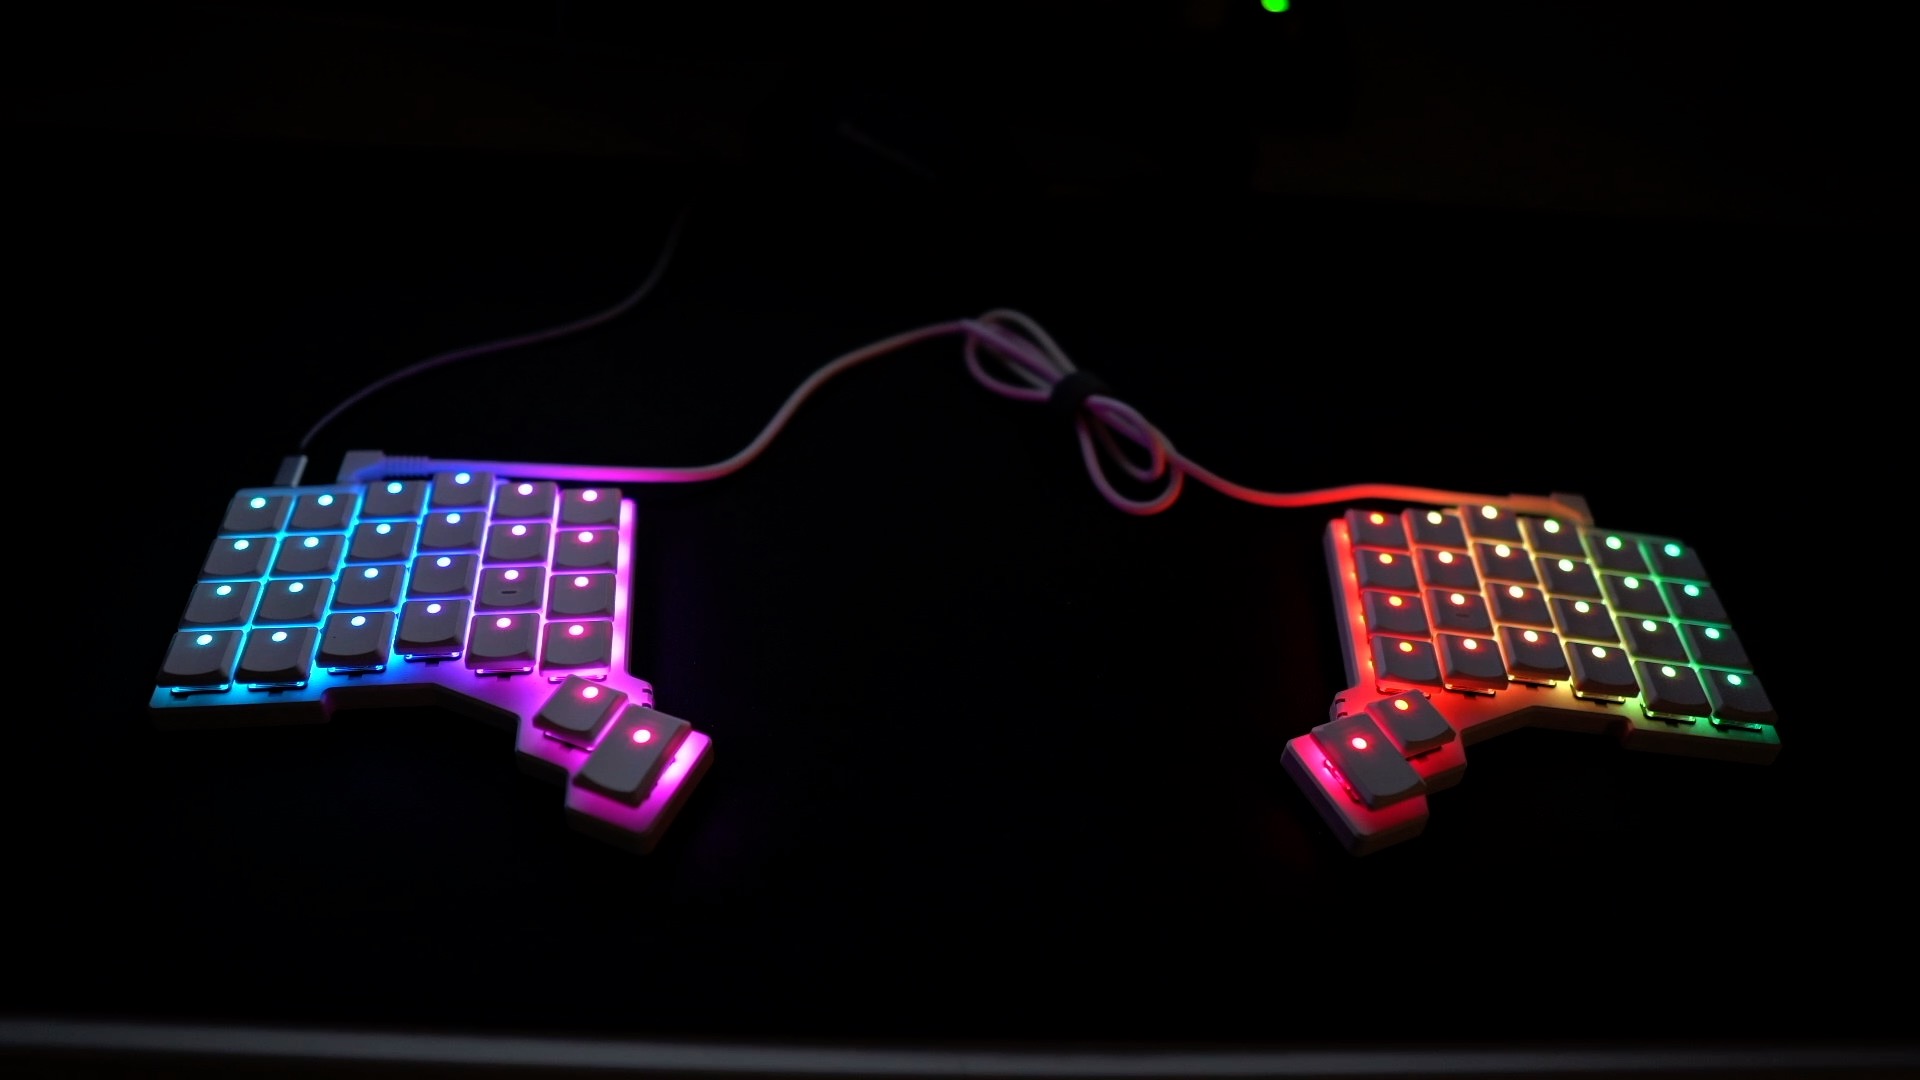
And then turn them off the lights because I’m not ten years old.
If you go for the lettered keycaps, they include extra homing keys for other layouts like Colemak, so you can actually have a homing key in the right place with the right character. That was something I grumbled about with other boards, including ZSA’s own Moonlander, so I’m really pleased they are included with the Voyager.
There are two LEDs on each half of the board, and running the length of the switch columns is one of my favourite details; little channels cut into the board to make getting a switch puller in and swapping the switches without marking the plastic easy. Love that.
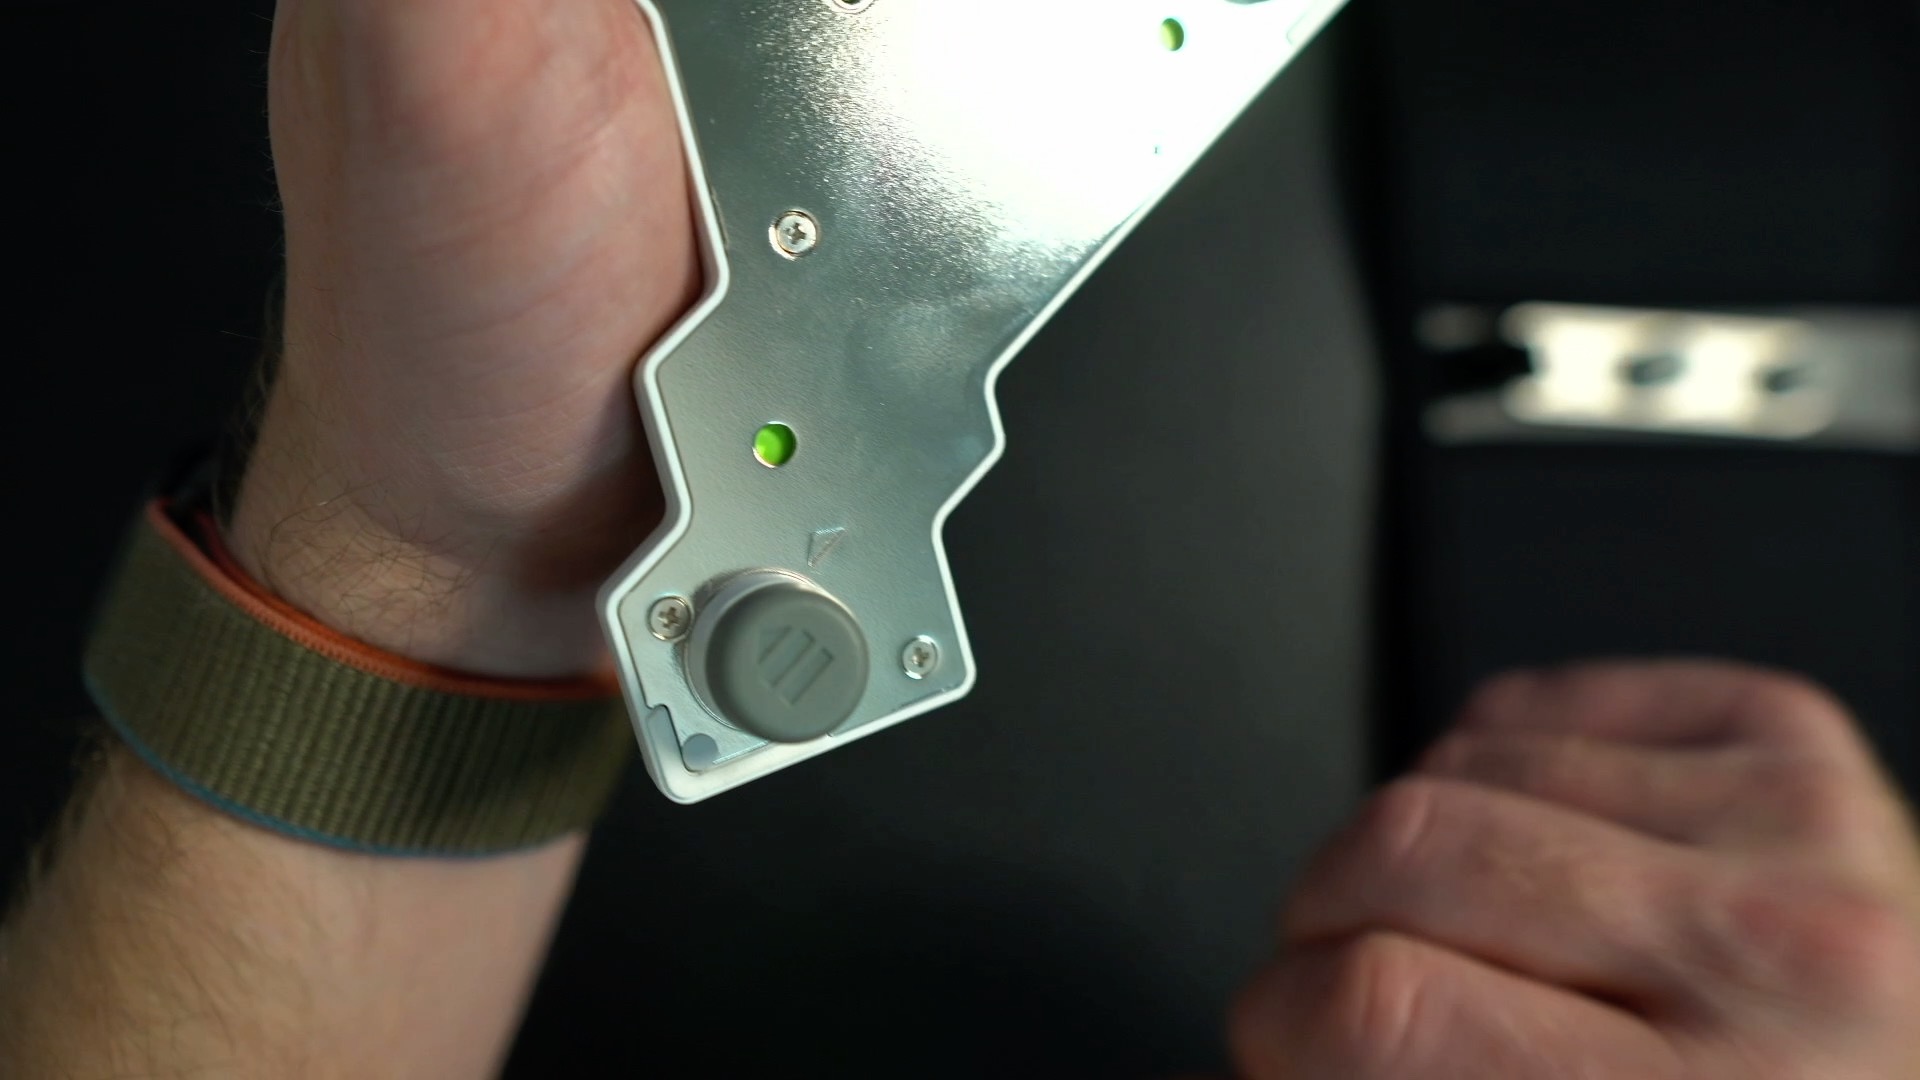
The underside of the Voyager is steel. And that gives this little powerhouse a feeling of absolute invincibility.
And that steel also makes a wonderful little trick possible. There are four feet, two have one distance spacing for the locator pins and two have another slightly wider spaced set of pins. You bring them close and they just snap into place. And like that, you have a little tenting on your board.
And let me tell you, the magnets used here are magnetic with a capital M. You can have absolutely no worries that these things are going to shift. And I haven’t even got to the strength of the optional tripod mounts. More on those shortly.
I should probably admit at this point that the magnetism proved problematic when I first started travelling with the Voyager. Every time I pulled half of the board out of the sleeve, it would stick to the feet. Until that is, I realised I was being a complete dumbass, and the way to do it was fold out the feet holder and then slide the board out.
I also want to call out the little rubbery feet on the bottom of the case. You can barely see them, and they only add about 1mm to the height, but they keep the Voyager rooted to the desk, even without the extra feet on. It would have been easy to just opt for some sort of bumpon, but again, ZSA have gone the extra distance and provided something far more elegant.
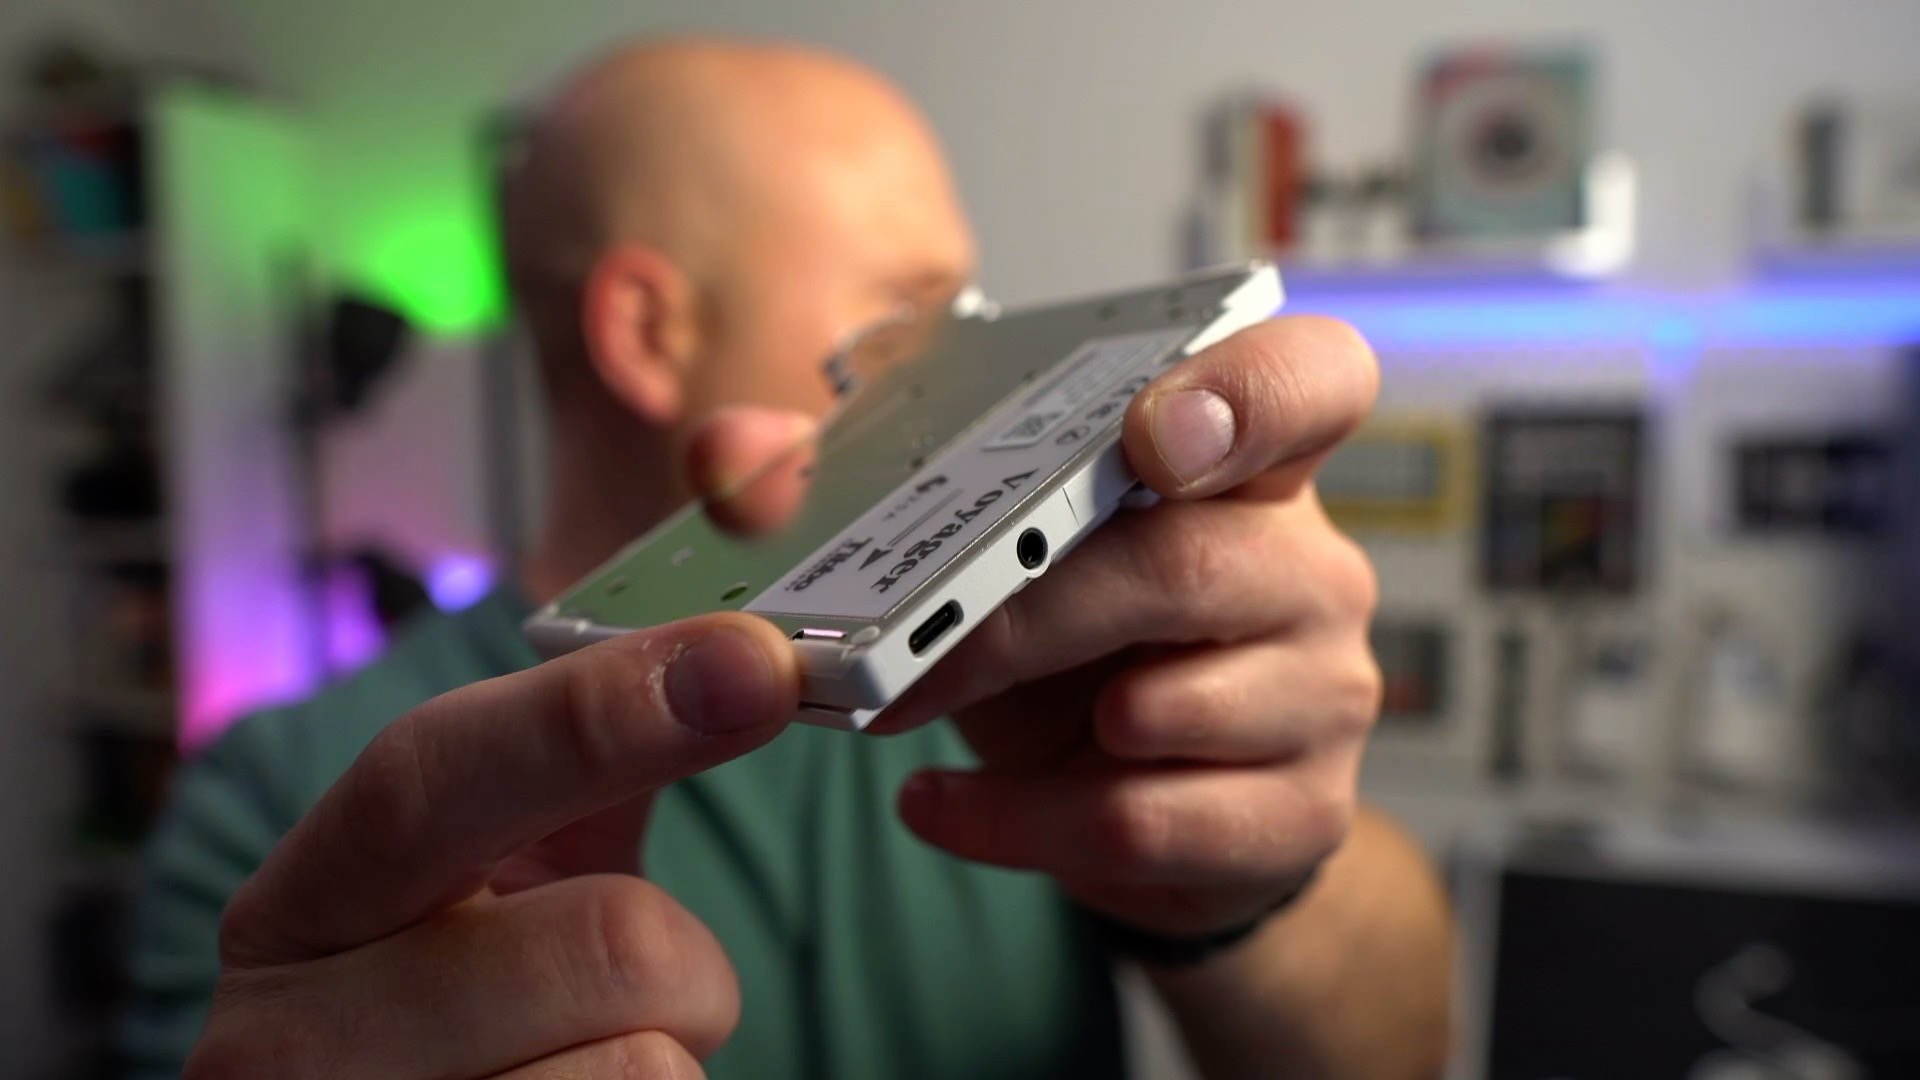
Speaking of elegant, the Voyager has a fantastic reset switch at the back. It might seem ridiculous to rave about a reset switch, but when most other keyboards of this nature require you to use a paperclip to reset, or use some keyboard shortcut that I invariably forget, you appreciate it. When you want to flash the firmware, just press it in and the configurator can connect, allowing you to flash the firmware straight to your board, no extra software, key combinations or paper clips needed.
I also appreciate that it is only standard cross head screws that stop you opening the Voyager up, although, it’s so thin, I’m not sure you would ever want to. I certainly can’t imagine you could get any damping material in there and I don’t have any appetite to do so either, I love the clacky noise of this Voyager, even with red choc switches in, which I usually despise. I don’t hear any of the normal spring ping of the reds in this board, a huge achievement in itself.
One little thing I do miss from the Moonlander, is there is no startup noise when you plug it in. I know it’s not a deal breaker but I always liked that.
Weight
The Voyager, with both halves, the longest USB lead, the carry case and feet weight in at 650g, and without the feet sits about 16.3mm off the desk.
I really don’t have a single negative on the hardware side of things. I love pretty much everything about this board.
But, before I had it in my hands, I had some nagging doubts. There are certainly some elephants in the room. Like, why isn’t this board wireless? And why only 2 thumb keys per side? Why are the keys MX and not choc spaced? And, if I am programming a numpad on one side, what the hell am I supposed to do with that top row?
Lets deal with the wireless side of things first.
The elephant in the room: Wireless
There is no wireless version of the Voyager. It’s a wired only board. A TRRS cable connects the halves and a USB C cable (the Voyager comes with a few different lengths) connects to the host. It runs a QMK based firmware.
ZSA has made its arguments against wireless in a blog post on its site, some of the points I agree with, some I don’t.
I’ve got a number of ZMK powered boards and I do appreciate the wire-free aesthetic. I have also found my ZMK boards as dependable as wired QMK boards. So could ZSA have made this board wireless, kept it hotswap, and this low to the ground? Probably.
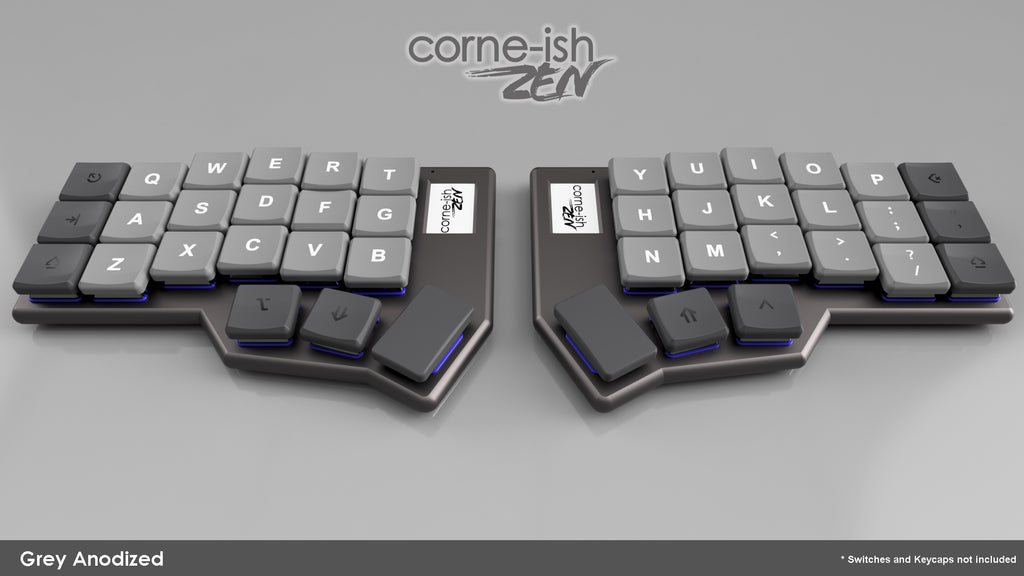
Here is the Cornish Zen. A more ‘boutique’ product for sure, but wireless, with choc switches, hot-swappable, and even includes an e-ink display, which is actually the only thing I don’t like about it. But the fact is they didn’t. And I really thought that might be a deal breaker for me.
But, despite my initial disappointment, in a short space of time, I have become entirely fine with the wired nature of the Voyager. There is just so much other stuff I like about it, I’ve just forgotten about that aspect.
I was also harbouring the belief that wireless was less hassle than wired boards. However, when you factor in needing on/off switches and needing to swap Bluetooth profiles when you change sources, and if you happen to be using an Advantage 360, the need to sacrifice a Lamb every seventh day to get a connection between your halves, yes, I don’t know that there is much in it.
There is a actually a certain liberation that I had forgotten, in just plugging a keyboard in, and have it work.
But look, I get it, wired won’t be for everyone, if wireless is a deal breaker for you, you can stop reading now and go and buy something else.
Choc spaced v MX spaced
Mechanical keyboards that use MX switches have MX spacing between the keys. Boards that use low profile Choc switches can opt to use ‘choc’ spacing, with smaller keycaps, and the keys closer together. It makes for a slightly more compact layout, as you can see on this Corne, compared to the Voyager.

So the Voyager, while having choc switches, still uses MX spacing. I thought I wouldn’t like that as I have enjoyed the tightness of the Corne with Choc spacing but it’s actually been no problem whatsoever. My typing speed rarely gets above 50 WPM and I’ve not seen any real difference in speed between the choc spaced corne and the mx spaced Voyager. Obviously someone a little more highly tuned or with smaller hands than me might notice something but I found no difference in terms of real world performance.
And when all said and done, we are talking very small margins. Width wise, the Corne with choc spacing is 18mm from the start of one keycap to the start of the next, on the Voyager it is 19mm. So with that gap over 6 keys that equates to 108mm on the choc spaced board, and 113mm on the Voyager. Admittedly, Choc spacing height wise is 2mm difference (choc switch spacing is a rectangular 18 x 17mm, while MX is square at 19.05 x 19.05), rather than 1mm, but over the 3 rows of a Corne, that just wasn’t significant to me.
For me, in practicality, the choc vs MX spacing was a complete non-issue. I am happy typing on my Cornish Zen with the Choc spacing, I’m equally happy typing with the Voyager with MX spacing.
The layout
Waiting for this board to arrive I just wasn’t sure what I was going to do with the layout. A couple of things bothered me. Firstly, I didn’t have any other boards with just two thumb switches. Secondly, with smaller boards I have found mapping a numpad onto a layer on either half very effective, so wasn’t really sure what to do with that top row of keys if I didn’t need it for numbers.
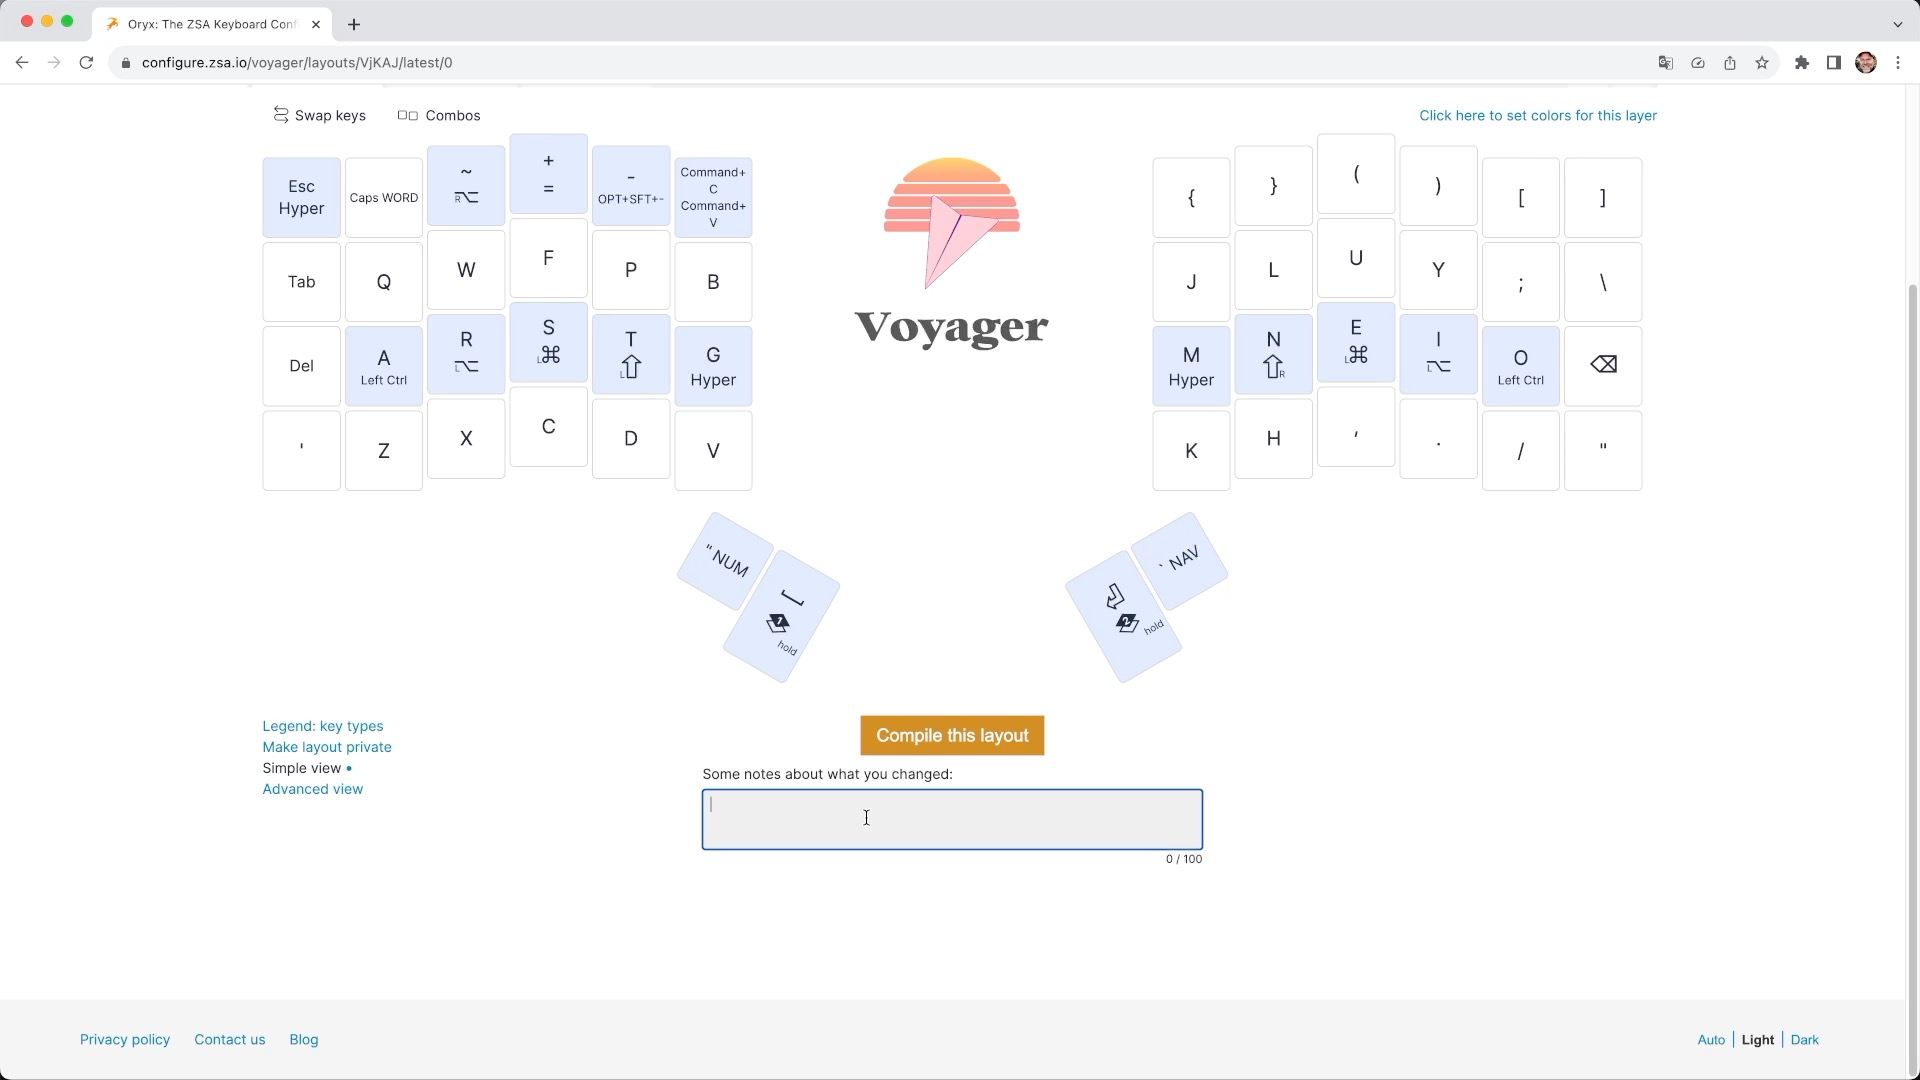
Well, after a lot of tweaking over the weeks, I have something I’m finding very effective. My top row has all my coding symbols; things I would normally have to switch layers for on my Corne are now a short stretch away. My right side has all my brackets, and my left has caps word, tilde, equals, dash and the all important tap dance for copy and paste.
To free up enough keys to do this I needed to use Home Rows Modifiers. I assume the majority of you reading this are nerdy enough to know what I am talking about, so go ahead and skip to the next section. If however, you are not a social recluse that spends too long thinking about keyboards, here is the essential info:
Home row mods
Home row mods are doubling up the keys on the home row (where you fingers rest by default on each side of the board) so a tap performs the normal key, and a hold gives you a modifier. For me, each home row gives me ctrl/alt/super/shift/hyper.
For reasons I can’t fathom, to begin with, I had a really difficult time getting home row mods working via Oryx, the ZSA keymap configuration tool for the Voyager. I couldn’t even get through a single typing test without a bunch of unwanted modifier keys firing. I’d only setup home row mods on ZMK firmware keyboards before, so after hours of frustration, I assumed that QMK and by extension Oryx, was just horrible for home row mods.
Disgruntled, for about a week, I largely gave up using the Voyager and moaned to ZSA about the shortcomings of QMK. They were very sympathetic and helpful but insisted they hadn’t had any complaints in this regard. But despite trying everything they suggested it remained horrible.
But there was the nagging doubt that QMK couldn’t really be this bad. Plenty of people were using Home Row Mods with QMK/Oryx with no problem. Surely it had to be an error between the keyboard and chair? So I got the Voyager back out, set everything back to default in the Oryx configurator, set a tapping time of 250ms on my shift key, 350ms on the others, flashed the new firmware and then it just worked.
I was very happy. But sadly have no idea what combination of settings I had managed to apply previously to make things so bad. Other people have commented that they had similar issues getting them to work on the Moonlander so I know there is something awry, I just cannot replicate it.
I still don’t think QMKs home row mods implementation is quite as forgiving as ZMKs implementation but it is absolutely usable, and subsequently my enjoyment of using this board has skyrocketed further. I have been using it every day since, for weeks now, with no issues.
What is it like to type on
I’ve been typing on the Voyager, without the feet, for the most part as I prefer it flat. And, it’s really just a wonderful typing experience.
These days, having typed a lot on the Glove80 and a Cornish Zen of late, which both use low profile choc switches, I find it very weird when I go back to the longer travel feel of MX switches. Chocs are kind of like a half way house between Apple keyboards and MX, and I prefer them over MX switches currently. I’m a little faster on them but I feel faster on them, which is just as good for me.
I also find the Voyager incredibly comfortable to type on for long periods. The thumb positions are just absolutely perfect for me. That’s not to say that everyone will find them that way but for me they feel made to measure.
Even after a couple of months, I am still finding this board, one of, if not the most comfortable board I own. Now, I also own the Advantage360 and Glove80, both boards with key wells, so I had better explain why I think that might be so.
I realise I’m an outlier here but there is a generally accepted truth with split keyboard designs I’m not sure I agree with. And that is that the thumb is the strongest digit and therefore it should be doing more work. The logical conclusion of this seems to be that we should all have a bunch of keys on our boards, just for our thumbs. But here is the thing. I don’t know if I’ve been a bit genetically short changed but my thumbs just aren’t that dexterous. In addition, with keywell boards like the 360 and to a lesser extent, the Glove80, I can find my thumbs actually ache after a full day. I attribute this to the slightly raised poised position I have my thumbs in with those boards, compared to the Voyager and other boards that are very low and completely flat.
So, this is a long way to addressing two things – why I personally find this board so comfortable, and why I am happy enough it just has two thumb keys.
But again, let me be clear, the most comfortable keyboard, is the one that’s most comfortable for you. And I, nor anyone else, can make any guarantees which keyboard will be the most comfortable board for you.
Extras (Tripod Kit)
Now, one really nice thing about ZSAs other board, the Moonlander was the built in palm rests. They positioned your hands nicely over the keys at an angle I really appreciated. There is nothing like that on the Voyager, and even though it is lower still to the desk, your wrist angle might not be quite as comfortable.
If you are sensitive to such differences, you might entertain the ‘Tripod Mount’. For an extra $89 you get two mounts and a TRRS cable that’s over 2 metres long.
The mounts use a standard tripod thread so you can use any one of the gazzillion different camera mounts out there to mount your Voyager.
And here is the thing, if I didn’t know otherwise, I could be convinced that these little mounts have built in tractor beams. The magnets are unbelievably strong. Once they have snapped on, it takes some serious effort to pull them back off.
If you had any concerns that the mounts would be flimsy or easy to get knocked off, you needn’t worry, they are absolutely solid.
Now I need to get a new chair so I can mount these mounts onto the arms so I can try out going ‘full Picard’ (I have the hair line after all) is something I am going to look at seriously moving forward.
But, while the enormous cable makes setting that kind of thing up, it does also make me think that wireless would have been really nice in this situation.
Software
ZSA’s Oryx toolset is still probably the most complete package of tools to get the most out of a ortholinear split board.
It’s not just the configurator, which is impressive enough in its own right, and still perhaps the best online tool of its kind. Its also the training side of things. If you have never had a split ergo board before, it can feel like you’ve made a terrible decision in those first weeks as you peck around trying to get to 10 words per minute. The different training modes for prose, code etc allow you get to grips far quicker and handily show the layout of the different layers as you select them.
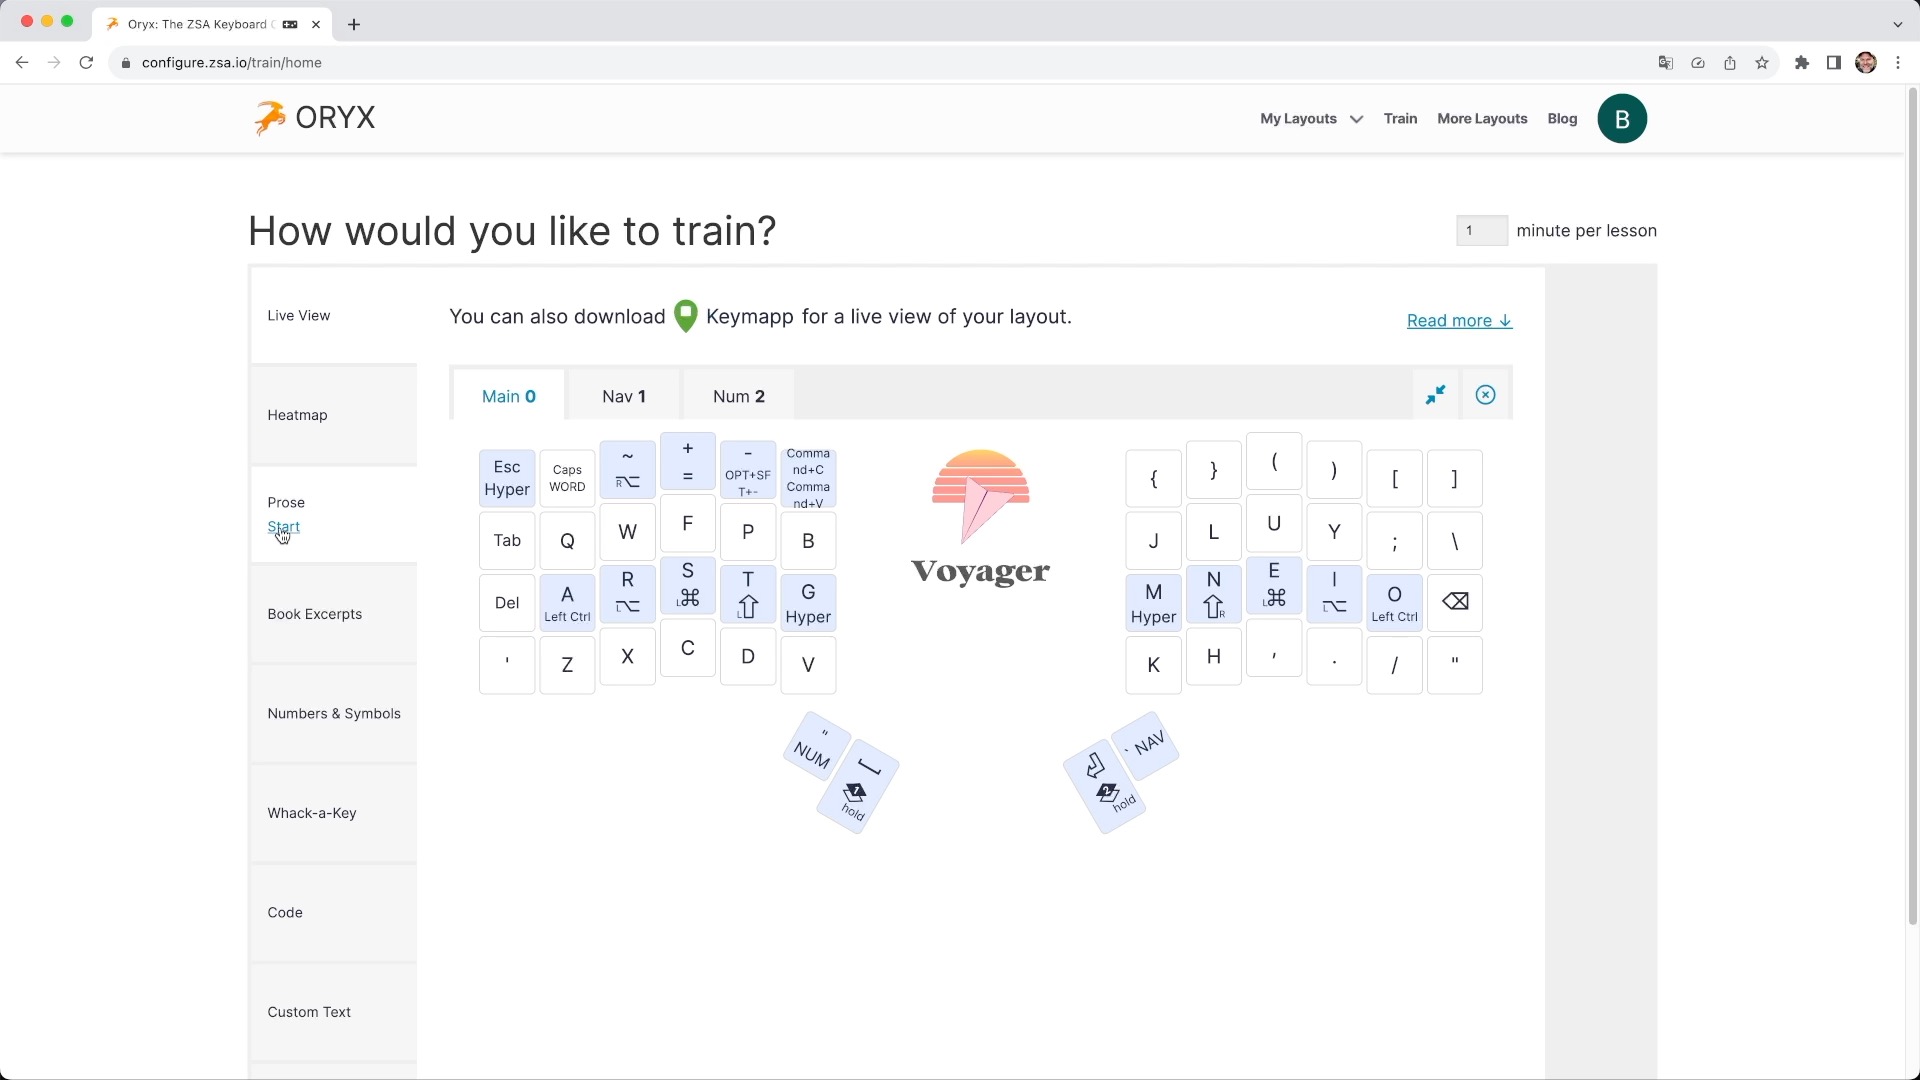
Once you get into fine tuning your layout, I found the heatmap very effective in finding where I had put poorly placed keys, so the ones I use most frequently are as close to the home row as possible.
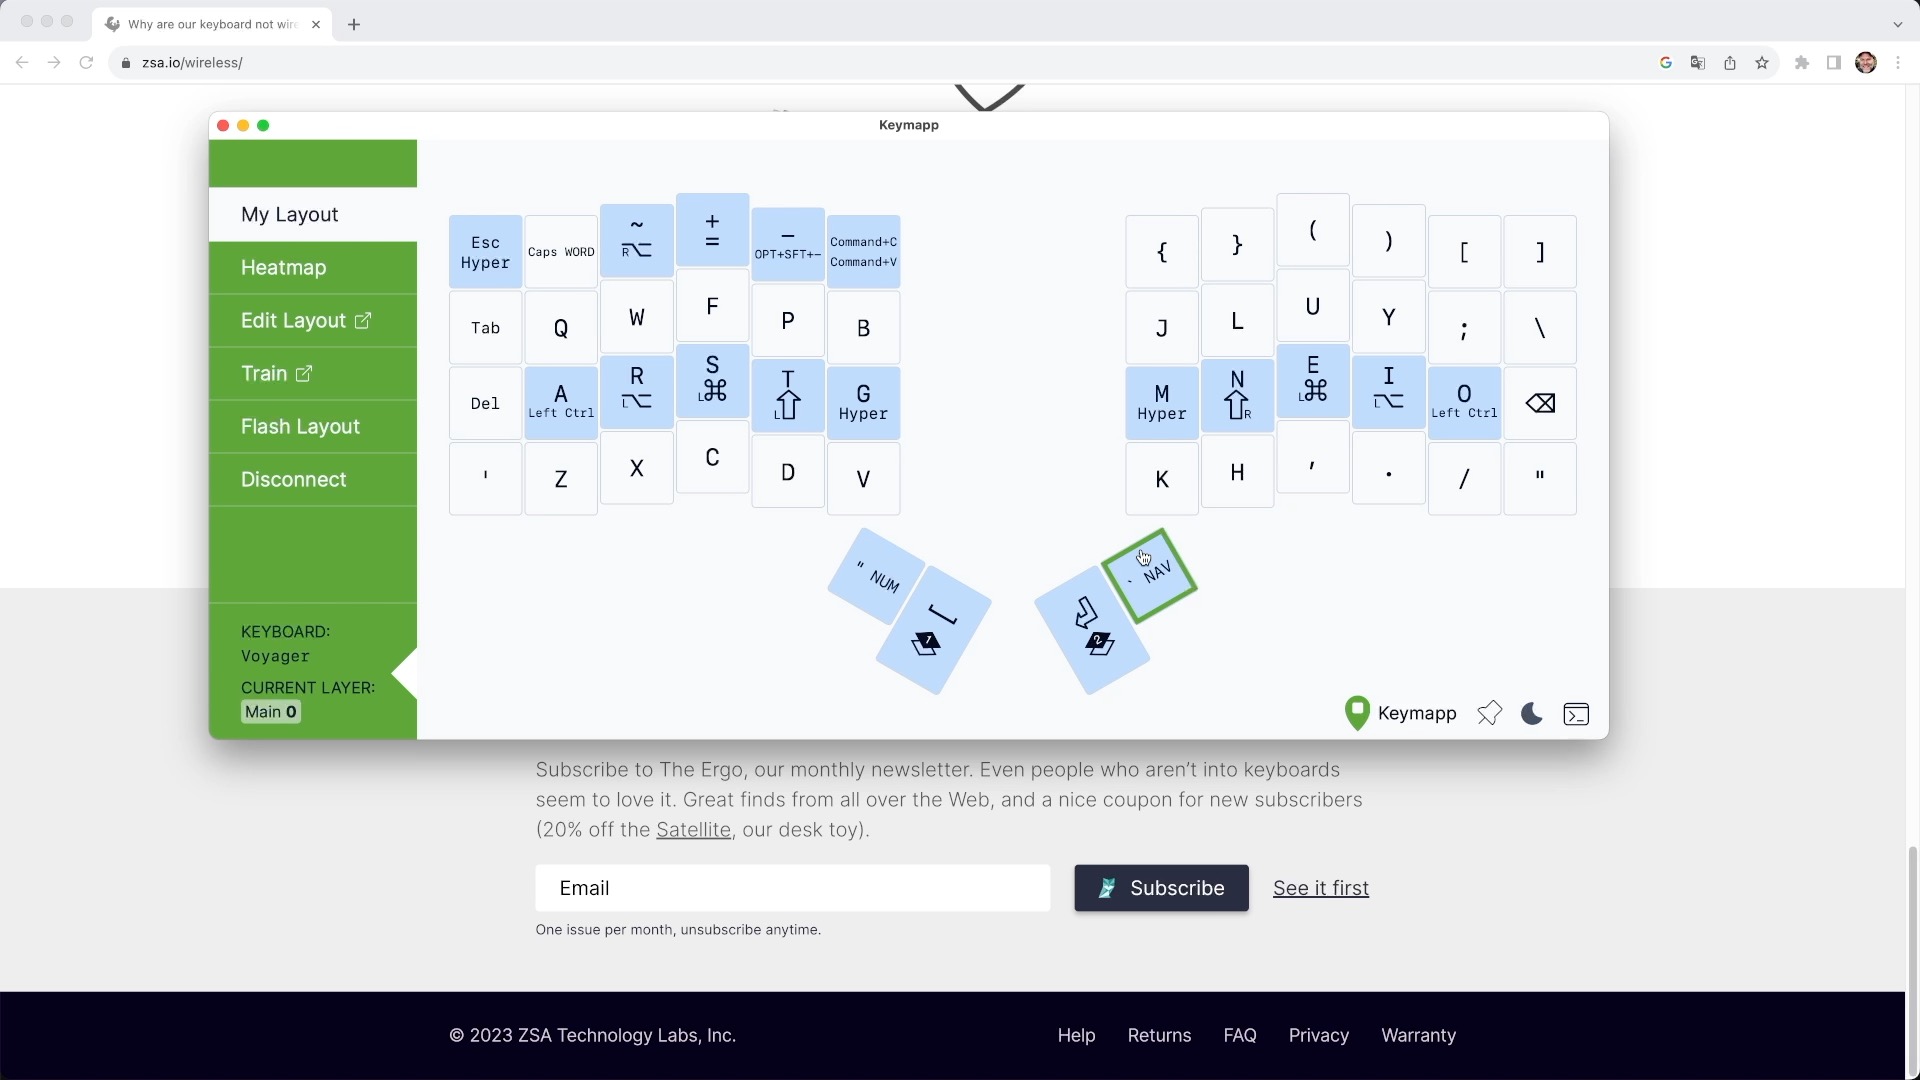
And I mentioned already, tweaking your layout and getting it across to the board is painless with any Chromium based browser. However, if you just don’t want to use your browser to flash the firmware, you can use ZSA’s Keymapp application. Not only does it let you flash the board, it also lets you have a live preview of your layout as you work, very helpful at the beginning because like the browser based tools, it switches to show you the keys of the current layer as you toggle them.
You can get the heatmap that way too.
Minor annoyances
So nothing is perfect, so what problems have I found, and what things don’t I like with the Voyager?
Waking from sleep is occasionally an issue with on macOS. A key tap wakes the mac, but then no further keys are registered. Again, I had this at the beginning with this board and it now hasn’t done it for weeks. When it does happen, you can just unplug and replug the USB cable and you’re back in business. ZSA have given me a couple of things to try which have lessened the occurrence but every so often, the problem shows up again. I’m using my Voyager plugged in to the built in KVM of this Dell monitor, which might be a contributing factor, but it isn’t an issue I’ve had with any ZMK boards when plugged in.
On the subject of ZMK again, the biggest limitation of this board, for me, is that ZMK just has far better features for smaller boards, than QMK. There are already a few little things that just don’t work as well in QMK, things like having a key that can be a shifted brace on tap, and hyper on hold. You can just do that in ZMK. In QMK, it seems you cannot. On one level that’s fine and you work around it, but on another, you look at boards powered with ZMK that can do that, and feel a little frustrated. After all, with less physical keys to work with, this kind of flexibility in the software is very valuable.
I’d also like it, if some of the indicator LEDs could do a little more. For example, I’d like to see a caps lock light come on, if I use CAPS WORD. I can absolutely get by without that but, you know, while we are being picky.
But honestly that’s about it. I’m looking for problems with this board, rather than have them hit me.
Summary
This board nails what it set out to do. If you can live without wireless, and you likely can, and don’t need 85 thumb keys, this is an absolute cracker of a keyboard.
It’s a fantastic form factor, easy to travel with, it flatters even switches I usually despise like the Red chocs and just has an absolutely sublime feel. There’s just a lovely satisfying feeling you get when typing on it. And even if, in time, you want to change the switches, it’s hotswap so changing them is as easy as playing with Lego.
If you are new to these kind of boards, you will find the supporting software very useful, and ZSA do a great job over email helping with any problems you might encounter.
If you have a larger board currently, something like the Moonlander, and you are wondering if you can transition to something smaller, I am proof you can. I’m not the fastest to adapt and I reckon it took a couple of months to get really comfortable with this kind of smaller form factor.
What about if you have a conventional board and trying to decide between this and the Moonlander? In that case, I’d say go with the Moonlander. A split keyboard, columns and fewer keys might be a bit much initially. At least with the Moonlander you can start with a layout similar to where you are currently.
If you currently have something like a Corne, I think you will enjoy this board immensely. It is everything that is good about the Corne, with an extra row of keys up top, that you will surely find good use for.
So, in conclusion, ZSA really nailed it with this one. The Voyager is an absolutely fantastic travel board, and just keyboard in its own right. I have no qualms about recommending it whole heartedly.
Sold. Read this review and bought one of these (yet to get it).
It’s worth noting that I come from an X-Bows Crystal. That keyboard has fixed my RSI issues. Completely.
But, its key switches started to fail withing a year and when I tried to swap them out, the PCB peeled apart during insertion of the ‘three’ key (can’t type that key right now!). Did not fancy another X-Bow after that experience!
I already played with the voyager configurator and have got a layout similar enough to my X-Bows that I should hit the ground with muscle memory running.
Thanks for a useful review.