
Learning a new programming language can help broaden your software development expertise, open career opportunities, or create fun challenges. However, it can be difficult to decide on one specific approach to learning a new language. Artificial intelligence (AI) can help. In this tutorial, you'll learn how to leverage AI-powered GitLab Duo Code Suggestions for a guided experience in learning the Python programming language with a pratical hands-on example.
- Preparations
- Learning a new programming language: Python
- Start learning Python with a practical example
- File I/O: Read and print a log file
- Flow control
- Functions
- Printing results and formatting
- Dependency management and continuous verification
- What is next
Preparations
Choose your preferred and supported IDE, and follow the documentation to enable Code Suggestions for GitLab.com SaaS or GitLab self-managed instances.
Programming languages can require installing the language interpreter command-line tools or compilers that generate binaries from source code to build and run the application.
Tip: You can also use GitLab Remote Development workspaces to create your own cloud development environments, instead of local development environments. This blog post focuses on using VS Code and the GitLab Web IDE.
VS Code
Install VS Code on your client, and open it. Navigate to the Extensions menu and search for gitlab workflow. Install the GitLab Workflow extension for VS Code. VS Code will also detect the programming languages, and offer to install additional plugins for syntax highlighting and development experience. For example, install the Python extension.
Code Suggestions
Familiarize yourself with suggestions before actually verifying the suggestions. GitLab Duo Code Suggestions are provided as you type, so you do not need use specific keyboard shortcuts. To accept a code suggestion, press the tab key. Also note that writing new code works more reliably than refactoring existing code. AI is non-deterministic, which means that the same suggestion may not be repeated after deleting the code suggestion. While Code Suggestions is in Beta, we are working on improving the accuracy of generated content overall. Please review the known limitations, as this could affect your learning experience.
Tip: The latest release of Code Suggestions supports multiline instructions. You can refine the specifications to your needs to get better suggestions. We will practice this method throughout the blog post.
Learning a new programming language: Python
Now, let's dig into learning Python, which is one of the supported languages in Code Suggestions.
Before diving into the source code, make sure to set up your development environment.
Development environment for Python
- Create a new project
learn-python-aiin GitLab, and clone the project into your development environment. All code snippets are available in this "Learn Python with AI" project.
git clone https://gitlab.com/NAMESPACE/learn-python-ai.git

cd learn-python-ai

git status
- Install Python and the build toolchain. Example on macOS using Homebrew:
brew install python
- Consider adding a
.gitignorefile for Python, for example this .gitignore template for Python.
You are all set to learn Python!
Hello, World
Start your learning journey in the official documentation, and review the linked resources, for example, the Python tutorial. The library and language reference documentation can be helpful, too.
Tip: When I touched base with Python in 2005, I did not have many use cases except as a framework to test Windows 2000 drivers. Later, in 2016, I refreshed my knowledge with the book "Head First Python, 2nd Edition," providing great practical examples for the best learning experience – two weeks later, I could explain the differences between Python 2 and 3. You do not need to worry about Python 2 – it has been deprecated some years ago, and we will focus only on Python 3 in this blog post. In August 2023, "Head First Python, 3rd Edition" was published. The book provides a great learning resource, along with the exercises shared in this blog post.
Create a new file hello.py in the root directory of the project and start with a comment saying # Hello world. Review and accept the suggestion by pressing the tab key and save the file (keyboard shortcut: cmd s).
# Hello world
Commit the change to the Git repository. In VS Code, use the keyboard shortcut ctrl shift G, add a commit message, and hit cmd enter to submit.
Use the command palette (cmd shift p) and search for create terminal to open a new terminal. Run the code with the Python interpreter. On macOS, the binary from Homebrew is called python3, other operating systems and distributions might use python without the version.
python3 hello.py

Tip: Adding code comments in Python starting with the # character before you start writing a function or algorithm will help Code Suggestions with more context to provide better suggestions. In the example above, we did that with # Hello world, and will continue doing so in the next exercises.
Add hello.py to Git, commit all changes and push them to your GitLab project.
git add hello.py

git commit -avm "Initialize Python"

git push
The source code for all exercises in this blog post is available in this "Learn Python with AI" project.
Start learning Python with a practical example
The learning goal in the following sections involves diving into the language datatypes, variables, flow control, and functions. We will also look into file operations, string parsing, and data structure operations for printing the results. The exercises will help build a command-line application that reads different log formats, works with the data, and provides a summary. This will be the foundation for future projects that fetch logs from REST APIs, and inspire more ideas such as rendering images, creating a web server, or adding Observability metrics.

As an experienced admin, you can put the script into production and use real-world log format exmples. Parsing and analyzing logs in stressful production incidents can be time-consuming. A local CLI tool is sometimes faster than a log management tool.
Let's get started: Create a new file called log_reader.py in the directory root, add it to Git, and create a Git commit.
Define variables and print them
As a first step, we need to define the log files location, and the expected file suffix. Therefore, let's create two variables and print them. Actually, ask Code Suggestions to do that for you by writing only the code comments and accepting the suggestions. Sometimes, you need to experiment with suggestions and delete already accepted code blocks. Do not worry – the quality of the suggestions will improve over time as the model generates better suggestions with more context.


# Specify the path and file suffix in variables
path = '/var/log/'
file_suffix = '.log'

# Print the variables

print(path)
print(file_suffix)
Navigate into the VS Code terminal and run the Python script:
python3 log_reader.py

Python supports many different types in the standard library. Most common types are: Numeric (int, float, complex), Boolean (True, False), and String (str). Data structures include support for lists, tuples, and dictionaries.
Explore variable types
To practice different variable types, let's define a limit of log files to read as a variable with the integer type.
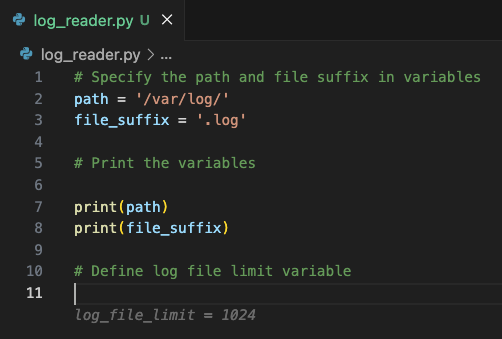
# Define log file limit variable
log_file_limit = 1024
Create a Boolean variable that forces to read all files in the directory, no matter the log file suffix.
# Define boolean variable whether to read all files recursively
read_all_files_recursively = True
File I/O: Read and print a log file
Create a directory called log-data in your project tree. You can copy all file examples from the log-data directory in the example project.
Create a new file sample.log with the following content, or any other two lines that provide a different message at the end.
Oct 17 00:00:04 ebpf-chaos systemd[1]: dpkg-db-backup.service: Deactivated successfully.
Oct 17 00:00:04 ebpf-chaos systemd[1]: Finished Daily dpkg database backup service.
Instruct Code Suggestions to read the file log-data/sample.log and print the content.

# Read the file in log-data/sample.log and print its content
with open('log-data/sample.log', 'r') as f:
    print(f.read())
Tip: You will notice the indent here. The with open() as f: statement opens a new scope where f is available as stream. This flow requires indenting )tab) the code block, and perform actions in this scope, calling f.read() to read the file contents, and passing the immediate value as parameter into the print() function.
Navigate into the terminal, and run the script again with python3 log_reader.py. You will see the file content shown in the VS Code editor, also printed into the terminal.

Flow control
Reading one log file is not enough – we want to analyze all files in a given directory recursively. For the next exercise, we instruct Code Suggestions to create an index of all files.
Prepare the log-data directory with more example files from the log-data directory in the example project. The directory tree should look as follows:
tree log-data                                                             ─╯
log-data
├── sample.log
└── var
    └── log
        ├── auth.log
        ├── syslog.log
        └── syslog_structured.log

3 directories, 4 files
Loops and lists to collect files
Modify the path variable to use the value log-data/.
# Specify the path and file suffix in variables
path = 'log-data/'
file_suffix = '.log'
Tell Code Suggestions to read all file paths in the directory into a list. After the collection loop, print the list of file paths.
# Read all file paths in the directory into a list

# Print the list of log file paths

An example of a suggestion could look like this:
# Read all file paths in the directory into a list
import os

# Read all file paths in the directory into a list
log_files = []
for root, directories, files in os.walk(path):
    for file in files:
        if file.endswith(file_suffix):
            log_files.append(os.path.join(root, file))

# Print the list of log file paths

print(log_files)
Let's analyze what happens here: The import os statement is required to bring the os library into the current scope, and we are able to call os.walk() later. The log_files list is initialized as an empty list using empty brackets. os.walk() expects a path as directory tree to start searching for files. The function returns a generator object, which will walk the directory tree recursively. The returned tuples include the collected files, which we want to access in a loop iteraor, using the for loop notation. When the file ends with the defined suffix, its full path is appended to the list. This is an optimized and complex example. Do not worry about understanding everything just yet - we will revisit this later.
Conditionally collect files
Modify the instructions and add the Boolean flag evaluation for read_all_files_recursively as an input to the glob() function.
# Read all file paths in the top level directory into a list
# If read_all_files_recursively is True, read all files recursively

# Read all file paths in the top level directory
import os

# Read all file paths in the top level directory into a list
# If read_all_files_recursively is True, read all files recursively

log_files = []
for file in os.listdir(path):
    if file.endswith(file_suffix):
        log_files.append(os.path.join(path, file))

if read_all_files_recursively:
    for root, directories, files in os.walk(path):
        for file in files:
            if file.endswith(file_suffix):
                log_files.append(os.path.join(root, file))

# Print log_files
print(log_files)
The result is not optimal yet because it always executes the first loop, and optionally the second loop. This flow leads to duplicated results when the script is executed.
python3 log_reader.py

['log-data/sample.log', 'log-data/sample.log', 'log-data/var/log/auth.log']
Experiment with Code Suggestions instructions to get a solution for the problem. There are different approaches you can take:
- A potential solution is to wrap the source code into an if-then-else block, and move the
os.listdir()loop into the else-block.
if read_all_files_recursively:
    for root, directories, files in os.walk(path):
        for file in files:
            if file.endswith(file_suffix):
                log_files.append(os.path.join(root, file))
else:
    for file in os.listdir(path):
        if file.endswith(file_suffix):
            log_files.append(os.path.join(path, file))
- Alternatively, do not use
append()to always add a new list entry, but check if the item exists in the list first.
for file in os.listdir(path):
    if file.endswith(file_suffix):
        # check if the entry exists in the list already
        if os.path.isfile(os.path.join(path, file)):
            log_files.append(os.path.join(path, file))

if read_all_files_recursively:
    for root, directories, files in os.walk(path):
        for file in files:
            if file.endswith(file_suffix):
                # check if the entry exists in the list already
                if file not in log_files:
                    log_files.append(os.path.join(root, file))
- Or, we could eliminate duplicate entries after collecting all items. Python allows converting lists into sets, which hold unique entries. After applying
set(), you can again convert the set back into a list. Code Suggestions knows about this possibility, and will help with the comment# Ensure that only unique file paths are in the list

# Ensure that only unique file paths are in the list

log_files = list(set(log_files))
- Take a step back and evaluate whether the variable read_all_files_recursively makes sense. Maybe the default behavior should just be reading all files recursively?
Tip for testing different paths in VS Code: Select the code blocks, and press cmd / on macOS to comment out the code.
Functions
Let's create a function called parse_log_file that parses a log file, and returns the extracted data. We will define the expected log format and columns to extract, following the syslog format specification. There are different log format types and also customized formats by developers that need to be taken into account – exercise for later.
Start with a simple log format
Inspect a running Linux VM, or use the following example log file example for additional implementation.
less /var/log/syslog | grep -v docker

Oct 17 00:00:04 ebpf-chaos systemd[1]: Starting Daily dpkg database backup service...
Oct 17 00:00:04 ebpf-chaos systemd[1]: Starting Rotate log files...
Oct 17 00:00:04 ebpf-chaos systemd[1]: dpkg-db-backup.service: Deactivated successfully.
Oct 17 00:00:04 ebpf-chaos systemd[1]: Finished Daily dpkg database backup service.
Oct 17 00:00:04 ebpf-chaos systemd[1]: logrotate.service: Deactivated successfully.
Oct 17 00:00:04 ebpf-chaos systemd[1]: Finished Rotate log files.
Oct 17 00:17:01 ebpf-chaos CRON[727495]: (root) CMD (   cd / && run-parts --report /etc/cron.hourly)
We can create an algorithm to split each log line by whitespaces, and then join the results again. Let's ask Code Suggestions for help.
# Split log line "Oct 17 00:00:04 ebpf-chaos systemd[1]: Finished Rotate log files." by whitespaces and save in a list

log_line = "Oct 17 00:00:04 ebpf-chaos systemd[1]: Finished Rotate log files."
log_line_split = log_line.split(" ")
print(log_line_split)
Run the script again to verify the result.
python3 log_reader.py

['Oct', '17', '00:00:04', 'ebpf-chaos', 'systemd[1]:', 'Finished', 'Rotate', 'log', 'files.']
The first three items are part of the datetime string, followed by the host, service, and remaining log message items. Let's practice string operations in Python as the next step.
String and data structure operations
Let's ask Code Suggestions for help with learning to join strings, and perform list operations.
- Join the first three items with a whitespace again.
- Keep host and service.
- Join the remaining variable item count into a string, separated with whitespaces, again.
- Store the identified column keys, and their respective values in a new data structure: dictionary.

python3 log_reader.py

# Array
['Oct', '17', '00:00:04', 'ebpf-chaos', 'systemd[1]:', 'Finished', 'Rotate', 'log', 'files.']

# Dictionary
{'datetime': 'Oct 17 00:00:04', 'host': 'ebpf-chaos', 'service': 'systemd[1]:', 'message': ' ebpf-chaos systemd[1]: Finished Rotate log files.'}
A working suggestion can look like the following:
# Initialize results dictionary with empty values for datetime, host, service, message
# Loop over log line split
# Join the first three list items as date string
# Item 4: host
# Item 5: service
# Join the remaining items into a string, separated with whitespaces
# Print the results after the loop

results = {'datetime': '', 'host': '', 'service': '', 'message': ''}

for item in log_line_split:

    if results['datetime'] == '':
        results['datetime'] = ' '.join(log_line_split[0:3])

    elif results['host'] == '':
        results['host'] = log_line_split[3]

    elif results['service'] == '':
        results['service'] = log_line_split[4]

    else:
        results['message'] += ' ' + item

print(results)
The suggested algorithm loops over all log line items, and applies the same operation for the first three items. log_line_split[0:3] extracts a slice of three items into a new list. Calling join() on a separator character and passing the array as an argument joins the items into a string. The algorithm continues to check for not initialized values for host (Item 4) and service (Item 5)and concludes with the remaining list items appended into the message string. To be honest, I would have used a slightly different algorithm, but it is a great learning curve to see other algorithms, and ways to implement them. Practice with different instructions, and data structures, and continue printing the data sets.
Tip: If you need to terminate a script early, you can use sys.exit(). The remaining code will not be executed.
import sys
sys.exit(1)
Imagine doing these operations for different log formats, and message types – it can get complicated and error-prone very quickly. Maybe there is another approach.
Parse log files using regular expressions
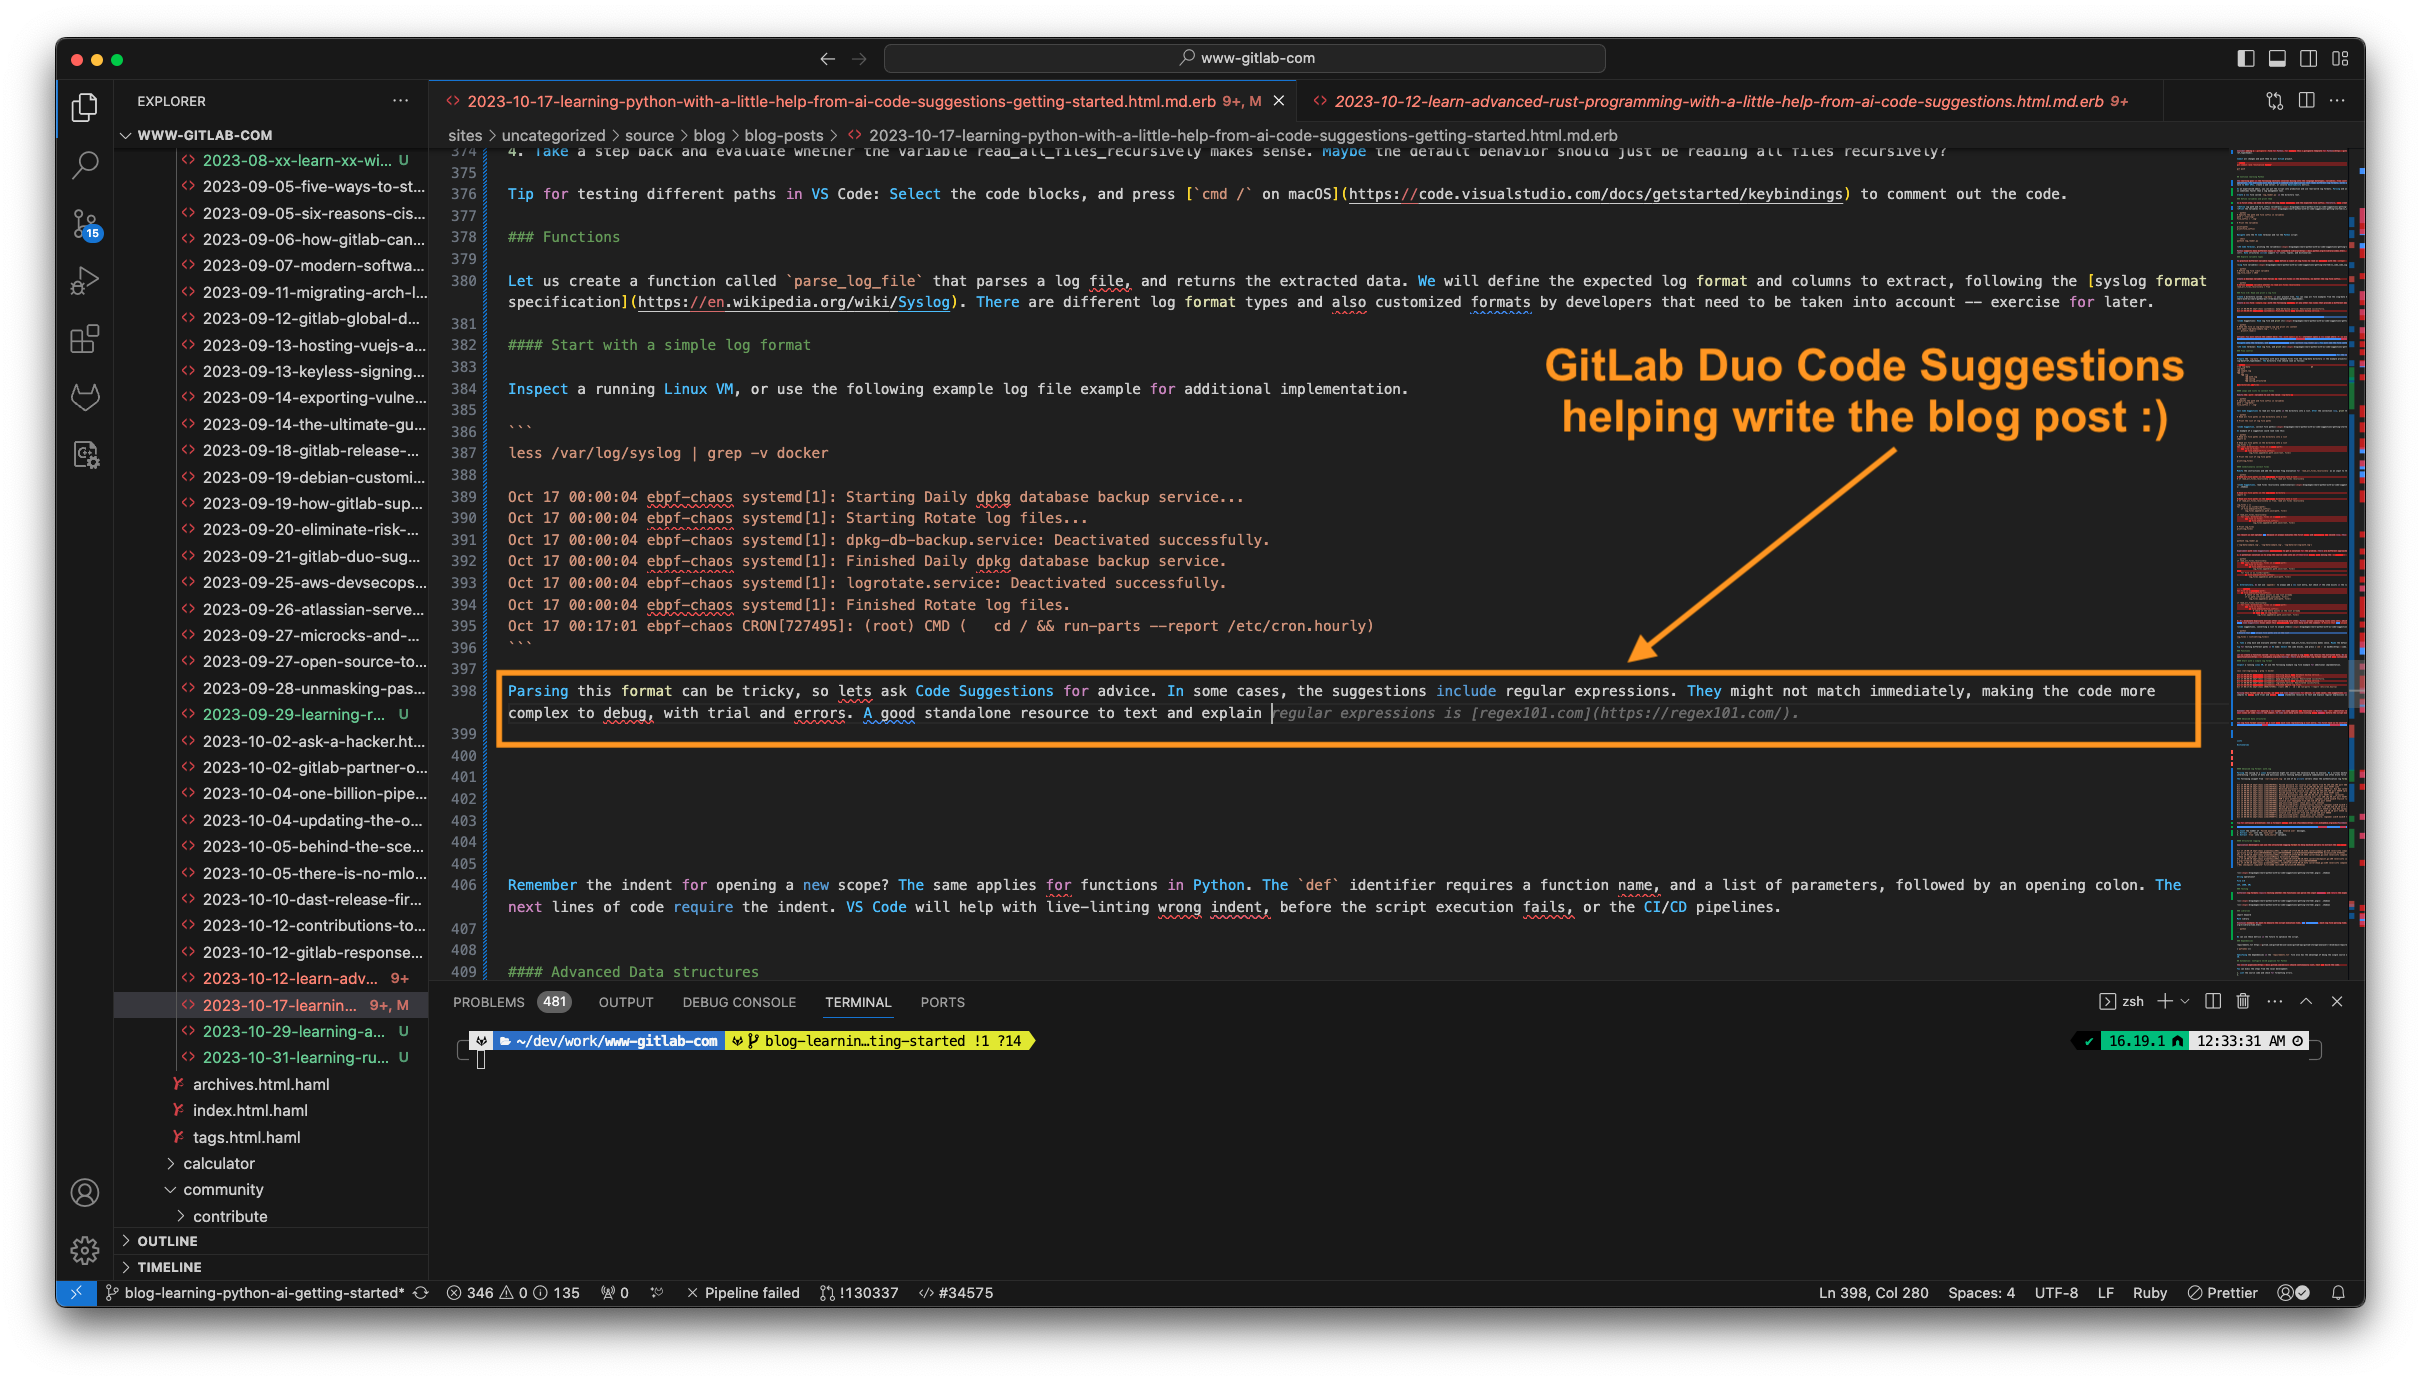
There are different syslog format RFCs – RFC 3164 is obsolete but still found in the wild as default configuration (matching the pattern above), while RFC 5424 is more modern, including datetime with timezone information. Parsing this format can be tricky, so let's ask Code Suggestions for advice.
In some cases, the suggestions include regular expressions. They might not match immediately, making the code more complex to debug, with trial and errors. A good standalone resource to text and explain regular expressions is regex101.com.
Tip: You can skip diving deep into regular expressions using the following code snippet as a quick cheat. The next step involves instructing Code Suggestions to use these log patterns, and help us extract all valuable columns.
# Define the syslog log format regex in a dictionary
# Add entries for RFC3164, RFC5424
regex_log_pattern = {
    'rfc3164': '([A-Z][a-z][a-z]\s{1,2}\d{1,2}\s\d{2}[:]\d{2}[:]\d{2})\s([\w][\w\d\.@-]*)\s(.*)$',
    'rfc5424': '(?:(\d{4}[-]\d{2}[-]\d{2}[T]\d{2}[:]\d{2}[:]\d{2}(?:\.\d{1,6})?(?:[+-]\d{2}[:]\d{2}|Z)?)|-)\s(?:([\w][\w\d\.@-]*)|-)\s(.*)$;'
}
We know what the function should do, and its input parameters – the file name, and a log pattern to match. The log lines should be split by this regular expression, returning a key-value dictionary for each log line. The function should return a list of dictionaries.
# Create a function that parses a log file
# Input parameter: file path
# Match log line against regex_log_pattern
# Return the results as dictionary list: log line, pattern, extracted columns

Remember the indent for opening a new scope? The same applies for functions in Python. The def identifier requires a function name, and a list of parameters, followed by an opening colon. The next lines of code require the indent. VS Code will help with live-linting wrong indent, before the script execution fails, or the CI/CD pipelines.
Continue with Code Suggestions – it might already know that you want to parse all log files, and parse them using the newly created function.

A full working example can look like this:
import os

# Specify the path and file suffix in variables
path = 'log-data/'
file_suffix = '.log'

# Read all file paths in the directory into a list
log_files = []
for root, directories, files in os.walk(path):
    for file in files:
        if file.endswith(file_suffix):
            log_files.append(os.path.join(root, file))

# Define the syslog log format regex in a dictionary
# Add entries for RFC3164, RFC5424
regex_log_pattern = {
    'rfc3164': '([A-Z][a-z][a-z]\s{1,2}\d{1,2}\s\d{2}[:]\d{2}[:]\d{2})\s([\w][\w\d\.@-]*)\s(.*)$',
    'rfc5424': '(?:(\d{4}[-]\d{2}[-]\d{2}[T]\d{2}[:]\d{2}[:]\d{2}(?:\.\d{1,6})?(?:[+-]\d{2}[:]\d{2}|Z)?)|-)\s(?:([\w][\w\d\.@-]*)|-)\s(.*)$;'
}

# Create a function that parses a log file
# Input parameter: file path
# Match log line against regex_log_pattern
# Return the results as dictionary list: log line, pattern name, extracted columns
import re

def parse_log_file(file_path):
    # Read the log file
    with open(file_path, 'r') as f:
        log_lines = f.readlines()

    # Create a list to store the results
    results = []

    # Iterate over the log lines
    for log_line in log_lines:
        # Match the log line against the regex pattern
        for pattern_name, pattern in regex_log_pattern.items():
            match = re.match(pattern, log_line)

            # If the log line matches the pattern, add the results to the list
            if match:
                extracted_columns = match.groups()
                results.append({
                    'log_line': log_line,
                    'pattern_name': pattern_name,
                    'extracted_columns': extracted_columns,
                    'source_file': file_path
                })

    # Return the results
    return results

# Parse all files and print results
for log_file in log_files:
    results = parse_log_file(log_file)
    print(results)
Let's unpack what the parse_log_file() function does:
- Opens the file from
file_pathparameter. - Reads all lines into a new variable
log_lines. - Creates a results list to store all items.
- Iterates over the log lines.
- Matches against all regex patterns configured in regex_log_pattern.
- If a match is found, extracts the matching column values.
- Creates a results item, including the values for the keys
log_line,pattern_name,extracted_colums,source_file. - Appends the results item to the results list.
- Returns the results list.
There are different variations to this – especially for the returned result data structure. For this specific case, log lines come as list already. Adding a dictionary object instead of a raw log line allows function callers to extract the desired information in the next step. Once a working example has been implemented, you can refactor the code later, too.
Advanced log format: auth.log
Parsing the syslog on a Linux distribution might not unveil the necessary data to analyze. On a virtual machine that exposes port 22 (SSH) to the world, the authentication log is much more interesting – plenty of bots and malicious actors testing default password combinations and often brute force attacks.
The following snippet from /var/log/auth.log on one of my private servers shows the authentication log format and the random attempts from bots using different usernames, etc.
Oct 15 00:00:19 ebpf-chaos sshd[3967944]: Failed password for invalid user ubuntu from 93.254.246.194 port 48840 ssh2
Oct 15 00:00:20 ebpf-chaos sshd[3967916]: Failed password for root from 180.101.88.227 port 44397 ssh2
Oct 15 00:00:21 ebpf-chaos sshd[3967944]: Received disconnect from 93.254.246.194 port 48840:11: Bye Bye [preauth]
Oct 15 00:00:21 ebpf-chaos sshd[3967944]: Disconnected from invalid user ubuntu 93.254.246.194 port 48840 [preauth]
Oct 15 00:00:24 ebpf-chaos sshd[3967916]: Failed password for root from 180.101.88.227 port 44397 ssh2
Oct 15 00:00:25 ebpf-chaos sshd[3967916]: Received disconnect from 180.101.88.227 port 44397:11:  [preauth]
Oct 15 00:00:25 ebpf-chaos sshd[3967916]: Disconnected from authenticating user root 180.101.88.227 port 44397 [preauth]
Oct 15 00:00:25 ebpf-chaos sshd[3967916]: PAM 2 more authentication failures; logname= uid=0 euid=0 tty=ssh ruser= rhost=180.101.88.227  user=root
Oct 15 00:00:25 ebpf-chaos sshd[3967998]: Invalid user teamspeak from 185.218.20.10 port 33436
Tip for intrusion prevention: Add a firewall setup, and use fail2ban to block invalid auth logins.
The next exercise is to extend the logic to understand the free form log message parts, for example Failed password for invalid user ubuntu from 93.254.246.194 port 48840 ssh2. The task is to store the data in an optional dictionary with key value pairs.
Create a new function that takes the previously parsed log line results as input, and specifically parses the last list item for each line.
- Count the number of
Failed passwordandInvalid usermessages. - Return the results with count, log file, pattern

A working suggestion can look like the following code:
# Create a function that parses a log file message from the last extracted_columns entry
# Input: Parsed log lines results list
# Loop over all log lines in the list, and extract the last list item as message
# Count failure strings in the message: Failed password, Invalid user
# Return the results if failure count greater 0: log_file, count, failure string
def parse_log_file_message(results):
    failure_results = []

    # Iterate over the log lines
    for result in results:
        # Extract the message from the last list item
        message = result['extracted_columns'][-1]

        # Count the number of failure strings in the message
        failure_count = message.count('Failed password') + message.count('Invalid user')

        # If the failure count is greater than 0, add the results to the list
        if failure_count > 0:
            failure_results.append({
                'log_file': result['source_file'],
                'count': failure_count,
                'failure_string': message
            })

    # Return the results
    return failure_results

# Parse all files and print results
for log_file in log_files:
    results = parse_log_file(log_file)
    failure_results = parse_log_file_message(results)
    print(failure_results)
The algorithm follows the previous implementations: First, create a results array to store matching data. Then, iterate over the already parsed log_lines in the list. Each log line contains the extracted_columns key, which holds the free-form message string at the end. The next step is to call the string object function count() to count how many times a given character sequence is contained in a string. The returned numbers are added up to the failure_count variable. If it is greater than zero, the result is added to the results list, including the log_file, count and failure_string key-value pairs. After returning the parsed log message results, loop through all log files, parse them, and print the results again.
Execute the script to inspect the detected matches. Note that the data structure can be optimized in future learning steps.
python3 log_reader.py

[{'log_file': 'log-data/var/log/auth.log', 'count': 1, 'failure_string': 'sshd[3967944]: Failed password for invalid user ubuntu from 93.254.246.194 port 48840 ssh2'}, {'log_file': 'log-data/var/log/auth.log', 'count': 1, 'failure_string': 'sshd[3967916]: Failed password for root from 180.101.88.227 port 44397 ssh2'}, {'log_file': 'log-data/var/log/auth.log', 'count': 1, 'failure_string': 'sshd[3967916]: Failed password for root from 180.101.88.227 port 44397 ssh2'}, {'log_file': 'log-data/var/log/auth.log', 'count': 1, 'failure_string': 'sshd[3967998]: Invalid user teamspeak from 185.218.20.10 port 33436'}, {'log_file': 'log-data/var/log/auth.log', 'count': 1, 'failure_string': 'sshd[3967998]: Failed password for invalid user teamspeak from 185.218.20.10 port 33436 ssh2'}, {'log_file': 'log-data/var/log/auth.log', 'count': 1, 'failure_string': 'sshd[3968077]: Invalid user mcserver from 218.211.33.146 port 50950'}]
Parsing more types: Structured logging
Application developers can use the structured logging format to help machine parsers to extract the key value pairs. Prometheus provides this information in the following structure in syslog:
Oct 17 19:00:10 ebpf-chaos prometheus[594]: ts=2023-10-17T19:00:10.425Z caller=compact.go:519 level=info component=tsdb m
sg="write block" mint=1697558404661 maxt=1697565600000 ulid=01HCZG4ZX51GTH8H7PVBYDF4N6 duration=148.675854ms
Oct 17 19:00:10 ebpf-chaos prometheus[594]: ts=2023-10-17T19:00:10.464Z caller=head.go:1213 level=info component=tsdb msg
="Head GC completed" caller=truncateMemory duration=6.845245ms
Oct 17 19:00:10 ebpf-chaos prometheus[594]: ts=2023-10-17T19:00:10.467Z caller=checkpoint.go:100 level=info component=tsd
b msg="Creating checkpoint" from_segment=2308 to_segment=2309 mint=1697565600000
Oct 17 19:00:10 ebpf-chaos prometheus[594]: ts=2023-10-17T19:00:10.517Z caller=head.go:1185 level=info component=tsdb msg
="WAL checkpoint complete" first=2308 last=2309 duration=50.052621ms
This format is easier to parse for scripts, because the message part can be split by whitespaces, and the assignment character =. Strings that contain whitespaces are guaranteed to be enclosed with quotes. The downside is that not all programming language libraries provide ready-to-use structured logging libraries, making it harder for developers to adopt this format.
Practice following the previous example to parse the auth.log format with additional information. Tell Code Suggestions that you are expecting structured logging format with key-value pairs, and which returned data structure would be great:
# Create a function that parses a log file message from the last extracted_columns entry
# Input: Parsed log lines results list
# Loop over all log lines in the list, and extract the last list item as message
# Parse structured logging key-value pairs into a dictionary
# Return results: log_file, dictionary

Printing results and formatting
Many of the examples used the print() statement to print the content on the terminal. Python objects in the standard library support text representation, and for some types it makes more sense (string, numbers), others cannot provide much details (functions, etc.).
You can also pretty-print almost any data structure (lists, sets, dictionaries) in Python. The JSON library can format data structures in a readable format, and use a given spaces indent to draw the JSON structure on the terminal. Note that we use the import statement here to bring libraries into the current scope, and access their methods, for example json.dumps.
import json
print(json.dumps(structured_results, indent=4))
Practice with modifying the existing source code, and replace the code snippets where appropriate. Alternatively, create a new function that implements pretty printing.
# Create a pretty print function with indent 4

This idea works in a similar fashion with creating your own logger functions...but we have to stop learning and take a break. Before we conclude the first blog post in the learning series, let's ensure that CI/CD and dependencies are set up properly for future exercises and async practice.
Dependency management and continuous verification
Pip and pyenv: Bringing structure into Python
Dependencies can be managed in the requirements.txt file, including optional version dependencies. Using requirements.txt file also has the advantage of being the single source of truth for local development environments and running continuous builds with GitLab CI/CD. They can use the same installation command:
pip install -r requirements.txt
Some Linux distributions do not install the pip package manager by default, for example, Ubuntu/Debian require to install the python3-pip package.
You can manage different virtual environments using venv. This workflow can be beneficial to install Python dependencies into the virtual environment, instead of globally into the OS path which might break on upgrades.
pip install virtualenv
virtualenv venv
source venv/bin/activate
Automation: Configure CI/CD pipeline for Python
The CI/CD pipeline should continuously lint, test, and build the code. You can mimic the steps from the local development, and add testing more environments and versions:
- Lint the source code and check for formatting errors. The example uses Pyflakes, a mature linter, and Ruff, a fast linter written in Rust.
- Cache dependencies installed using the pip package manager, following the documentation for Python caching in GitLab CI/CD. This saves time and resources on repeated CI/CD pipeline runs.
- Use parallel matrix builds to test different Python versions, based on the available container images on Docker Hub and their tags.
stages:
  - lint
  - test

default:
  image: python:latest
  cache:                      # Pip's cache doesn't store the python packages
    paths:                    # https://pip.pypa.io/en/stable/topics/caching/
      - .cache/pip
  before_script:
    - python -V               # Print out python version for debugging
    - pip install virtualenv
    - virtualenv venv
    - source venv/bin/activate

variables:  # Change pip's cache directory to be inside the project directory since we can only cache local items.
  PIP_CACHE_DIR: "$CI_PROJECT_DIR/.cache/pip"

# lint template
.lint-tmpl:
  script:
    - echo "Linting Python version $VERSION"
  parallel:
    matrix:
      - VERSION: ['3.9', '3.10', '3.11', '3.12']   # https://hub.docker.com/_/python

# Lint, using Pyflakes: https://pypi.org/project/pyflakes/
lint-pyflakes:
  extends: [.lint-tmpl]
  script:
    - pip install -r requirements.txt
    - find . -not -path './venv' -type f -name '*.py' -exec sh -c 'pyflakes {}' \;

# Lint, using Ruff (Rust): https://docs.astral.sh/ruff/
lint-ruff:
  extends: [.lint-tmpl]
  script:
    - pip install -r requirements.txt
    - ruff .

What is next
Fun fact: GitLab Duo Code Suggestions also helped writing this blog post in VS Code, knowing about the context. In the screenshot, I just wanted to add a tip about regex101, and GitLab Duo already knew.
In an upcoming blog, we will look into advanced learning examples with more practical (log) filtering and parallel operations, how to fetch logs from API endpoints (CI/CD job logs for example), and more data analytics and observability. Until then, here are a few recommendations for practicing async.
Async learning exercises
- Implement the missing
log_file_limitvariable check. - Print a summary of the results in Markdown, not only JSON format.
- Extend the script to accept a search filter as environment variable. Print/count only filtered results.
- Extend the script to accept a date range. It might require parsing the datetime column in a time object to compare the range.
- Inspect a GitLab CI/CD pipeline job log, and download the raw format. Extend the log parser to parse this specific format, and print a summary.
Share your feedback
Which programming language are you learning or considering learning? Start a new topic on our community forum or Discord and share your experience.
When you use GitLab Duo Code Suggestions, please share your thoughts and feedback in the feedback issue.