How to Install Hugo Site Generator with Nginx on Rocky Linux 9
On this page
- Prerequisites
- Step 1 - Configure Firewall
- Step 2 - Install Nginx
- Step 3 - Install Git
- Step 4 - Install Hugo
- Step 5 - Create a new Hugo Site
- Step 6 - Install Hugo Theme
- Step 7 - Create Posts and Pages
- Step 8 - Publish Hugo Site
- Step 9 - Install SSL
- Step 10 - Configure Nginx
- Step 11 - Configure SELinux
- Step 12 - Run the Site
- Step 13 - Update Hugo
- Step 14 - Backup and Restore Hugo
- Conclusion
A static site is built with pages of static content or plain HTML, JavaScript, or CSS code. The content is not dynamically generated and does not involve any database or server-side processing. Such sites are incredibly fast and immune to exploits that depend on dynamic code or SQL.
Hugo is an open-source static site generator written in Go. It generates content by converting posts written in markdown language to HTML. Hugo also ships with an in-built server to host the sites it generates. You can also host a Hugo website on Amazon S3, GitHub pages, Google Cloud, Netlify, Vercel, etc.
In this tutorial, we will explore how to install Hugo to create a static website on a server powered by Rocky Linux 9. We will use the Nginx server to host the site and the Let's Encrypt SSL certificate to secure our installation.
Prerequisites
-
A server running Rocky Linux 9.
-
A non-root user with sudo privileges.
-
A fully qualified domain name (FQDN) pointing to your server. For our purposes, we will use
hugo.example.comas the domain name. -
Make sure everything is updated.
$ sudo dnf update
-
Install basic utility packages. Some of them may already be installed.
$ sudo dnf install wget curl nano unzip yum-utils tree -y
Step 1 - Configure Firewall
The first step is to configure the firewall. Rocky Linux uses Firewalld Firewall. Check the firewall's status.
$ sudo firewall-cmd --state
running
The firewall works with different zones, and the public zone is the default one that we will use. List all the services and ports active on the firewall.
$ sudo firewall-cmd --permanent --list-services
It should show the following output.
cockpit dhcpv6-client ssh
Wiki.js needs HTTP and HTTPS ports to function. Open them.
$ sudo firewall-cmd --add-service=http --permanent
$ sudo firewall-cmd --add-service=https --permanent
Reload the firewall to apply the changes.
$ sudo firewall-cmd --reload
Step 2 - Install Nginx
Rocky Linux 9 ships with an older version of Nginx. You need to download the official Nginx repository to install the latest version.
Create and open the /etc/yum.repos.d/nginx.repo file for creating the official Nginx repository.
$ sudo nano /etc/yum.repos.d/nginx.repo
Paste the following code in it.
[nginx-stable]
name=nginx stable repo
baseurl=http://nginx.org/packages/centos/$releasever/$basearch/
gpgcheck=1
enabled=1
gpgkey=https://nginx.org/keys/nginx_signing.key
module_hotfixes=true

[nginx-mainline]
name=nginx mainline repo
baseurl=http://nginx.org/packages/mainline/centos/$releasever/$basearch/
gpgcheck=1
enabled=0
gpgkey=https://nginx.org/keys/nginx_signing.key
module_hotfixes=true
Save the file by pressing Ctrl + X and entering Y when prompted.
Install the Nginx server.
$ sudo dnf install nginx -y
Verify the installation.
$ nginx -v
nginx version: nginx/1.24.0
Enable and start the Nginx server.
$ sudo systemctl enable nginx --now
Check the status of the server.
$ sudo systemctl status nginx
? nginx.service - nginx - high performance web server
     Loaded: loaded (/usr/lib/systemd/system/nginx.service; enabled; preset: disabled)
     Active: active (running) since Mon 2023-10-30 08:24:05 UTC; 7s ago
       Docs: http://nginx.org/en/docs/
    Process: 4265 ExecStart=/usr/sbin/nginx -c /etc/nginx/nginx.conf (code=exited, status=0/SUCCESS)
   Main PID: 4266 (nginx)
      Tasks: 2 (limit: 4402)
     Memory: 1.9M
        CPU: 7ms
     CGroup: /system.slice/nginx.service
             ??4266 "nginx: master process /usr/sbin/nginx -c /etc/nginx/nginx.conf"
             ??4267 "nginx: worker process"

Oct 30 08:24:05 hugo.example.com systemd[1]: Starting nginx - high performance web server...
Step 3 - Install Git
Hugo needs Git to work. Run the following command to install Git
$ sudo dnf install git -y
Verify Git installation.
$ git --version
git version 2.39.3
Step 4 - Install Hugo
Since Hugo is built using the Go language, installing it is quite easy since it doesn't require any dependency and can be run standalone.
Download Hugo. For our tutorial, we will be installing the extended version of Hugo. The extended version can encode images to the Webp format when processing images. This is useful if you want Hugo to convert images for you on the fly and keep their sizes down. The extended version also includes a SASS compiler which can be useful in certain cases in case you need it.
Create a directory for Hugo.
$ sudo mkdir /var/www/html/hugo -p
Switch to the newly created directory.
$ cd /var/www/html/hugo
Download Hugo from the GitHub releases page. At the time of writing this tutorial, v0.119.0 is the latest version which is what we will download.
$ sudo wget https://github.com/gohugoio/hugo/releases/download/v0.119.0/hugo_extended_0.119.0_linux-amd64.tar.gz
Extract the files from the archive.
$ sudo tar -xzf hugo_extended_0.119.0_linux-amd64.tar.gz
You will see the following three files in your directory.
$ ls
hugo  hugo_extended_0.119.0_linux-amd64.tar.gz  LICENSE  README.md
Move the hugo binary to the /usr/bin directory.
$ sudo mv hugo /usr/bin/hugo
The file already has executable permission set so you don't need to set it.
Confirm the installation.
$ hugo version
hugo v0.119.0-b84644c008e0dc2c4b67bd69cccf87a41a03937e+extended linux/amd64 BuildDate=2023-09-24T15:20:17Z VendorInfo=gohugoio
You can also check all the available options for use by using the --help flag.
$ hugo --help
You will get the following output.
hugo is the main command, used to build your Hugo site.

Hugo is a Fast and Flexible Static Site Generator
built with love by spf13 and friends in Go.

Complete documentation is available at https://gohugo.io/.

Usage:
  hugo [flags]
  hugo [command]

Available Commands:
  completion  Generate the autocompletion script for the specified shell
  config      Print the site configuration
  convert     Convert your content to different formats
  deploy      Deploy your site to a Cloud provider.
  env         Print Hugo version and environment info
  gen         A collection of several useful generators.
  help        Help about any command
  import      Import your site from others.
  list        Listing out various types of content
  mod         Various Hugo Modules helpers.
  new         Create new content for your site
  server      A high performance webserver
  version     Print Hugo version and environment info

Flags:
  -b, --baseURL string             hostname (and path) to the root, e.g. https://spf13.com/
  -D, --buildDrafts                include content marked as draft
  -E, --buildExpired               include expired content
  -F, --buildFuture                include content with publishdate in the future
      --cacheDir string            filesystem path to cache directory
      --cleanDestinationDir        remove files from destination not found in static directories
      --clock string               set the clock used by Hugo, e.g. --clock 2021-11-06T22:30:00.00+09:00
      --config string              config file (default is hugo.yaml|json|toml)
      --configDir string           config dir (default "config")
  -c, --contentDir string          filesystem path to content directory
      --debug                      debug output
  -d, --destination string         filesystem path to write files to
      --disableKinds strings       disable different kind of pages (home, RSS etc.)
      --enableGitInfo              add Git revision, date, author, and CODEOWNERS info to the pages
  -e, --environment string         build environment
      --forceSyncStatic            copy all files when static is changed.
      --gc                         enable to run some cleanup tasks (remove unused cache files) after the build
  -h, --help                       help for hugo
      --ignoreCache                ignores the cache directory
      --ignoreVendorPaths string   ignores any _vendor for module paths matching the given Glob pattern
  -l, --layoutDir string           filesystem path to layout directory
      --logLevel string            log level (debug|info|warn|error)
      --minify                     minify any supported output format (HTML, XML etc.)
      --noBuildLock                don't create .hugo_build.lock file
      --noChmod                    don't sync permission mode of files
      --noTimes                    don't sync modification time of files
      --panicOnWarning             panic on first WARNING log
      --poll string                set this to a poll interval, e.g --poll 700ms, to use a poll based approach to watch for file system changes
      --printI18nWarnings          print missing translations
      --printMemoryUsage           print memory usage to screen at intervals
      --printPathWarnings          print warnings on duplicate target paths etc.
      --printUnusedTemplates       print warnings on unused templates.
      --quiet                      build in quiet mode
      --renderToMemory             render to memory (only useful for benchmark testing)
  -s, --source string              filesystem path to read files relative from
      --templateMetrics            display metrics about template executions
      --templateMetricsHints       calculate some improvement hints when combined with --templateMetrics
  -t, --theme strings              themes to use (located in /themes/THEMENAME/)
      --themesDir string           filesystem path to themes directory
      --trace file                 write trace to file (not useful in general)
  -v, --verbose                    verbose output
  -w, --watch                      watch filesystem for changes and recreate as needed

Use "hugo [command] --help" for more information about a command.
Delete all the remaining files in the folder since they are no longer needed.
$ sudo rm -rf *.*
Step 5 - Create a new Hugo Site
Issue the following command to create a new Hugo website.
$ sudo hugo new site howtoforge
You will get the following output.
Congratulations! Your new Hugo site was created in /home/navjot/hugo/howtoforge.

Just a few more steps...

1. Change the current directory to /home/navjot/hugo/howtoforge.
2. Create or install a theme:
   - Create a new theme with the command "hugo new theme <THEMENAME>"
   - Install a theme from https://themes.gohugo.io/
3. Edit hugo.toml, setting the "theme" property to the theme name.
4. Create new content with the command "hugo new content <SECTIONNAME>/<FILENAME>.<FORMAT>".
5. Start the embedded web server with the command "hugo server --buildDrafts".

See documentation at https://gohugo.io/.
Run the tree command to check the structure of the site.
$ tree howtoforge/
You will get the following output.
howtoforge/
??? archetypes
?   ??? default.md
??? assets
??? content
??? data
??? hugo.toml
??? i18n
??? layouts
??? static
??? themes

8 directories, 2 files
Switch to the Hugo directory.
$ cd howtoforge
Step 6 - Install Hugo Theme
The next step is to install a Hugo theme. There are two ways to go about it and both of them require Git. The first method is plain and simple and involves cloning the Theme's GitHub repository. This is useful in most cases and the easiest way to go about it. Updating via this method is easy though this method does involve downloading a lot of unnecessary stuff you don't need. There are some themes, especially the paid ones, that don't have a GitHub repository from where you can grab them. Such themes are usually offered as a compressed archive. In that case, you need to extract the archive manually and keep the theme updated manually. The third method involves grabbing the theme as a Git submodule. This requires you to initialize your Hugo directory as a Git repository. This is the recommended method and is useful in case you want to deploy your site to GitHub, Netlify, or any other hosting service. Pushing your Hugo site to GitHub ensures automatic backups as well without any extra effort.
We will cover all three methods. There is another method of installing a Hugo theme using Hugo Go modules. This method only works if the theme is available as a Hugo module. However, we will not be covering it since it is outside the scope of this article.
Method 1 - Cloning a Hugo Theme
This is the most commonly used method of installing a Hugo theme. For our tutorial, we will be installing the Paper theme. Switch to the Hugo directory.
$ cd /var/www/html/hugo/howtoforge
Run the following command to clone the theme's GitHub repository. The --depth=1 flag only grabs the latest commit.
$ sudo git clone https://github.com/nanxiaobei/hugo-paper themes/Paper --depth=1
To update the theme downloaded via this method, run the following commands.
$ cd ~/hugo/howtoforge/themes/Paper
$ sudo git pull
Method 2 - Installing Theme from compressed archive
This is the easiest method of all. Grab the archive of the theme file. Paper theme doesn't have a releases section so you can't download a particular version. Therefore, we will download the GitHub master archive. You can grab the link from its GitHub repository page.
$ cd ~
$ wget https://github.com/nanxiaobei/hugo-paper/archive/refs/heads/main.zip
Extract the archive into the themes directory. The -q flag suppresses the output and the -d flag specifies the output directory.
$ sudo unzip -q main.zip -d /var/www/html/hugo/howtoforge/themes/
To update the theme, you need to download the latest archive and extract it again. Make sure you take a backup of all the files you have changed.
The bottom two methods work only if your Hugo site is hosted as a Git project. Otherwise, you don't need to use the following methods.
Method 3 - Installing Theme as a Git Submodule
Switch to the Hugo folder.
$ cd /var/www/html/hugo/howtoforge
Initialize the Hugo folder as a Git repository. This is an important step. This allows you to push your Hugo site to GitHub for use later to host using Netlify, AWS, Vercel, etc.
$ sudo git init
Run the following command to add the theme as a Git submodule.
$ sudo git submodule add https://github.com/nanxiaobei/hugo-paper themes/paper
To update a theme added as a Submodule, run the following command from the Hugo folder.
$ sudo git submodule update --remote --merge
Configure Hugo
Once you have installed the theme using a method of your choice, open the hugo.toml file in your Hugo's root directory. Starting with Hugo v0.110.0, the default configuration file is named hugo.toml. If you are using an older version of Hugo, you will find the file config.toml in your Hugo directory.
$ sudo nano hugo.toml
Add the following line to the file. The value should match the directory of the theme. For the paper theme, that would be the hugo-paper-theme directory if you used the archive installation or Paper if you used the Git clone or submodule method above.
theme = 'hugo-paper-main'
Also, change the value of the variable baseURL to your site's domain name. And change the title of your website.
Your configuration file should look like the following.
baseURL = 'https://hugo.example.com/'
languageCode = 'en-us'
title = 'Howtoforge Hugo Demo'
theme = 'hugo-paper-main'
Once finished, save the file by pressing Ctrl + X and entering Y when prompted.
Step 7 - Create Posts and Pages
To create a new post, issue the following command.
$ sudo hugo new post/first-post.md
This will create a new markdown file first-post.md with the title First Post in the content/post folder. Open the file in your favorite editor and edit out the details and write something for your first post.
+++
title = 'First Post'
date = 2023-10-30T03:32:38Z
draft = true
+++
## Introduction

This is **bold** text, and this is *emphasized* text.

Visit the [Howtoforge](https://www.howtoforge.com) website!
Remove the draft = true once you have finished writing the post. Save the file by pressing Ctrl + X and entering Y when prompted.
To create a new page, issue the following command.
$ sudo hugo new about.md
This will create a new page titled About in the content folder. Open it and edit it in the same way as the post.
Configure Theme
Before publishing, we need to make a few changes to the theme to show the menu bar. These changes will be done in Hugo's configuration file and not the theme's configuration.
Switch to the Hugo directory.
$ cd /var/www/html/hugo/howtoforge
Open the hugo.toml file for editing.
$ sudo nano hugo.toml
Paste the following code at the bottom.
author = "Navjot Singh"
copyright = "Copyright © 2023, Navjot Singh; all rights reserved."
paginate = 3
enableInlineShortcodes = true
# needed to  render raw HTML (e.g. <sub>, <sup>, <kbd>, <mark>)
[markup]
  [markup.goldmark]
    [markup.goldmark.renderer]
      unsafe = true

[menu]
  [[menu.main]]
    identifier = "about"
    name = "About"
    url = "/about/"
    weight = 10

[taxonomies]
category = "categories"
tag = "tags"
series = "series"
Save the file by pressing Ctrl + X and entering Y when prompted.
These are some basic settings to make the site functional. Here we have configured the site to display 3 posts per page, show the About page as a menu item, and set up categories, tags, and post-series. We have also enabled Hugo's inline shortcodes and enabled raw HTML for the Goldmark Markdown render. You can disable it if you don't want to embed raw HTML in your posts.
Step 8 - Publish Hugo Site
To build and publish the site, just run the following command.
$ sudo hugo
You will get a similar output.
Start building sites …
hugo v0.119.0-b84644c008e0dc2c4b67bd69cccf87a41a03937e+extended linux/amd64 BuildDate=2023-09-24T15:20:17Z VendorInfo=gohugoio


                   | EN
-------------------+-----
  Pages            |  7
  Paginator pages  |  0
  Non-page files   |  0
  Static files     | 11
  Processed images |  0
  Aliases          |  3
  Sitemaps         |  1
  Cleaned          |  0

Total in 46 ms
This creates and publishes the static Hugo website in the public folder. These are the files we need to specify in the Nginx configuration for the site to work. Run the command again after making any change and your website will get updated in no time.
Step 9 - Install SSL
Before we proceed, we need to install the Certbot tool and install an SSL certificate for our domain.
To install Certbot, we will use the Snapd package installer. Snapd always carries the latest stable version of Certbot and you should use that.
Snapd tool requires the Epel repository to work.
$ sudo dnf install epel-release -y
We will use Snapd to install Certbot. Install Snapd.
$ sudo dnf install snapd -y
Enable and Start the Snap service.
$ sudo systemctl enable snapd.socket --now
Create necessary links for Snapd to work.
$ sudo ln -s /var/lib/snapd/snap /snap
$ echo 'export PATH=$PATH:/var/lib/snapd/snap/bin' | sudo tee -a /etc/profile.d/snapd.sh
Ensure that your version of snapd is up to date. Wait for a couple of seconds before issuing the following commands.
$ sudo snap install core
$ sudo snap refresh core
Install Certbot.
$ sudo snap install --classic certbot
Use the following command to ensure that the Certbot command can be run by creating a symbolic link to the /usr/bin directory.
$ sudo ln -s /snap/bin/certbot /usr/bin/certbot
Verify the installation.
$ certbot --version
certbot 2.7.3
Generate an SSL certificate.
$ sudo certbot certonly --nginx --agree-tos --no-eff-email --staple-ocsp --preferred-challenges http -m [email protected] -d hugo.example.com
The above command will download a certificate to the /etc/letsencrypt/live/hugo.example.com directory on your server.
Generate a Diffie-Hellman group certificate.
$ sudo openssl dhparam -dsaparam -out /etc/ssl/certs/dhparam.pem 4096
Check the Certbot renewal scheduler service.
$ sudo systemctl list-timers
You will find snap.certbot.renew.service as one of the services scheduled to run.
NEXT                        LEFT          LAST                        PASSED    UNIT                         ACTIVATES
Wed 2023-10-29 10:00:17 UTC 57min left    Wed 2023-10-18 08:49:39 UTC 12min ago dnf-makecache.timer          dnf-makecache.service
Wed 2023-10-29 12:18:00 UTC 3h 15min left -                           -         snap.certbot.renew.timer     snap.certbot.renew.service
Thu 2023-10-30 00:00:00 UTC 14h left      Wed 2023-10-18 08:10:08 UTC 52min ago logrotate.timer              logrotate.service
Do a dry run of the process to check whether the SSL renewal is working fine.
$ sudo certbot renew --dry-run
If you see no errors, you are all set. Your certificate will renew automatically.
Step 10 - Configure Nginx
Create and open the file /etc/nginx/conf.d/hugo.conf for editing.
$ sudo nano /etc/nginx/conf.d/hugo.conf
Paste the following code in the hugo.conf file. Replace all instances of hugo.example.com with your domain.
## enforce HTTPS
server {
  listen 80;
  listen [::]:80;
  server_name hugo.example.com;
  return 301 https://$server_name$request_uri;
}

server {
  listen 443 ssl http2;
  listen [::]:443 ssl http2;
  server_name hugo.example.com;

  root /home/navjot/hugo/howtoforge/public;
  index index.html

  access_log /var/log/nginx/hugo.access.log;
  error_log /var/log/nginx/hugo.error.log;
  client_max_body_size 20m;
  gzip on;

  http2_push_preload on; # Enable HTTP/2 Server Push

  ssl_certificate     /etc/letsencrypt/live/hugo.example.com/fullchain.pem;
  ssl_certificate_key /etc/letsencrypt/live/hugo.example.com/privkey.pem;
  ssl_trusted_certificate /etc/letsencrypt/live/hugo.example.com/chain.pem;
  ssl_session_timeout 1d;

  # Enable TLS versions (TLSv1.3 is required upcoming HTTP/3 QUIC).
  ssl_protocols TLSv1.2 TLSv1.3;

  # Enable TLSv1.3's 0-RTT. Use $ssl_early_data when reverse proxying to
  # prevent replay attacks.
  #
  # @see: https://nginx.org/en/docs/http/ngx_http_ssl_module.html#ssl_early_data
  ssl_early_data on;

  ssl_ciphers 'ECDHE-ECDSA-AES256-GCM-SHA384:ECDHE-RSA-AES256-GCM-SHA384:ECDHE-ECDSA-CHACHA20-POLY1305:ECDHE-RSA-CHACHA20-POLY1305:ECDHE-ECDSA-AES256-SHA384:ECDHE-RSA-AES256-SHA384';
  ssl_prefer_server_ciphers on;
  ssl_ecdh_curve X25519:prime256v1:secp384r1:secp521r1;
  ssl_session_cache shared:SSL:50m;
  ssl_session_tickets off;

  # OCSP Stapling ---
  # fetch OCSP records from URL in ssl_certificate and cache them
  ssl_stapling on;
  ssl_stapling_verify on;
  ssl_dhparam /etc/ssl/certs/dhparam.pem;

  add_header X-Early-Data $tls1_3_early_data;

  location / {
      try_files $uri $uri/ =404;
  }

  # Media
  location ~* \.(?:jpg|jpeg|gif|png|ico|cur|gz|svg|mp4|ogg|ogv|webm|htc)$ {
      expires 30d;
  }

  # CSS and Js
  location ~* \.(css|js)$ {
      expires 7d;
  }
}

# This block is useful for debugging TLS v1.3. Please feel free to remove this
# and use the `$ssl_early_data` variable exposed by NGINX directly should you
# wish to do so.
map $ssl_early_data $tls1_3_early_data {
  "~." $ssl_early_data;
  default "";
}
The above configuration will redirect all HTTP requests to HTTPS and will serve as a proxy for Hugo service to serve it via your domain.
Save the file by pressing Ctrl + X and entering Y when prompted.
Open the file /etc/nginx/nginx.conf for editing.
$ sudo nano /etc/nginx/nginx.conf
Add the following line before the line include /etc/nginx/conf.d/*.conf;.
server_names_hash_bucket_size 64;
Save the file by pressing Ctrl + X and entering Y when prompted.
Verify your Nginx configuration.
$ sudo nginx -t
If you see no errors, it means you are good to go. Reload the Nginx server.
$ sudo systemctl reload nginx
Step 11 - Configure SELinux
Change the file security context for OpenEMR.
$ sudo semanage fcontext -a -t httpd_sys_rw_content_t "/var/www/html/hugo/howtoforge/public(/.*)?"
Apply the policy.
$ sudo restorecon -Rv /var/www/html/hugo/howtoforge/public/
Allow Nginx to connect to the network.
$ sudo setsebool -P httpd_can_network_connect 1
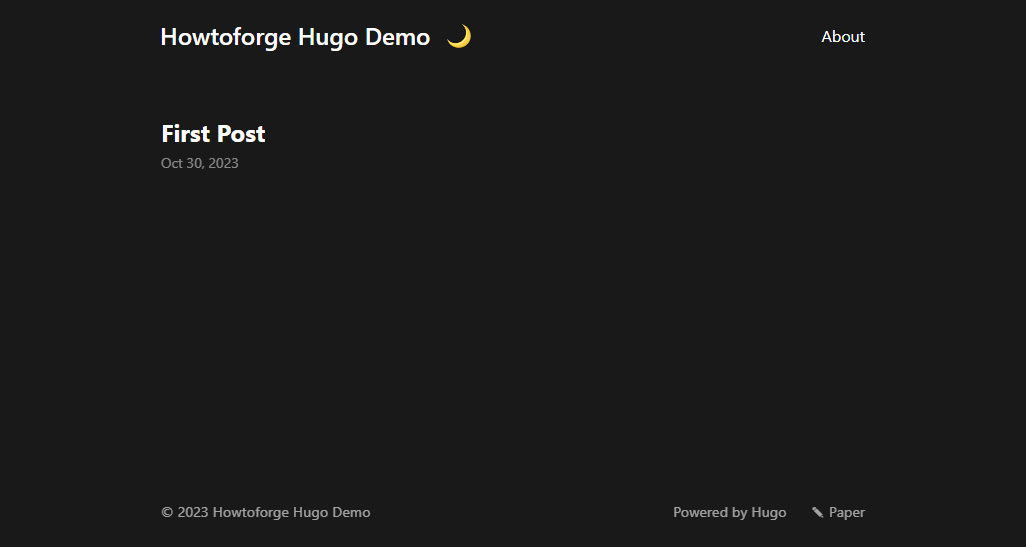
Step 12 - Run the Site
Now, you can verify your installation by opening https://hugo.example.com in your web browser. You will get the following page indicating a successful installation.
Step 13 - Update Hugo
Updating Hugo is pretty simple. Download the latest release from Hugo's GitHub page.
$ cd /var/www/html/hugo
$ sudo wget https://github.com/gohugoio/hugo/releases/download/v0.119.0/hugo_extended_0.119.0_linux-amd64.tar.gz
Extract the archive.
$ sudo tar -xzf hugo_extended_0.119.0_linux-amd64.tar.gz
And replace the Hugo binary with the latest version. The -f flag overwrites the binary without prompting. You can use the -i flag instead if you want to the prompt for overwriting.
$ sudo mv -f hugo /usr/bin/hugo
That's all. Updating Hugo is as simple as replacing the binary.
Step 14 - Backup and Restore Hugo
To take a backup, create an archive of the entire Hugo folder.
$ cd /var/www/html/hugo
$ sudo tar -czvf howtoforge.tar.gz howtoforge/
To restore it on a new server, extract the archive and install the binary and you are good to go.
$ cd /var/www/html/hugo
$ sudo tar -xzf howtoforge.tar.gz
Conclusion
This concludes our tutorial on how to set up the Hugo static site generator on your Rocky Linux 9 server using Nginx. If you have any questions or feedback, share them in the comments below.

