Hello! In the last few weeks I started reading about and testing Flutter, the new mobile SDK from Google, that let’s you build for both Android and iOS at the same time (similar to React Native).
In the following tutorial, I will show you how to build a simple weather app using Flutter and how this app runs, with very little platform specific code, on both Android and iOS.
Project Setup
To start, first you need to install Flutter on your computer. Go to https://flutter.io/get-started/install/ and follow the instructions there. Also add the Flutter plugin to the Android Studio you probably alredy have installed.
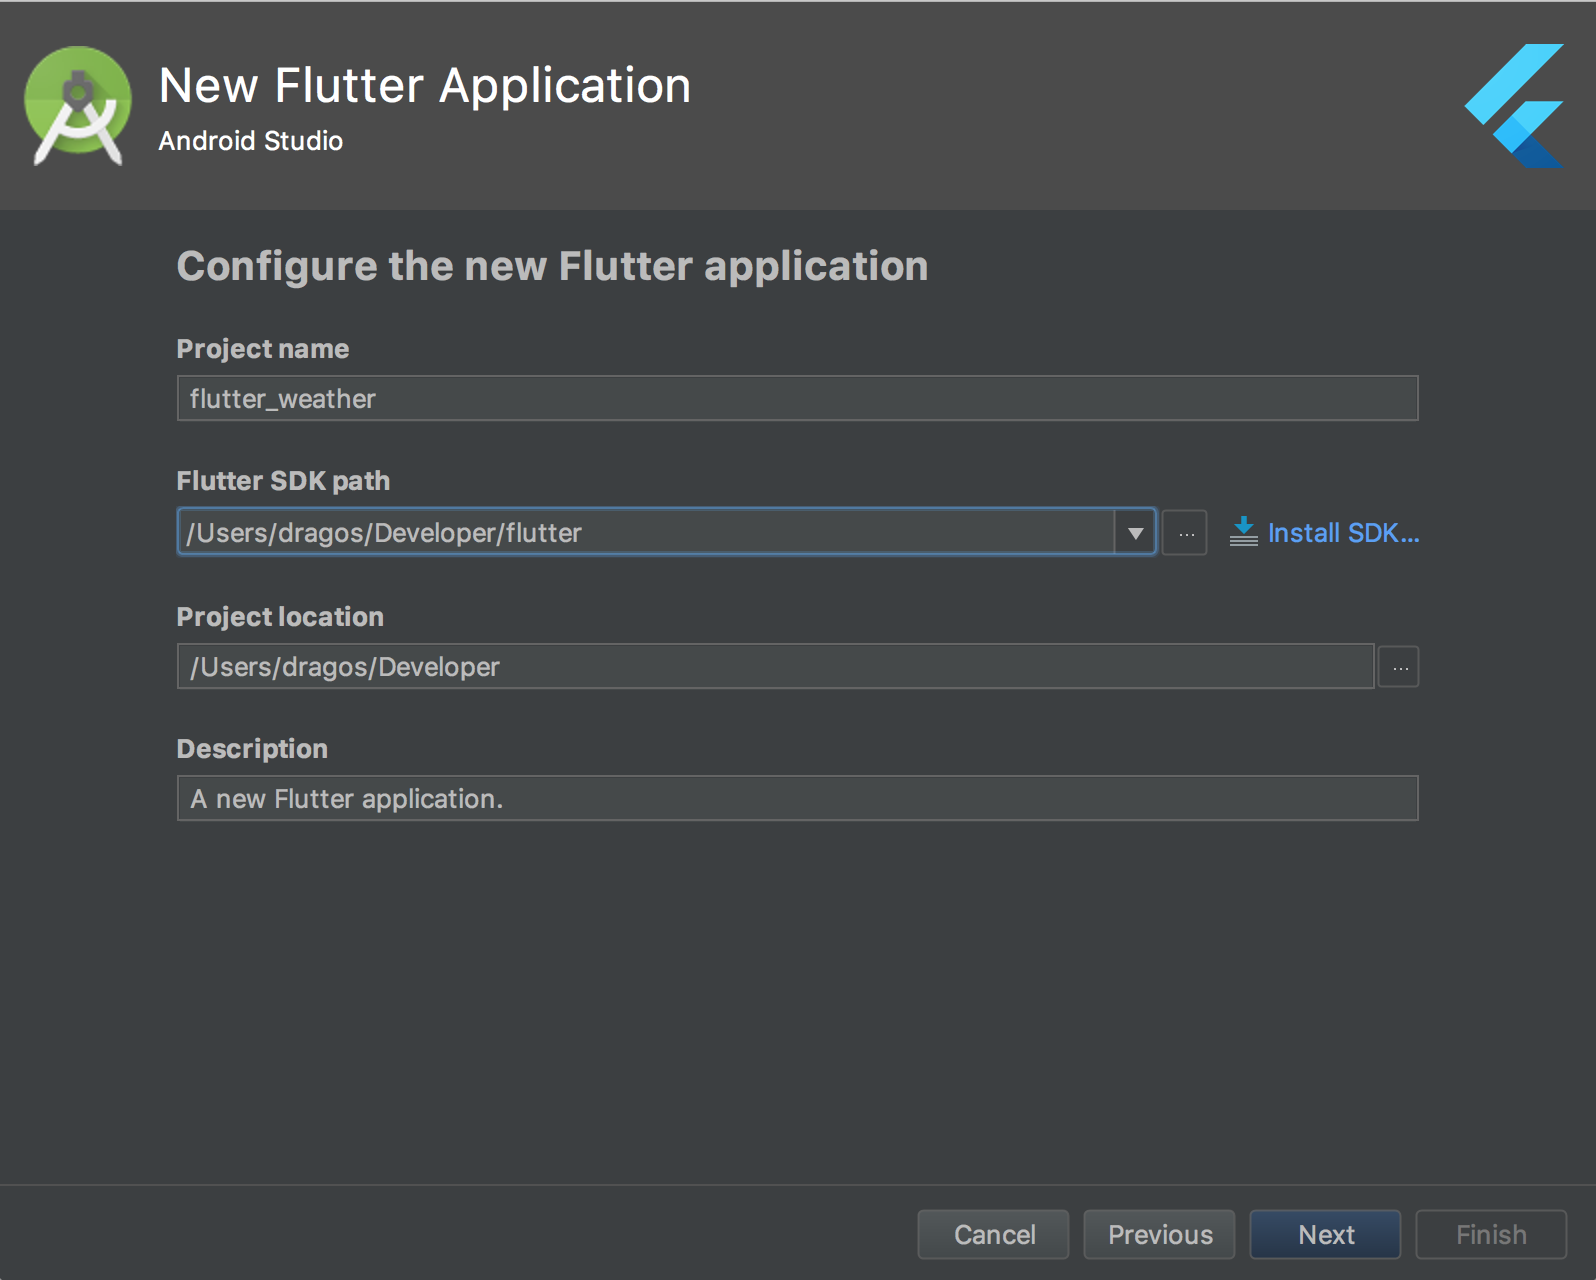
Next, open Android Studio and create a new Flutter project. Choose the Flutter Application option when promted. Name the project flutter_weather and make sure to set the Flutter SDK path to point to the folder you installed Flutter earlier.
Click on Next, enter your company or personal domain to be used when generating the app’s package name, the click on Finish.
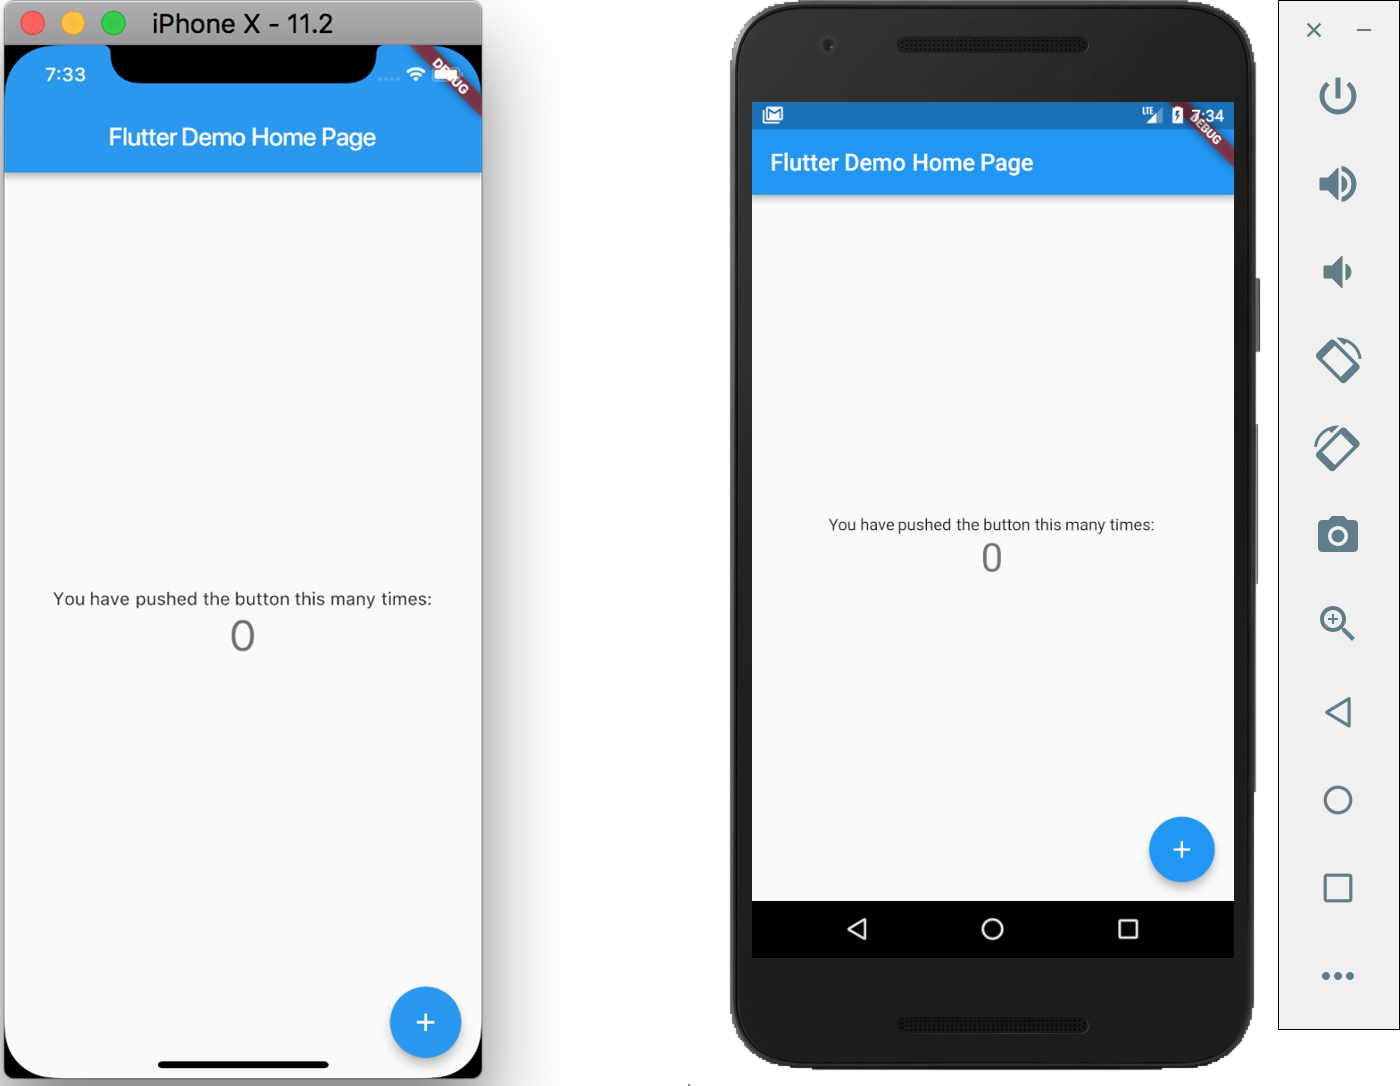
After a few moments, you will end up with a fully functional Flutter demo app that runs both on Android and iOS. Just choose the simulator or connected device from the devices dropdown and click on the run button.

Build the UI
Let’s continue by building our app’s user interface, using dummy data for now.
In Android Studio, open the lib/main.dart file. Here you will find the code generated for the Flutter demo app. Select all and delete everything so we’ll start from scratch. Now add the following to build a basic “Hello World!” Flutter application:
import 'package:flutter/material.dart';

void main() => runApp(new MyApp());

class MyApp extends StatelessWidget {
  @override
  Widget build(BuildContext context) {
    return MaterialApp(
      title: 'Hello World!',
      theme: ThemeData(
        primarySwatch: Colors.blue,
      ),
      home: Scaffold(
        appBar: AppBar(
          title: Text('Hello World!'),
        ),
        body: Center(
          child: Text('Hello World!')
        )
      ),
    );
  }
}
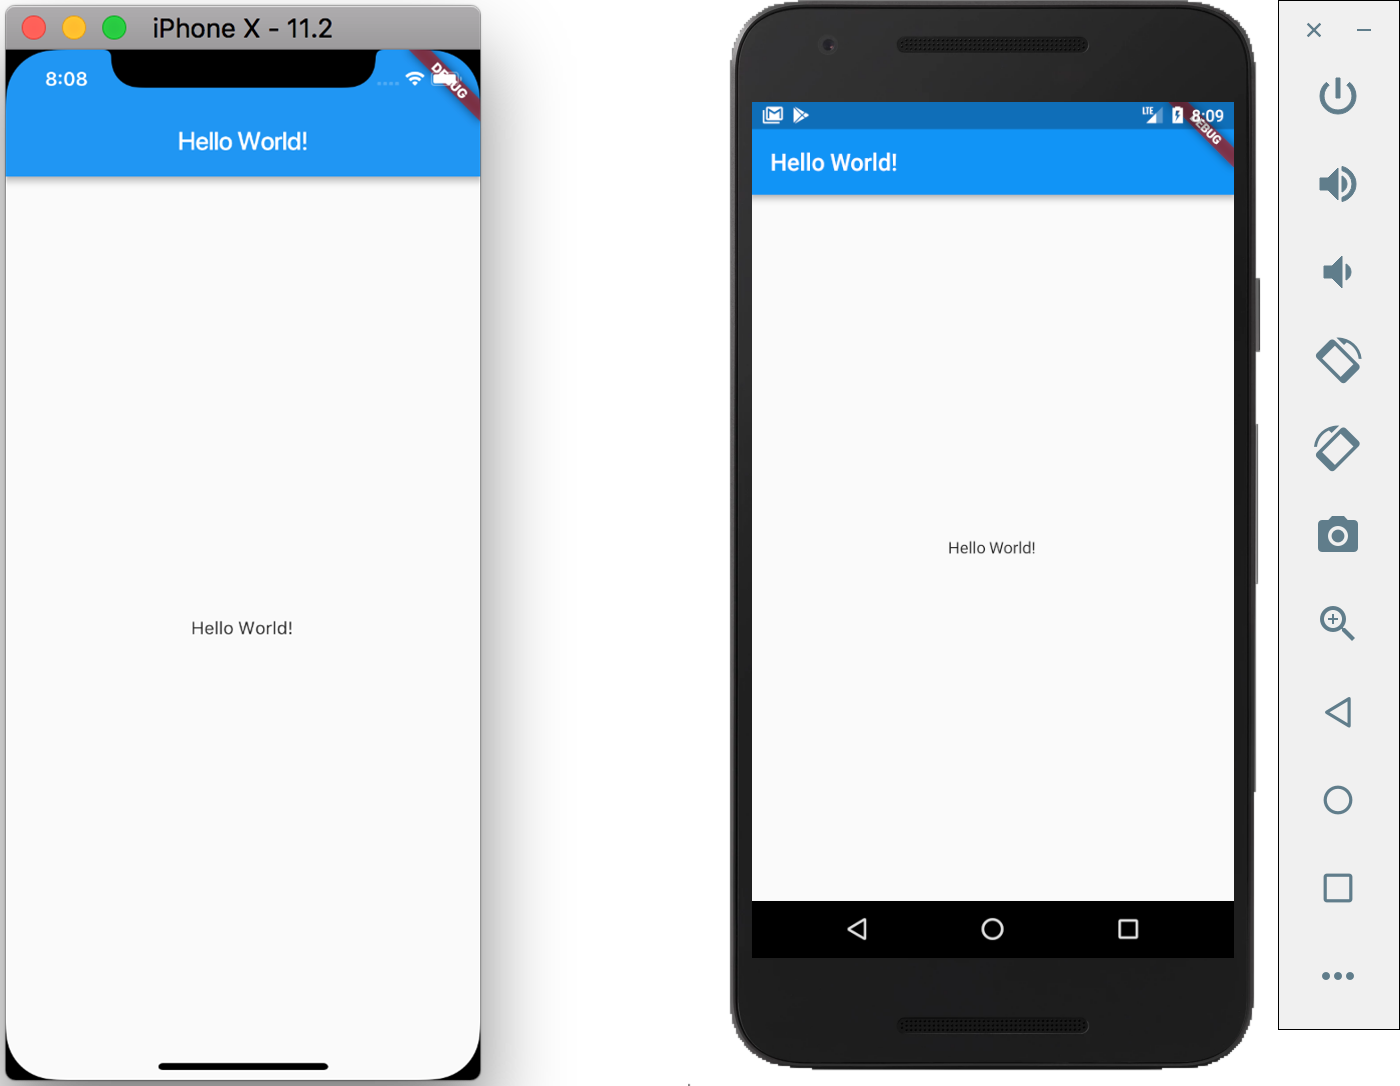
Run the app now and you will end up with a very basic Flutter app:
Let’s take a few moments to understand what we just did.
You should know that everything in Flutter is a Widget. Your entire app, named here MyApp, is a Widget and every component that forms it, is a Widget.
The code starts by importing the material.dart library, which defines a lot of widgets for you that implement the Material design. Next, the MyApp is defined as a StatelessWidget and it has to implement the build method which returns… you guessed it, an Widget. This one is a special kind of widget, the base of our material design app, the MaterialApp widget. I added links to all of these, so you can go and read about them to better understand their use.
The MaterialApp widget has a lot of options, but we only used the title, theme and home. You can try to change the theme’s color and, when you save the file, the app will automatically rebuild and reload on the device/simulator (that’s one of the collest features of Flutter actuallly). Give it a try, then come back to continue the tutorial.
At last, the home, the default route of our app, will return a Scaffold widget with an AppBar and a centered Text displaying the well known “Hello World!” you probably got bored already.
Now that you kow how to use the basic building blocks for a Flutter app, let’s get up to speed and build the UI for our weather app:
import 'package:flutter/material.dart';

void main() => runApp(new MyApp());

class MyApp extends StatelessWidget {
  @override
  Widget build(BuildContext context) {
    return MaterialApp(
      title: 'Flutter Weather App',
      theme: ThemeData(
        primarySwatch: Colors.blue,
      ),
      home: Scaffold(
        backgroundColor: Colors.blueGrey,
        appBar: AppBar(
          title: Text('Flutter Weather App'),
        ),
        body: Center(
          child: Column(
            mainAxisSize: MainAxisSize.min,
            children: <Widget>[
              Padding(
                padding: const EdgeInsets.all(8.0),
                child: Column(
                  children: <Widget>[
                    Text('New York', style: new TextStyle(color: Colors.white)),
                    Text('Sunny', style: new TextStyle(color: Colors.white, fontSize: 32.0)),
                    Text('72°F',  style: new TextStyle(color: Colors.white)),
                    Image.network('https://openweathermap.org/img/w/01d.png'),
                    Text('Jun 28, 2018', style: new TextStyle(color: Colors.white)),
                    Text('18:30', style: new TextStyle(color: Colors.white)),
                  ],
                ),
              ),
              Padding(
                padding: const EdgeInsets.all(8.0),
                child: IconButton(
                  icon: new Icon(Icons.refresh),
                  tooltip: 'Refresh',
                  onPressed: () => null,
                  color: Colors.white,
                ),
              )
            ]
          )
        )
      ),
    );
  }
}
Here we used several widgets to build our main weather display, populated with some dummy data for now.
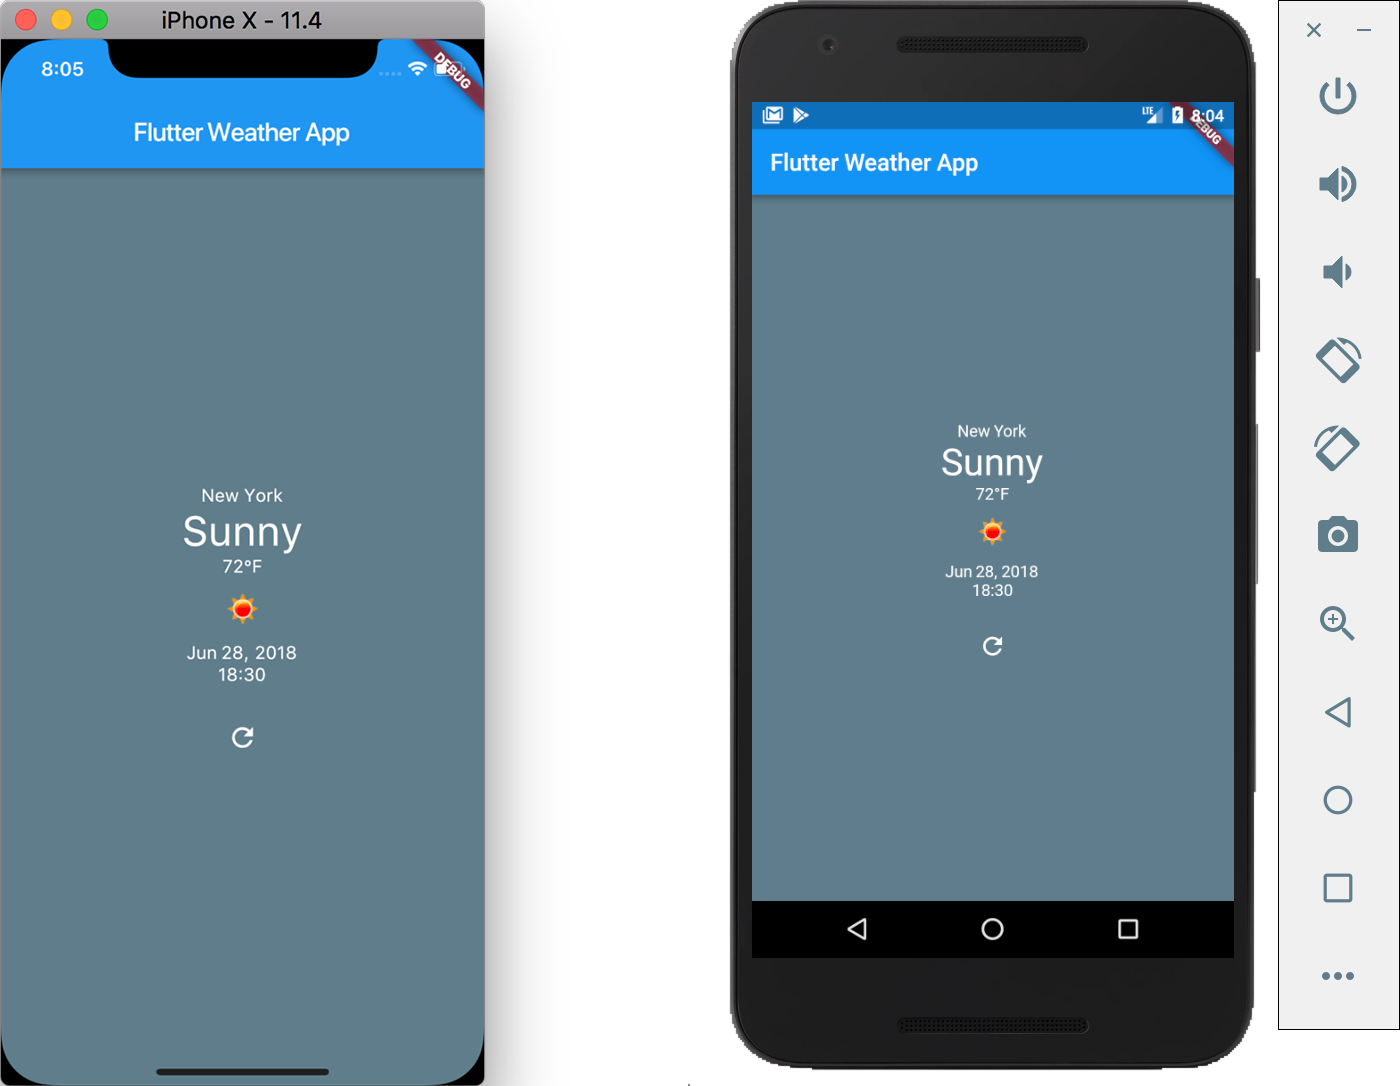
Please go an read about every new widget used here, on the Flutter website, so you can understand better how they work.
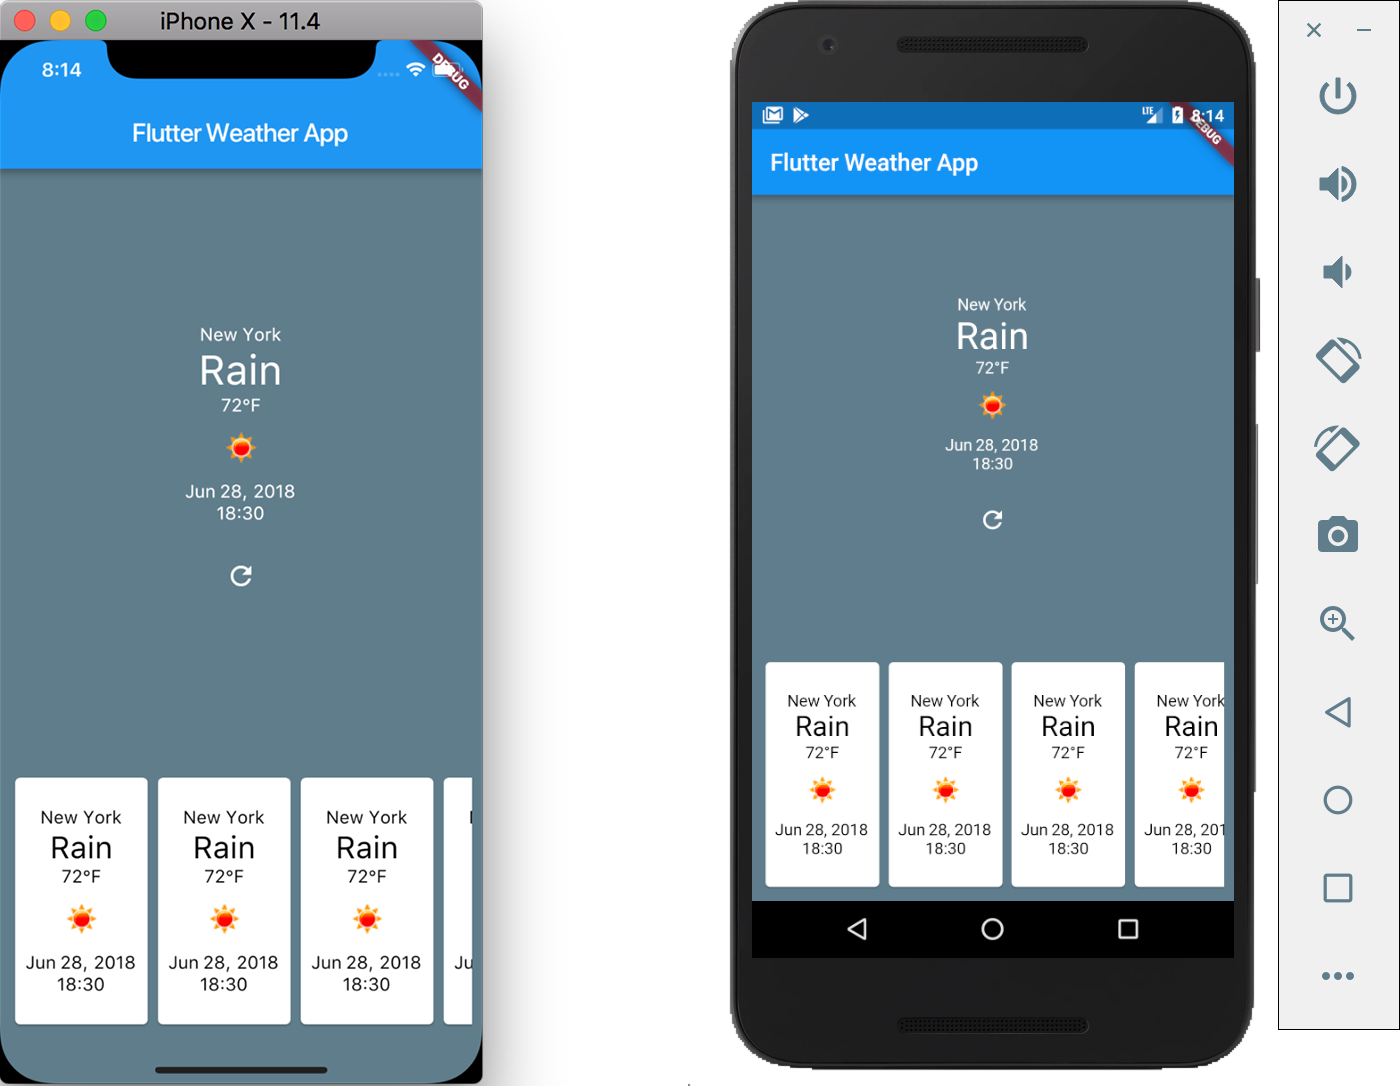
Next thing we need to add to our app is the weather forecast. We will use a horizontal scrolling ListView to hold our forecast data, among with other widgets so we end up with the layout we want:
import 'package:flutter/material.dart';

void main() => runApp(new MyApp());

class MyApp extends StatelessWidget {
  @override
  Widget build(BuildContext context) {
    return MaterialApp(
      title: 'Flutter Weather App',
      theme: ThemeData(
        primarySwatch: Colors.red,
      ),
      home: Scaffold(
        backgroundColor: Colors.blueGrey,
        appBar: AppBar(
          title: Text('Flutter Weather App'),
        ),
        body: Center(
          child: Column(
            mainAxisSize: MainAxisSize.min,
            children: <Widget>[
              Expanded(
                child: Column(
                  mainAxisAlignment: MainAxisAlignment.center,
                  children: <Widget>[
                    Padding(
                      padding: const EdgeInsets.all(8.0),
                      child: Column(
                        children: <Widget>[
                          Text('New York', style: new TextStyle(color: Colors.white)),
                          Text('Rain', style: new TextStyle(color: Colors.white, fontSize: 32.0)),
                          Text('72°F',  style: new TextStyle(color: Colors.white)),
                          Image.network('https://openweathermap.org/img/w/01d.png'),
                          Text('Jun 28, 2018', style: new TextStyle(color: Colors.white)),
                          Text('18:30', style: new TextStyle(color: Colors.white)),
                        ],
                      ),
                    ),
                    Padding(
                      padding: const EdgeInsets.all(8.0),
                      child: IconButton(
                        icon: new Icon(Icons.refresh),
                        tooltip: 'Refresh',
                        onPressed: () => null,
                        color: Colors.white,
                      ),
                    ),
                  ],
                ),
              ),
              SafeArea(
                child: Padding(
                  padding: const EdgeInsets.all(8.0),
                  child: Container(
                    height: 200.0,
                    child: ListView.builder(
                        itemCount: 10,
                        scrollDirection: Axis.horizontal,
                        itemBuilder: (context, index) => Card(
                          child: Padding(
                            padding: const EdgeInsets.all(8.0),
                            child: Column(
                              mainAxisAlignment: MainAxisAlignment.center,
                              children: <Widget>[
                                Text('New York', style: new TextStyle(color: Colors.black)),
                                Text('Rain', style: new TextStyle(color: Colors.black, fontSize: 24.0)),
                                Text('72°F',  style: new TextStyle(color: Colors.black)),
                                Image.network('https://openweathermap.org/img/w/01d.png'),
                                Text('Jun 28, 2018', style: new TextStyle(color: Colors.black)),
                                Text('18:30', style: new TextStyle(color: Colors.black)),
                              ],
                            ),
                          ),
                        )
                    ),
                  ),
                ),
              )
            ]
          )
        )
      ),
    );
  }
}
Run the app now to see the result:
We’re almost done building the UI, but, before jumping to the next section, let’s reactor the code so it will be easier to maintain and understand in the future.
We will create two new widgets and use them in the main.dart file, one for the main weather display and one for the weather item used in the forecast list.
Create a new folder named widgets and, in it add a new file, Weather.dart, for the first widget:
import 'package:flutter/material.dart';

class Weather extends StatelessWidget {
  @override
  Widget build(BuildContext context) {
    return Column(
      children: <Widget>[
        Text('New York', style: new TextStyle(color: Colors.white)),
        Text('Rain', style: new TextStyle(color: Colors.white, fontSize: 32.0)),
        Text('72°F',  style: new TextStyle(color: Colors.white)),
        Image.network('https://openweathermap.org/img/w/01d.png'),
        Text('Jun 28, 2018', style: new TextStyle(color: Colors.white)),
        Text('18:30', style: new TextStyle(color: Colors.white)),
      ],
    );
  }
}
Similar, create the WeatherItem.dart file to hold our second widget:
import 'package:flutter/material.dart';

class WeatherItem extends StatelessWidget {
  @override
  Widget build(BuildContext context) {
    return Card(
      child: Padding(
        padding: const EdgeInsets.all(8.0),
        child: Column(
          mainAxisAlignment: MainAxisAlignment.center,
          children: <Widget>[
            Text('New York', style: new TextStyle(color: Colors.black)),
            Text('Rain', style: new TextStyle(color: Colors.black, fontSize: 24.0)),
            Text('72°F',  style: new TextStyle(color: Colors.black)),
            Image.network('https://openweathermap.org/img/w/01d.png'),
            Text('Jun 28, 2018', style: new TextStyle(color: Colors.black)),
            Text('18:30', style: new TextStyle(color: Colors.black)),
          ],
        ),
      ),
    );
  }
}
Finally, use them back in the main.dart file:
import 'package:flutter/material.dart';

import 'package:flutter_weather/widgets/Weather.dart';
import 'package:flutter_weather/widgets/WeatherItem.dart';

void main() => runApp(new MyApp());

class MyApp extends StatelessWidget {
  @override
  Widget build(BuildContext context) {
    return MaterialApp(
      title: 'Flutter Weather App',
      theme: ThemeData(
        primarySwatch: Colors.blue,
      ),
      home: Scaffold(
        backgroundColor: Colors.blueGrey,
        appBar: AppBar(
          title: Text('Flutter Weather App'),
        ),
        body: Center(
          child: Column(
            mainAxisSize: MainAxisSize.min,
            children: <Widget>[
              Expanded(
                child: Column(
                  mainAxisAlignment: MainAxisAlignment.center,
                  children: <Widget>[
                    Padding(
                      padding: const EdgeInsets.all(8.0),
                      child: Weather(),
                    ),
                    Padding(
                      padding: const EdgeInsets.all(8.0),
                      child: IconButton(
                        icon: new Icon(Icons.refresh),
                        tooltip: 'Refresh',
                        onPressed: () => null,
                        color: Colors.white,
                      ),
                    ),
                  ],
                ),
              ),
              SafeArea(
                child: Padding(
                  padding: const EdgeInsets.all(8.0),
                  child: Container(
                    height: 200.0,
                    child: ListView.builder(
                        itemCount: 10,
                        scrollDirection: Axis.horizontal,
                        itemBuilder: (context, index) => WeatherItem()
                    ),
                  ),
                ),
              )
            ]
          )
        )
      ),
    );
  }
}
That’s it! The UI for our app is finished! Run the app one more time to check that everything works, then continue with the next section.
Load Data from the Internet
Our app looks great, but it will be a lot better if it will be able to actually tell us the real weather conditions, instead of the static data we used. To get this type of information we will use the API offered by the OpenWeatherMap website.
First, we’ll get the current weather data using geographic coordinates from the https://api.openweathermap.org/data/2.5/weather URL, then we’ll get the forecast for the next 5 days from the https://api.openweathermap.org/data/2.5/forecast URL using the same coordinates. We’ll also need an app id so you will have to register for a free one here.
When you’re done getting your app id, test the two API calls to see what they return. Use the geographical coordinates for New York (40.730610, -73.935242) or any other city you like. Here’s the response for the current weather API call:
{
  "coord":{
    "lon":-73.94,
    "lat":40.73
  },
  "weather":[
    {
      "id":800,
      "main":"Clear",
      "description":"clear sky",
      "icon":"01d"
    }
  ],
  "base":"stations",
  "main":{
    "temp":301.78,
    "pressure":1019,
    "humidity":48,
    "temp_min":301.15,
    "temp_max":303.15
  },
  "visibility":16093,
  "wind":{
    "speed":1.41,
    "deg":234.501
  },
  "clouds":{
    "all":1
  },
  "dt":1530366960,
  "sys":{
    "type":1,
    "id":2121,
    "message":0.0557,
    "country":"US",
    "sunrise":1530350885,
    "sunset":1530405054
  },
  "id":5125125,
  "name":"Long Island City",
  "cod":200
}
We will only use the data from the highlighted code.
Let’s do the same for the forecast API call:
{
  "cod":"200",
  "message":0.0048,
  "cnt":40,
  "list":[
    {
      "dt":1530370800,
      "main":{
        "temp":304.99,
        "temp_min":302.455,
        "temp_max":304.99,
        "pressure":1027.79,
        "sea_level":1031.25,
        "grnd_level":1027.79,
        "humidity":44,
        "temp_kf":2.53
      },
      "weather":[
        {
          "id":800,
          "main":"Clear",
          "description":"clear sky",
          "icon":"01d"
        }
      ],
      "clouds":{
        "all":0
      },
      "wind":{
        "speed":1.41,
        "deg":234.501
      },
      "sys":{
        "pod":"d"
      },
      "dt_txt":"2018-06-30 15:00:00"
    },
    ...
  ],
  "city":{
    "id":5125125,
    "name":"Long Island City",
    "coord":{
      "lat":40.7448,
      "lon":-73.9488
    },
    "country":"US",
    "population":25595
  }
}
Now, that we know what data we will use, let’s create some model classes in out project. First create a new models folder and, in it, two new dart files:
WeatherData.dart
class WeatherData {
  final DateTime date;
  final String name;
  final double temp;
  final String main;
  final String icon;

  WeatherData({this.date, this.name, this.temp, this.main, this.icon});

  factory WeatherData.fromJson(Map<String, dynamic> json) {
    return WeatherData(
      date: new DateTime.fromMillisecondsSinceEpoch(json['dt'] * 1000, isUtc: false),
      name: json['name'],
      temp: json['main']['temp'].toDouble(),
      main: json['weather'][0]['main'],
      icon: json['weather'][0]['icon'],
    );
  }
}
ForecastData.dart
import 'package:flutter_weather/models/WeatherData.dart';

class ForecastData {
  final List list;

  ForecastData({this.list});

  factory ForecastData.fromJson(Map<String, dynamic> json) {
    List list = new List();

    for (dynamic e in json['list']) {
      WeatherData w = new WeatherData(
          date: new DateTime.fromMillisecondsSinceEpoch(e['dt'] * 1000, isUtc: false),
          name: json['city']['name'],
          temp: e['main']['temp'].toDouble(),
          main: e['weather'][0]['main'],
          icon: e['weather'][0]['icon']);
      list.add(w);
    }

    return ForecastData(
      list: list,
    );
  }
}
As you notice, the ForecastData class holds a list of WeatherData. The elements from this list will be shown in the ListView from our UI.
Back, in our main.dart file, we need to make some significant changes so the app can update itself using the data received from the internet. For this we need to change the type of our app class from StatelessWidget to StatefulWidget.
The first type means that the widget will not change during it’s lifetime, the second one means it will be able to change as needed to reflect changes in out app data. Be sure to read about both to understand exactly how they work. You can find some additional explanation here too.
import 'package:flutter/material.dart';

import 'package:flutter_weather/widgets/Weather.dart';
import 'package:flutter_weather/widgets/WeatherItem.dart';

void main() => runApp(new MyApp());

class MyApp extends StatefulWidget {
  @override
  State<StatefulWidget> createState() {
    return new MyAppState();
  }
}

class MyAppState extends State<MyApp> {
  @override
  Widget build(BuildContext context) {
    return MaterialApp(
      title: 'Flutter Weather App',
      theme: ThemeData(
        primarySwatch: Colors.blue,
      ),
      home: Scaffold(
        backgroundColor: Colors.blueGrey,
        appBar: AppBar(
          title: Text('Flutter Weather App'),
        ),
        body: Center(
          child: Column(
            mainAxisSize: MainAxisSize.min,
            children: <Widget>[
              Expanded(
                child: Column(
                  mainAxisAlignment: MainAxisAlignment.center,
                  children: <Widget>[
                    Padding(
                      padding: const EdgeInsets.all(8.0),
                      child: Weather(),
                    ),
                    Padding(
                      padding: const EdgeInsets.all(8.0),
                      child: IconButton(
                        icon: new Icon(Icons.refresh),
                        tooltip: 'Refresh',
                        onPressed: () => null,
                        color: Colors.white,
                      ),
                    ),
                  ],
                ),
              ),
              SafeArea(
                child: Padding(
                  padding: const EdgeInsets.all(8.0),
                  child: Container(
                    height: 200.0,
                    child: ListView.builder(
                        itemCount: 10,
                        scrollDirection: Axis.horizontal,
                        itemBuilder: (context, index) => WeatherItem()
                    ),
                  ),
                ),
              )
            ]
          )
        )
      ),
    );
  }
}
If you run the app now, there should be no change… yet. Just be aware that you’ll probably need to recompile the app, hot reload does not seem to work with this type of significant change.
Now, we can add the method to load the weather data from the internet. But, to access the network, we need the http flutter package. To install it, it’s really simple: just open the pubspec.yaml file and add it to the dependencies:
name: flutter_weather
description: A new Flutter application.

dependencies:
  flutter:
    sdk: flutter

  # The following adds the Cupertino Icons font to your application.
  # Use with the CupertinoIcons class for iOS style icons.
  cupertino_icons: ^0.1.2

  http: "^0.11.3+16"

dev_dependencies:
  flutter_test:
    sdk: flutter


# ...
Now click on the Packages get link from the top-right in Android Studio to download and install the new package.
Let’s jump back in the code, specifically in the main.dart file:
import 'dart:convert';
import 'package:flutter/material.dart';
import 'package:http/http.dart' as http;

import 'package:flutter_weather/widgets/Weather.dart';
import 'package:flutter_weather/widgets/WeatherItem.dart';
import 'package:flutter_weather/models/WeatherData.dart';
import 'package:flutter_weather/models/ForecastData.dart';

void main() => runApp(new MyApp());

class MyApp extends StatefulWidget {
  @override
  State<StatefulWidget> createState() {
    return new MyAppState();
  }
}

class MyAppState extends State<MyApp> {
  bool isLoading = false;
  WeatherData weatherData;
  ForecastData forecastData;

  @override
  void initState() {
    super.initState();

    loadWeather();
  }

  @override
  Widget build(BuildContext context) {
    return MaterialApp(
      title: 'Flutter Weather App',
      theme: ThemeData(
        primarySwatch: Colors.blue,
      ),
      home: Scaffold(
        backgroundColor: Colors.blueGrey,
        appBar: AppBar(
          title: Text('Flutter Weather App'),
        ),
        body: Center(
          child: Column(
            mainAxisSize: MainAxisSize.min,
            children: <Widget>[
              Expanded(
                child: Column(
                  mainAxisAlignment: MainAxisAlignment.center,
                  children: <Widget>[
                    Padding(
                      padding: const EdgeInsets.all(8.0),
                      child: weatherData != null ? Weather(weather: weatherData) : Container(),
                    ),
                    Padding(
                      padding: const EdgeInsets.all(8.0),
                      child: isLoading ? CircularProgressIndicator(
                        strokeWidth: 2.0,
                        valueColor: new AlwaysStoppedAnimation(Colors.white),
                      ) : IconButton(
                        icon: new Icon(Icons.refresh),
                        tooltip: 'Refresh',
                        onPressed: loadWeather,
                        color: Colors.white,
                      ),
                    ),
                  ],
                ),
              ),
              SafeArea(
                child: Padding(
                  padding: const EdgeInsets.all(8.0),
                  child: Container(
                    height: 200.0,
                    child: forecastData != null ? ListView.builder(
                        itemCount: forecastData.list.length,
                        scrollDirection: Axis.horizontal,
                        itemBuilder: (context, index) => WeatherItem(weather: forecastData.list.elementAt(index))
                    ) : Container(),
                  ),
                ),
              )
            ]
          )
        )
      ),
    );
  }

  loadWeather() async {
    setState(() {
      isLoading = true;
    });

    final lat = 40.730610;
    final lon = -73.935242;
    final weatherResponse = await http.get(
        'https://api.openweathermap.org/data/2.5/weather?APPID=YOUR_APP_ID&lat=${lat
            .toString()}&lon=${lon.toString()}');
    final forecastResponse = await http.get(
        'https://api.openweathermap.org/data/2.5/forecast?APPID=YOUR_APP_ID&lat=${lat
            .toString()}&lon=${lon.toString()}');

    if (weatherResponse.statusCode == 200 &&
        forecastResponse.statusCode == 200) {
      return setState(() {
        weatherData = new WeatherData.fromJson(jsonDecode(weatherResponse.body));
        forecastData = new ForecastData.fromJson(jsonDecode(forecastResponse.body));
        isLoading = false;
      });
    }

    setState(() {
      isLoading = false;
    });
  }
}
This code sends some data to the Weather and WeatherItem widgets so they know what information to show to the user. To be able to do this, we need to make same changes to them too.
First, edit the Weather.dart file:
import 'package:flutter/material.dart';
import 'package:intl/intl.dart';

import 'package:flutter_weather/models/WeatherData.dart';

class Weather extends StatelessWidget {
  final WeatherData weather;

  Weather({Key key, @required this.weather}) : super(key: key);

  @override
  Widget build(BuildContext context) {
    return Column(
      children: <Widget>[
        Text(weather.name, style: new TextStyle(color: Colors.white)),
        Text(weather.main, style: new TextStyle(color: Colors.white, fontSize: 32.0)),
        Text('${weather.temp.toString()}°F',  style: new TextStyle(color: Colors.white)),
        Image.network('https://openweathermap.org/img/w/${weather.icon}.png'),
        Text(new DateFormat.yMMMd().format(weather.date), style: new TextStyle(color: Colors.white)),
        Text(new DateFormat.Hm().format(weather.date), style: new TextStyle(color: Colors.white)),
      ],
    );
  }
}
Next, change the WeatherItem.dart to the following:
import 'package:flutter/material.dart';
import 'package:intl/intl.dart';

import 'package:flutter_weather/models/WeatherData.dart';

class WeatherItem extends StatelessWidget {
  final WeatherData weather;

  WeatherItem({Key key, @required this.weather}) : super(key: key);

  @override
  Widget build(BuildContext context) {
    return Card(
      child: Padding(
        padding: const EdgeInsets.all(8.0),
        child: Column(
          mainAxisAlignment: MainAxisAlignment.center,
          children: <Widget>[
            Text(weather.name, style: new TextStyle(color: Colors.black)),
            Text(weather.main, style: new TextStyle(color: Colors.black, fontSize: 24.0)),
            Text('${weather.temp.toString()}°F',  style: new TextStyle(color: Colors.black)),
            Image.network('https://openweathermap.org/img/w/${weather.icon}.png'),
            Text(new DateFormat.yMMMd().format(weather.date), style: new TextStyle(color: Colors.black)),
            Text(new DateFormat.Hm().format(weather.date), style: new TextStyle(color: Colors.black)),
          ],
        ),
      ),
    );
  }
}
The two widgets use a new flutter package to be able to format the date and time. Add the intl package to the pubspec.yaml and click on the Packages get as we did before:
name: flutter_weather
description: A new Flutter application.

dependencies:
  flutter:
    sdk: flutter

  # The following adds the Cupertino Icons font to your application.
  # Use with the CupertinoIcons class for iOS style icons.
  cupertino_icons: ^0.1.2

  http: "^0.11.3+16"

  intl: "^0.15.6"

# ...
Restart the app now and you’ll see the weather information updated with real data from the OpenWeatherMap API. You should also be able to click the reload button to get fresh data if you need it. Also, please, don’t forget to add your app id in the URLs, because they won’t work without it!
Get the Current Location
If you live in New York you probably think we’re done. But what about the rest of us, not so lucky? We need to make the app to show the weather for the current location, so we end up with something useful for the entire world, don’t you think?
To find out the device location we need to install yet another flutter package, the location package. Add it to the pubspec.yaml and click on the Packages get:
name: flutter_weather
description: A new Flutter application.

dependencies:
  flutter:
    sdk: flutter

  # The following adds the Cupertino Icons font to your application.
  # Use with the CupertinoIcons class for iOS style icons.
  cupertino_icons: ^0.1.2

  http: "^0.11.3+16"

  intl: "^0.15.6"

  location: "^1.3.4"

# ...
In order to make the location work on Apple devices, we need add some platform specific code, because Apple requires you to inform the user why you need the location. So, open the ios/Runner/Info.plist file and add the following keys to it:
<?xml version="1.0" encoding="UTF-8"?>
<!DOCTYPE plist PUBLIC "-//Apple//DTD PLIST 1.0//EN" "http://www.apple.com/DTDs/PropertyList-1.0.dtd">
<plist version="1.0">
<dict>
   ...
   <key>NSLocationWhenInUseUsageDescription</key>
   <string>We need your location to show the weather</string>
   <key>NSLocationAlwaysUsageDescription</key>
   <string>We need your location to show the weather</string>
</dict>
</plist>
Finally, let’s add the code for our app to get the current location and load the weather data using it:
import 'dart:convert';
import 'package:flutter/material.dart';
import 'package:http/http.dart' as http;
import 'package:location/location.dart';
import 'package:flutter/services.dart';

import 'package:flutter_weather/widgets/Weather.dart';
import 'package:flutter_weather/widgets/WeatherItem.dart';
import 'package:flutter_weather/models/WeatherData.dart';
import 'package:flutter_weather/models/ForecastData.dart';

void main() => runApp(new MyApp());

class MyApp extends StatefulWidget {
  @override
  State<StatefulWidget> createState() {
    return new MyAppState();
  }
}

class MyAppState extends State<MyApp> {
  bool isLoading = false;
  WeatherData weatherData;
  ForecastData forecastData;
  Location _location = new Location();
  String error;

  @override
  void initState() {
    super.initState();

    loadWeather();
  }

  @override
  Widget build(BuildContext context) {
    return MaterialApp(
      title: 'Flutter Weather App',
      theme: ThemeData(
        primarySwatch: Colors.blue,
      ),
      home: Scaffold(
        backgroundColor: Colors.blueGrey,
        appBar: AppBar(
          title: Text('Flutter Weather App'),
        ),
        body: Center(
          child: Column(
            mainAxisSize: MainAxisSize.min,
            children: <Widget>[
              Expanded(
                child: Column(
                  mainAxisAlignment: MainAxisAlignment.center,
                  children: <Widget>[
                    Padding(
                      padding: const EdgeInsets.all(8.0),
                      child: weatherData != null ? Weather(weather: weatherData) : Container(),
                    ),
                    Padding(
                      padding: const EdgeInsets.all(8.0),
                      child: isLoading ? CircularProgressIndicator(
                        strokeWidth: 2.0,
                        valueColor: new AlwaysStoppedAnimation(Colors.white),
                      ) : IconButton(
                        icon: new Icon(Icons.refresh),
                        tooltip: 'Refresh',
                        onPressed: loadWeather,
                        color: Colors.white,
                      ),
                    ),
                  ],
                ),
              ),
              SafeArea(
                child: Padding(
                  padding: const EdgeInsets.all(8.0),
                  child: Container(
                    height: 200.0,
                    child: forecastData != null ? ListView.builder(
                        itemCount: forecastData.list.length,
                        scrollDirection: Axis.horizontal,
                        itemBuilder: (context, index) => WeatherItem(weather: forecastData.list.elementAt(index))
                    ) : Container(),
                  ),
                ),
              )
            ]
          )
        )
      ),
    );
  }

  loadWeather() async {
    setState(() {
      isLoading = true;
    });

    Map<String, double> location;

    try {
      location = await _location.getLocation;

      error = null;
    } on PlatformException catch (e) {
      if (e.code == 'PERMISSION_DENIED') {
        error = 'Permission denied';
      } else if (e.code == 'PERMISSION_DENIED_NEVER_ASK') {
        error = 'Permission denied - please ask the user to enable it from the app settings';
      }

      location = null;
    }

    if (location != null) {
      final lat = location['latitude'];
      final lon = location['longitude'];

      final weatherResponse = await http.get(
          'https://api.openweathermap.org/data/2.5/weather?APPID=0721392c0ba0af8c410aa9394defa29e&lat=${lat
              .toString()}&lon=${lon.toString()}');
      final forecastResponse = await http.get(
          'https://api.openweathermap.org/data/2.5/forecast?APPID=0721392c0ba0af8c410aa9394defa29e&lat=${lat
              .toString()}&lon=${lon.toString()}');

      if (weatherResponse.statusCode == 200 &&
          forecastResponse.statusCode == 200) {
        return setState(() {
          weatherData =
          new WeatherData.fromJson(jsonDecode(weatherResponse.body));
          forecastData =
          new ForecastData.fromJson(jsonDecode(forecastResponse.body));
          isLoading = false;
        });
      }
    }

    setState(() {
      isLoading = false;
    });
  }
}
Try running the app now on a real device. You will be asked to allow the app to access your location and, then, you should be able to see the current weather and the forecast for your real location on this planet (New York included).
That’s it! We now have a functional weather app that works both on Android and iOS. Of course, there are many things that can be improved to have a fully featured app, but now you should be able to add as many features as you want. Please let me know in the comments what else you added and leave a link to your published app if you have one.
I hope you enjoyed building this and learned a lot along the way. Please let me know in the comments how it was for you, if you found any problems or if you have any improvements to suggest. Also, if this tutorial helped you build some other Flutter apps, please add some links in the comments and tell all of us about them.
You can get the final code from GitHub, in case something goes terribly wrong and you don’t manage to fix it. See you at the next tutorial!
Hi,
Thanks for your offering.
BTW I have 1 question because I’ve got an issue when I try to refer several lines of your codes in main.dart which doesn’t seem tricky.
It is in the line that includes ‘location = await _location.getLocation;’in main.dart.
Whenever I try to run the codes, it gets an error with the message saying ‘error: A value of type ‘Future Function()’ can’t be assigned to a variable of type ‘Map’.’
Could you figure out what happened to this line?
Thanks 🙂