How to Set Up a Local DNS Resolver with Unbound on Rocky Linux 9
Unbound is free and open-source DNS server software that can be used for validating, recursive, and caching DNS resolvers. It's a feature-rich DNS server that supports DNS-over-TLS (DoT), DNS-over-HTTPS (DoH), Query Name Minimisation, the Aggressive Use of DNSSEC-Validated Cache, and support for authority zones. Unbound is focused on the privacy and security of DNS, but without sacrificing the speed and performance.
Unbound is primarily developed by NLnet Labs and distributed under the BSD license, and it supports modern features on open standards of DNS Server. Unbound has been rigorously audited, and it can be run on Linux, BSD, and macOS. Unbound is available for most of these OSs and can be installed via the system package manager.
In this tutorial, I will set up a Local DNS Server with Unbound on a Rocky Linux 9 server. You'll configure Unbound as an authoritative, validating, and recursive caching DNS. In addition to that, you'll also set up Unbound as a DNS resolver for your local network with DNS-over-TLS (DoT) enabled on top of it.
Through the end of this tutorial, you'll also set up Unbound logs via Rsyslog and Logrotate, and also set up a Linux client machine to use Unbound as a DNS resolver and verify your whole installation from there.
Prerequisites
Before you begin with this tutorial, ensure that you have the following requirements:
- A server with Rocky Linux 9 installed - This example uses a Rocky Linux with the hostname 'unbound-rocky' and the IP address '192.168.5.25'.
- A non-root user with root/sudo administrator privileges.
- An SELinux is running in permissive mode.
And that's it. If all requirements are in place, go on and start installing Unbound on your server.
Installing Unbound
Unbound is a DNS Server software that supports the majority of operating systems, including Linux, BDS, and macOS. On Rocky Linux, the Unbound package is available by default on the official Rocky Linux AppStream repository.
In this first step, you'll install the Unbound package to your Rocky Linux system.
Now run the below dnf command to verify the 'unbound' package available on the AppStream repository. At the time of this writing, the Rocky Linux AppStream repository provides Unbound 1.16.
sudo dnf info unbound
Output:

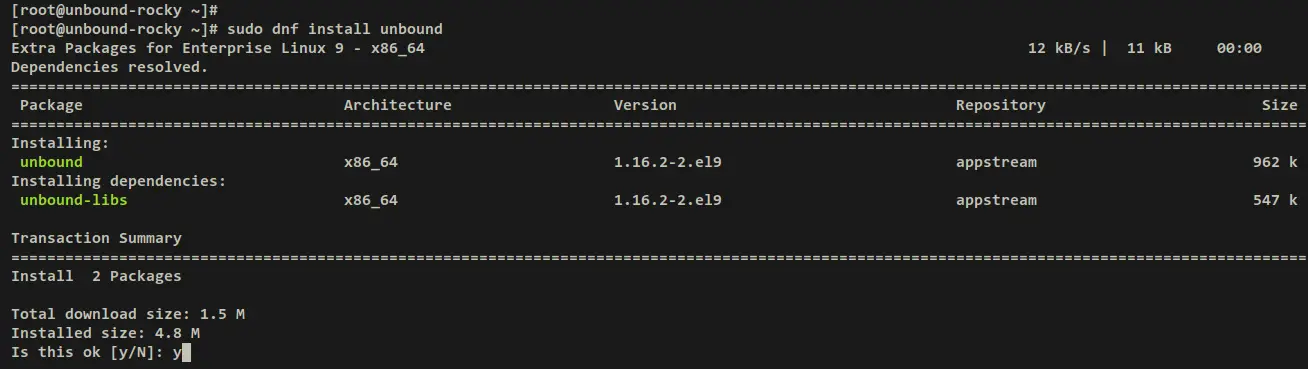
Install Unbound via the dnf command below. When prompted, input y to confirm and press ENTER to proceed.
sudo dnf install unbound
Output:
Once unbound is installed, start and enable the 'unbound' service via the below systemctl command utility. This will start Unbound on your Rocky Linux server and enable it to run automatically upon the system startup.
sudo systemctl start unbound
sudo systemctl enable unbound
Verify Unbound service using the below systemctl command. The output 'active (running)' confirms that the Unbound service is running. And the output 'loaded ....; enabled;...' confirms that the Unbound service is enabled.
sudo systemctl status unbound
Output:

Your Unbound is now installed and running with the default config file '/etc/unbound/unbound.conf'. Next, you'll modify the Unbound config file '/etc/unbound/unbound.conf' and set up Unbound as an authoritative, validating, and recursive caching DNS, and also enable Unbound as a DNS resolver with DoT enabled.
Configuring Unbound
By default, the Unbound config file is located at '/etc/unbound/unbound.conf'. In this step, you'll modify the config file '/etc/unbound/unbound.conf', then set up and optimize Unbound installation.
You'll set up Unbound to run as authoritative, validating, and recursive caching DNS. In addition to that, you'll also optimize Unbound installation for performance, privacy, and security. And lastly, you'll set up Unbound as a DNS resolver for local networks.
First, run the below wget command to download the root DNS file to '/etc/unbound/root.hints'. Then, change the ownership of the file '/etc/unbound/root.hints' to the user and group 'unbound'.
wget https://www.internic.net/domain/named.root -O /etc/unbound/root.hints
sudo chown unbound:unbound /etc/unbound/root.hints
Next, backup the default Unbound config file to '/etc/unbound/unbound.conf.orig' and modify the original file '/etc/unbound/unbound.conf' using the below nano editor command.
sudo cp -v /etc/unbound/unbound{.conf,.conf.orig}
sudo nano /etc/unbound/unbound.conf
Now let's start configuring Unbound.
Unbound Basic Configuration
First, you'll set up which IP address and port the Unbound service should be running. Then, you'll also set up a certificate bundle that will be used to authenticate connections made upstream and add the root DNS servers via the 'root-hints' parameter.
Add the following lines within the 'server:' section. With these settings, you'll run Unbound on a local IP address '192.168.5.25' with the default UDP port '53'.
server:
    ...
    ...
    # interface-automatic: no
    do-ip6: no
    interface: 192.168.5.25
    port: 53
    prefetch: yes

    tls-cert-bundle: /etc/pki/ca-trust/extracted/pem/tls-ca-bundle.pem
    root-hints: /etc/unbound/root.hints
Detail parameters:
- do-ip6: use 'yes' to run Unbound with IPv6 or set 'no' to disable IPv6.
- interface: network interface or IP address that unbound will be running. You can use an IP address or the interface name such as 'eth0'. Also, you can run in a specific port by adding format like this 'IP-ADDRESS@PORT'.
- port: specify the port that Unbound will be running and the client's connections will be handled by this port. The default DNS port is 53.
- prefetch: set to 'yes' to enable prefetching of almost expired message cache entries.
- tls-cert-bundle: Certificates used to authenticate connections made upstream. On RHEL-based distribution, the cert file is located at '/etc/pki/ca-trust/extracted/pem/tls-ca-bundle.pem'.
- root-hints: a file that contains root DNS server details. You've downloaded this file to '/etc/unbound/root.hints'.
Enable DNS Cache
Now add the following lines to enable recursive caching DNS via Unbound. This will cache DNS queries made by clients on the Unbound server in the amount of time.
    cache-max-ttl: 14400
    cache-min-ttl: 1200
Detail parameters:
- cache-max-ttl: TTL or Time To Live for RRSets and messages in DNS cache. The format is in seconds.
- cache-min-ttl: minimal Time To Live for the cache. The default is 0, but you can change this to your flavor such as '1200' seconds. Do not set this for more than 1 hour or you will get into trouble due to stale data.
Hardening Unbound
Some privacy and security parameters for Unbound are enabled by default on the RHEL-based distribution. But, you can also add more parameters like these lines.
    hide-identity: yes
    hide-version: yes
    use-caps-for-id: yes
Detail parameters:
- hide-identity: set to yes to disable answers from bind queries about id.server or hostname.bind.
- hide-version: set to yes to disable version.server and version.bind queries.
- use-caps-for-id: set to yes to enable the use of '0x20-encoded' in the query to foil spoof attempts.
Defining Private Address and Access Control Lists
Next, you'll need to define private-address and ACLs (Access Control Lists) for your local networks. Be sure to change the local subnet in the below lines with your current network environment.
    private-address: 192.168.0.0/16
    private-address: 169.254.0.0/16
    private-address: 172.16.0.0/12
    private-address: 10.0.0.0/8
    private-address: fd00::/8
    private-address: fe80::/10

    #control which clients are allowed to make (recursive) queries
    access-control: 127.0.0.1/32 allow_snoop
    access-control: ::1 allow_snoop
    access-control: 127.0.0.0/8 allow
    access-control: 192.168.5.0/24 allow
Detail parameters:
- private-address: define private network subnets on your infrastructure. Only 'private-domain' and 'local-data' names are allowed to have these private addresses.
- access-control: define access control in which clients are allowed to make (recursive) queries to the Unbound server. The parameter 'allow' will enable recursive, while the 'allow_snoop' will enable both recursive and non-recursive.
Setting up Local Domain Name and Sub-domains
After configuring private-address and access control lists, you'll now create local domain names via the Unbound 'local-zone' parameter. This is very useful, especially if you have multiple self-hosted applications on your local network. You can easily define your domain name or sub-domains and pointed to the specific target IP address.
In this example, you'll set up a 'static' local domain 'garden.lan' and create multiple sub-domains via the 'local-data' parameter. Each sub-domain will be pointed to a specific IP address, and also you'll create PTR records via the 'local-data-ptr' parameter.
    # local zone
    local-zone: "garden.lan." static

    local-data: "firewall.garden.lan.  IN A 10.0.0.1"
    local-data: "vault.garden.lan.    IN A 10.0.0.2"
    local-data: "media.garden.lan.   IN A 10.0.0.3"
    local-data: "docs.garden.lan.       IN A 10.0.0.4"
    local-data: "wiki.garden.lan.     IN A 10.0.0.5"

    local-data-ptr: "10.0.0.1  firewall.garden.lan"
    local-data-ptr: "10.0.0.2  vault.garden.lan"
    local-data-ptr: "10.0.0.3  media.garden.lan"
    local-data-ptr: "10.0.0.4  docs.garden.lan"
    local-data-ptr: "10.0.0.5  wiki.garden.lan"
Detail parameters:
- local-zone: define the local domain here.
- local-data: define A record for sub-domains and which local IP address will be resolved.
- local-data-ptr: define the ptr record for your sub-domains.
Unbound Optimization and Tweaks
Next, add the following lines to optimize your Unbound installation. You can adjust and tweaks the parameters below depending on your current environment.
    msg-cache-slabs: 8
    rrset-cache-slabs: 8
    infra-cache-slabs: 8
    key-cache-slabs: 8
    rrset-cache-size: 256m
    msg-cache-size: 128m
    so-rcvbuf: 8m
Detail parameters:
- msg-cache-slabs: the number of slabs to use for the message cache. Set it to 8 to optimize Unbound to use more memory for caching.
- rrset-cache-slabs: the number of slabs to use for the RRset cache. Set it to 8 to optimize Unbound to use more memory for the RRSet cache.
- infra-cache-slabs: the number of slabs to use for the Infrastructure cache. Set it to 8 to optimize Unbound to use more memory for the Infrastructure cache.
- key-cache-slabs: the number of slabs to use for the key cache. Set it to 8 to optimize Unbound to use more memory for the key cache.
- rrset-cache-size: specify the amount of memory for the RRSet cache. This example uses 256MB, with the default is only 4MB.
- msg-cache-size: specify the amount of memory for the message cache. This example uses 128MB, with the default is only 4MB.
- so-rcvbuf: set up buffer size for DNS port 53/udp to 8MB.
Setup Unbound as a DNS Resolver with DNS-over-TLS (DoT)
Lastly, add a new section 'forward-zone' to set up Unbound as a DNS resolver for your local networks. This example uses Quad9 DNS servers with DoT (DNS-over-TLS) enabled as an upstream DNS resolver.
forward-zone:
    name: "."
    forward-ssl-upstream: yes
    ## Also add IBM IPv6 Quad9 over TLS
    forward-addr: 9.9.9.9@853#dns.quad9.net
    forward-addr: 149.112.112.112@853#dns.quad9.net
Details parameters:
- forward-zone: define forward zone for Unbound.
- name: set to "." to forward all DNS queries.
- forward-addr: use a specific forwarder to forward all DNS queries. This example uses Quad9 DNS with DNS-over-TLS (DoT) enabled.
Now save and exit the file '/etc/unbound/unbound.conf' when all is finished.
Next, run the below command to verify Unbound configurations and ensure that you've correct and proper configuration. When successful, you should get an output 'unbound-checkconf: no errors in /etc/unbound/unbound.conf'.
unbound-checkconf
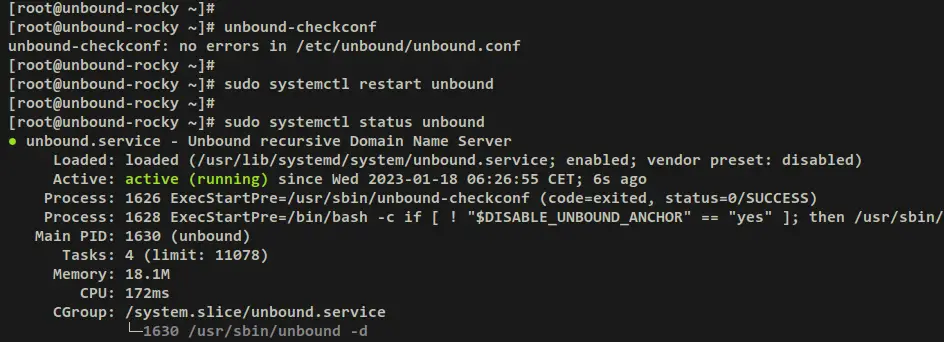
Now restart the Unbound service via the systemctl command utility below and apply the changes.
sudo systemctl restart unbound
With this, you've now finished the Unbound configuration and it's now running on IP address '192.168.5.25' with the default UDP port '53'.
In the next steps, you'll set up the firewalld to open the DNS port and set up Unbound logging via Rsyslog and Logrotate.
Setting up Firewalld
So, the Unbound is up and running on default UDP port 53. Now you must open the DNS port 53/UDP on firewalld and allow clients to access your Unbound DNS Server.
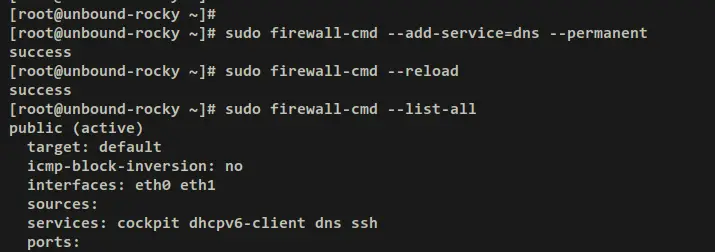
Run the below firewall-cmd command below to add the new service 'dns'. Then, reload the firewalld to apply the changes. When successful, you should get an output such as 'success' on your terminal.
sudo firewall-cmd --add-service=dns --permanent
sudo firewall-cmd --reload
Next, run the below command to verify the list of enabled services on firewalld. And you should see the 'dns' service added to the firewalld.
sudo firewall-cmd --list-all
Output:
Setting up Unbound Log via Rsyslog and Logrotate
After configuring the firewalld, you'll now set up a log file for Unbound via rsyslog and logrotate. The rsyslog service will create a specific log file for Unbound and the logrotate will rotate the Unbound log file in a certain time.
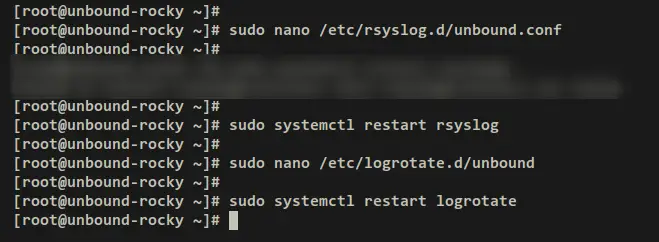
Create a new config file '/etc/rsyslog.d/unbound.conf' using the below nano editor command.
sudo nano /etc/rsyslog.d/unbound.conf
Add the following lines to the file. With this, the Rsyslog will create a new log file '/var/log/unbound.log' for the '$programname' == 'unbound'.
# Log messages generated by unbound application
if $programname == 'unbound' then /var/log/unbound.log
# stop processing it further
& stop
Save and exit the file '/etc/rsyslog.d/unbound.conf' when finished.
Next, create a new Logrottate config file '/etc/logrotate.d/unbound' using the below nano editor command.
sudo nano /etc/logrotate.d/unbound
Add the following lines to the file. This will create log rotation for the Unbound log file '/var/log/unbound.log' on a daily basis.
/var/log/unbound.log {
  daily
  rotate 7
  missingok
  create 0640 root adm
  postrotate
    /usr/lib/rsyslog/rsyslog-rotate
  endscript
}
Save the file and exit the editor when finished.
Lastly, run the following systemctl command utility to restart both Rsyslog and Logrotate services and apply the changes to your system.
sudo systemctl restart rsyslog
sudo systemctl restart logrotate
With this, you've now finished the Unbound installation. In the next step, you'll learn how to set up a local client machine to use Unbound as a DNS resolver using two methods, then you'll verify the Unbound DNS server from there.
Setting up DNS Resolver for Client
To set up DNS resolver on client machines, you can use different methods. In this step, you'll learn how to set up DNS resolvers via NetworkManager and via the systemd-resolved combined with NetworkManager.
Via NetworkManager
If you want to set up DNS resolver via NetworkManager directly, then you must edit your network interface configurations, which are stored in the '/etc/NetworkManager/system-connections/' directory.
In this example, the main connection for the client machine is 'eth0', so the configuration on NetworkManager should be '/etc/NetworkManager/system-connections/eth0.nmconnection'. You may have different interface names such as eth1 and many more.
Open the NetworkManager interface config file '/etc/NetworkManager/system-connections/eth0.nmconnection' using the below nano editor command.
sudo nano /etc/NetworkManager/system-connections/eth0.nmconnection
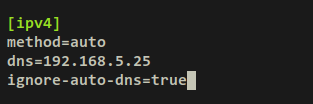
Add the following lines to the '[ipv4]' section. Also, be sure to change the IP address on the 'dns' parameter with your Unbound DNS Server.
[ipv4]
...
dns=192.168.5.25
ignore-auto-dns=true
Save and exit the file when finished.
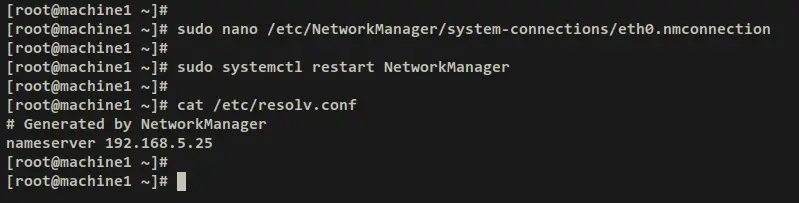
Next, run the below systemctl command to restart the NetworkManager service and apply the changes. Then, verify the DNS resolver config file '/etc/resolv.conf' via the cat command.
sudo systemctl restart NetworkManager
cat /etc/resolv.conf
You should get an output that the IP address '192.168.5.25' is configured as the default DNS resolver for your client machine.
Via systemd-resolved and NetworkManager
Another way to set up a DNS resolver is via the systemd-resolved and NetworkManager. With this, you can easily change the DNS resolver system-wide and not depend on network interfaces on your system.
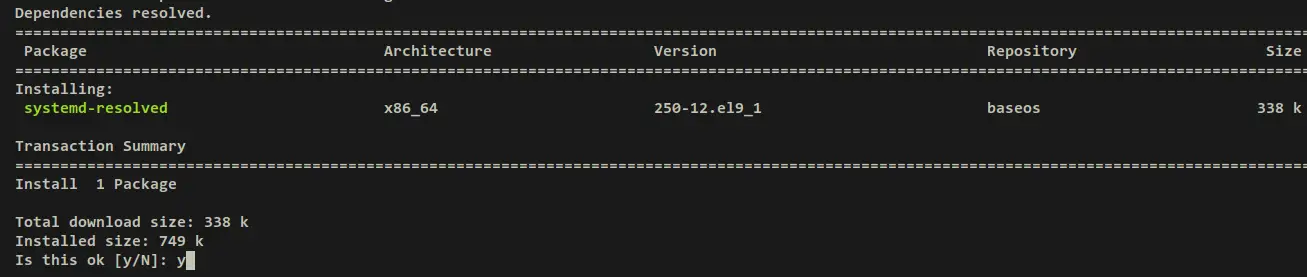
On RHEL-based distributions, the systemd-resolved is not yet installed. You can easily install it via the dnf command below. When prompted, input y to confirm and press ENTER to proceed.
sudo dnf install systemd-resolved
Output:
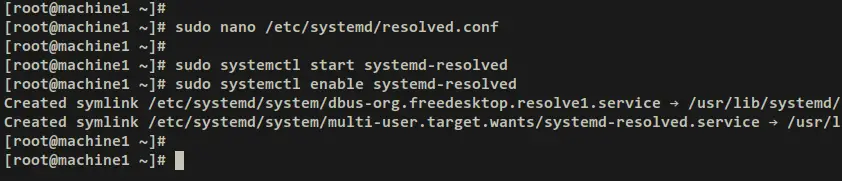
After systemd-resolved is installed, open the config file '/etc/systemd/resolved.conf' using the below nano editor command.
sudo nano /etc/systemd/resolved.conf
On the '[Resolver]' section, uncomment the 'DNS' parameter and add your Unbound DNS server IP address into it.
[Resolver]
DNS=192.168.5.25
Save and exit the file when finished.
Next, run the below systemctl command to start and enable the 'systemd-resolved' service.
sudo systemctl start systemd-resolved
sudo systemctl enable systemd-resolved
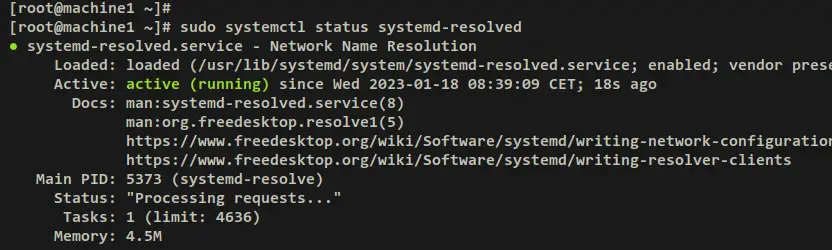
Now verify the 'systemd-resolved' service to ensure that the service is running. You should receive an output such as 'active (running)', which confirms that the service is running. And the output 'Loaded ../../systemd-resolved.service; enabled;..' confirm that the service is enabled and will start automatically upon the system startup.
sudo systemctl status systemd-resolved
Output:
With the systemd-resolved running, you'll next modify the DNS backend for the NetworkManager service.
Open the NetworkManager config file '/etc/NetworkManager/NetworkManager.conf' using the below nano editor command.
sudo nano /etc/NetworkManager/NetworkManager.conf
Under the '[main]' section, add the 'dns' parameter with the value 'systemd-resolved'. This will override the DNS server on your NetworkManager to use the 'systemd-resolved' service.
[main]
dns=systemd-resolved
Save and exit the file when finished.
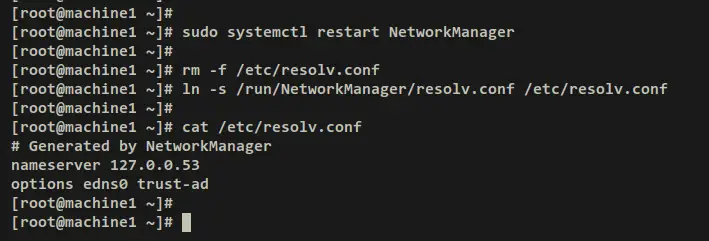
Now run the below systemctl command to restart the NetworkManager service and apply the changes. The new DNS resolver for NetworkManager is written in the '/run/NetworkManager/resolv.conf' file.
sudo systemctl restart NetworkManager
Run the below command to remove the default file '/etc/resolve.conf'. Then, create a new symlink file of '/run/NetworkManager/resolv.conf' to '/etc/resolv.conf'.
rm -f /etc/resolv.conf
ln -s /run/NetworkManager/resolv.conf /etc/resolv.conf
With this, your client machine is now using the systemd-resolved as the DNS resolver. Behind the 'systemd-resolved', you're using the Unbound DNS Server.
Below is the details of '/etc/resolv.conf' file after using the systemd-resolved and NetworkManager.
cat /etc/resolv.conf
Output:
Verifying Unbound DNS Server
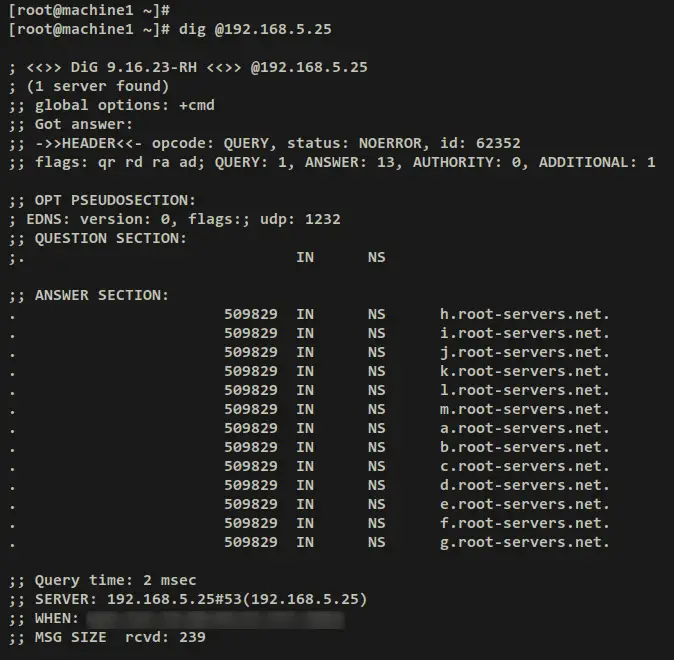
Run the dig command below to ensure that the Unbound DNS is working as a DNS resolver. The parameter '@192.168.5.25' ensures that you're using an Unbound DNS server that runs on IP address '192.168.5.25'.
dig @192.168.5.25
When successful, you receive an answer from the root DNS server like the below output. Also, you'll notice the 'ad' (authentic data) flag in the header output, which means the DNSSEC is enabled.
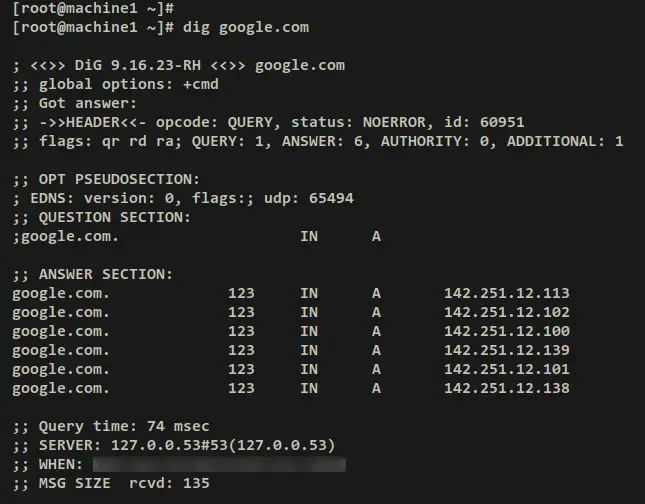
Next, run the below command to ensure that clients can access domain names on the internet.
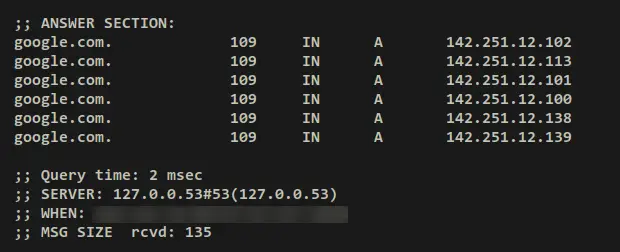
dig google.com
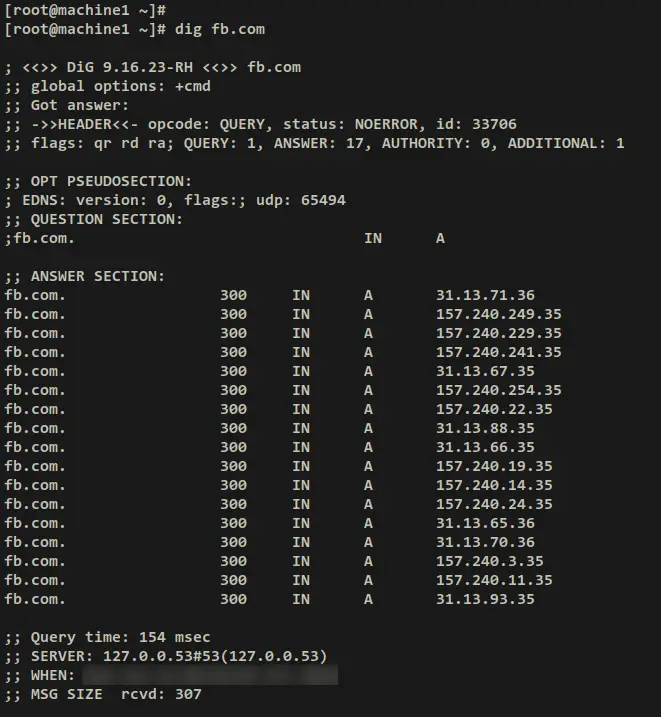
dig fb.com
When successful, you should receive an output details DNS record for the domain 'google.com' and 'fb.com'. You can see the DNS resolver that answers the query is '127.0.0.53#53', which is the systemd-resolved that uses Unbound as the default resolver. Also, you can see the 'Query time' for each query, the 'Query time' to domain 'google.com' is '74ms' and to 'fb.com' is '154ms'.
Output for google.com:
Output for fb.com:
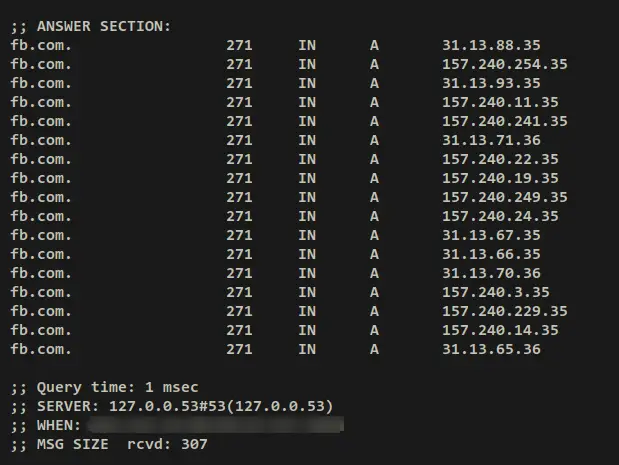
If you rerun the dig command on top, the 'Query time' should be reduced. And this confirms that your queries have been cached, and the DNS cache is working.
dig google.com
dig fb.com
Output:
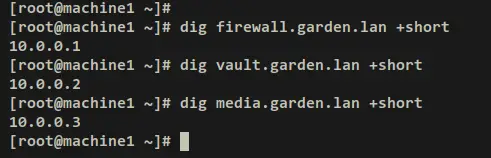
Next, verify the local domain or sub-domain via the dig command below. If successful, each sub-domains will be pointed to the correct IP address as configured on the Unbound config file '/etc/unbound/unbound.conf'.
dig firewall.garden.lan +short
dig vault.garden.lan +short
dig media.garden.lan +short
Output:
Now run the below dig command to ensure that PTR records are pointed to the correct domain name.
dig -x 10.0.0.1 +short
dig -x 10.0.0.2 +short
dig -x 10.0.0.3 +short
Output:

Lastly, you can also verify DoT (DNS over TLS) via tcpdump. Install the 'tcpdump' package to your Unbound server via the dnf command below.
sudo dnf install tcpdump
Input y when prompted and press ENTER to proceed.

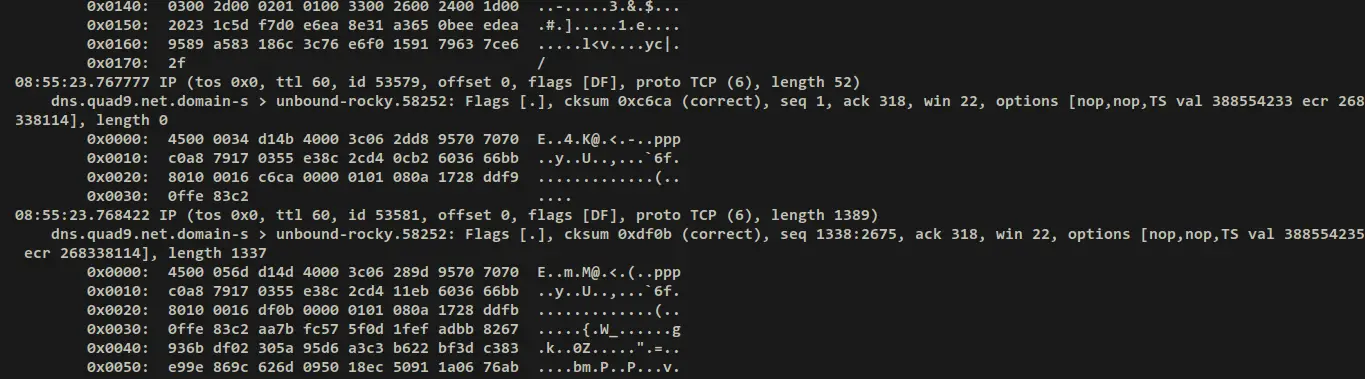
Now run the below tcpdump command to monitor traffics on the interface 'eth0' with DoT port 853. In this example, the Unbound DNS is running on IP address '192.168.5.25' with the interface 'eth0'.
tcpdump -vv -x -X -s 1500 -i eth0 'port 853'
Move to the client machine and run the below command to access external/internet domain names via the dig command below.
dig twitter.com
Output:

After that, move back to the Unbound server and you should now get an output similar to this on the tcpdump output.
With this, you've now installed and configured Local DNS Server via Unbound. Also, you've configured a DNS resolver on RHEL clients via systemd-resolved and NetworkManager.
Conclusion
In this guide, you've installed Unbound Local DNS Server on a Rocky Linux 9 server. You've enabled DNS cache, DNSSEC (enabled by default), configure private-address and ACLs, added local domain via local-zone, then configured Unbound as DNS resolver with DoT (DNS-over-TLS).
In addition to that, you've configured basic DNS privacy and security, optimized Unbound, and configured Unbound logs via rsyslog and logrotate.
To the end of this guide, you've also learned how to set up a DNS resolver on RHEL-based distributions via NetworkManager and systemd-resolved. And also learned the basic usage of the dig command for checking the DNS server.

