How to Install a CockroachDB Cluster on AlmaLinux 9
On this page
- Prerequisite
- Setting Up FQDN
- Downloading and Installing CockroachDB
- Setting up Firewalld
- Generating SSL/TLS Certificates
- Running CockroachDB as Systemd Service
- Initializing CockroachDB Cluster
- Creating Admin User on CockroachDB
- Basic Operation on CockroachDB
- Checking Database Replication in CockroachDB Cluster
- Conclusion
CockroachDB is an open-source distributed and scalable SQL database for cloud applications. CockroachDB provides next-level consistency, replicated SQL database, and a transactional data store. CockroachDB stores your data in multiple locations making data delivery faster. Also, it's easy to scale and provides high availability and fault tolerance for your applications.
This guide shows you how to install and create a CockroachDB cluster on multiple AlmaLinux 9 servers. You will also learn the basic queries using CockroachDB and verifying the automatic replication of your databases.
Prerequisite
Before you begin, ensure you have the following:
- Two or more AlmaLinux 9 servers - In this demo, we'll use two servers: srv1 with IP address 192.168.10.20 and srv2 with IP address 192.168.10.21.
- A non-root user can execute the sudo command to get root privileges.
Setting Up FQDN
The first step you will do is to set up fqdn (fully qualified domain name) for all of your servers and ensure that each fqdn is pointed to the proper local IP address.
On srv1, run the following command to set up the fqdn to srv1.hwdomain.lan.
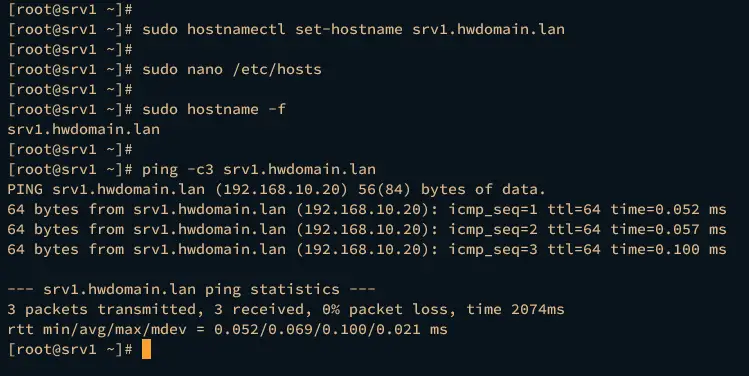
sudo hostnamectl set-hostname srv1.hwdomain.lan
For the srv2, run the following command to set up the fqdn srv2.hwdomain.lan.
sudo hostnamectl set-hostname srv2.hwdomain.lan
Now open the file /etc/hosts using the following nano editor command.
sudo nano /etc/hosts
Insert the following configuration to the bottom of the line.
```ini
192.168.10.20 srv1.hwdomain.lan srv1
192.168.10.21 srv2.hwdomain.lan srv2
```
Save and exit the file after finished.
Lastly, run the following command to verify the fqdn of each server and execute the ping command to ensure that each fqdn is pointed to the proper internal IP address.
sudo hostname -f
ping -c3 srv1.hwdomain.lan
ping -c3 srv2.hwdomain.lan
The srv1 server should have the fqdn srv1.hwdomain.lan and pointed to IP address 192.168.10.20, while the srv2 server configured with fqdn srv2.hwdomain.lan and the IP address 192.168.10.21.
Downloading and Installing CockroachDB
CockroachDB can be installed on multiple environments, you can install it traditionally by downloading the pre-built binary package of CockroachDB or installing it in a containerized environment such as Kubernetes.
In this section, you will install CockroachDB via a pre-built binary package to your AlmaLinux 9 servers.
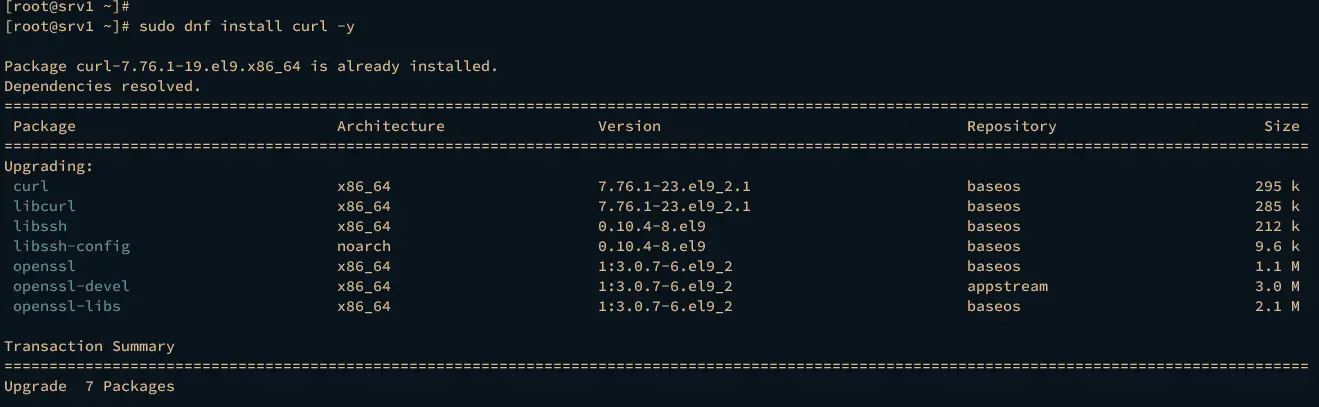
First, install curl using the dnf command below.
sudo dnf install curl -y
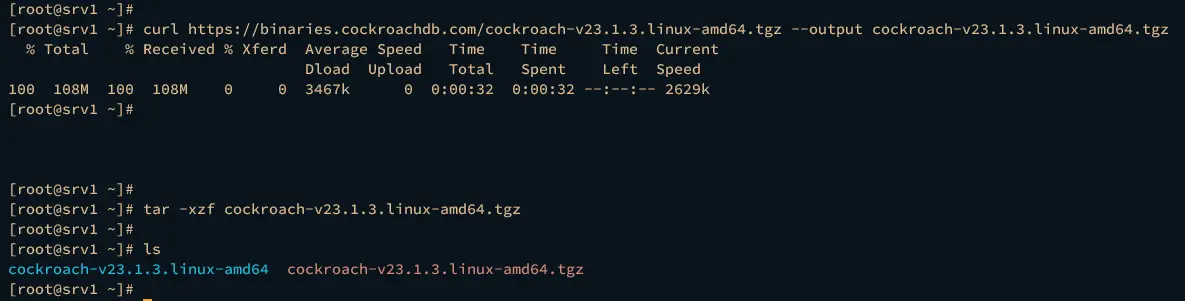
Now run the command below to download the CockroachDB binary package and extract it via the tar command.
curl https://binaries.cockroachdb.com/cockroach-v23.1.3.linux-amd64.tgz --output cockroach-v23.1.3.linux-amd64.tgz
tar -xzf cockroach-v23.1.3.linux-amd64.tgz
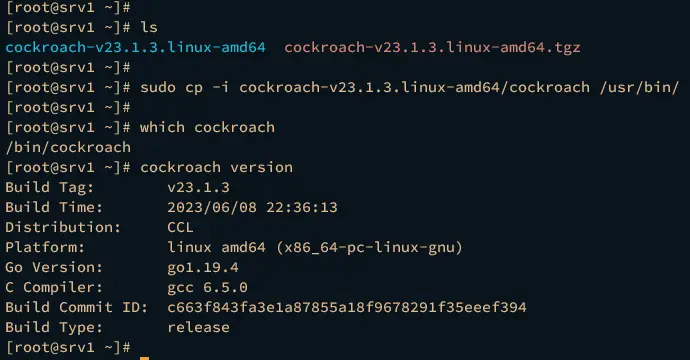
Move the CockroachDB binary file cockroach-v23.1.3.linux-amd64/cockroach to the /usr/bin/ directory using the command below.
sudo cp -i cockroach-v23.1.3.linux-amd64/cockroach /usr/bin/
Lastly, enter the following command to verify the full path of the cockroach binary file and the CockroachDB version.
which cockroach
cockroach version
Setting up Firewalld
After installing CockroachDB, you will set up the firewalld and open port 8080 for the CockroachDB web administration dashboard and port 26257 for the cluster connection.
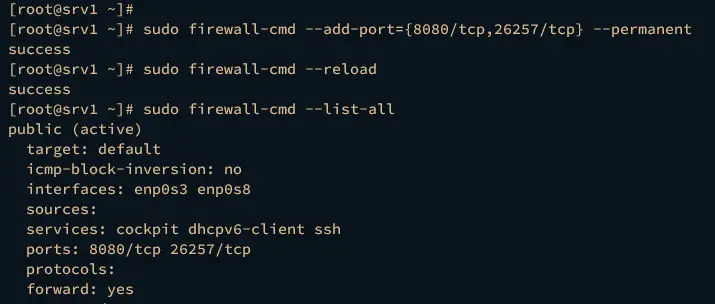
Run the firewall-cmd command below to add ports 8080 and 26257 to the firewalld. Then reload the firewalld to apply the changes.
sudo firewall-cmd --add-port={8080/tcp,26257/tcp} --permanent
sudo firewall-cmd --reload
Now verify the list of firewalld rules using the command below. You should see that port 8080 and 26257 is added to the firewalld.
sudo firewall-cmd --list-all
Generating SSL/TLS Certificates
In the following section, you will be generating multiple certificates that will be used for the CockroachDB cluster. This can be achieved via OpenSSL, but also you can use the cockroach command-line tool.
Below are some SSL/TLS certificates that you will be generating:
- CA certificates: This will be used to sign all of your certificates.
- Client certificates: This can be used to connect to the CockroachDB cluster.
- Node certificates: You must create node certificates for each server to create a secure CockroachDB cluster.
Generating CA Certificates
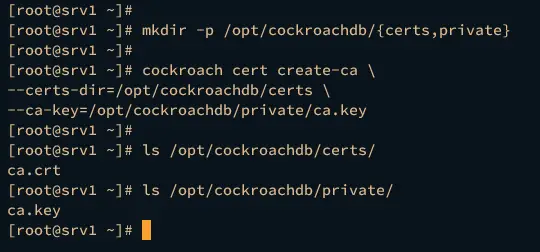
Run the following command on both the srv1 and srv2 servers to create a new directory /opt/cockroachdb/. Within that directory, you will also create directories certs and private.
mkdir -p /opt/cockroachdb/{certs,private}
On the srv1, run the cockroach command below to generate the CA certificates. This will generate CA certificate ca.crt and ca.key.
cockroach cert create-ca \
--certs-dir=/opt/cockroachdb/certs \
--ca-key=/opt/cockroachdb/private/ca.key
Now run the scp command below to copy CA certificates ca.crt and ca.key to the srv2 server.
scp /opt/cockroachdb/private/ca.key [email protected]:/opt/cockroachdb/private/
scp /opt/cockroachdb/certs/ca.crt [email protected]:/opt/cockroachdb/certs/

Generating Client Certificates
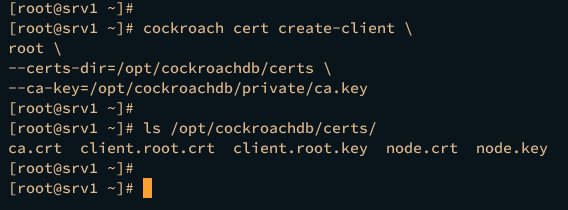
On the srv1 server, run the following command to generate the client certificate for the default user root. This will generate two certificates client.root.crt and client.root.key that can be used to log in to the CockroachDB cluster.
cockroach cert create-client \
root \
--certs-dir=/opt/cockroachdb/certs \
--ca-key=/opt/cockroachdb/private/ca.key
Generating Node Certificate
After CA certificates are generated and uploaded to the srv2 server, you will be generating node certificates on both the srv1 and srv2 servers.
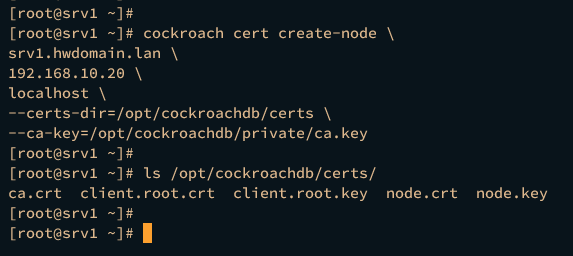
Run the following command on the srv1 server to generate the certificate node. Be sure to change the fqdn and the IP address of the srv1 server.
cockroach cert create-node \
srv1.hwdomain.lan \
192.168.10.20 \
localhost \
--certs-dir=/opt/cockroachdb/certs \
--ca-key=/opt/cockroachdb/private/ca.key
After the command is executed, the node certificate node.crt and node.key will be available.
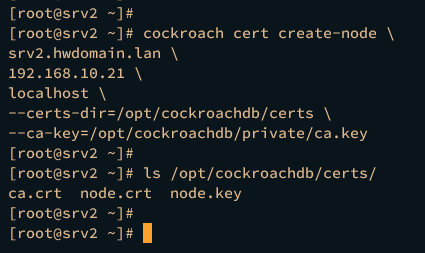
Now run the command below on the srv2 server to generate node certificates. Be sure to change the fqdn and IP address of the srv2 server.
cockroach cert create-node \
srv2.hwdomain.lan \
192.168.10.21 \
localhost \
--certs-dir=/opt/cockroachdb/certs \
--ca-key=/opt/cockroachdb/private/ca.key
You should see node certificate node.crt and node.key generated.
Running CockroachDB as Systemd Service
After generating SSL/TLS certificates, you next will start the CockroachDB service. You can start CockroachDB via the command line manually, but the recommended method is by using the systemd service.
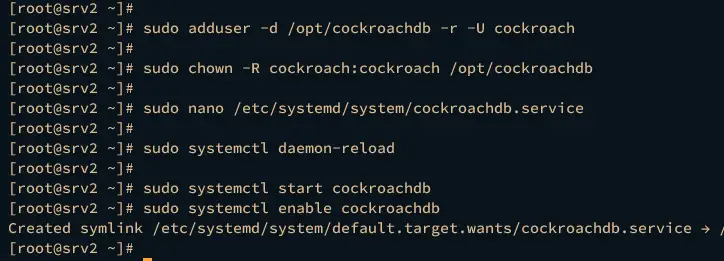
First, run the following command on both the srv1 and srv2 servers to create a new user cockroach and change the ownership of /opt/cockroachdb directory to the user cockroach.
sudo adduser -d /opt/cockroachdb -r -U cockroach
sudo chown -R cockroach:cockroach /opt/cockroachdb
On the srv1 server, run the nano command below to create a new systemd service file /etc/systemd/system/cockroachdb.service.
sudo nano /etc/systemd/system/cockroachdb.service
Insert the following configuration and be sure to change the --advertise-addr parameter with the srv1 server IP address.
[Unit]
Description=Cockroach Database cluster node
Requires=network.target

[Service]
Type=notify
WorkingDirectory=/opt/cockroachdb
ExecStart=/usr/bin/cockroach start --certs-dir=/opt/cockroachdb/certs --advertise-addr=192.168.10.20 --join=192.168.10.20,192.168.10.21
TimeoutStopSec=60
Restart=always
RestartSec=10
StandardOutput=syslog
StandardError=syslog
SyslogIdentifier=cockroach
User=cockroach

[Install]
WantedBy=default.target
Save the file and exit the editor when finished.
Now move to the srv2 server and create a new systemd service file /etc/systemd/system/cockroachdb.service using nano editor.
sudo nano /etc/systemd/system/cockroachdb.service
Add the following configuration to the file and be sure to change the --advertise-addr parameter to the srv2 server IP address.
[Unit]
Description=Cockroach Database cluster node
Requires=network.target

[Service]
Type=notify
WorkingDirectory=/opt/cockroachdb
ExecStart=/usr/bin/cockroach start --certs-dir=/opt/cockroachdb/certs --advertise-addr=192.168.10.21 --join=192.168.10.20,192.168.10.21
TimeoutStopSec=60
Restart=always
RestartSec=10
StandardOutput=syslog
StandardError=syslog
SyslogIdentifier=cockroach
User=cockroach

[Install]
WantedBy=default.target
Save the file and exit the editor when finished.
Next, run the systemctl command below to reload the systemd manager and apply the new systemd service.
sudo systemctl daemon-reload
Then, start and enable the cockroachdb service using the systemctl command below.
sudo systemctl start cockroachdb
sudo systemctl enable cockroachdb
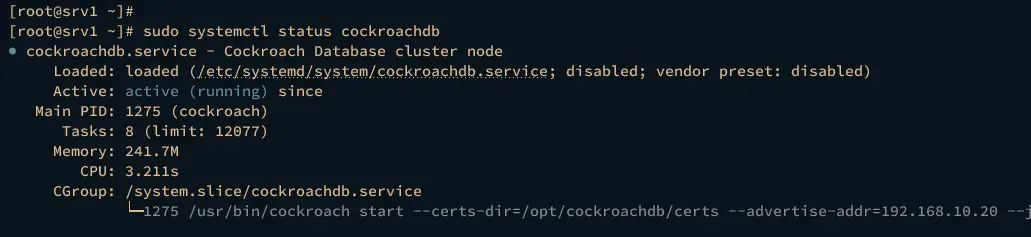
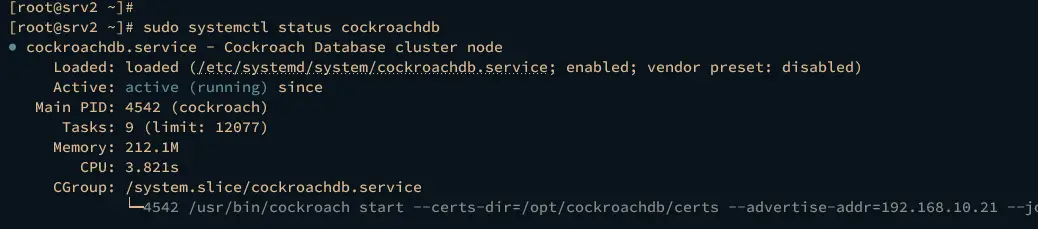
Lastly, verify the cockroachdb service to ensure that the service is running.
sudo systemctl status cockroachdb
If the configuration is successful, you should get the cockroachdb service status active (running).
The cockroachdb service status on the srv1 server.
The cockroachdb service status on the srv2 server.
Initializing CockroachDB Cluster
After starting the CockroachDB as a systemd service on the srv1 and srv2 servers, you're ready to initialize the CockroachDB cluster.
Run the cockroach command below on the srv1 server to initialize the CockroachDB cluster.
cockroach init --certs-dir=/opt/cockroachdb/certs --host=192.168.10.20:26257
If the initialization is successful, you should get an output "Cluster successfully initialized".
Now run the command below to check the CockroachDB logs in the CockroachDB data directory /opt/cockroachdb/cockroach-data/.
grep 'node starting' /opt/cockroachdb/cockroach-data/logs/cockroach.log -A 11
If you get the output such as "CockroachDB node starting..", it means the CockroachDB cluster is successfully initialized.

Lastly, run the following command to check the list of nodes on the CockroachDB cluster and the detailed status of each node.
cockroach node --certs-dir=/opt/cockroachdb/certs --host=192.168.10.20 ls
cockroach node --certs-dir=/opt/cockroachdb/certs --host=192.168.10.20 status
You should see two CockroachDB servers in the cluster with the status alive and available.

Creating Admin User on CockroachDB
With the CockroachDB cluster running, the next step is to create an admin user for the CockroachDB cluster.
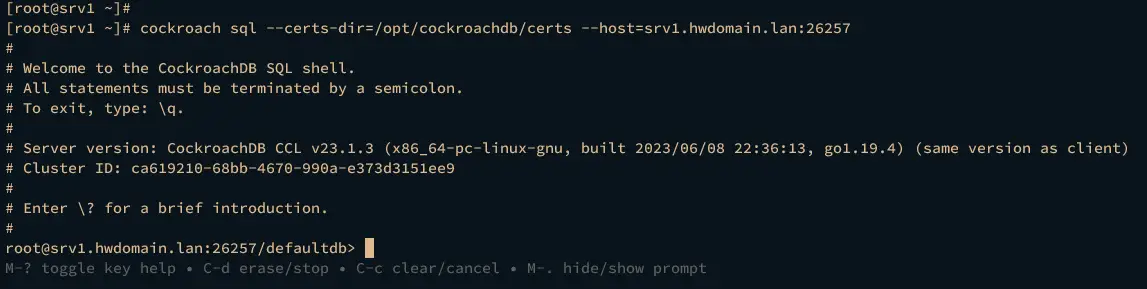
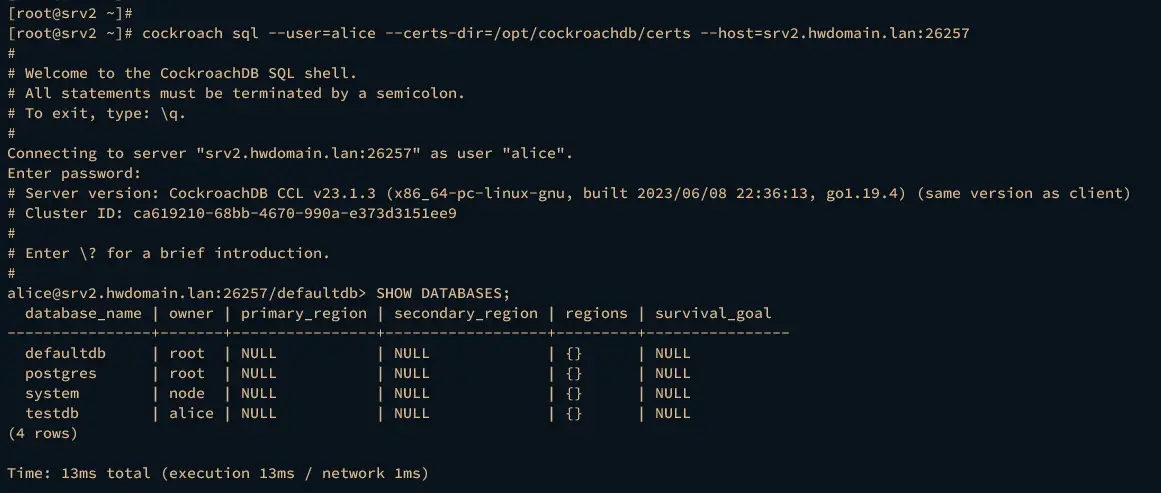
First, run the cockroach command below to connect to the CockroachDB server srv1.hwdomain.lan with the default user root and certificates within /opt/cockroachdb/certs directory.
cockroach sql --certs-dir=/opt/cockroachdb/certs --host=srv1.hwdomain.lan:26257
In the CockroachDB prompt below, it's confirmed that you've connected as the default root user to the CockroachDB server srv1.hwdomain.lan and the database defaultdb.
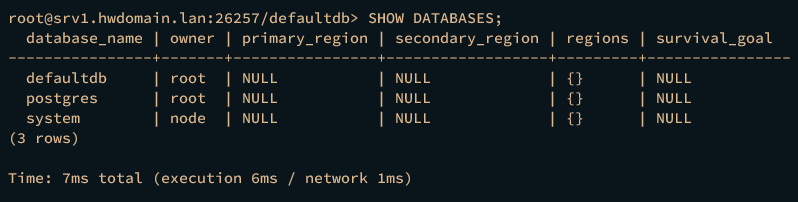
Now run the following query to list available databases on the CockroachDB cluster.
SHOW DATABASES;
You should see the database defaultdb, postgres, and system on your CockroachDB cluster.
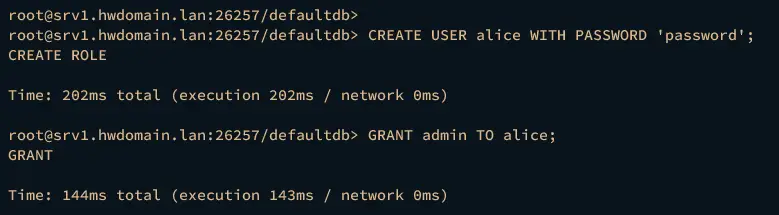
Next, run the following query to create a new user alice. Then, grant the alice user admin privileges. Do not forget to change the password in the below query.
CREATE USER alice WITH PASSWORD 'password';
GRANT admin TO alice;
Now type quit or press Ctrl+d to quit from the CockroachDB shell.
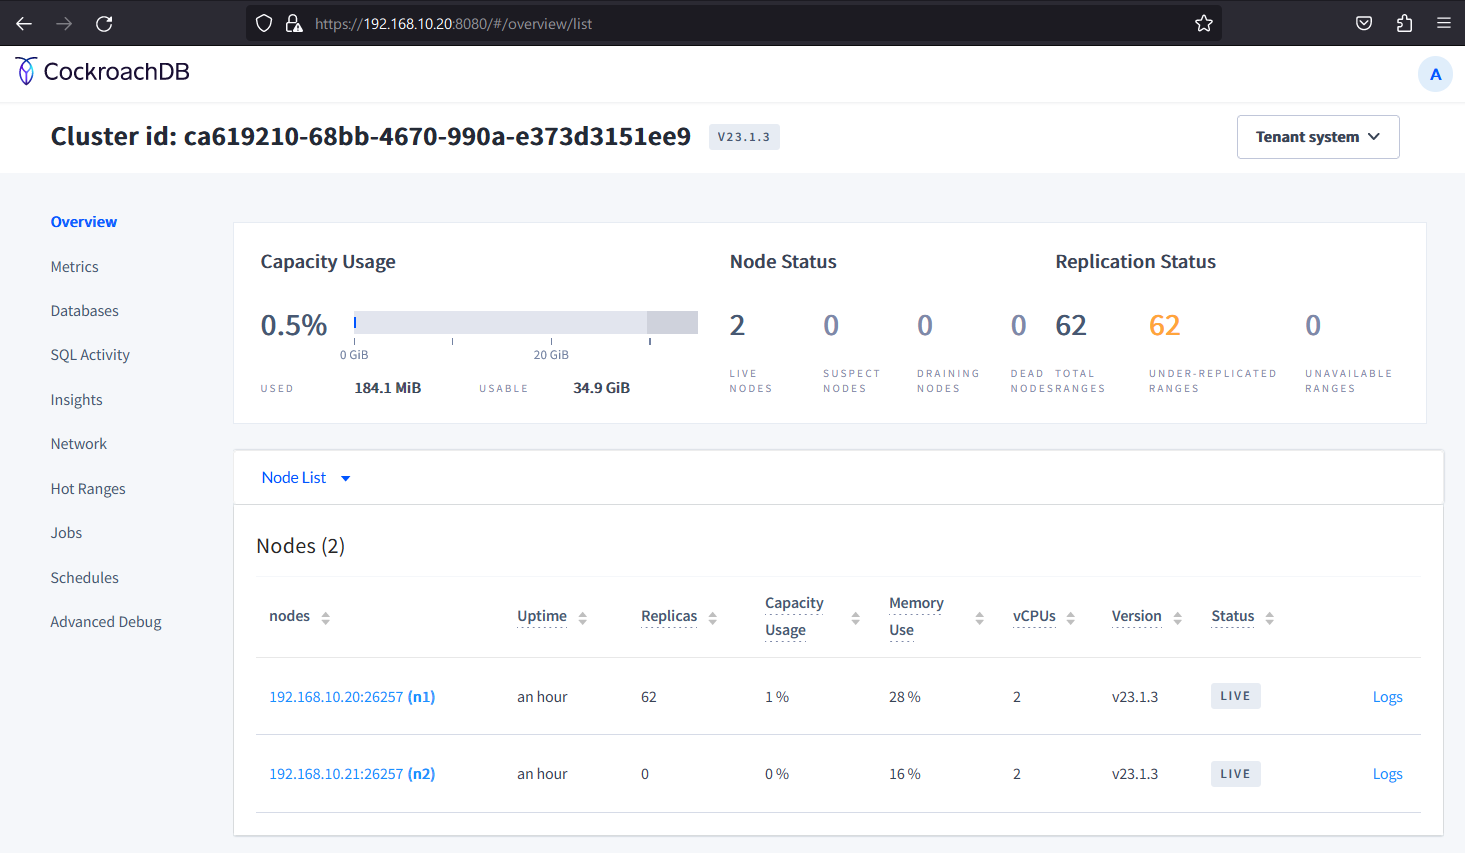
Lastly, launch your web browser and visit the srv1 IP address followed by port 8080 (i.e: http://192.168.10.20:8080/) to access the CockroachDB web administration dashboard. You should be prompted for the CockroachDB authentication.
Input the user alice and the password, then click Log in.
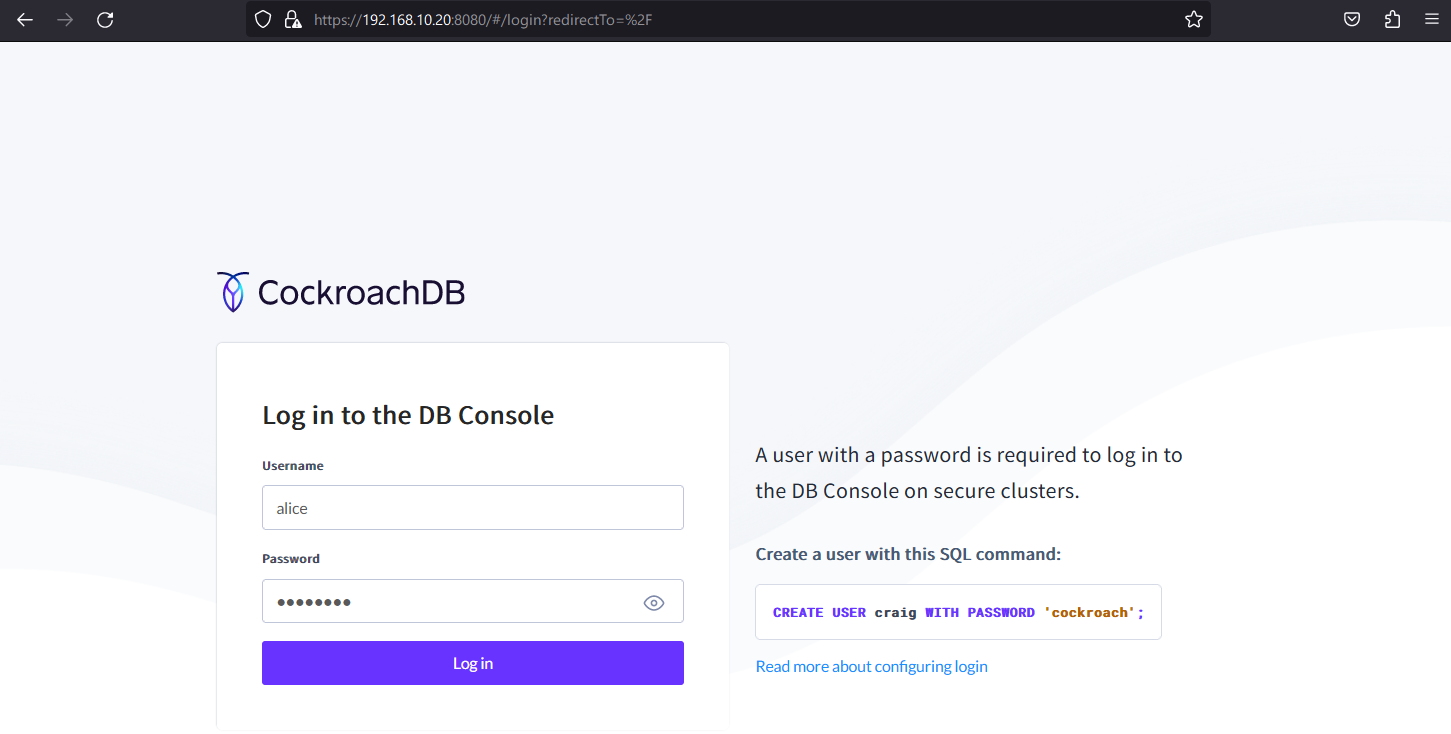
If you have the proper user and password, you should get the CockroachDB administration dashboard. You should CockroachDB cluster has two servers, 192.168.10.20 and 192.168.10.21.
Basic Operation on CockroachDB
In the following section, you will learn how to create a new database and table, inserting and retrieving data on CockroachDB. The following command will be run on the srv1 server.
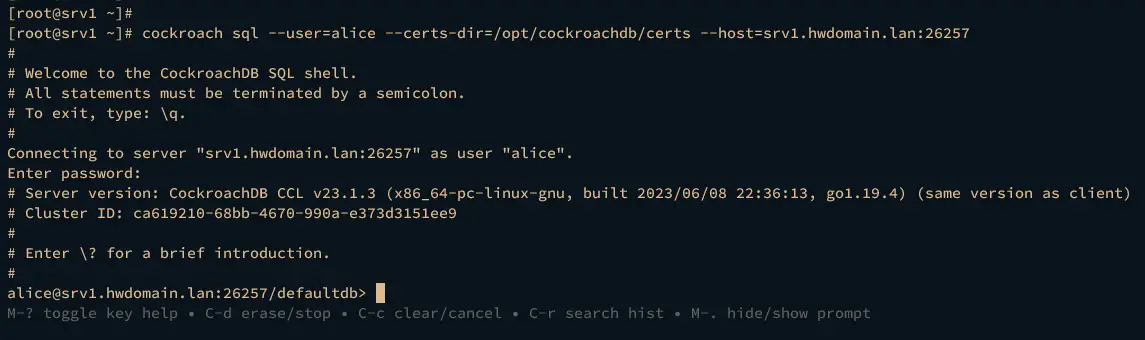
First, run the following command to log in to the CockroachDB cluster via user alice.
cockroach sql --user=alice --certs-dir=/opt/cockroachdb/certs --host=srv1.hwdomain.lan:26257
When prompted for the password, input the password for user alice.
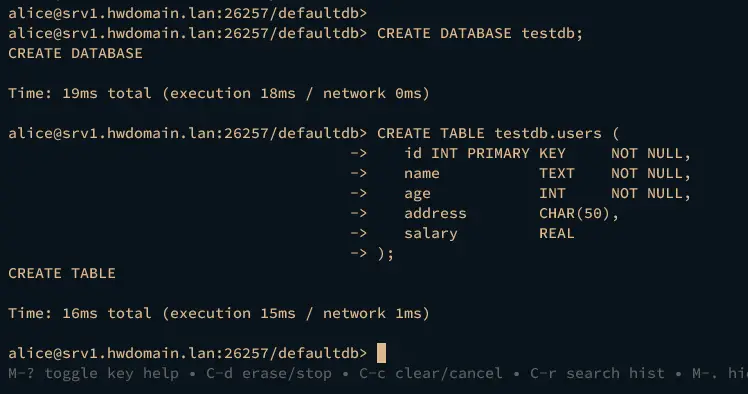
Once logged in, run the following queries to create a new database testdb with the table users.
CREATE DATABASE testdb;
CREATE TABLE testdb.users (
   id INT PRIMARY KEY     NOT NULL,
   name           TEXT    NOT NULL,
   age            INT     NOT NULL,
   address        CHAR(50),
   salary         REAL
);
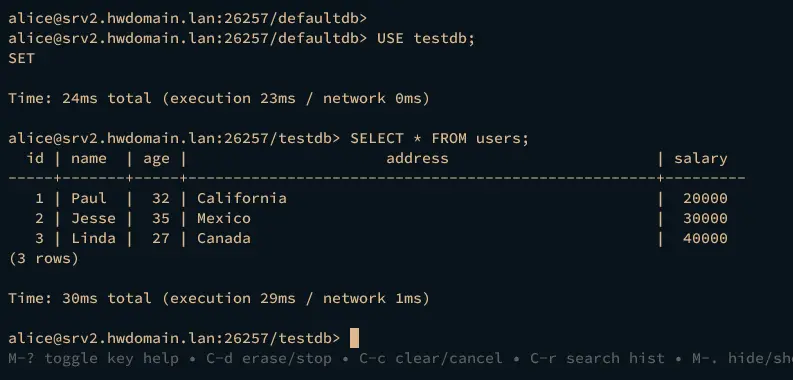
Now run the USE query to switch to the database testdb and run some INSERT query below to add new data to the table users.
USE testdb;
INSERT INTO users (id,name,age,address,salary) VALUES (1, 'Paul', 32, 'California', 20000.00);
INSERT INTO users (id,name,age,address,salary) VALUES (2, 'Jesse', 35, 'Mexico', 30000.00);
INSERT INTO users (id,name,age,address,salary) VALUES (3, 'Linda', 27, 'Canada', 40000.00);

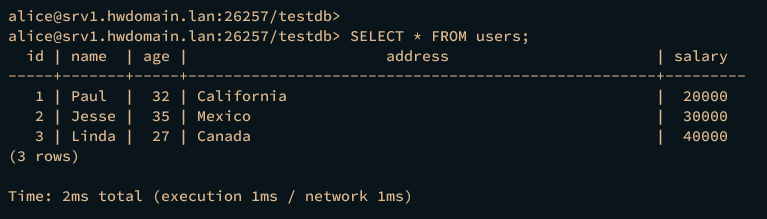
Lastly, execute the SELECT query below to retrieve your data from the table users.
SELECT * FROM users;
Your data should be printed on your terminal screen.
Checking Database Replication in CockroachDB Cluster
After creating a new database and inserting new data, you will now verify the database replication on the CockroachDB cluster from the srv2 server, so be sure to run these commands on the srv2 server.
On the srv2 server, run the following command to connect to the CockroachDB server via user alice.
cockroach sql --user=alice --certs-dir=/opt/cockroachdb/certs --host=srv2.hwdomain.lan:26257
Input the password for user alice when prompted.
Once logged in, run the following query to check the list of available databases on the CockroachDB cluster.
SHOW DATABASES;
If database replication is successful, you should get the database testdb available on the srv2 server.
Now run the following queries to switch to the database testdb and retrieve available data from the table users.
USE testdb;
SELECT * FROM users;
If the replication succeeds, you should see your data on the srv2 server.
Conclusion
Congratulations and well done! You've completed the installation of the CockroachDB cluster on your AlmaLinux 9 servers. You have created a secure CockroachDB cluster with SSL/TLS certificates and running CockroachDB as a systemd service in the background. Furthermore, you have also learned some basic queries for creating an admin user, and database and inserting and retrieving data on CockroachDB.
With this in mind, you can now start migrating to the CockroachDB cluster and your database will automatically be replicated to multiple nodes.

