Guide to Install Matomo Web Analytics on AlmaLinux 9
Matomo, formerly Piwik, is free and open-source web analytics software that can track website visits and display reports for data and audience analysis. Matomo is licensed under GPL License. It's written in PHP and can be run with MySQL or MariaDB database server.
Matomo provides insightful reports for user tracking on your websites. This includes the referrer search engine and the keywords, languages, page visits like file visitors downloads, and many more. Matomo is becoming more and more popular as an alternative to analytics services such as Google Analytics.
The following tutorial shows you how to install Matomo web analytics on AlmaLinux 9 server. I will install Matomo with the Httpd web server, PHP, and MariaDB database. I will also secure Matomo with SSL/TLS certificates via Letsencrypt.
Prerequisites
Ensure you have the following to start Matomo installation:
- An AlmaLinux 9 server - This example uses a server with the hostname alma9.
- A non-root user with root administrator privileges.
- A domain name pointed to the server IP address.
Installing and Configuring MariaDB
Matomo required the MySQL or MariaDB database server to be installed, and in this case, you will be using the MariaDB server. The following steps will show you how to install the MariaDB database server, secure the MariaDB installation, and how to create a new database and user for your Matomo installation.
Instaling MariaDB
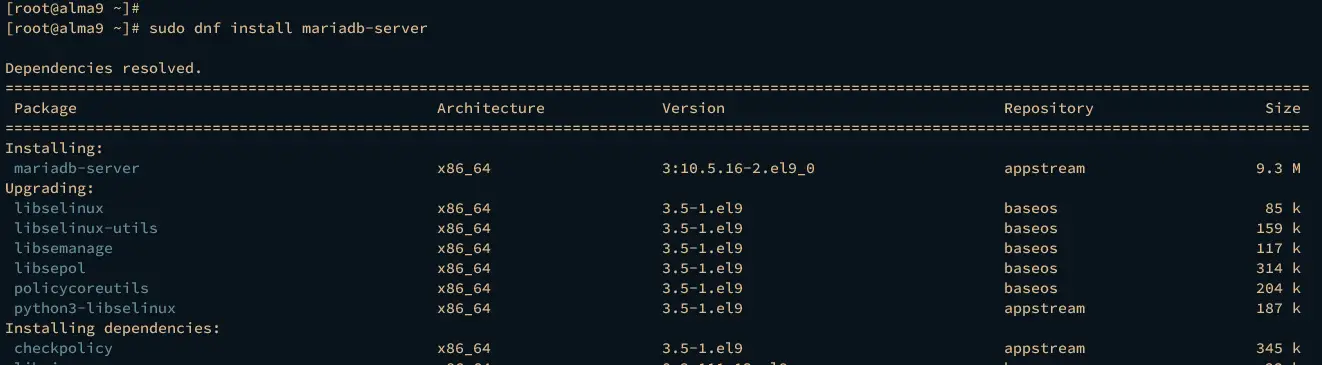
By default, the AlmaLinux appstream repository provides the MariaDB packages. You can easily install MariaDB via DNF without the need for a third-party repository.
First, run the dnf command below to install the MariaDB database server. Then, input y to confirm the installation and press ENTER.
sudo dnf install mariadb-server
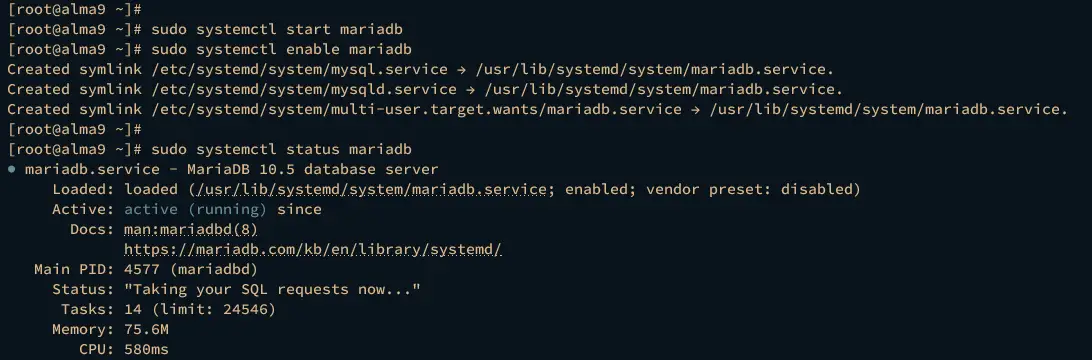
After installing the MariaDB server, execute the following systemctl commands to start and enable the MariaDB server. Enabling the MariaDB server, allow the service to run automatically during the system startup.
sudo systemctl start mariadb
sudo systemctl enable mariadb
Now verify the MariaDB server status to ensure that the service is running. And if running, you should get an output active (running) on your terminal.
sudo systemctl status mariadb
Securing MariaDB Deployment
After MariaDB is installed and running, you will next secure the installation by setting up the root password, disable remote login for the root user, and removing the default database test and anonymous user. Those can be done via the mariadb-secure-installation utility.
To secure the MariaDB server, run the utility mariadb-secure-installation on your terminal.
sudo mariadb-secure-installation
During the process, you can input Y to apply the configuration or n for No. Below are some MariaDB server settings that you will be prompted:
- When asked to provide the MariaDB root password, press ENTER.
- Input n to skip the configuration of unix_socket authentication.
- Input Y to set up the MariaDB root password, then type your new password and repeat it.
- Input Y to disable the remote login from the MariaDB root user.
- Input Y to remove the default anonymous user from your MariaDB server.
- Then, input Y again to remove the default database test.
- Lastly, input Y to reload table privileges and apply the changes.
Creating New Database and User
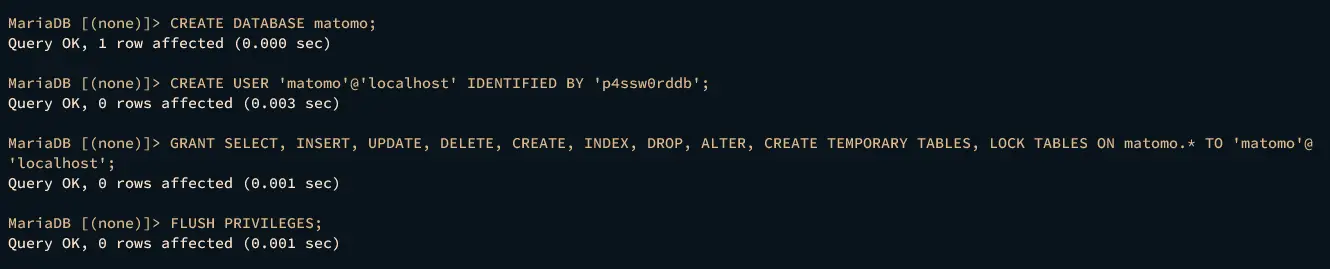
Now that you have secure MariaDB running, the next step will be creating a new MariaDB database and user for the Matomo installation. You must log in to the MariaDB server via the MariaDB client utility.
Log in to the MariaDB shell via the mariadb client command below. When prompted for the password, input your MariaDB root password.
sudo mariadb -u root -p
After logging in, run the following queries to create a new database and user for Matomo installation. In this demo, you will create a new database and user matomo, and be sure to replace the password p4ssw0rddb with a new strong password.
CREATE DATABASE matomo;
CREATE USER 'matomo'@'localhost' IDENTIFIED BY 'p4ssw0rddb';
GRANT SELECT, INSERT, UPDATE, DELETE, CREATE, INDEX, DROP, ALTER, CREATE TEMPORARY TABLES, LOCK TABLES ON matomo.* TO 'matomo'@'localhost';
FLUSH PRIVILEGES;
Now run the following query to ensure that the user matomo is available on the MariaDB server and has privileges to the database matomo.
SHOW GRANTS FOR 'matomo'@'localhost';
Lastly, type quit to exit from the MariaDB shell.

Installing Httpd Web Server and PHP 8.1
Matomo is mainly written in PHP, at this time, it required at least PHP 8.x. In the following section, you will be installing the httpd web server and PHP 8.1 packages via the AlmaLinux appstream repository. And after that, you will be configuring PHP.
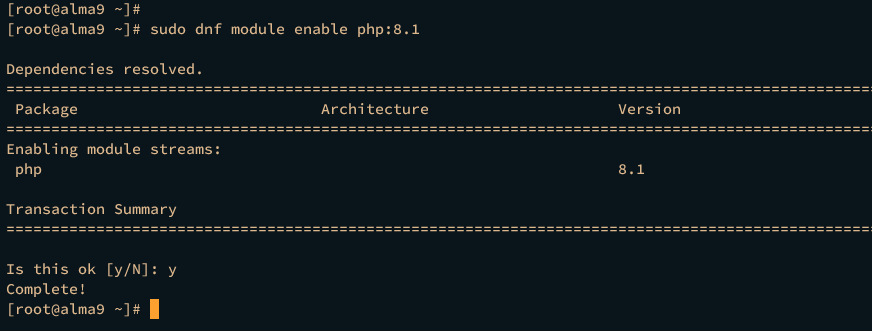
Before installing PHP packages, select the default PHP version to PHP 8.1. In RHEL-based distribution, this is called a repository module, and the default AlmaLinux repository provides two versions of PHP 8.0 and 8.1 packages.
sudo dnf module enable php:8.1
Input y when prompted to confirm.
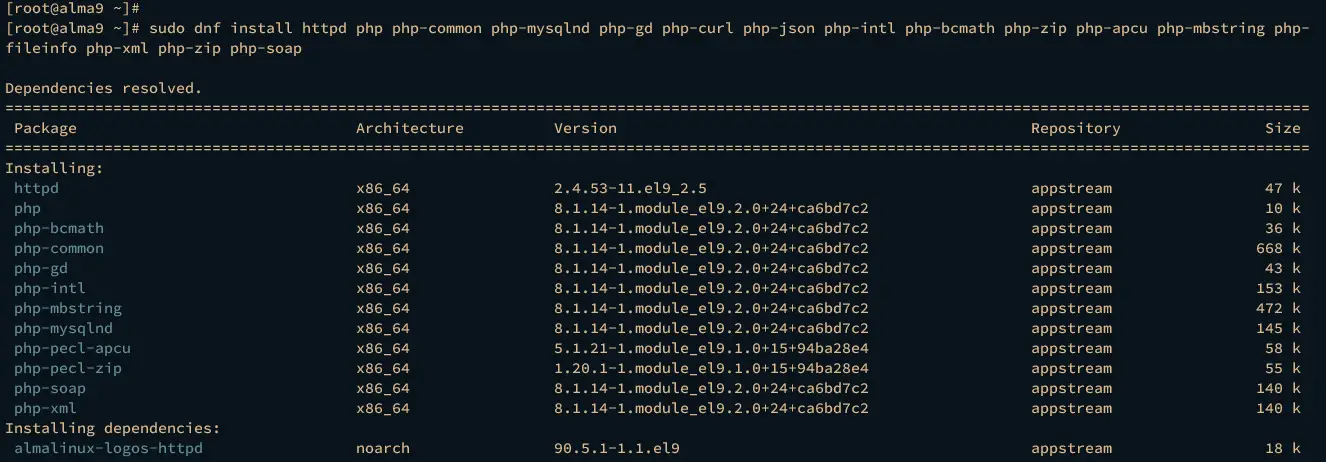
Now run the dnf command below to install your system's httpd web server and PHP packages. Type y to confirm the installation and press ENTER.
sudo dnf install httpd php php-common php-mysqlnd php-gd php-curl php-json php-intl php-bcmath php-zip php-apcu php-mbstring php-fileinfo php-xml php-zip php-soap
After installing httpd and PHP, execute the following systemctl commands to start and enable the httpd web server. This will run the httpd web server on default port 80, enabling it to run automatically at boot.
sudo systemctl start httpd
sudo systemctl enable httpd
Now verify the httpd web server status using the command below. If the httpd web server is running, you should get an output active (running).
sudo systemctl status httpd

At this point, you have installed the httpd web server and PHP packages. Now you will be configuring PHP as needed for the Matomo installation.
Open the default PHP configuration /etc/php.ini using the following nano editor.
sudo nano /etc/php.ini
Uncomment the following options and change the value accordingly. These options depend on your AlmaLinux machine.
date.timezone = Europe/Stockholm
memory_limit = 256M
upload_max_filesize = 16M
max_execution_time = 300
Save and close the file when finished.
Now execute the systemctl command below to restart the httpd web server and apply the changes.
sudo systemctl restart httpd
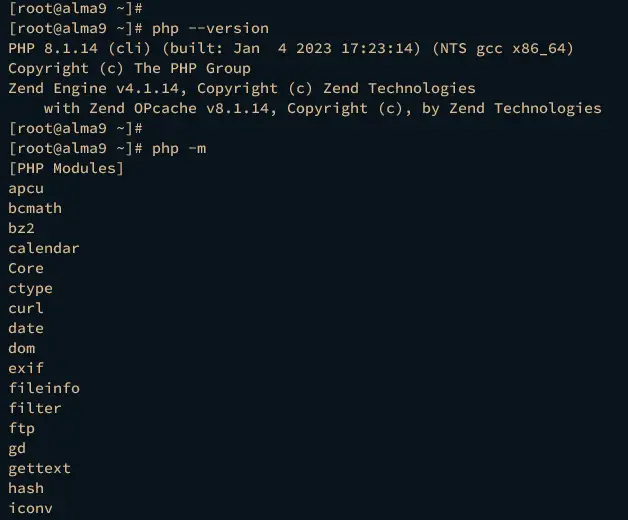
Verify the PHP version and available modules by executing the command below.
php --version
php -m
You should get PHP 8.1 installed on your system and some enabled modules such as apcu, curl, and gd.
Downloading Matomo Source Code
At this point, most required packages are installed and running. Now you will download the Matomo source code and set up the Matomo document root directory with proper ownership.
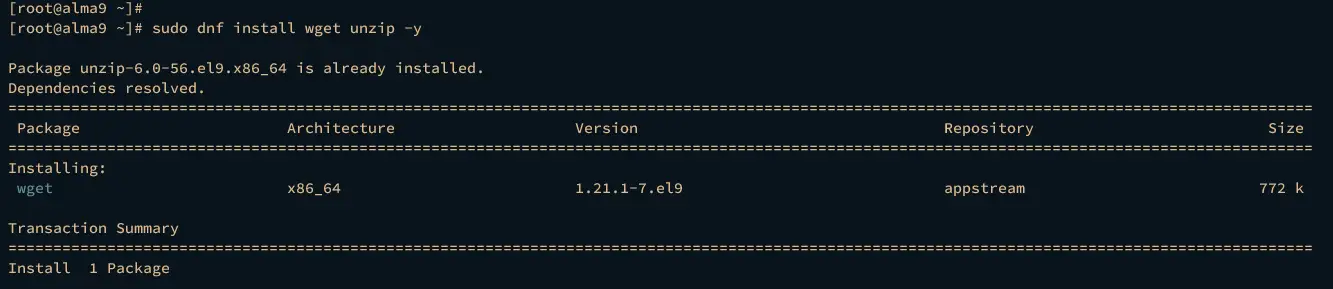
Before downloading the Matomo source code, run the dnf command below to install wget and unzip to your system.
sudo dnf install wget unzip -y
Now move to the /var/www directory and execute the wget command below to download the Matomo source code. Once the source code is downloaded, you should see the file matomo.zip.
cd /var/www
wget https://builds.matomo.org/matomo.zip
After that, run the unzip command below to extract the file matomo.zip. Once the matomo.zip file is extracted, you should get the new directory matomo, and this will be the document root for your Matomo installation.
unzip matomo.zip
Lastly, run the chmod command below to change the ownership of the /var/www/matomo directory to the apache user and group. This allows the httpd web server and PHP to access the Matomo source code.
sudo chown -R apache:apache /var/www/matomo
Then run again the following command to set up proper permission for the source code.
find /var/www/matomo/tmp -type f -exec chmod 644 {} \;
find /var/www/matomo/tmp -type d -exec chmod 755 {} \;
find /var/www/matomo/tmp/assets/ -type f -exec chmod 644 {} \;
find /var/www/matomo/tmp/assets/ -type d -exec chmod 755 {} \;
find /var/www/matomo/tmp/cache/ -type f -exec chmod 644 {} \;
find /var/www/matomo/tmp/cache/ -type d -exec chmod 755 {} \;
find /var/www/matomo/tmp/logs/ -type f -exec chmod 644 {} \;
find /var/www/matomo/tmp/logs/ -type d -exec chmod 755 {} \;
find /var/www/matomo/tmp/tcpdf/ -type f -exec chmod 644 {} \;
find /var/www/matomo/tmp/tcpdf/ -type d -exec chmod 755 {} \;
find /var/www/matomo/tmp/templates_c -type f -exec chmod 644 {} \;
find /var/www/matomo/tmp/templates_c -type d -exec chmod 755 {} \;
Configuring Httpd Virtual Host
In the following section, you will create a new httpd virtual host configuration for running the Matomo web application. Before that, ensure that your domain name is pointed to your server IP address and configured properly.
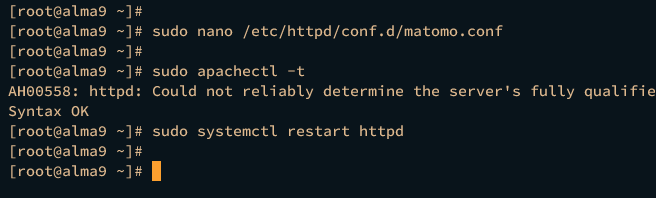
Create a new httpd virtual host configuration /etc/httpd/conf.d/matomo.conf using the nano editor command below.
sudo nano /etc/httpd/conf.d/matomo.conf
Insert the following configuration and be sure to change the domain name on the ServerName parameter with your domain.
<VirtualHost *:80>
    ServerAdmin webmaster@localhost
    ServerName analytics.hwdomain.io
    DocumentRoot /var/www/matomo/

    <Directory /var/www/matomo>
        DirectoryIndex index.php
        Options FollowSymLinks
        AllowOverride All
        Require all granted
    </Directory>

    <Files "console">
        Options None
        Require all denied
    </Files>

    <Directory /var/www/matomo/misc/user>
        Options None
        Require all granted
    </Directory>

    <Directory /var/www/matomo/misc>
        Options None
        Require all denied
    </Directory>

    <Directory /var/www/matomo/vendor>
        Options None
        Require all denied
    </Directory>

    ErrorLog /var/log/httpd//matomo_error.log
    CustomLog /var/log/httpd//matomo_access.log combined

</VirtualHost>
Save the file and exit the editor when finished.
Now run the apachectl utility below to verify overall httpd configurations. If you have correct and proper httpd configurations, you should get an output such as Syntax OK.
sudo apachectl -t
Next, execute the systemctl command below to restart the httpd web server and apply the new virtual host configuration.
sudo systemctl restart httpd
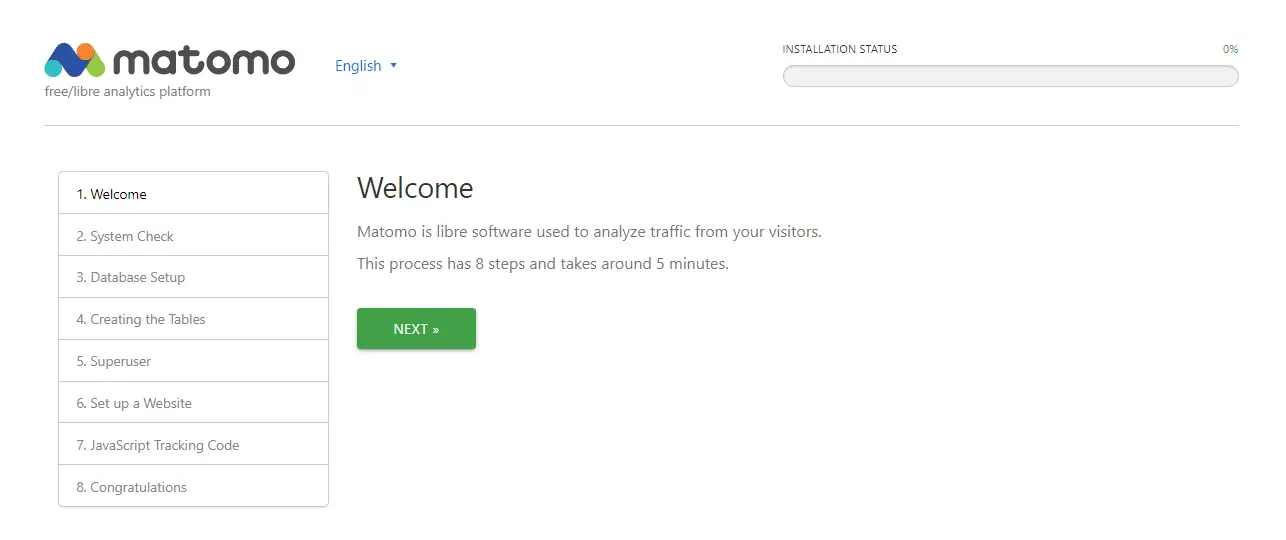
Lastly, launch the web browser and visit the domain name of the matomo installation. If successful, you should get the Matomo installation page like this:
Securing Matomo with SSL/TLS Certificates
It's recommended to run Matomo with SSL/TLS certificates. In this section, you will secure Matomo via SSL from Letsencrypt, which can be generated via Certbot. Certbot is a Letsencrypt client that is available on the EPEL repository, so you must add the EPEL repository first before installing Certbot.
Run the dnf command below to install certbot and the certbot Apache/httpd module. Input y to confirm the installation and press ENTER.
sudo dnf install epel-release -y
sudo dnf install certbot python3-certbot-apache

Once certbot is installed, run the certbot command below to generate SSL certificates for your domain name, and be sure to change the domain name and email address in the following command.
sudo certbot --apache2 --agree-tos --redirect --hsts --staple-ocsp --email [email protected] -d analytics.hwdomain.io
After the command is executed, new SSL/TLS certificates will be generated at /etc/letsencrypt/live/domain-name.com directory, and a new SSL configuration added to the file /etc/httpd/conf.d/matomo.conf. The SSL configuration is added via the Certbot Apache plugin.
Installing Matomo Web Analytics
Back to your web browser and visit the domain name for the Matomo installation. After getting the welcome page, click Next to start the installation.
Now the installer will be checking the system for requirements. So, ensure everything is marked with a green check like this:
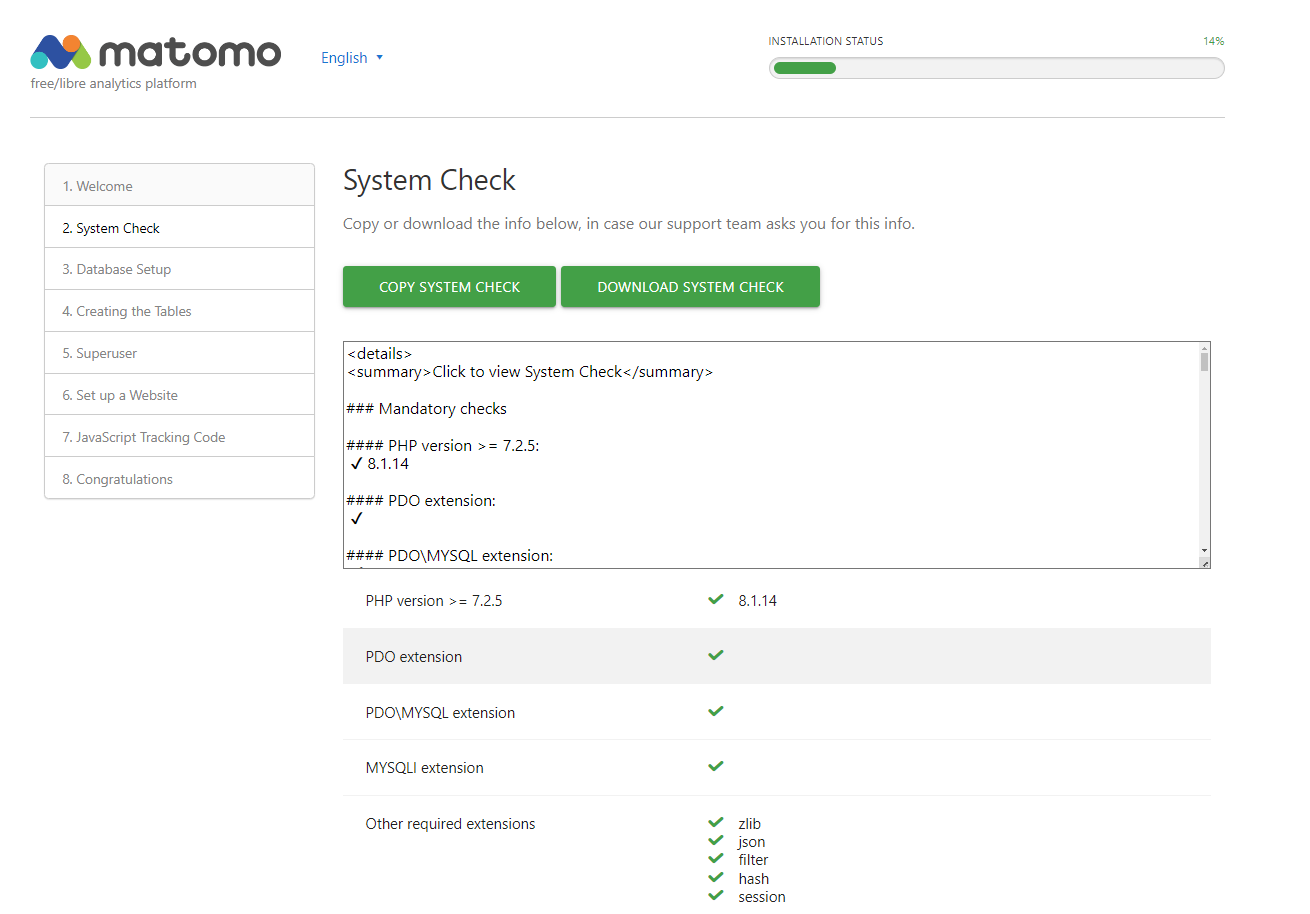
Click Next again to continue.
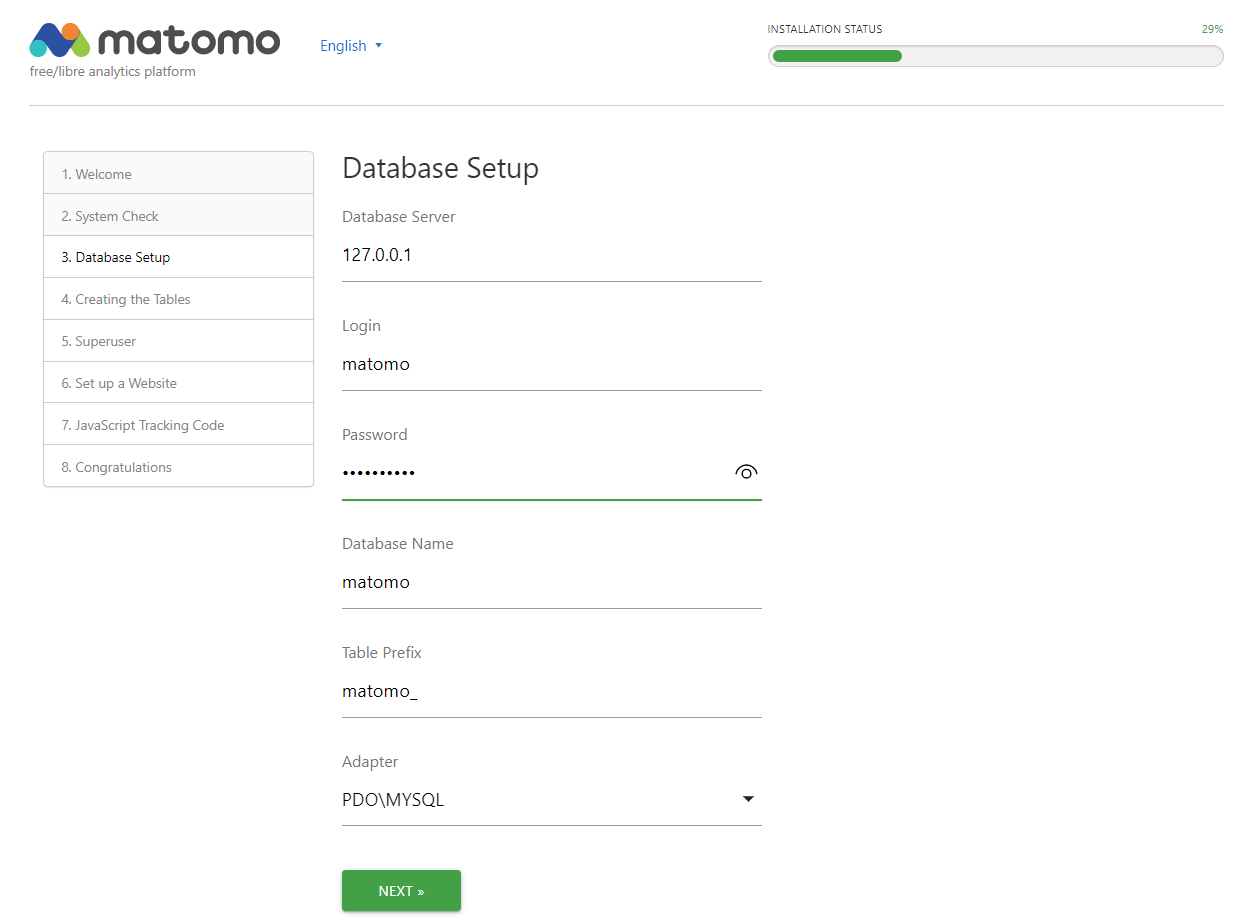
Input details of the MariaDB database and user that you have created. Then click Next again.
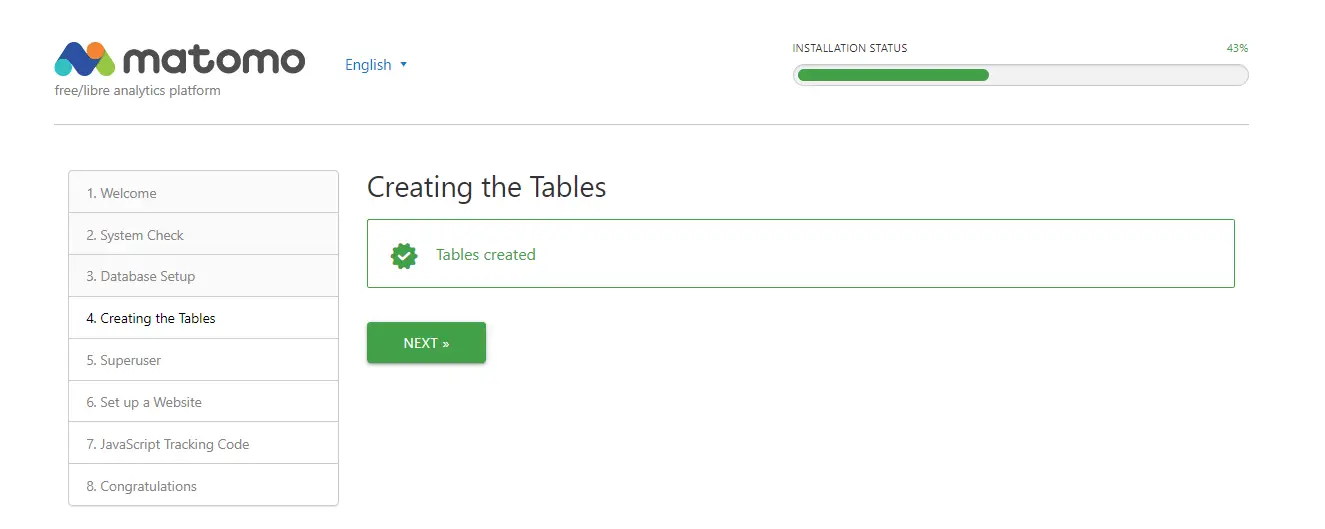
After tables for Matomo are created, you will see the message Tables is created, then click Next.
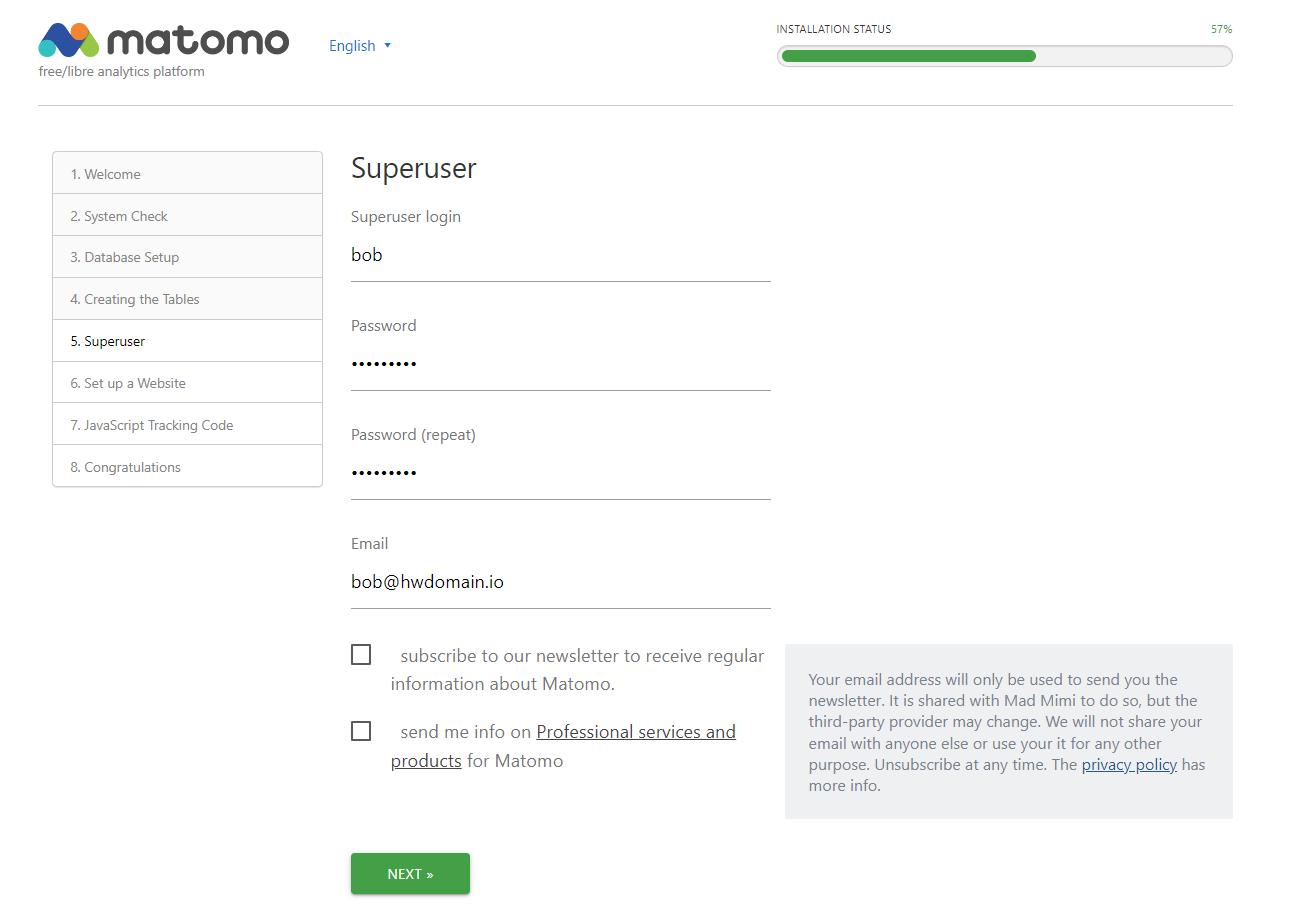
Now input the new username and password for Matomo. This user will be used as an administrator for Matomo, be sure to always remember the username and password.
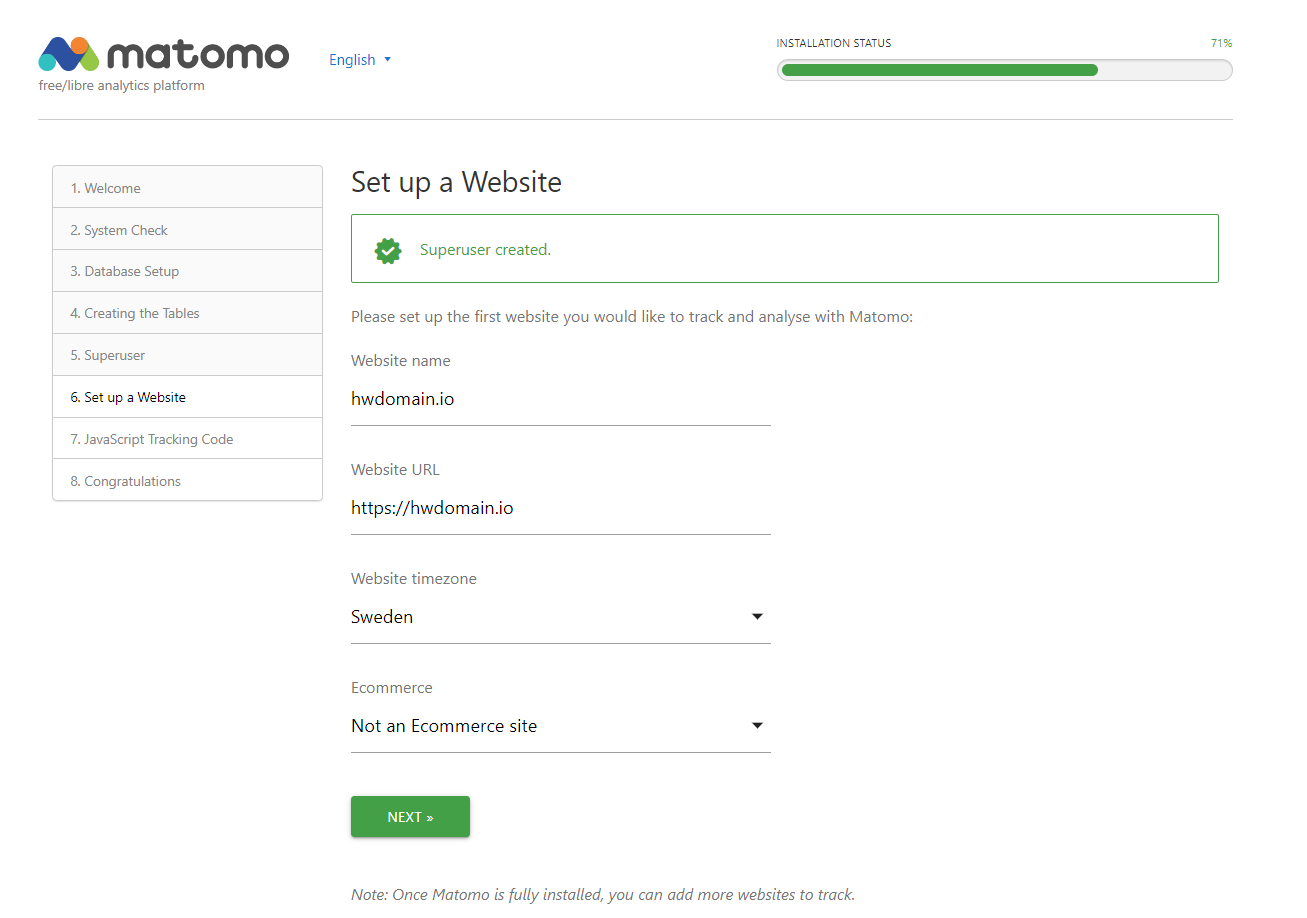
After that, input the domain name as the first tracker and change the timezone accordingly. Then click Next to continue.
Once the first tracker is created, you should see get the tracking code on your screen. Scroll down to the bottom page and click Continue.
![]()
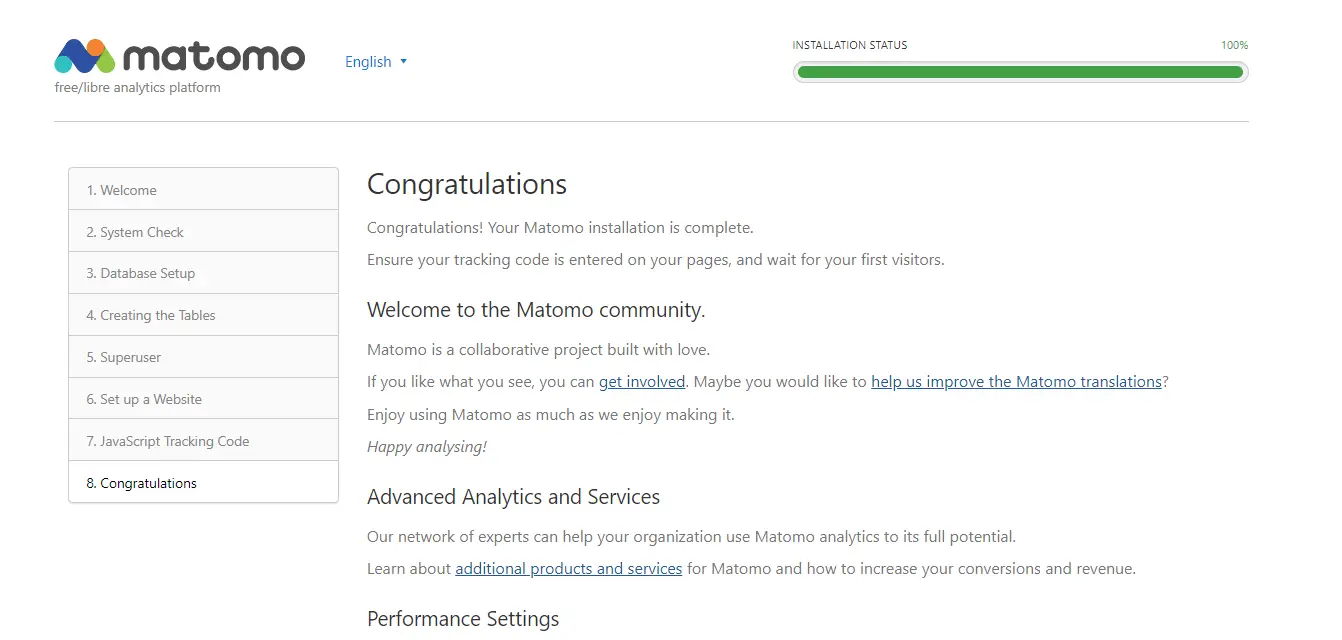
Now the installation should be finished. Scroll down and click the button CONTINUE TO MATOMO.
When prompted for the logging screen, input the Matomo admin user and password, then click SIGN IN.
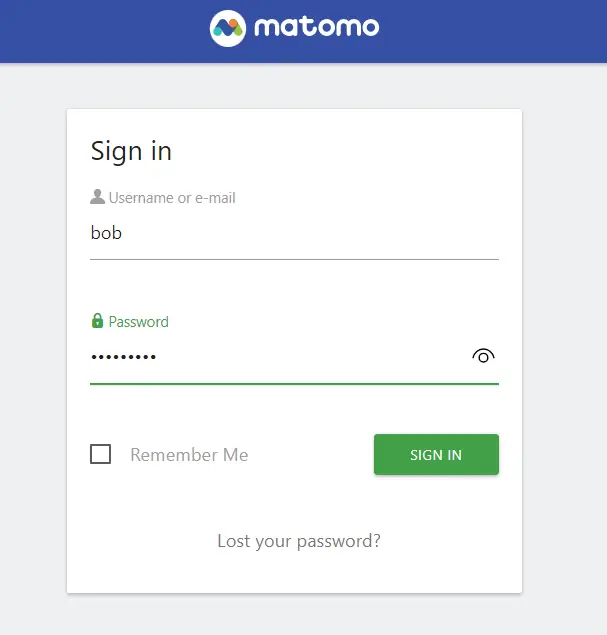
If you have the correct username and password, the Matomo administration dashboard will be shown on your browser.

From there, you can easily manage Matomo installation and add more trackers for websites.
Conclusion
You've successfully installed Matomo Web Analytics on your AlmaLinux machine. You've installed Matomo with the httpd web server, PHP 8.1, and the MariaDB database server. Moreover, you have secured Matomo with SSL certificates generated via Certbot and Letsencrypt.
With this in mind, you can now start adding your websites and tracking your visitors with respected privacy that is built on top of Matomo Web Analytics

