How to Install Graylog on AlmaLinux 9
Graylog is a free and open-source log-management platform for capturing, storing, and enabling real-time analysis of your data and logs. It's written in Java and built on top of other open-source software like MongoDB and Elasticsearch. Graylog provides one of the most efficient, fast, and flexible centralized log management platforms. With Graylog, you can send and analyze both structured and unstructured data from almost any data source.
In this guide, we'll go over the installation of Graylog as a Centralized Log Management System on AlmaLinux 9 server. You will install the Graylog server, then set up inputs for clients to send logs to the Graylog server.
Prerequisites
For you to complete this guide, ensure that you have the following:
- An AlmaLinux 9 server with at least 4 GB of memory - In this case, we'll be using an AlmaLinux server with 8 GB of memory and IP address 192.168.10.20.
- A non-root user with administrator privileges.
Setting Up Repositories
To start this guide, you will be adding new repositories to your AlmaLinux 9 machine. You will add the repository of MongoDB 6.x, Opensearch 2.x, and the Graylog 5.x to your system.
First, execute the dnf command below to install curl on your system.
sudo dnf install curl -y

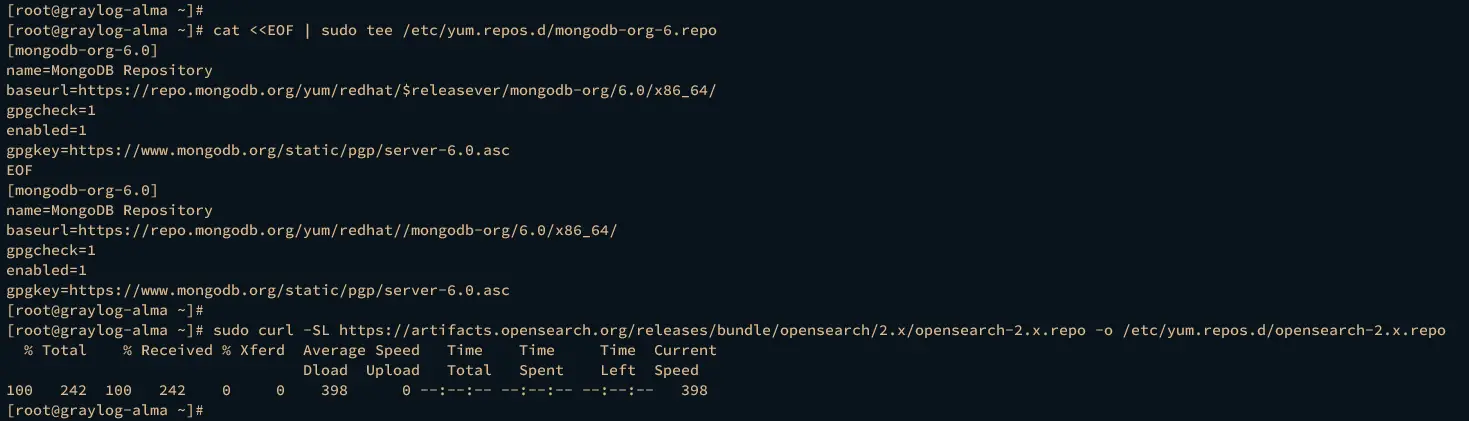
Now copy and run the following command to add the MongoDB repository. The Graylog server required at least MongoDB v6.x.
cat <<EOF | sudo tee /etc/yum.repos.d/mongodb-org-6.repo
[mongodb-org-6.0]
name=MongoDB Repository
baseurl=https://repo.mongodb.org/yum/redhat/9/mongodb-org/6.0/x86_64/
gpgcheck=1
enabled=1
gpgkey=https://www.mongodb.org/static/pgp/server-6.0.asc
EOF
Next, run the following command to add the Opensearch repository. Opensearch is an alternative to Elasticsearch, which is recommended to use in the new Graylog version. In this case, we'll be using Opensearch v2.x.
sudo curl -SL https://artifacts.opensearch.org/releases/bundle/opensearch/2.x/opensearch-2.x.repo -o /etc/yum.repos.d/opensearch-2.x.repo
Now run the command below to add the Graylog repository to your system. At the time of this writing, the latest version of the Graylog server is v5.1.
sudo rpm -Uvh https://packages.graylog2.org/repo/packages/graylog-5.1-repository_latest.rpm

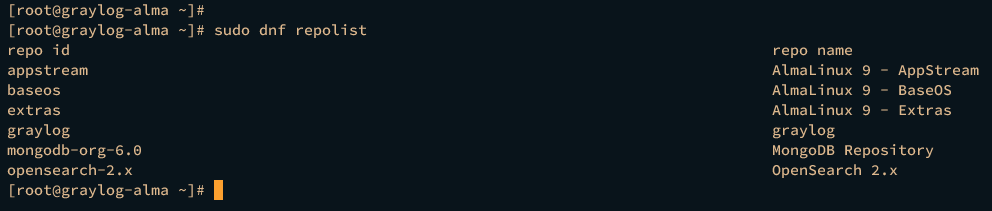
Lastly, execute the dnf command below to verify available repositories on your AlmaLinux server.
sudo dnf repolist
If successful, you should see the repository of MongoDB 6.x, Opensearch 2.x, and the Graylog server.
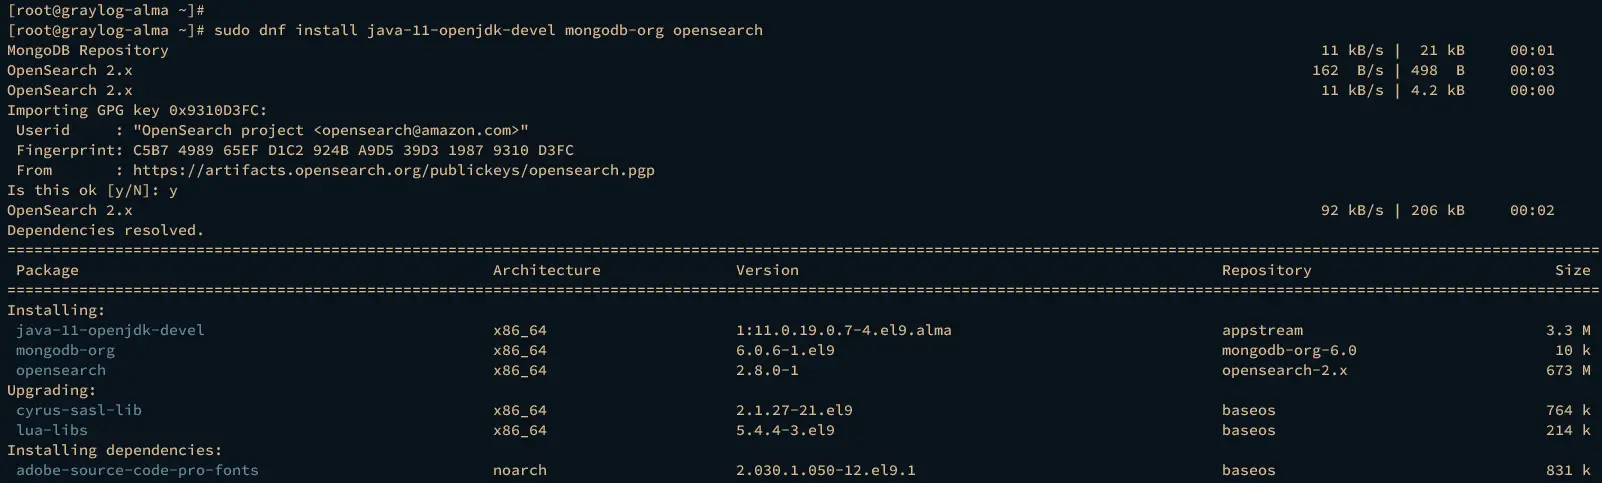
Installing Dependencies
After adding repositories, you will then install MongoDB 6.x and Opensearch 2.x via the DNF package manager. MongoDB will be used for string data, and Opensearch will be the main search engine for the Graylog server.
Execute the dnf command below to install MongoDB and Opensearch. Input y when prompted for confirmation, then press ENTER.
sudo dnf install mongodb-org opensearch
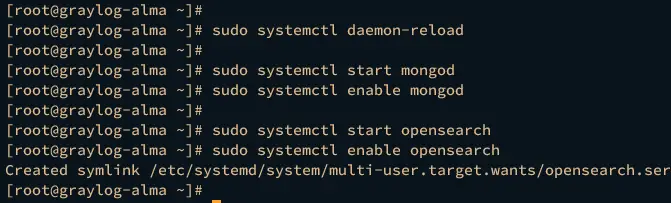
Once MongoDB and Opensearch are installed, run the systemctl command below to reload the systemd manager.
sudo systemctl daemon-reload
Then, start and enable the MongoDB service using the command below.
sudo systemctl start mongod
sudo systemctl enable mongod
Start and enable the Opensearch service using the command below.
sudo systemctl start opensearch
sudo systemctl enable opensearch
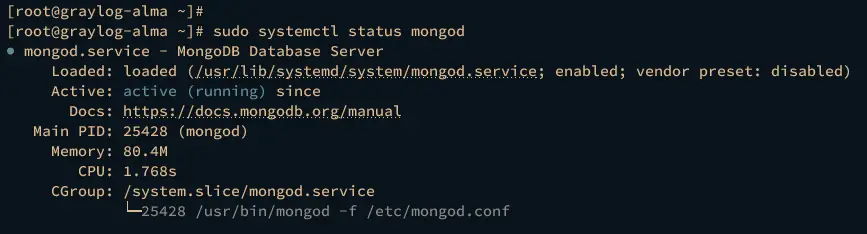
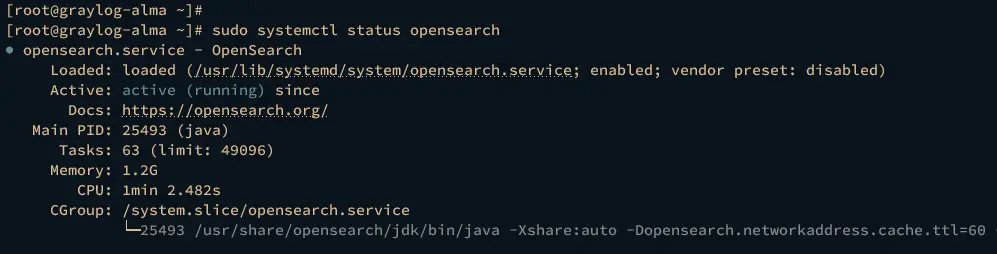
Lastly, run the command below to verify both MongoDB and Opensearch service status. If running, the service status should be active (running).
sudo systemctl status mongod
sudo systemctl status opensearch
Checking MongoDB service status.
Checking Opensearch service status.
Configuring Opensearch
For Graylog deployment, it's recommended to use Opensearch as the default search engine. An alternative to Opensearch is Elasticsearch but only supports the Elasticsearch v7.x. In the following section, you will set up Opensearch as the default search engine for your Graylog server.
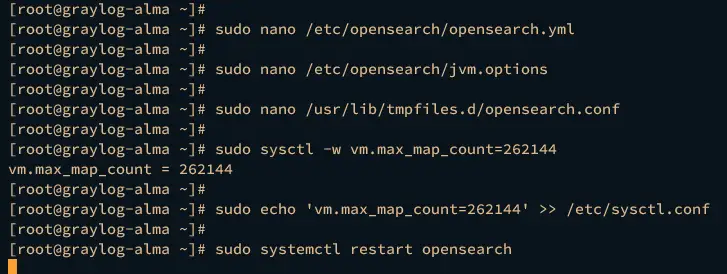
First, open the default Opensearch configuration /etc/opensearch/opensearch.yml using the following nano editor command.
sudo nano /etc/opensearch/opensearch.yml
Uncomment the parameter cluster.name and input the name of your Opensearch cluster, node.name and input the hostname of your system, then network.host and input your internal IP address. In this case, the cluster name will be graylog with the hostname graylog-alma and IP address 192.168.10.20 (This running on a local network).
cluster.name: graylog
node.name: graylog-alma
network.host: 0.0.0.0
Add the following lines to set up Opensearch as a single node/server, disable auto_create_index and the security plugin (for testing purpose only).
discovery.type: single-node
action.auto_create_index: false
plugins.security.disabled: true
Save the file and exit the editor when finished.
Now, open the file /etc/opensearch/jvm.options using the nano editor to set up the max memory allocation for the Opensearch service.
sudo nano /etc/opensearch/jvm.options
Change the default memory allocation for your Opensearch installation. In this case, the Opensearch should be running with a max memory of 2 GB.
-Xms2g
-Xmx2g
Save the file and exit the editor after finishing.
Next, open the file /usr/lib/tmpfiles.d/opensearch.conf using the following nano editor command.
sudo nano /usr/lib/tmpfiles.d/opensearch.conf
Change the default path from /var/run/opensearch to /run/opensearch. This directory will be used to store additional files related to Opensearch and will be created automatically via this configuration.
/run/opensearch
Save and close the file when finished.
After that, run the following command to increase the vm.max_map_count to 262144. This is required by the Opensearch, and to make it permanent, you will add a new parameter to /etc/sysctl.conf file.
sudo sysctl -w vm.max_map_count=262144
sudo echo 'vm.max_map_count=262144' >> /etc/sysctl.conf
Now run the systemctl command below to restart the Opensearch service and apply the changes that you've made.
sudo systemctl restart opensearch
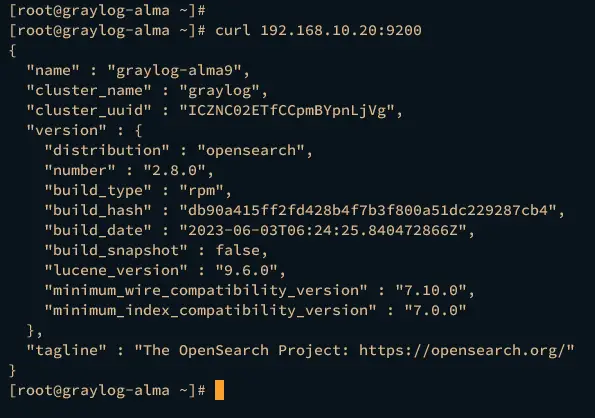
The Opensearch should be running on the local IP address of your server, and in this case, it's running on 192.168.10.20 with default port 9200.
Execute the curl command below to access your Opensearch installation.
curl 192.168.10.20:9200
If the Opensearch configuration is successful, you should see the detailed information about your Opensearch installation like this:
At this point, the Opensearch and MongoDB are ready. In the next section, you will start the Graylog server installation and configuration.
Installing and Configuring Graylog Server
In this section, you will install the Graylog server v5.x on your AlmaLinux 9 machine and configure Graylog as centralized log management for your infrastructure.
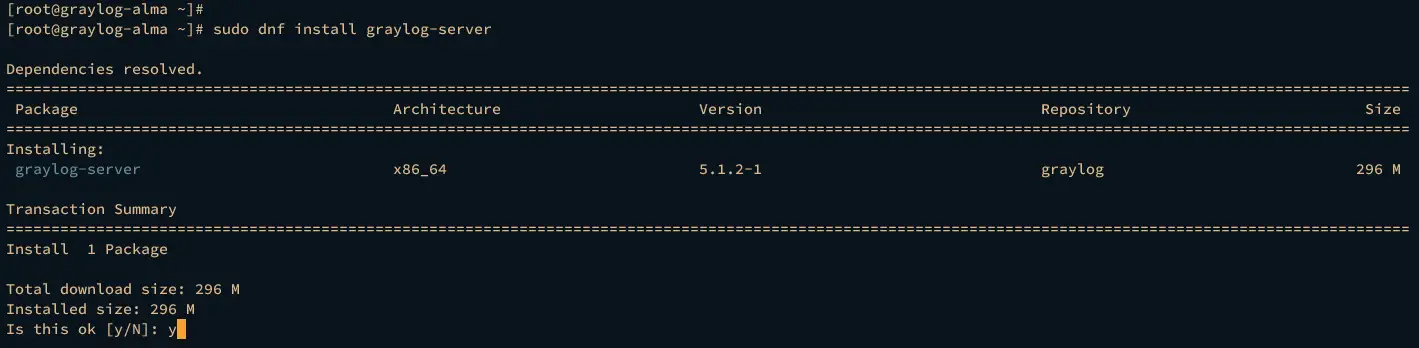
Execute the dnf command below to install the graylog-server package. Input y to confirm the installation and press ENTER to proceed.
sudo dnf install graylog-server
Inpu y again to add the GPG key of Graylog repository.

Once the Graylog server is installed, execute the following command to generate the password_secret for the Graylog server. Copy the random string that you've generated.
< /dev/urandom tr -dc A-Z-a-z-0-9 | head -c${1:-96};echo;
Now run the following command to generate the root_password_sha2 for your graylog server. This password will be used to log in to the Graylog administration dashboard.
echo -n "Enter Password: " && head -1 </dev/stdin | tr -d '\n' | sha256sum | cut -d" " -f1
Input your password and copy the generated hash password.

In the below example, JmGGtkruJ80LjnQBnz8QZ0gHjKpBZwWmH7JF0ZBa9iBS999bTlQfViaQj7jAH-XgIVcdVcDVYyy3x5Dh7fEXCPhbrSUXX1G1 is the password secret and 5e884898da28047151d0e56f8dc6292773603d0d6aabbdd62a11ef721d1542d8 is the generated root_password_sha2 password for your Graylog server.
Next, open the Graylog configuration /etc/graylog/server/server.conf using the nano editor.
sudo nano /etc/graylog/server/server.conf
Input the generated password secret to the password_secret parameter and change the default root_password_sha2 with the new password that you have generated.
password_secret = R8zwuO2NDewUcwRFQ0QDm07tn6AppmwThty0aagxOoqMDWNqPJLwrffpz7DdQyQVY1uHq54QwgYMNkZnBLuXQf3B1giq5RKX
...
root_password_sha2 = a7fdfe53e2a13cb602def10146388c65051c67e60ee55c051668a1c709449111
Uncomment the http_bind_address parameter and change the IP address with your internal IP address followed by the default Graylog server port 9000.
http_bind_address = 192.168.10.20:9000
Save the file and close the editor.
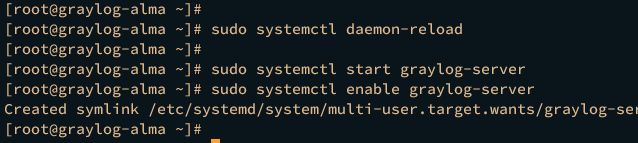
Now run the systemctl command below to reload the systemd manager.
sudo systemctl daemon-reload
Then start and enable the Graylog server using the command below.
sudo systemctl start graylog-server
sudo systemctl enable graylog-server
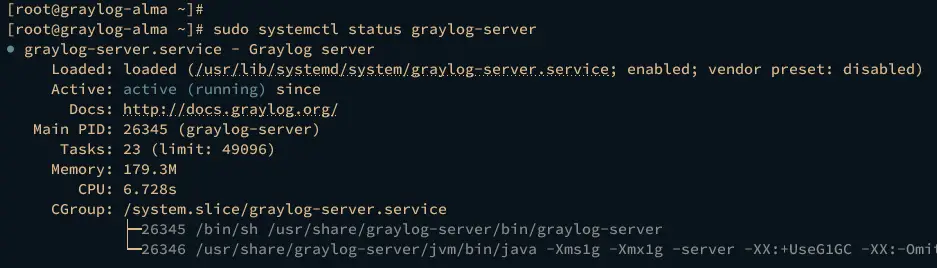
Lastly, verify the Graylog server status using the following command. If Graylog is running, you should get an output active (running) on your terminal.
sudo systemctl status graylog-server
Furthermore, you can also verify the Graylog server by checking the list of open ports on your system using the ss command below.
ss -tulpn | grep 9000
If successful, you should see the Graylog server is using that port 9000.
Configuring Firewalld and SELinux
After installing and configuring the Graylog server, the next step you will be setting up the SELinux and firewalld. In this case, the SELinux is running with enforcing mode and the firewalld is running.
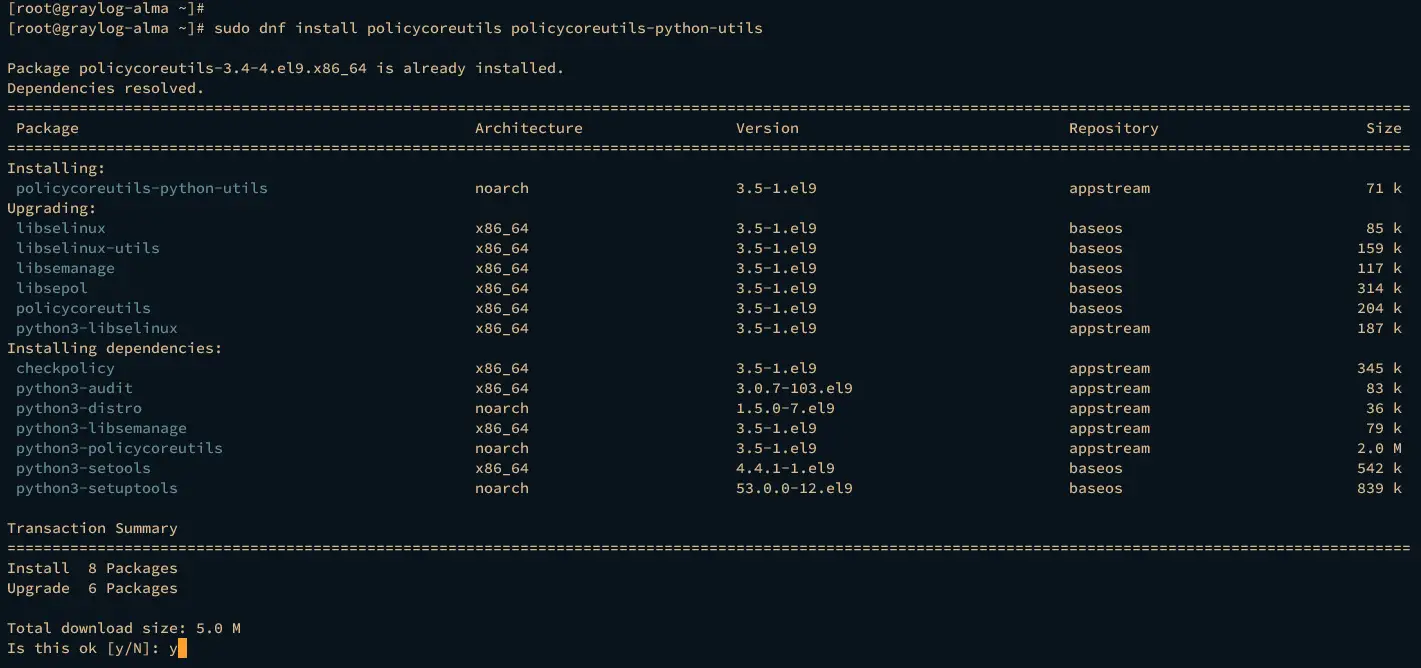
Run the dnf command below to install SELinux management tools to your AlmaLinux server. Input y when prompted, then press ENTER to proceed.
sudo dnf install policycoreutils policycoreutils-python-utils
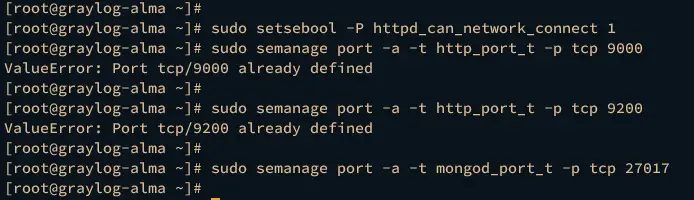
Now, run the following command to add some SELinux policies and allow ports for some services such as Graylog server port 9000, MongoDB port 27017, and Opensearch port 9200.
sudo setsebool -P httpd_can_network_connect 1
sudo semanage port -a -t http_port_t -p tcp 9000
sudo semanage port -a -t http_port_t -p tcp 9200
sudo semanage port -a -t mongod_port_t -p tcp 27017
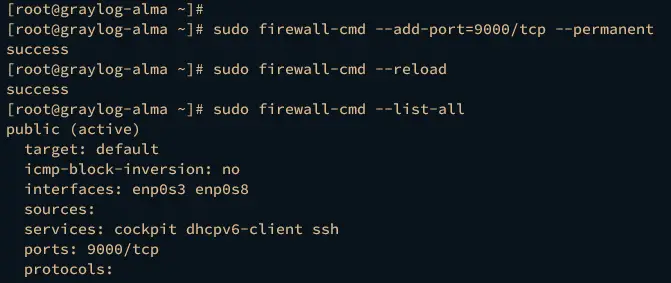
Next, run the firewall-cmd command below to add Graylog server port 9000 to the firewalld and reload the firewalld to apply the changes.
sudo firewall-cmd --add-port=9000/tcp --permanent
sudo firewall-cmd --reload
Lastly, run the following command to verify your system's list of firewalld rules. Ensure that port 9000 is available on your firewalld.
sudo firewall-cmd --list-all
Accessing Graylog Server
With you've successfully configured SELinux and firewalld, now you can access your Graylog server installation.
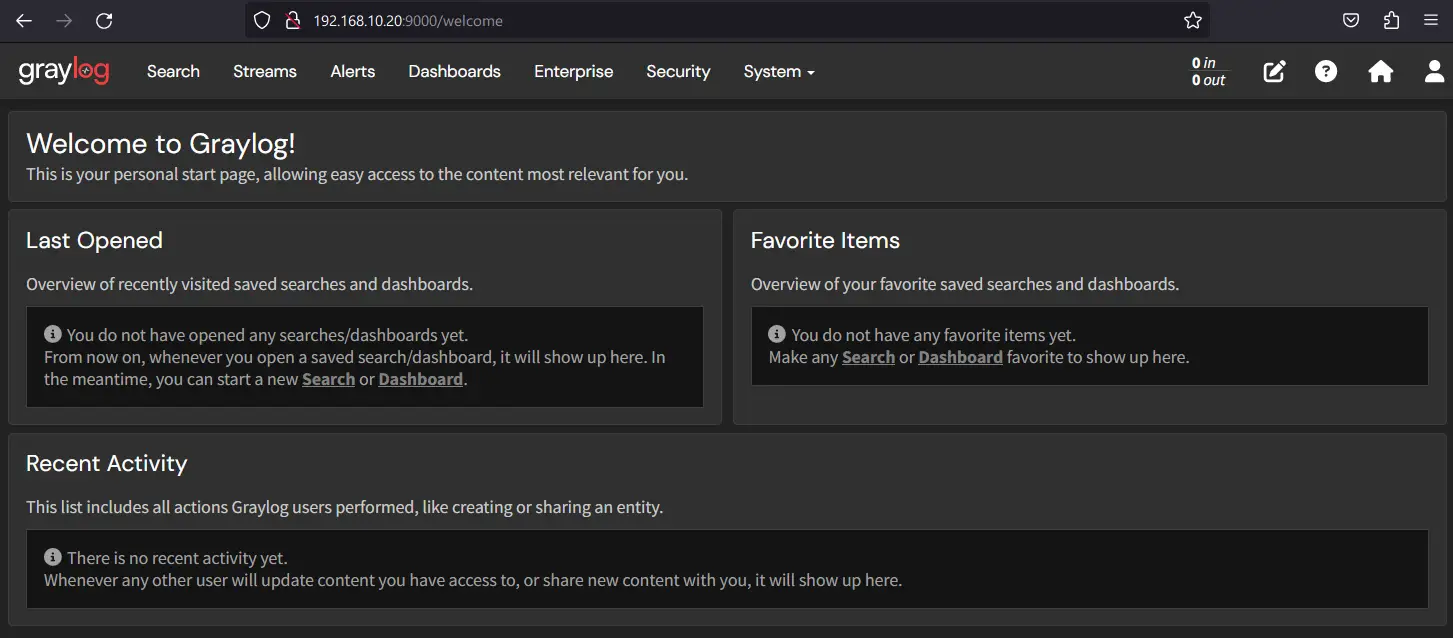
Launch your preferred web browser and visit your AlmaLinux server IP address followed by port 9000 (i.e: http://192.168.10.20:9000/). If the graylog installation is successful, you should see the Graylog login page like the following.
Log in with the default user admin and the password that you've generated (the root_password_sha2 password).

If you have the correct user and password, the Graylog administration dashboard will be shown on your browser.
Create First Graylog Input
After logging in to the Graylog server, the first thing you must do is create new inputs that will be used as the log receiver from the target monitoring system. There are two types of Graylog inputs, Listener inputs and Pull inputs.
Examples of Listener inputs are Syslog TCP/UDP, Beats TCP, GELF TCP, CEF TCP, and Netflow TCP. Some examples of Pull inputs are CEF AMQP and Kafka, Raw/Plaintext AMQP and Kafka, and Syslog AMQP and Kafka.
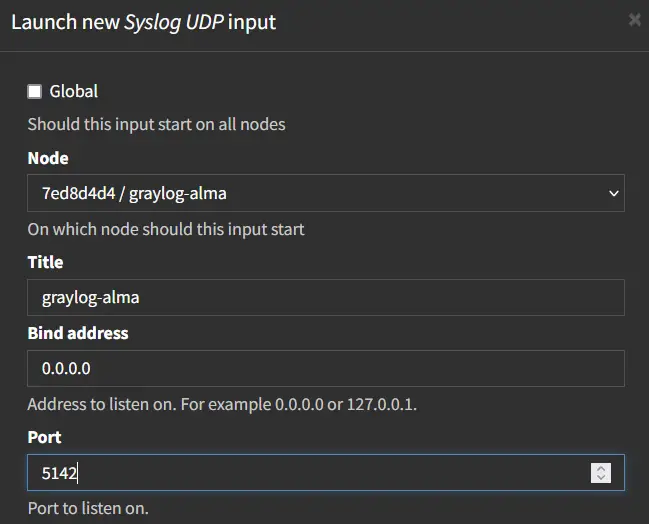
In the following section, you will create the first Graylog input using Syslog UDP.
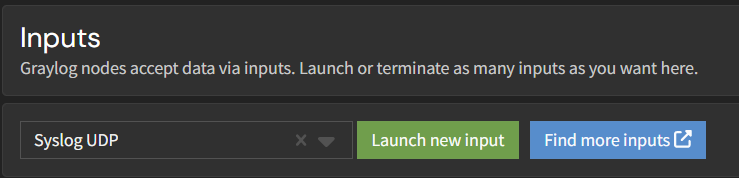
Click on the System menu and select Inputs.

Select the input type you want to create from the dropdown menu and click Launch new input. In this case, we'll create an input type Syslog UDP.
Type the input name, internal IP address, and port where the new input will be running. In this case, we'll create a Syslog UDP input graylog-alma that will be running on an internal IP address 0.0.0.0 with port 5142.
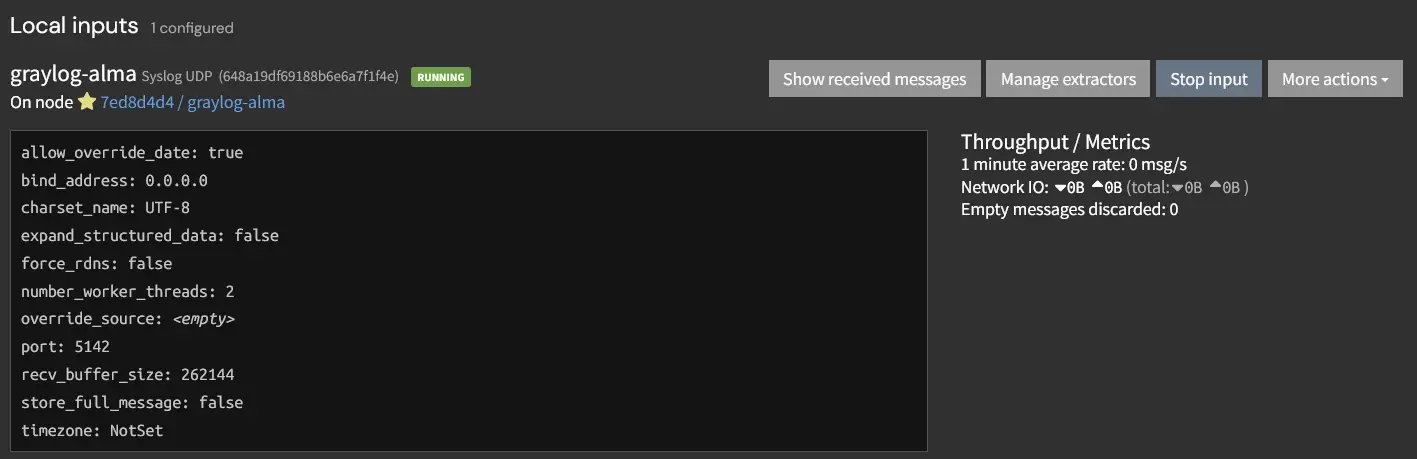
Next, scroll down to the bottom page and you should see the new input graylog-alma with status running.
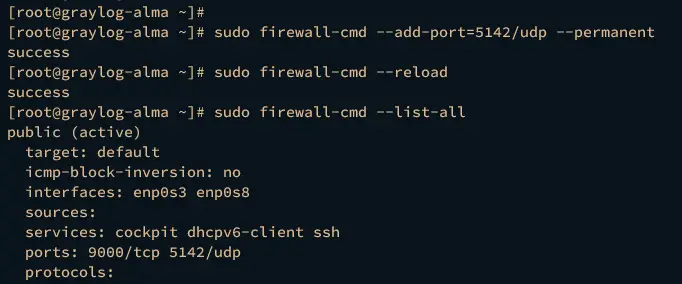
Lastly, back to the terminal server and execute the firewall-cmd command below to open port 5142 which will be used by graylog-alma input.
sudo firewall-cmd --add-port=5142/udp --permanent
sudo firewall-cmd --reload
Verify the list of open ports on firewalld using the following command. Ensure port 5142 is available on firewalld.
sudo firewall-cmd --list-all
Sending Log to Graylog via Rsyslog
After creating the Syslog UDP input on the Graylog server, you can now send log messages to the Graylog server. In the following section, you will be sending logs from a Linux machine to the Graylog server using Rsyslog.
Create a new additional rsyslog configuration /etc/rsyslog.d/graylog.conf using the following nano editor command.
sudo nano /etc/rsyslog.d/graylog.conf
Insert the following configuration and be sure to change the IP address and port with the details of input graylog-alma.
*.*@192.168.10.20:5142;RSYSLOG_SyslogProtocol23Format
Save and exit the file when finished.
Now run the systemctl command below to restart the Rsyslog service and apply the changes. After Rsyslog restarted, the target machine will be sending logs to the Graylog server via syslog protocol to the input graylog-alma.
sudo systemctl restart rsyslog
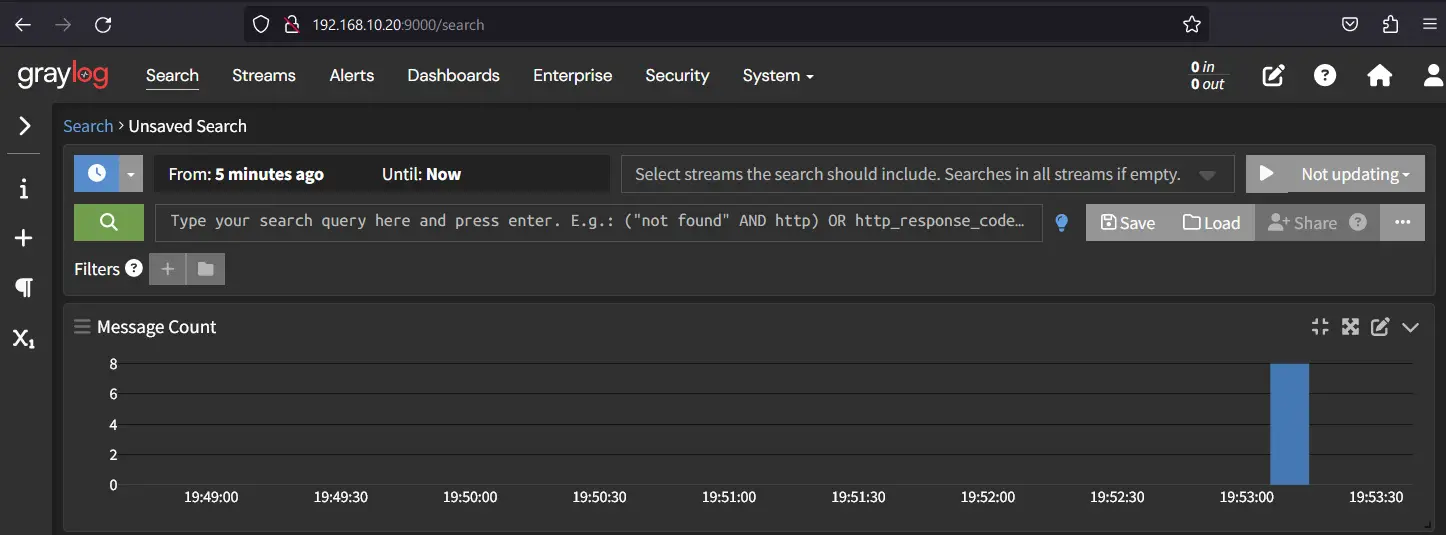
Next, back to the Graylog administration dashboard and click the Stream menu. If your installation is successful, you should see the details logs of the target machine available on the Graylog server.
Conclusion
Congratulations, you've completed the installation of Graylog as a centralized log management system on your AlmaLinux 9 system! You've installed Graylog with MongoDB and Opensearch and also configured the first Graylog input via Syslog UDP. You can now explore different types of Graylog inputs or set leverage the Graylog deployment with multiple servers.

