How to Install Passbolt CE Password Manager on AlmaLinux 9
Passbolt is a free and open-source password manager based on PHP, MySQL, and OpenPGP. It is a self-hosted application server, you can install it on your server. Passbolt is primarily designed for teams, but you can still use it as a personal password manager.
Passbolt is built on top of OpenPGP with an extensible API. On the client side, you can use the Passbolt browser extension, which uses OpenPGP.js for cryptography functionality. On the server side, Passbolt uses the GnuPG PHP Extension and OpenPGP-php to perform key validation and user authentication. Passbolt uses the GPGAuth protocol for user authentication.
This tutorial will show you how to install Passbolt Password Manager with a MariaDB database server and Nginx web server on an AlmaLinux 9 server.
Prerequisites
To get started with this guide, ensure that you have the following:
- An AlmaLinux 9 server - This demo uses a server with the hostname almalinux9.
- A non-root user with root/administrator privileges.
- A domain name pointed to the server IP address.
- Generated SSL/TLS certificates - You can use Letsencrypt and Certbot.
Setup Repository
Passbolt is a flexible password manager that can be installed on multiple platforms. You can install Passbolt on your virtual machine or install it as a container via Docker or pod via Kubernetes.
You will traditionally install Passbold Password Manager on the AlmaLinux virtual machine. You must first add the Passbolt repository to your system to achieve that.
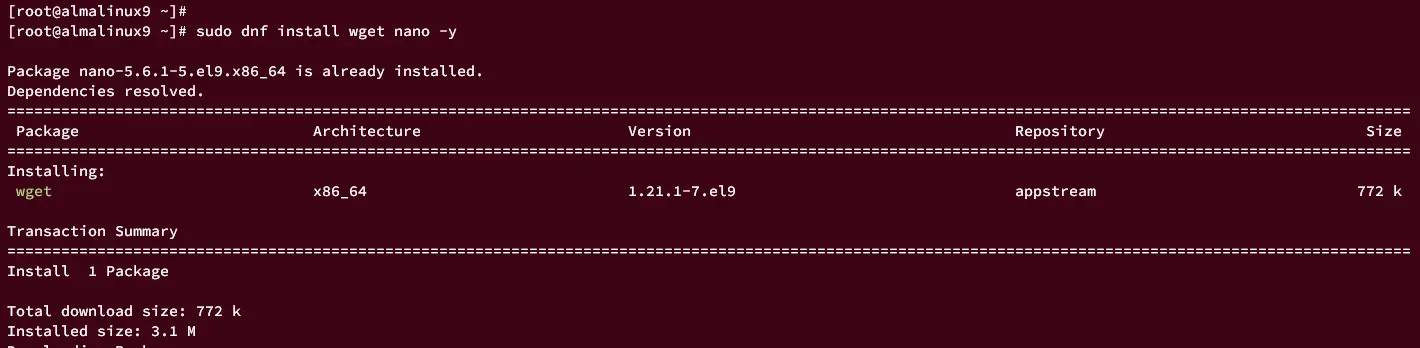
Run the dnf command below to install the wget package to your system.
sudo dnf install wget -y
Now, run the wget commands below to download the Passbolt repo setup script and the SHA512SUM file of it.
wget https://download.passbolt.com/ce/installer/passbolt-repo-setup.ce.sh
wget https://github.com/passbolt/passbolt-dep-scripts/releases/latest/download/passbolt-ce-SHA512SUM.txt
Then, please run the following command to verify the integrity of the Passbolt repo setup script and run it to add the Passbolt repository to your system.
sudo export LC_ALL=en_EN.UTF-8
sha512sum -c passbolt-ce-SHA512SUM.txt && sudo bash ./passbolt-repo-setup.ce.sh || echo "Bad checksum. Aborting" && rm -f passbolt-repo-setup.ce.sh
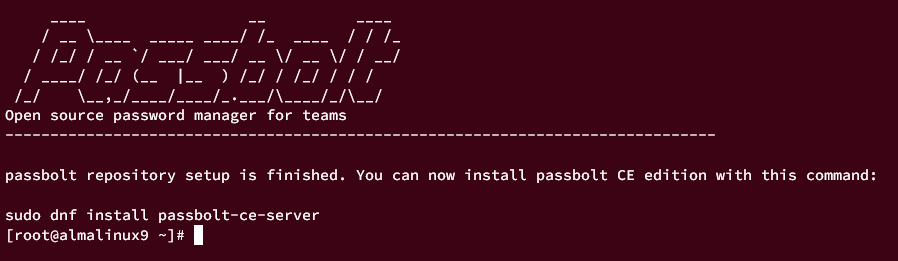
Once the Passbolt repository is added, your terminal will display the following output.
Installing Passbolt Password Manager
After adding the Passbolt repository, you will start installing and configuring the Passbolt Password Manager.
This section focuses on installing Passbolt CE (Community Edition), configuring it with the MariaDB database server, and securing Passbolt with SSL and Nginx web servers.
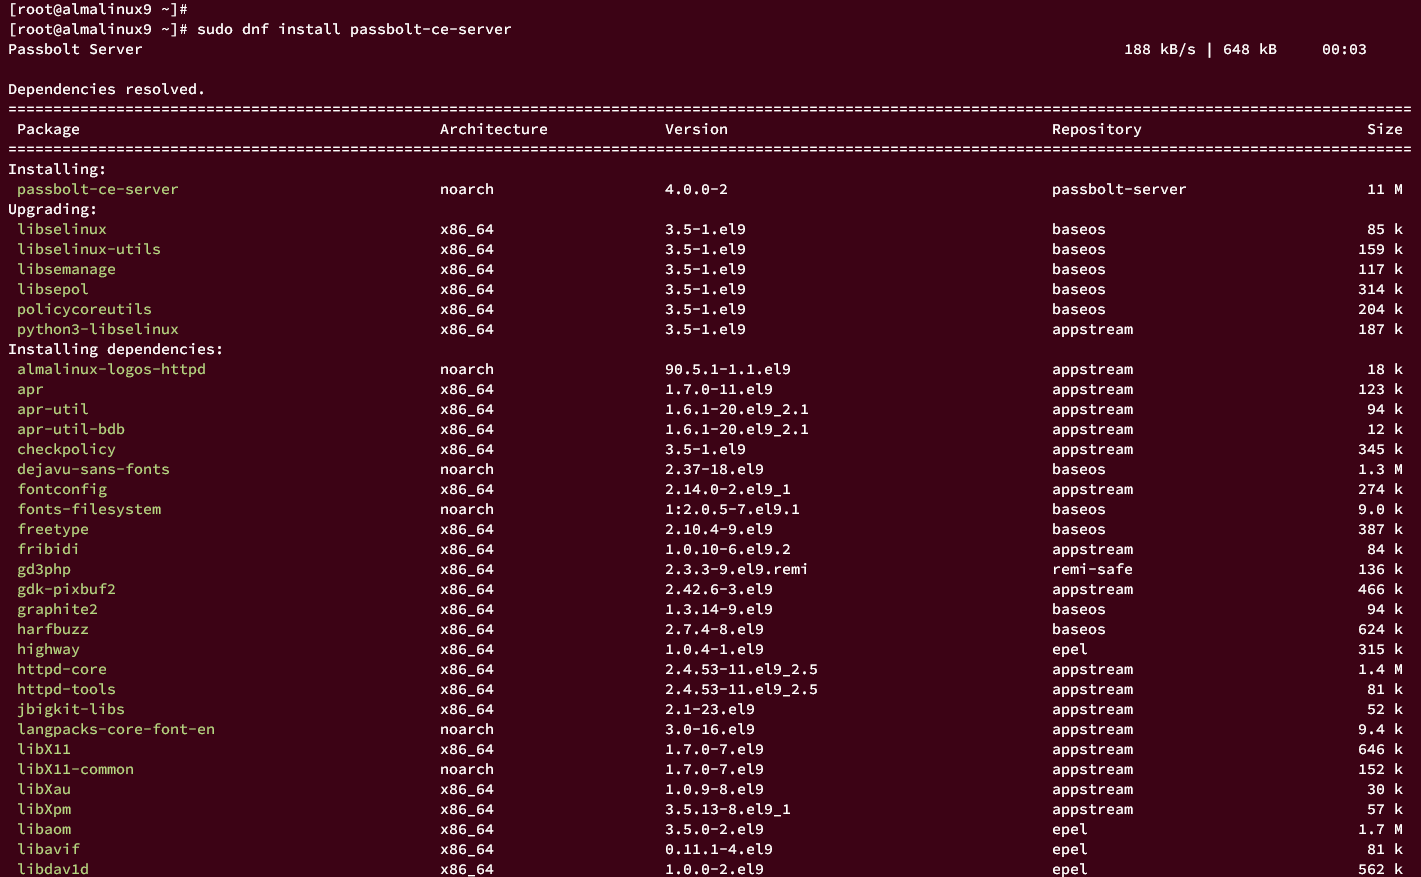
Run the dnf command below to install the passbolt-ce-server package to your system.
sudo dnf install passbolt-ce-server
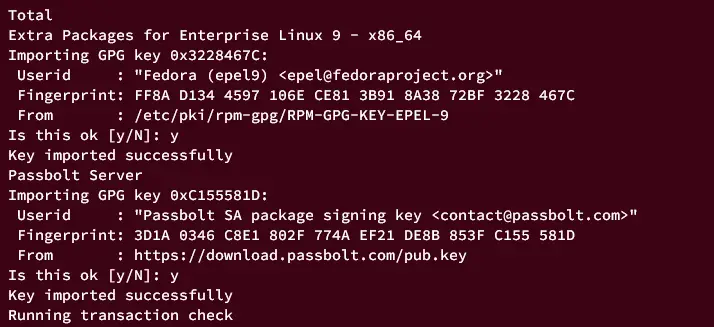
When prompted, input y to confirm the installation and press ENTER.
Input y again to accept the GPG key from EPEL and Passbolt repository.
Picture
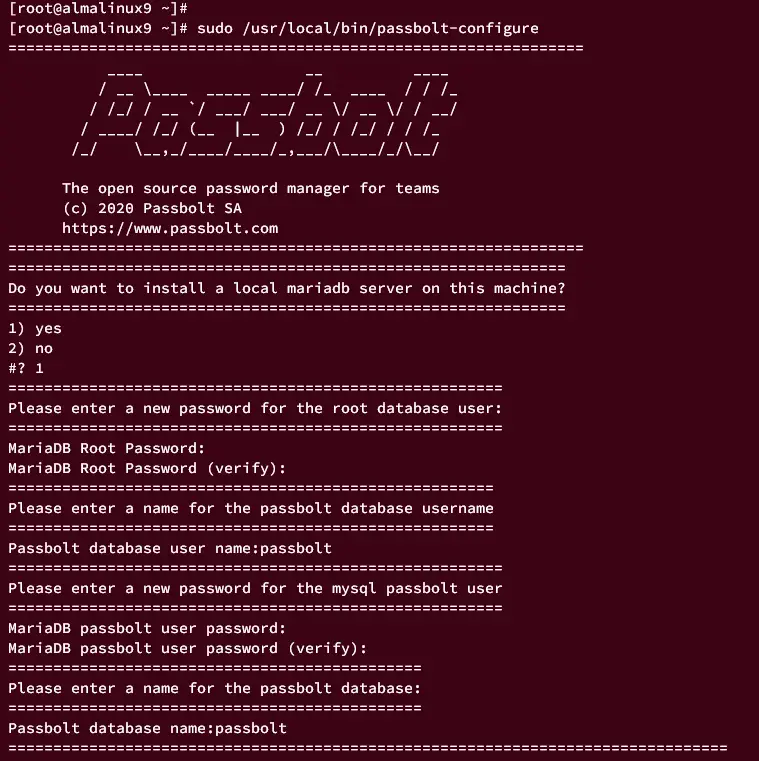
After passbolt-ce-server is installed, run the command passbolt-configure to start configuring Passbolt. This command will start the setup wizard of Passbolt Password Manager.
sudo /usr/local/bin/passbolt-configure
Input y to add the GPG key.
First, you will be prompted to set up the MariaDB database server.
- Input y and press ENTER to confirm the MariaDB server installation.
- Input the new password for the MariaDB root user and repeat.
- Input the new MariaDB user for the password.
- Input the password for the passbolt user and repeat.
- Input the database name that will be used by passbolt.
In the following example, you'll create the new MariaDB user and database password for the Passbolt installation.
Now, input y to confirm and install haveged, improving the speed of generating GPG key or SSL/TLS certificates.

Next, input the domain name for your Password installation. This demo will be using the domain pb.hwdomain.io for the installation.

Now you will be asked to set up SSL for your Passbolt installation. You can use different methods to set up SSL, manually by providing the full path of SSL certificates, or auto with automatic SSL certificate generation via Letsencrypt.
This example will be using a manual method to set up SSL for Passbolt.
- Type number 1 to use the manual method.
- Input the full path of the SSL public key.
- Input the full path of the SSL private key.
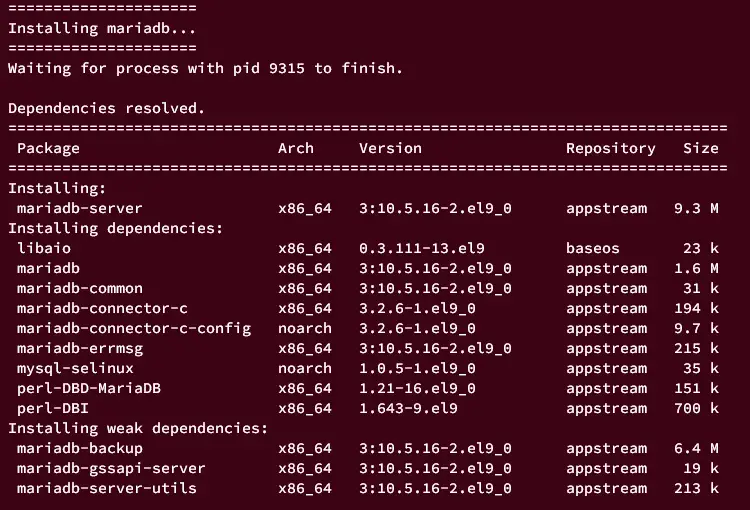
The MariaDB server installation should be starting.
After the Passbolt configuration is finished, you should see the following output:

With this, the Passbolt Password Manager configuration is completed.
Ensuring Services are Running
Now that you've finished the previous steps, you should have the Password running with the MariaDB database and Nginx web server.
Moving forward, you will verify the MariaDB, PHP-FPM, and Nginx services to ensure that it is running. Also, you will ensure that HTTP and HTTPS protocols are added to firewalld.
Run the following command to ensure that MariaDB, PHP-FPM, and Nginx services are enabled. The output enabled should indicate that the service is enabled and will start automatically upon the system's startup.
sudo systemctl is-enabled mariadb
sudo systemctl is-enabled php-fpm
sudo systemctl is-enabled nginx
Now run the firewall-cmd command below to verify the list of firewalld rules. Ensure that you have HTTP and HTTPS protocols available on the list of rules.
sudo firewall-cmd --list-all

If you don't see HTTP and HTTPS protocols on the firewalld rules, add both protocols to firewalld using the command below:
sudo firewall-cmd --add-service={http,https} --permanent
sudo firewall-cmd --reload
Lastly, run the systemctl command below to ensure that MariaDB, PHP-FPM, and Nginx services are running.
sudo systemctl status mariadb nginx php-fpm
If the service is running, the result active (running) should appear on your terminal.

Setting Up Passbolt from Client
After confirming that MariaDB, PHP-FPM, and Nginx services are running, you will be setting up Passbolt from the client machine. And you need a web browser and a Passbolt extension for your web browser.
To start, launch your web browser and install the Passbolt extension for your web browser.
Passbolt for Firefox.
Passbolt for Google Chrome/Chromium.
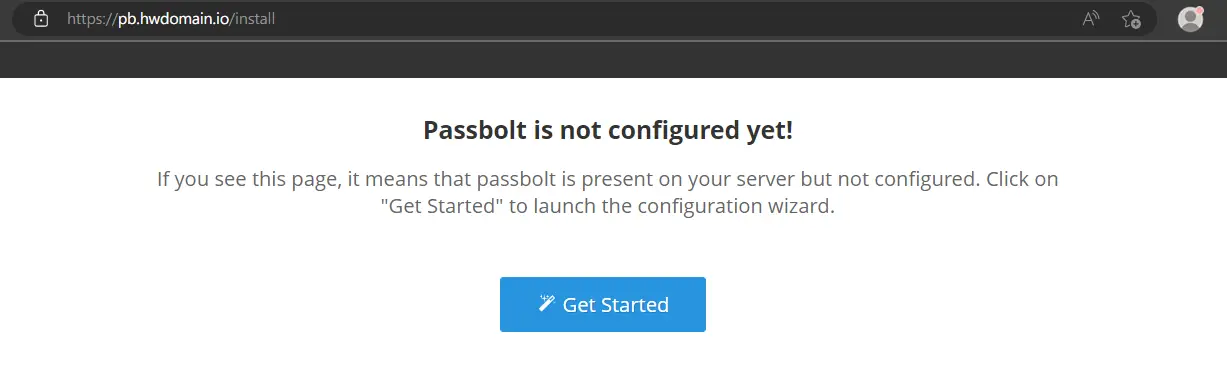
Visit the domain name of the Passbolt installation (i.e: https://pb.hwdomain.io/) and you should get the welcome message from Passbolt.
Click the Get Started button to start the installation.
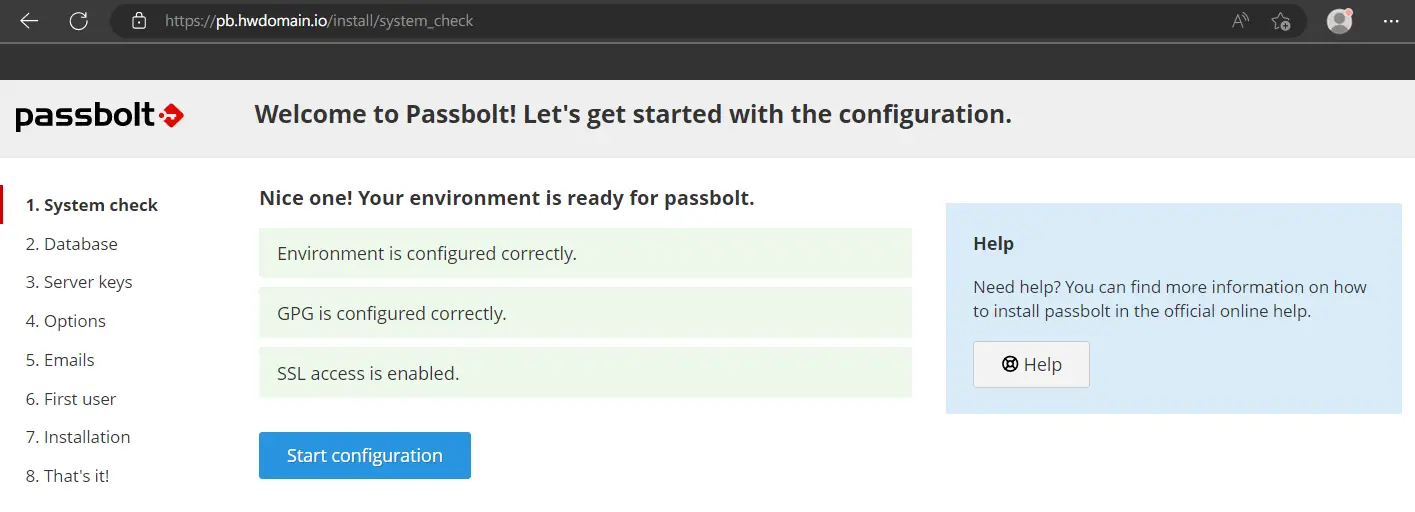
Now the Passbolt setup wizard will be checking the system environment for installation. Ensure all checks are ready and click the Start Configuration button.
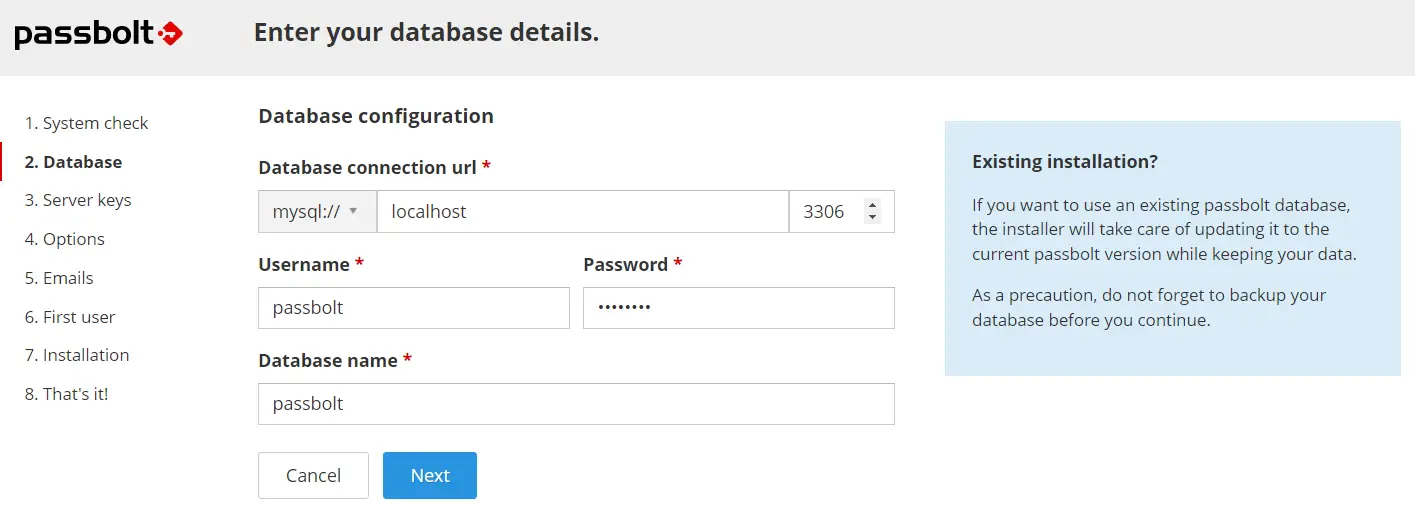
Next, input the details of the MariaDB database configuration for Passbolt. In this demo, the database host is localhost, the database user and database name is passbolt, then input the password that you've created.
Click Next to continue.
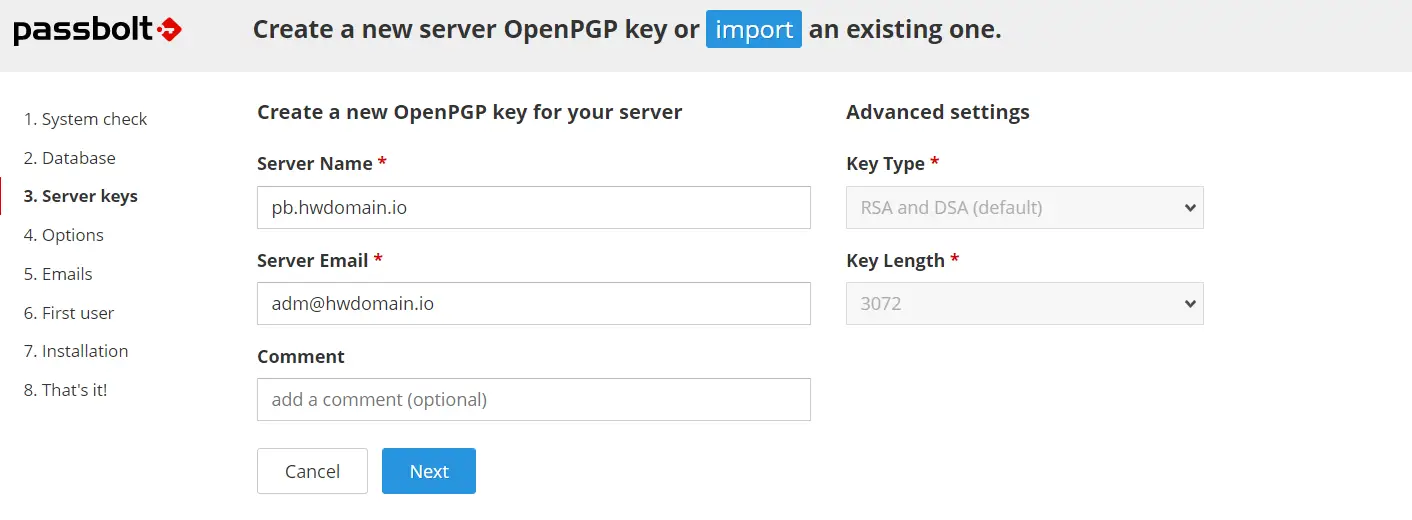
Input the server name or domain name and the email address information for generating the Passbolt GPG key. Click Next again to confirm and continue.
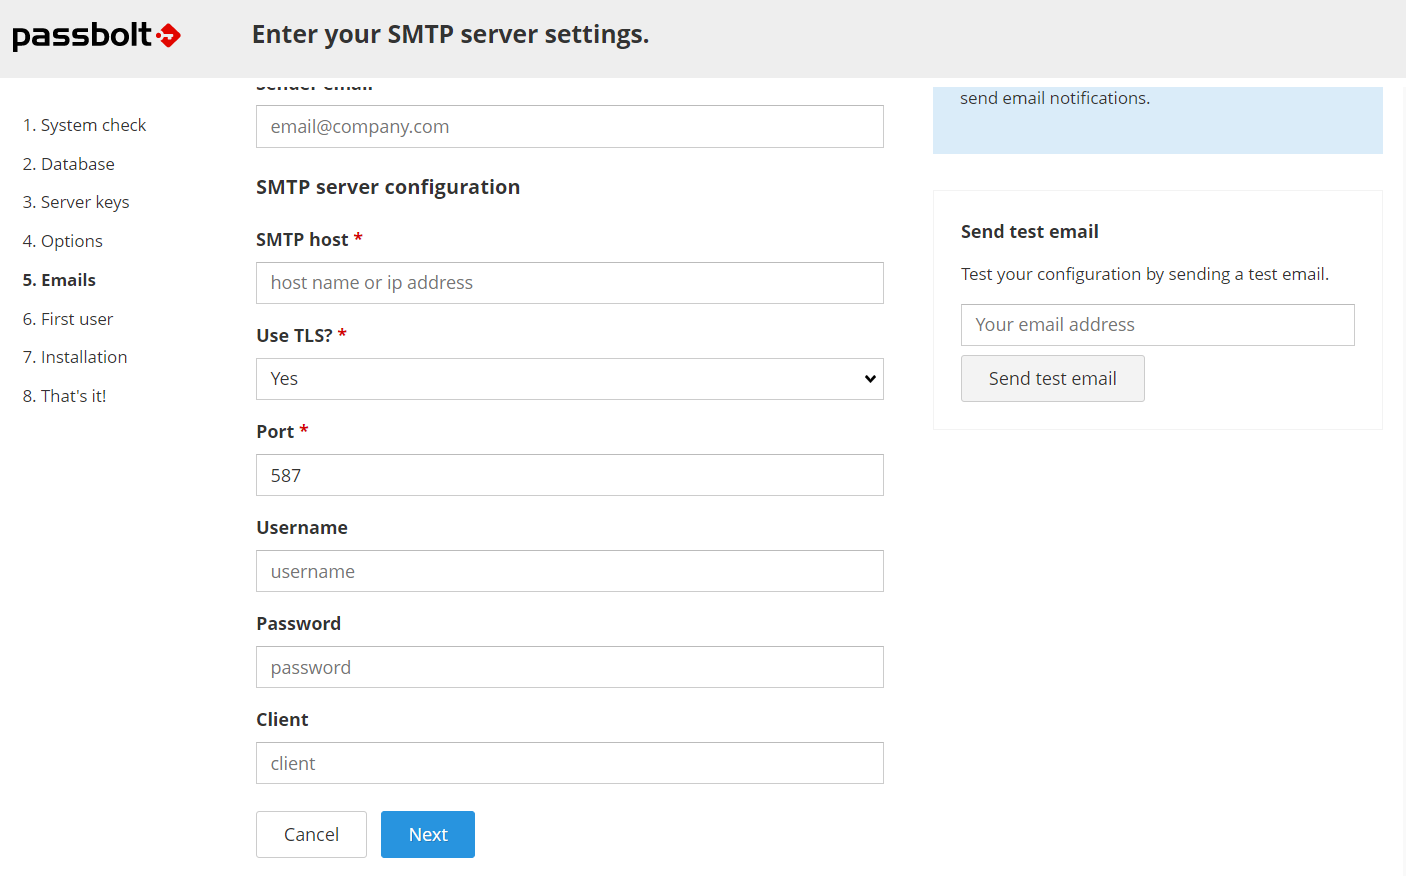
For the SMTP configuration, input the details of the server name of your SMTP services and click Next. You can also set up SMTP after the configuration is finished.
Now input the first name, last name, and email address to create an admin user for Passbolt. Then, click Next to continue.

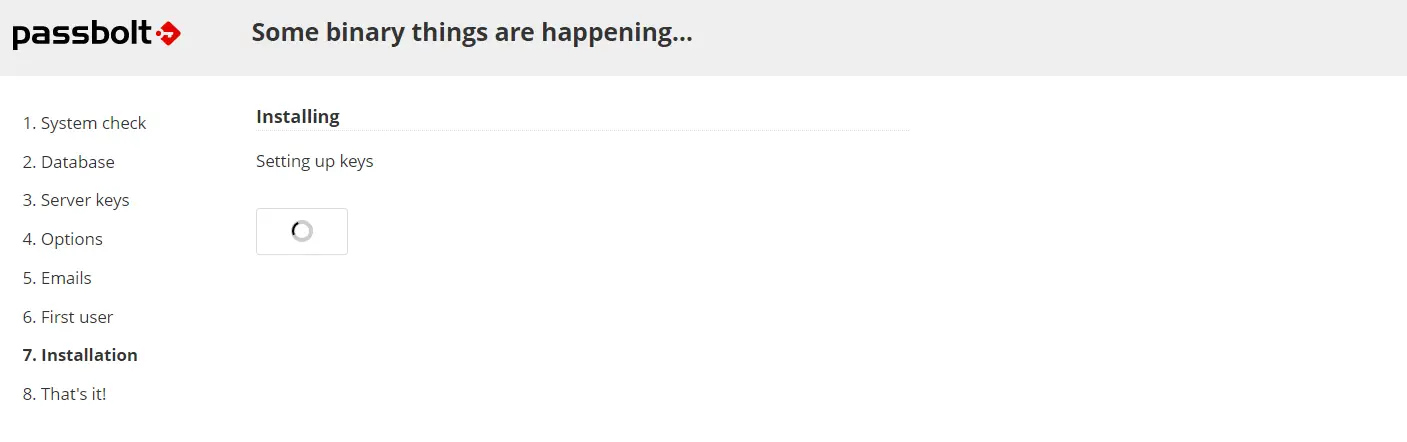
The Passbolt Password Manager installation should be processed.
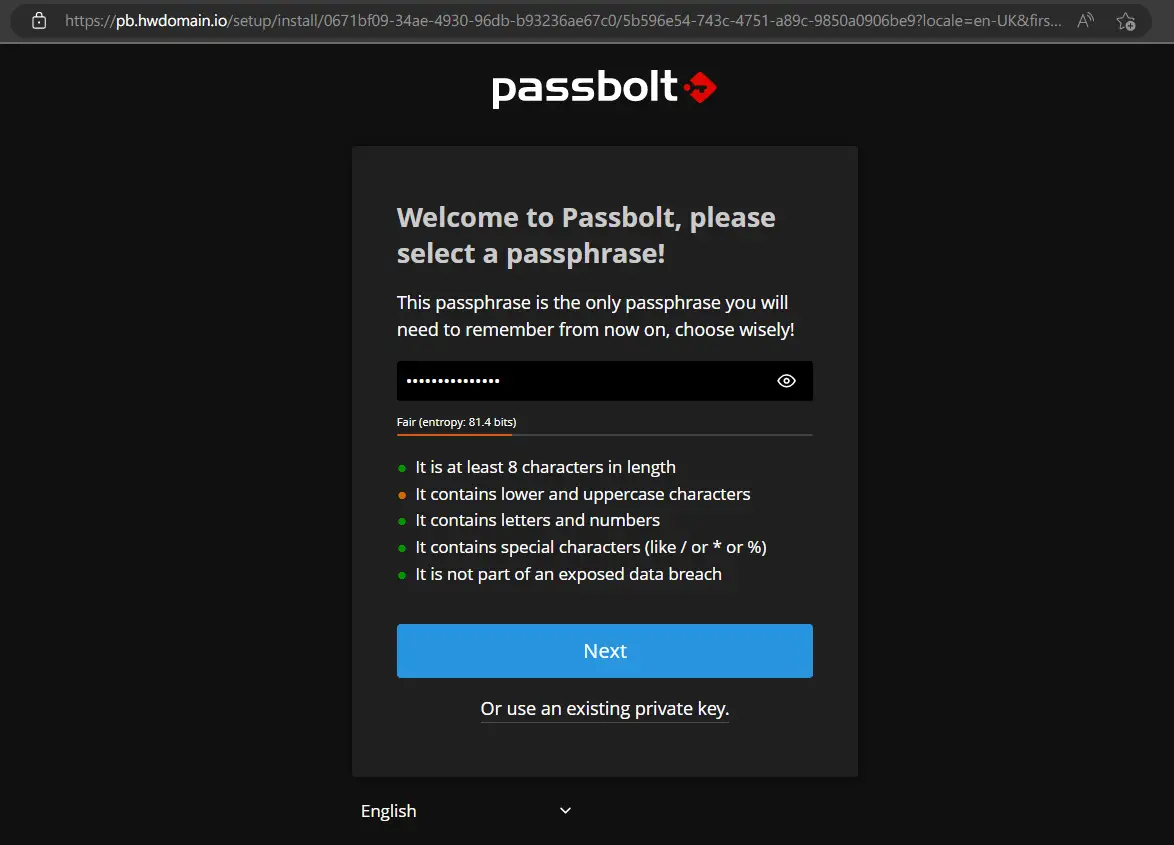
After installation is finished, and the Passbolt browser extension is installed, you will be redirected to the section for setting up the Passbolt passphrase. This you must always remember because this is the passphrase for your Passbolt GPG key.
Click Next to continue.
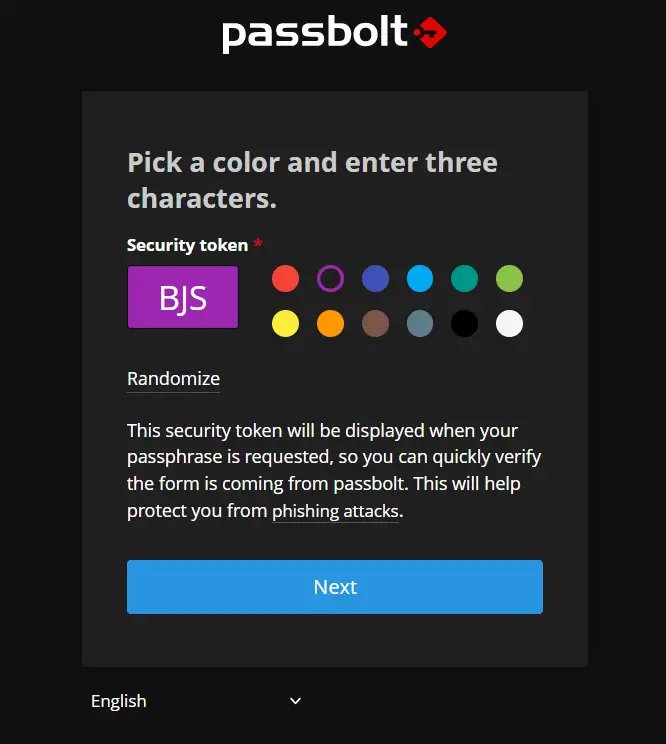
Now the key recovery kit will automatically download to your local machine with the filename passbolt-recovery-kit, which is the private key of the GPG key for your Passbolt installation. Click Next again to continue.

Choose the security token for your new Passbolt session and click Next to complete the installation.
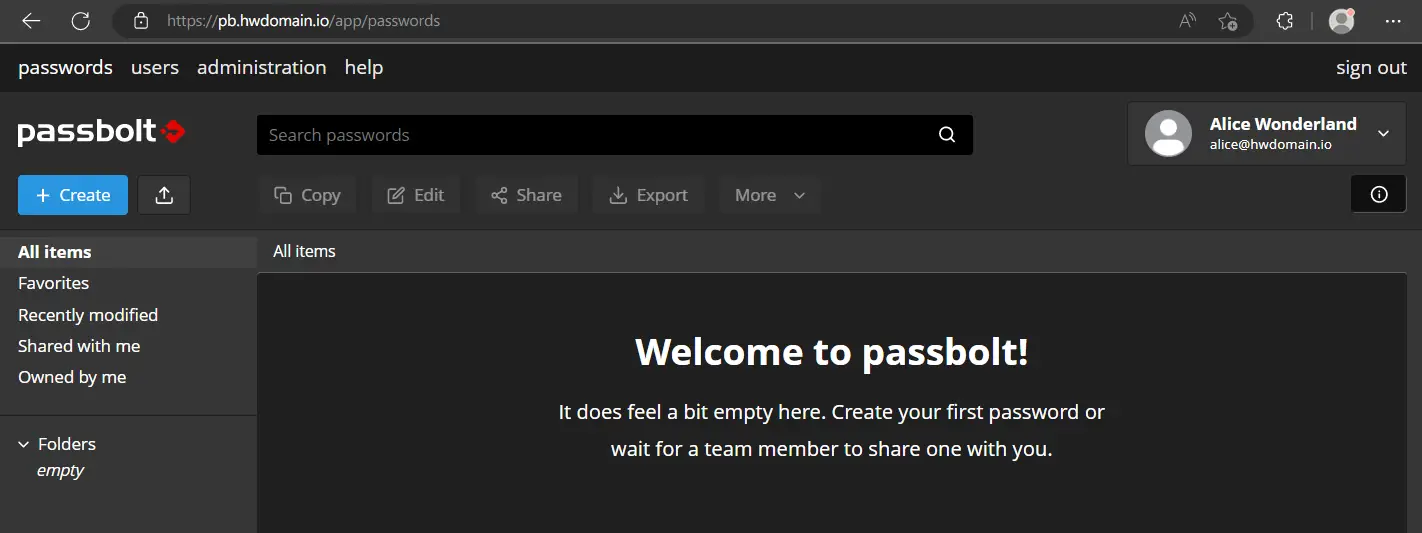
Upon the completion of Passbolt installation, you should see the Passbolt user dashboard like the following.
Conclusion
You're all set! You've completed the installation of Passbolt Password Manager with the MariaDB database server, Nginx web server, and PHP-FPM on your AlmaLinux 9 server. You can now use Passbolt as your day-to-day password manager or set up an additional SMTP server for Passbolt and use Passbolt for your organization or internal friends.

