
I want to share my experience of upgrading from Windows 10 to Windows 11 and all the hassles I had to go through to finally complete the upgrade. Here you go!
Before we start, Here’s my PC configuration:
- AMD Ryzen 7 3700X 8-Core Processor
- Installed Ram: 16 GB
- Edition: Windows 10 pro
- B450 Gaming Plus Max Motherboard
- MSI GeForce RTX 2060 graphic card
Checking compatibility
First, We need to check if the PC is compatible to upgrade to Windows 11. Microsoft has created a tool called PC health check which checks the compatibility and reports if there are any issues.
You should have the PC health check app already if your Windows 10 is up to date. Here’s what it looks like:
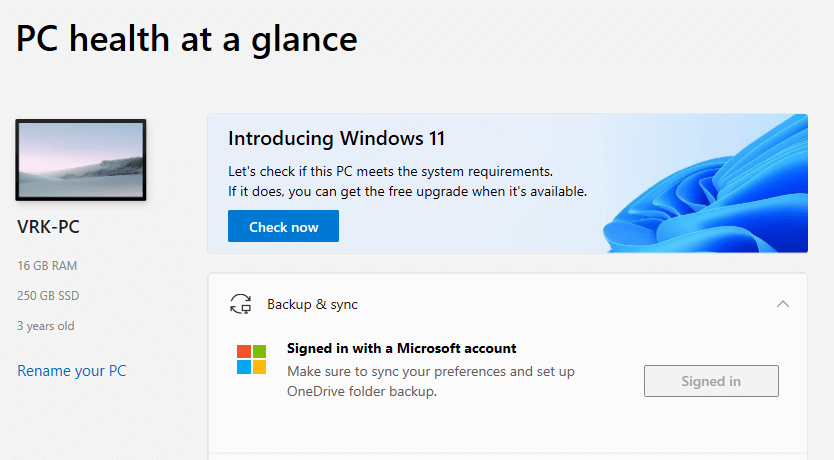
When I tapped on “Check now”, It reported 2 issues:
- TPM 2.0 is not enabled
- Secure boot is not enabled
Let’s get to work now
So I checked the help articles written by Microsoft which mention that we can enable TPM from the Recovery > Troubleshoot > UEFI Firmware Settings. So I tried but to my surprise, I couldn’t even see any UEFI firmware settings there.
Now I googled and found out that we need to set UEFI mode from the BIOS settings so I went ahead and did that. Now my PC doesn’t even boot to Windows. It just keeps going to BIOS again every time I exit BIOS
Then I googled again and found out that it doesn’t work unless my C drive is converted to GPT (GUID Partition Table) format from MBR (Master Boot Record)
I looked up a few articles and some of them were talking about using a USB boot loader and some shit. I felt that was too much and was also busy with other stuff so I gave up that day.
A fresh start, Enabling TPM 2.0
After a few days, I was back to putting in the work and determined to complete the Windows 11 upgrade.
I googled a bit and found an article on the MSI website about How to Enable TPM on MSI Motherboards Featuring TPM 2.0
I followed the steps in the article and enabled TPM from MSI bios and it worked!
TPM 2.0 is enabled now!
Enabling secure boot
I started searching again and found a video and started watching it.
After watching the video and reading the pinned comment, I realized that even this method will not work for me unless I convert my hard drive partition from MBR to GPT
Converting MBR to GPT
I started my research again. Read a few articles to understand the difference between MBR and GPT and then I stumbled upon this video showing how to convert MBR to GPT
This video explains how we can use a command line tool named MBR2GPT to convert the hard drive partition from MBR to GPT
I tried to do the first step of validating by running:
mbr2gpt /validate /disk:1 /allowFullOS
Note: disk number of my C drive is 1. It is usually 0 for most PCs. Change it accordingly
But the validation failed without any specific error. I couldn’t understand what to do from here.
Back to Googling and stumbled upon a post on the Microsoft tech community – MBR2GPT Disk layout validation failed
Many users have reported different issues and different solutions. I read all of them and found a comment which had similar behavior to my drive partitions.
I faced this issue because my system partition and boot partition were different disks. I copied the system partition to the same disk as boot partition, rebooted with bios change to point to correct disk (boot order), then deleted to older system partition on wrong disk. I was able to run this command successfully after that. Turned the boot to uefi from legacy. Enabled secure boot and tpm 2
– Smart2470
Now I understood the issue – “The system partition and boot partition were different disks”
Fix “System Partition and Boot Partition on Different Drives”
Back to Google and found this article – System and boot partition on different drives
The steps given in the article were clear and correct but the problem was that the tool mentioned in the article MiniTool Partition Wizard is not free to use. We need a subscription for it to work.
I followed the same steps in the article but used a different tool named EaseUS partition master
Download EaseUS partition master
How to Copy a Partition to Another Hard Drive
The free version of EaseUS partion master does support copying partition from one drive to another.
I created some unallocated space in C drive first using the same tool and then copied the system reserved partition to the C drive. All the steps are mentioned in the above articles.
I changed the boot order in BIOS to make sure that the hard disk which has the system and boot partition is the first priority. I verified that everything is working fine by restarting after changing the boot order and finally deleted the old duplicate system partition.
Back to converting the drive from MBR to GPT
I ran the validate command again and it was successfully validated!!
Now the final command to convert the drive from MBR to GPT
mbr2gpt /convert /disk:1 /allowFullOS
Note: disk number of my C drive is 1. It is usually 0 for most PCs. Change it accordingly
But the conversion failed with the error “Cannot find room for the EFI system partition”
Fixing “Cannot find room for the EFI system partition”
I read up a few Microsoft support posts in their forums and someone mentioned that this error could be caused by either not having enough space or if available shrink space is 0
In my case, I had plenty of space in the drive but available shrink space was shown as 0. I don’t know why it is shown as 0. The explanation is some unmovable files or something.
But someone had posted that if available shrink space is 0 and this is causing the conversion to fail then it can be fixed by running the command in recovery environment.
I restarted my PC while holding shift, Then Troubleshoot > Advanced options > Command Prompt.
Here comes the final test! I ran the conversion command again and it worked!
Then I exited the command prompt, entered BIOS > set boot to UEFI and enabled secure boot as shown in the above video.
I restarted the PC and ran the health check app again and checked for compatibility and voila my PC is now compatible to upgrade to Windows 11!
No Windows 11 upgrade on a compatible PC
Now my PC was compatible with Windows 11 but I don’t see any windows 11 update in the updates section. Turns out that Windows 11 is not fully out to the public yet and is available only for the users who have signed up for the windows insider program.
I signed up for the Windows Insider program from settings to the beta channel and restarted the PC. Then I got the Windows 11 upgrade in my Updates section.
I immediately downloaded the update and it took around 2 to 3 hours for the overall Windows 11 upgrade to complete!
Was it worth it?
Is Windows 11 worth it? After going through all the hassles to upgrade to Windows 11, I actually quite like it. The aesthetics have improved a lot. Everything looks cleaner and nicely animated.
I cannot comment on the performance as of now but so far I did not face any issues.
Should you upgrade to Windows 11 through all the hassles? Do it if the upgrade is straightforward to your PC without any compatibility issues. If your PC has compatibility issues then do it if you are a technical user. Otherwise, you could lose data and screw up your existing OS if you make any mistake in the process.
✌️
- Flutter lookup failed in @fields error (solved) - July 14, 2023
- Free open source alternative to Notion along with AI - July 13, 2023
- Threads API for developers for programmatic access - July 12, 2023