Redis Made Easy: A Step-by-Step Guide to Installing Redis on AlmaLinux 9
Redis is a popular and open-source in-memory key-value data store. It supports different data structures such as Hash, Lists, Sets, Strings, and many more. Redis is designed to be running in the trusted environment only, it can be used as a database, cache, and message broker. Redis is extensively known for its broad support, high performance, high availability, and flexibility.
You can install Redis as a standalone for small deployment. For large deployment, they provide additional components such as Redis Sentinel for high availability and Redis Cluster for partitioning data across multiple Redis node servers.
This tutorial will show you how to install and configure Redis on the AlmaLinux 9 server. In addition, we will also show you how to secure Redis via Redis ACLs (Access Control Lists) and Firewalld.
Prerequisites
To complete this tutorial, you must have the following:
- An AlmaLinux server 9 - This example uses the AlmaLinux server with hostname 'alma-linux' and IP address '192.168.5.21'.
- A non-root user with sudo/root administrator privileges.
- A firewalld configured, up, and running.
Now, let's dive in.
Installing Redis
Redis is a high-performance, open-source data store that can be used as a database, cache, message broker, and streaming engine. Redis is available on most Linux distributions, including AlmaLinux. It can be installed via the default distribution repository.
Before installing Redis, run the following command to rebuild the package cache and get the latest version of package information.
sudo dnf makecache

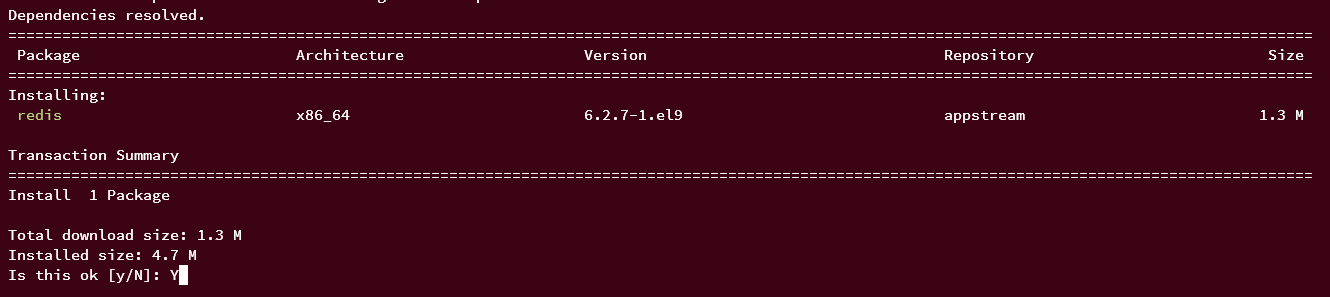
Now, run the dnf command below to install Redis. Input y when prompted, then press ENTER to proceed.
sudo dnf install redis
When Redis is installed, run the following systemctl commands to start and enable Redis service.
sudo systemctl start redis
sudo systemctl enable redis

Lastly, verify the Redis service status using the command below.
sudo systemctl is-enabled redis
sudo systemctl status redis
The following output confirms that Redis is running and enabled, which means it will be run automatically upon the system startup.

Securing Redis with Firewalld
In this section, you will set up firewalld to secure the Redis installation. And the best way to achieve this is by creating zones on firewalld and allowing specific networks/subnets to the service.
Run the following command to create a new firewalld zone called 'svcs', then add the internal network interface into it. In this example, the Redis will be run on an internal IP address under the interface 'enp0s8', you must add your interface to the zone 'svcs'.
sudo firewall-cmd --new-zone=svcs --permanent
sudo firewall-cmd --zone=svcs --add-interface=enp0s8 --permanent
Now, run the following command to allow the network '192.168.5.1/24' for accessing ports on the zone 'svcs'.
sudo firewall-cmd --zone=svcs --add-source=192.168.5.1/24
After that, add the Redis port '6379/tcp' to the zone 'svcs', then apply the changes to the firewalld.
sudo firewall-cmd --zone=svcs --add-port=6379/tcp
sudo firewall-cmd --runtime-to-permanent

Now, reload the firewalld using the following command to ensure that new changes are applied to the firewalld.
sudo firewall-cmd --reload
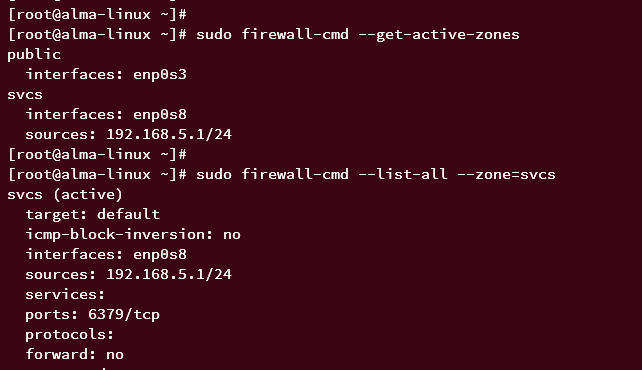
Lastly, run the following command to check the list of active zones on firewalld. And you should see the zone 'svcs' is active.
sudo firewall-cmd --get-active-zones
You can now verify the list of rules that are available in the 'svcs' zone. When successful, you should see the Redis port '6379/tcp' on the Ports section and the subnet '192.168.5.1/24' on the Source.
sudo firewall-cmd --list-all --zone=svcs
Configuring Redis
In this section, you will configure the Redis installation by modifying the default Redis configuration '/etc/redis/redis.conf'.
Open the Redis configuration file '/etc/redis/redis.conf' using the nano editor command below.
sudo nano /etc/redis/redis.conf
Change the value on the 'bind' parameters with the server's internal IP address. In his example, Redis will be running on a local IP address '192.168.5.21'.
bind 192.168.5.21

Now, disable the 'protected-mode' by changing the value of the parameter to 'no'. To allow remote connections from your application to the Redis server, you must disable the 'protected-mode'.
protected-mode no

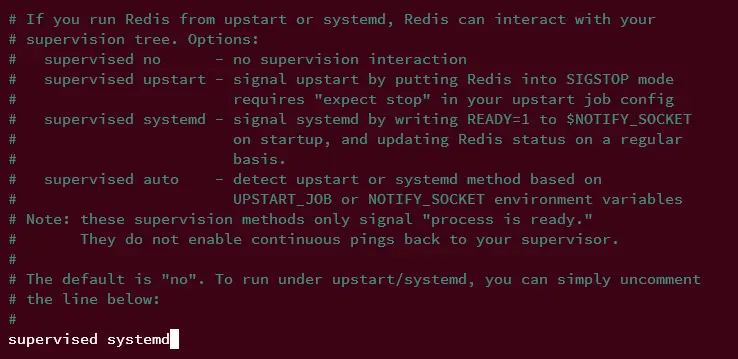
On AlmaLinux, the default service manager is 'systemd'. Uncomment the 'supervised' parameter and change the default value to 'systemd' to enable the integration of Redis with systemd.
supervised systemd
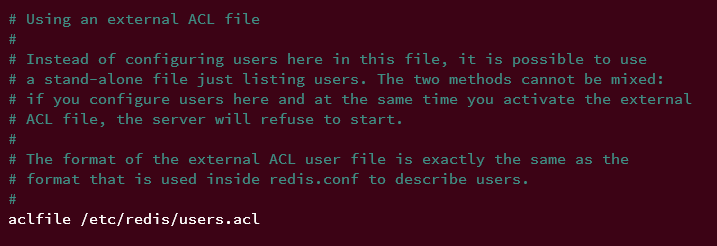
Lastly, uncomment the 'aclfile' parameter to enable the ACLs (Access Control Lists) of Redis via file. Since Redis v6, using ACLs is a recommended way for securing Redis, and Redis supports different methods for using ACLs, you can create ACLs via Redis shell or defined ACLs file. This example will be used ACLs via file.
aclfile /etc/redis/users.acl
Save and close the file when finished.
Now, run the following command to create the ACLs file '/etc/redis/users.acl'.
touch /etc/redis/users.acl
After that, run the command below to restart the Redis service and apply the changes that you have made.
sudo systemctl restart redis
With this, redis will be up and running with new configurations. The next step you will do is verify your Redis configuration via Redis CLI.
Connect to the Redis server using the 'redis-cli' command below. In this example, you will specify the IP address for the Redis server.
redis-cli -h 192.168.5.21
Once logged in, run the following command to ensure that the connection is successful. You should expect to see the output 'test redis' when the connection is successful.
PING "test redis"

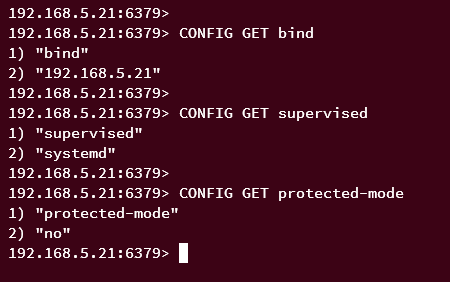
Next, run the following queries to get the current Redis configurations. In this example, you will check the 'bind', 'supervised', and protected-mode' settings.
CONFIG GET bind
CONFIG GET supervised
CONFIG GET protected-mode
When successful, you should get the configuration matched with the settings that you've made before.
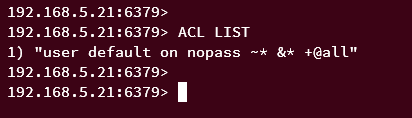
Lastly, run the following ACL query below to get the list of available ACLs on Redis.
ACL LIST
You should expect to see the output like this - The default Redis installation comes with ACL user 'default', the authentication is 'nopass' or log in without a password, and the permission '+@all', which allows the 'default' user to execute any Redis queries.
At this point, you have now finished the basic configuration of Redis. In the next step, you dive into the configuration of Redis ACLs (Access Control Lists) for securing Redis installation.
Securing Redis with ACLs (Access Control Lists)
Since Redis 6.x, the best way to secure Redis is by implementing ACLs (Access Control Lists). This allows you to set up user and permissions on the Redis server, and this can obsolete the 'requirepass' and 'rename-command' parameters on the old Redis version.
You can set up ACLs on Redis with two different methods:
- Setting up ACLs via ACL command\
- Setting up ACLs via external ACL file
With the Redis server that you've configured, you will set up Redis ACLs via an external ACL file.
First, open the ACL file '/etc/redis/users.acl' using the following nano editor command.
sudo nano /etc/redis/users.acl
Insert the following configurations to create two users for Redis.
user alice on -DEBUG +@all ~* >AliceP4ssw0rd
user bob on +@all -@dangerous ~* >BobP4ssw0rd
Save the file and exit the editor when finished.
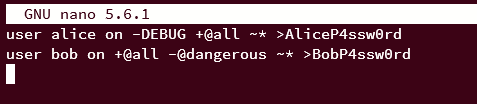
With this configuration, you will create two users:
- User alice with password 'AliceP4ssw0rd' and allowed to execute all queries '+@all' except DEBUG '-DEBUG', and also allowed to run queries against all available key-values '~*' that available.
- A user bob with password 'BobP4ssw0rd' and allowed user bob to execute all queries '+@all' except '-@dangerous'. The command category '-@dangerous' includes FLUSHALL, MIGRATE, RESTORE, SORT, KEYS, CLIENT, DEBUG, INFO, CONFIG, SAVE, REPLICAOF, and many more. Also, this user is allowed to make queries to all available key values on the Redis server.
Get the full list of command categories on Redis.
Now, run the following systemctl command to restart the Redis service and apply the changes.
sudo systemctl restart redis
Once Redis restarted, connect to the Redis server using the following redis-cli command below.
redis-cli -h 192.168.5.21
Once logged in, run the following ACL query to check the list of available users on Redis.
ACL LIST
At this point, you should expect to see three users alice, bob, and default.

You can also verify the detailed user on Redis using the following query.
ACL GETUSER alice
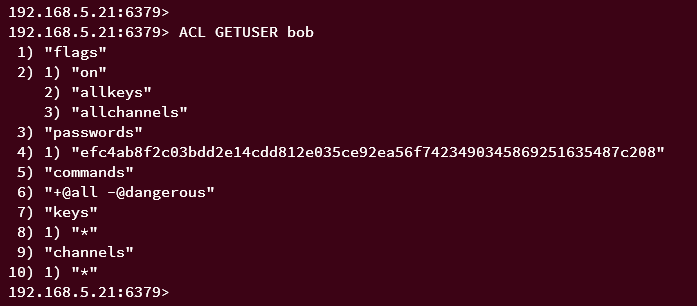
ACL GETUSER bob
You should see that the user alice is allowed to execute all available commands on Redis, with the command group '+@all'.

As for the user bob, you can see the allowed command '+@all', but also the command group 'dangerous' disabled.
Disable default Redis User
With the new user alice and bob is created, you must disable the 'default' user using the following query.
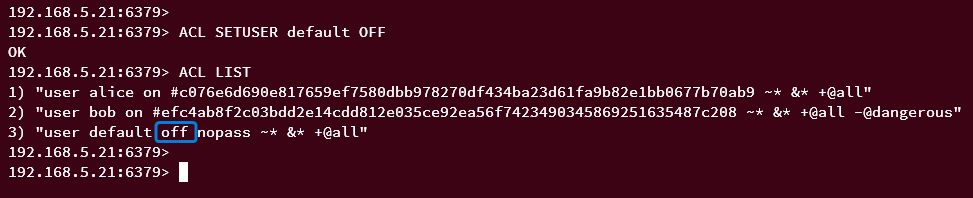
ACL SETUSER default OFF
Then, check again the list of available users on Redis using the command below.
ACL LIST
You should expect the user 'default' with the status off or disabled like this:
Press Ctrl+d to exit from the Redis shell.
After that, login again to Redis using the following command.
redis-cli -h 192.168.5.21
Then, input the following PING query to verify the current connection.
PING
With the Redis "default" user disabled, you should get an error like the following - You need must be authenticated user to run queries.

Verify User alice
Next, you will verify the new Redis user alice and bob that you've created.
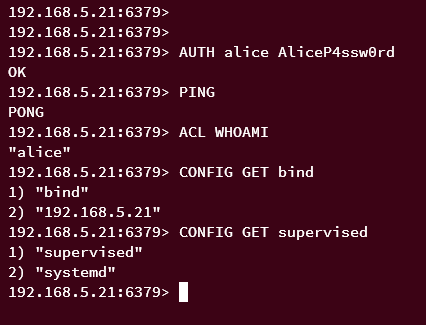
Run the following command to authenticate as user 'alice'. If successful, you should get an output 'OK'.
AUTH alice AliceP4ssw0rd
Now run the following queries to ensure that you're authenticated to Redis via user alice.
PING
ACL WHOAMI
You should expect to see the message PONG and authenticated as user alice.
Now, run the following queries to ensure that the user alice can execute all available queries, including related Redis management.
CONFIG GET bind
CONFIG GET supervised
When successful, you should get an output of the current Redis configuration for parameter bind and supervised.
Verify User bob
Run the following query to log in and authenticate as user bob.
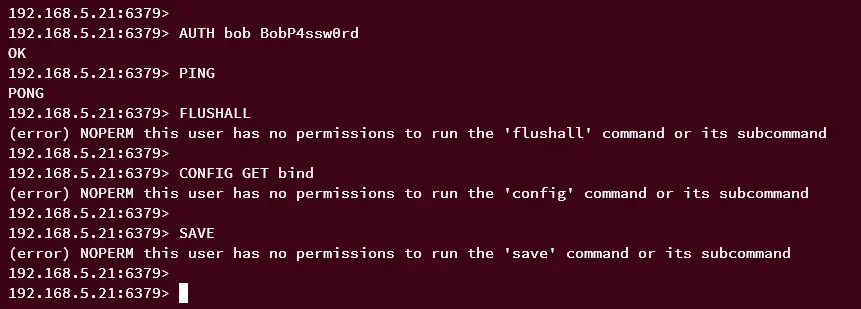
AUTH bob BobP4ssw0rd
After authentication, run the PING query below. If successful, you should get the message PONG.
PING
Next, within the Redis ACL file, the user bob the command category '-@dangerous', which prevents this user to execute some dangerous commands such as FLUSHALL, CONFIG, and many more on the Redis server.
If you run the following queries as user bob, you should get an output such as 'NOPERM', which means the user bob has no permission to execute the command.
FLUSHALL
CONFIG GET bind
SAVE
With this, you have now successfully secured Redis with ACLs (Access Control Lists) via ACL file.
Conclusion
Congratulations! You have now successfully installed Redis on AlmaLinux 9. You have also learned how to set up ACLs (Access Control Lists) via ACL file to secure Redis installation. In addition to that, you have also secured Redis with firewalld by creating a specific zone for Redis service.

