
Part 3: Migration of Telerik Xamarin ERP App to .NET MAUI

Roll up your sleeves! It’s time to get to work migrating a real app from Xamarin to .NET MAUI!
Now it is time to do the “dirty” job and actually migrate a real app. I’ve written this post based on the experience of migrating a complex real-world app—Telerik Xamarin ERP built with Telerik components.
The solution itself contains two major projects—web service telerikErpService.sln and Xamarin.Forms app TelerikErp.sln. Let’s leave the service for now as it is a general .NET app and focus on the Xamarin part.
The steps that I followed to port the app are:
1. Run the Dotnet Upgrade Assistant
I started using the dotnet Upgrade Assistant with the following command:
C:\Users\Rosit\Documents\ERP> upgrade-assistant upgrade C:\Users\Rosit\Documents\ERP\app|ErpApp.sln --non-interactive
The tool will back up the app , convert it to .NET 7, rename the Microsoft.Namespaces. with the Microsoft.Maui and Microsoft.Maui.Controls namespaces.
These changes are great, but the assistant will not update any third-party reference and will not deal with the UWP project, so a lot of manual changes will still be required.
2. Create a Blank .NET MAUI App
That is why I decided to start with a blank new .NET MAUI app and copy the cs and xaml files step by step from the output of the UpgradeAssistant in the order described later here.
3. Add Third-Party References
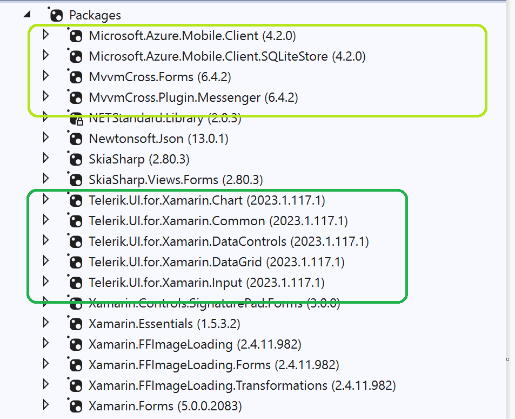
The Telerik ERP app uses the following third-party packages that we need to replace with their .NET MAUI alternative:
- Telerik UI
- MVVM cross
- Azure Moble Client services
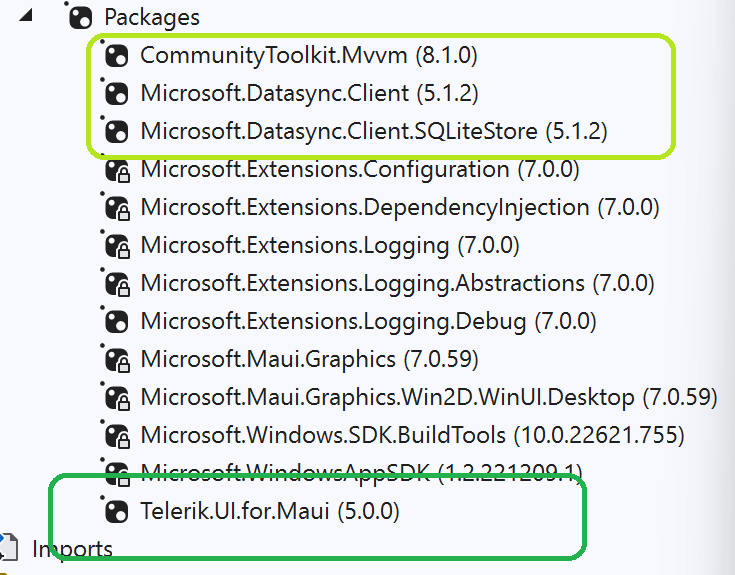
For the Telerik part, it is easy—now we will use Telerik UI for .NET MAUI, the most extensive UI suite on the market. You can download it here or directly as a NuGet from Telerik NuGet Server.
However, MVVM Cross does not support .NET MAUI, but the good news is that the .NET MAUI itself gives us all we need to replace it. Still, to make the migration easier I will use the MVVM Community toolkit, which gives me similar classes as MVVM Cross library.
Azure Mobile Services are now replaced by Microsoft.DataSync.Client.
And to compare .NET MAUI vs Xamarin ERP:
| Xamarin.Forms ERP | .NET MAUI ERP |
|---|---|
| Telerik UI for Xamarin | Telerik UI for .NET MAUI |
| MVVM cross | MVVM community toolkit |
| Microsoft.Azure.Mobile.Client | Microsoft.Datasync.Client |
| Microsoft.Azure.Mobile.Client.SqlLiteStore | Microsoft.Datasync.Client.SQLLiteStore |
Xamarin packages installed
.NET MAUI packages installed
4. Move Independent Code
Next, I started to move all code that was “independent” from technology stack as Constant.cs, Layout.cs, EmbededResources.cs and Converters folder. Here, I recommend building the new app to ensure that everything is OK.
Then I moved the Serialization folder with all classes. The interesting part here is the usage of Colors API.
Login and Authentication Part
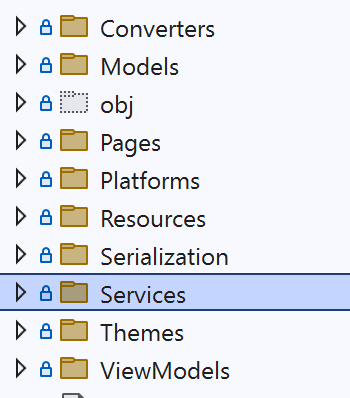
I decided to port the app function by function. I first ported the pages that did not rely on data, such as Login and AboutPage, then moved on to the rest. To do that, I created at the root level the same folders from the original app:
- Pages
- Services
- Models
- ViewModels
- Themes
5. Pages and Themes, or the XAML Part
I copied LoginPage.xaml, LoginPage.xaml.cs, AboutPage.xaml.cs and AboutPage.cs and all xaml from the themes folders from the original app to my new app.
Base Classes and Data Context
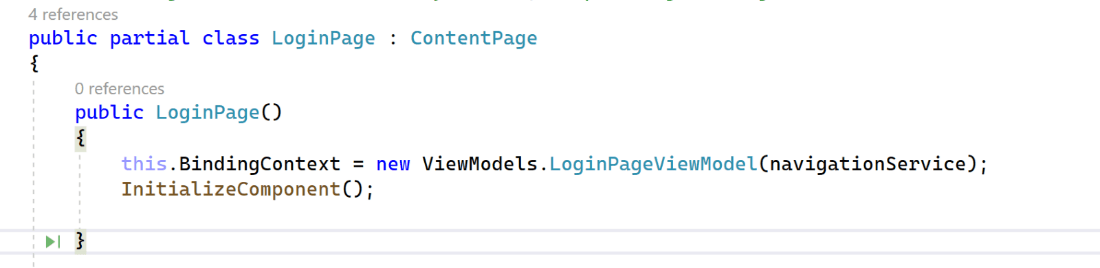
The first things to update are the base classes and data context. In the original app, we used MVVMcross and inherited MvxContentPage<ViewModels.LoginPageViewModel>, which also took
care for the data context of the page.
Now we will inherit from a simple ContentPage and set the BindingContext in the constructor:
Replacing Telerik UI
When we used Progress Telerik UI for Xamarin, we used to use separate NuGets and different namespaces for every respective assembly.
Now we are going to use one package and the telerik scheme, which is way more convenient. This way, we do not have to remember which component which assembly belongs to.
So replace all in xaml:
clr-namespace:Telerik.XamarinForms.*;assembly=Telerik.XamarinForms.*with:
http://schemas.telerik.com/2022/xaml/mauiWe will do a similar replacement in code-behind. Replace using Telerik.XamarinForms.* with using Telerik.Maui.Controls;.
Note: Time to have a look into
MAUIProgram.cs. To use Telerik, there is a method to be added here calledUseTelerik(). You can read more about this and look into the specific migration hints per components in the very descriptive documentation on migrating Telerik controls from Xamarin to .NET MAUI.
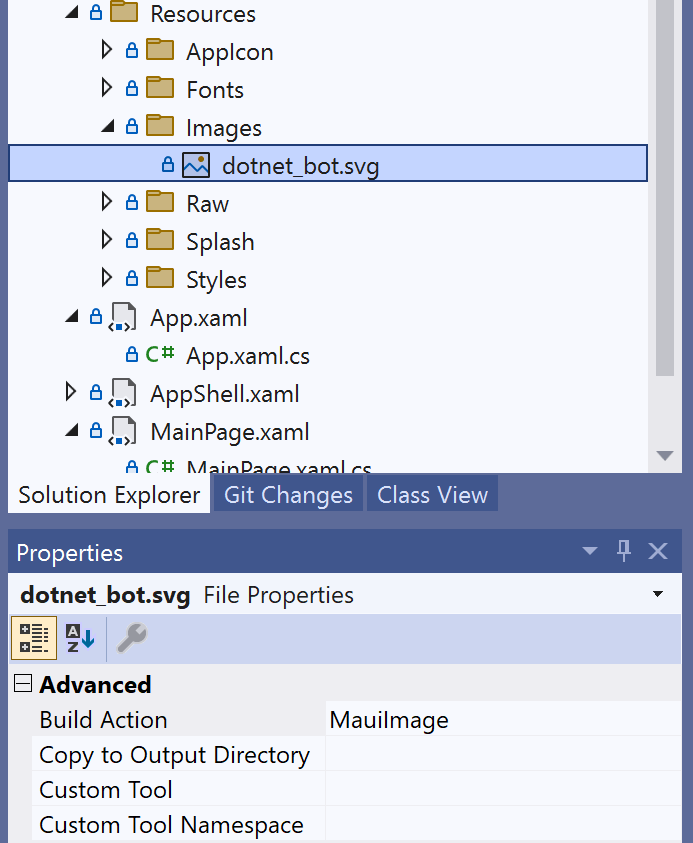
6. Now, Let’s Consider the Images
In the original app, we have an Assets folder with images set as EmbeddedResources loaded in class like this:
public static ImageSource LoginBackgroundImage => ImageSource.FromResource("MauiErp.Assets.bg_login.png",typeof(EmbeddedImages).GetTypeInfo().Assembly);This approach is still working in .NET MAUI so we can move it directly. However, we can benefit from the new resources’ mechanism. To do that, we can move the images under the shared Resources/Images folder, which now every .NET MAUI project has. This will automatically set the build action of the image to MauiImage and we can shorten the code to:
public static ImageSource LoginBackgroundImage => ImageSource.FromResource(" MauiErp.Assets.bg_login.png") ;
You can learn more about working with images in .NET MAUI in the MS docs: Image - .NET MAUI | Microsoft Learn.
7. ViewModels
The ViewModels in the original app inherits from MvxViewModel class of MVVM cross library, which now we don’t have access to. That is why we are going to replace it with
ObservableObject using MVVM community toolkit.
We will also replace IMvxCommand with ICommand.
For reference:
| MVVMCross | MVVM Community toolkit |
|---|---|
| MvxViewModel | ObservableObject |
| IMvxCommand | ICommand |
8. AuthenticationService and NavigationService
Great news for the AuthenticationService—no changes needed. We should just copy AuthenticationService.cs, IAuthenticationService.cs as it is to the Services folder
of our new app.
As for the NavigationService, we have more things to do. The Xamarin.Forms app uses MVVM cross navigation service, TabbedPage and NavigationPages.
Now, .NET MAUI has more capabilities to this without third-party services and we will use the built-in features of the framework. Shell is also the recommended approach for .NET MAUI apps and so we will replace that too using Shell Tabs. Then we will build our own simple NavigationService to work with Shell.
public interface INavigationService
{
  Task InitializeAsync();
  Task NavigateToAsync(string route, IDictionary<string, object> routeParameters = null);
  Task PopAsync();
}
public class NavigationService:INavigationService
{
  public NavigationService() { }
  public Task InitializeAsync()
  {
    return NavigateToAsync("//LoginPage");
  }

  public Task NavigateToAsync(string route, IDictionary<string, object> routeParameters =
null)
  {
    return
    routeParameters != null
    ? Shell.Current.GoToAsync(route, routeParameters)
    : Shell.Current.GoToAsync(route);
  }

  public Task PopAsync()
  {
    throw new NotImplementedException();
  }
}
And call it when needed like this. In our case, this code is needed in LoginpageViewModel:
await this.navigationService.NavigateToAsync("//AboutPage");Note that to navigate between pages we need to register them as route in XAML or in code behind like this:
<TabBar>
  <ShellContent  Title="Login" Route="LoginPage"
    ContentTemplate="{DataTemplate pages:LoginPage}"
    />
  <ShellContent   Title="About" Icon="About.png"
    ContentTemplate="{DataTemplate pages:AboutPage}"
    Route="AboutPage"/>
</TabBar>
Register the Services
While we relied on MVVM cross in Xamarin.Forms version of the app, it is now time to do this ourselves. We can easily do this with the built-in .NET MAUI dependency injection so I am just adding the following code to MAUIprogram.cs:
builder.Services.AddSingleton<IAuthenticationService, AuthenticationService>();
builder.Services.AddSingleton<INavigationService, NavigationService>();
Then I create a static Services provider in the AppShell.cs which I can use later in the view models to access the services:
App.cs
public partial class App : Application
{
  public static IServiceProvider Services;

  public App(IServiceProvider provider)
  {
    InitializeComponent();
    Services = provider;
    MainPage = new AppShell(Services.GetService<INavigationService>());
  }
}
LoginPageViewModel.cs (how to access the services):
this.authService = App.Services.GetService<IAuthenticationService>();
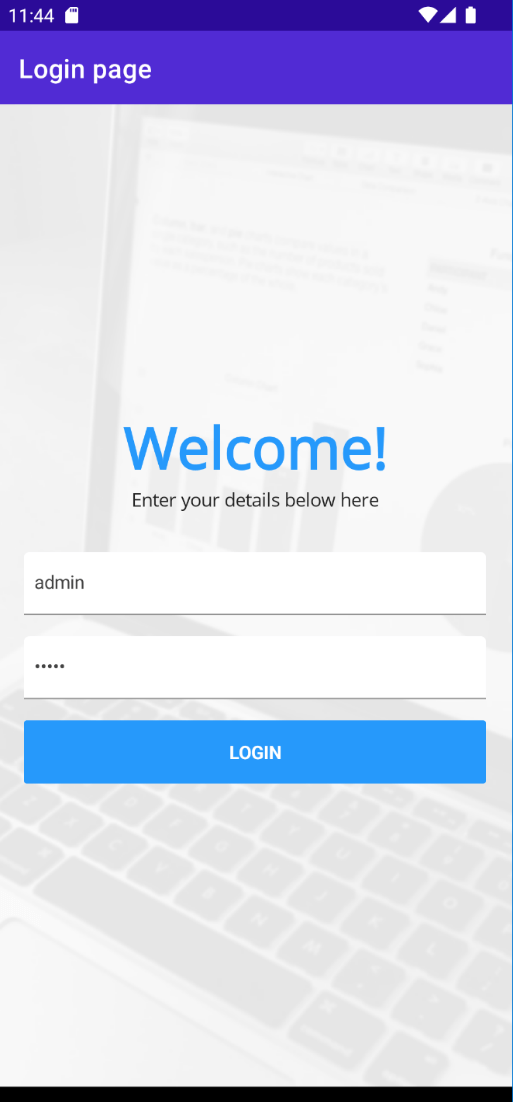
If you made all changes to both pages and their respective viewmodels, now we can build our app and test it. It will look like this:
9. Migrating Datamodels and Services
Now it is time to do a real dirty job and move the data classes and the related classes consuming our ERP services—updating Microsoft.WindowsAzure to Microsoft.Datasync. To do that, we copy all Pages, Models, ViewModels and Services classes.
Similar to migrating the LoginPage and AboutPage, we need to replace all changes described above in the rest of the xaml pages and view models.
And then we are focusing on moving the ErpService and using DataSync.
Replace namespace:
using Microsoft.WindowsAzure.MobileServices;
using Microsoft.WindowsAzure.MobileServices.SQLiteStore;
using Microsoft.WindowsAzure.MobileServices.Sync;
With:
Microsoft.Datasync.Client
Microsoft.Datasync.Client.SQLiteStore
Here are both the APIs to help you do the replacement, but in my opinion a better approach here is to consider and write the service from scratch following the Microsoft documentation.
Note: If your web service application is several years old, it is best to consider updating it first as it may not be compatible with using DataSync client. Again refer to MS docs here and here about more details.
And here are some comparisons.
| Xamarin | .NET MAUI |
|---|---|
IMobileServiceSyncTable<Vendor> | IRemoteTable<Vendor> |
const string offlineDbPath = @"localstore.db"; | const string offlineDbPath = FileSystem.CacheDirectory + "/offline.db" |
DeleteAsync | DeleteItemAsync |
InsertAsync | InsertItemAsync |
UpdateAsync | ReplaceItemAsync |
ToEnumerableAsync | ToAsyncEnumerable |
Xamarin
this.client = new MobileServiceClient(Constants.ApplicationURL);
  var store = new MobileServiceSQLiteStore(offlineDbPath);
  store.DefineTable<Vendor>();
  store.DefineTable<Product>();
  store.DefineTable<Order>();
  store.DefineTable<Customer>();

this.client.SyncContext.InitializeAsync(store, new ErpMobileServiceSyncHandler());

  //this.CurrentClient.
  this.vendorTable = client.GetSyncTable<Vendor>();
.NET MAUI
var store = new Microsoft.Datasync.Client.SQLiteStore.OfflineSQLiteStore(new Uri(offlineDbPath).AbsoluteUri);
  var options = new DatasyncClientOptions
  {
    OfflineStore = store
  };
    // Initialize the client.
    client = new DatasyncClient(Constants.ApplicationURL, options);
    this.client.InitializeOfflineStoreAsync();
Xamarin
this.client = new MobileServiceClient(Constants.ApplicationURL);
.NET MAUI
This.client = new DatasyncClient(Constants.ApplicationURL, options);
And again, register the services in MauiProgram.cs:
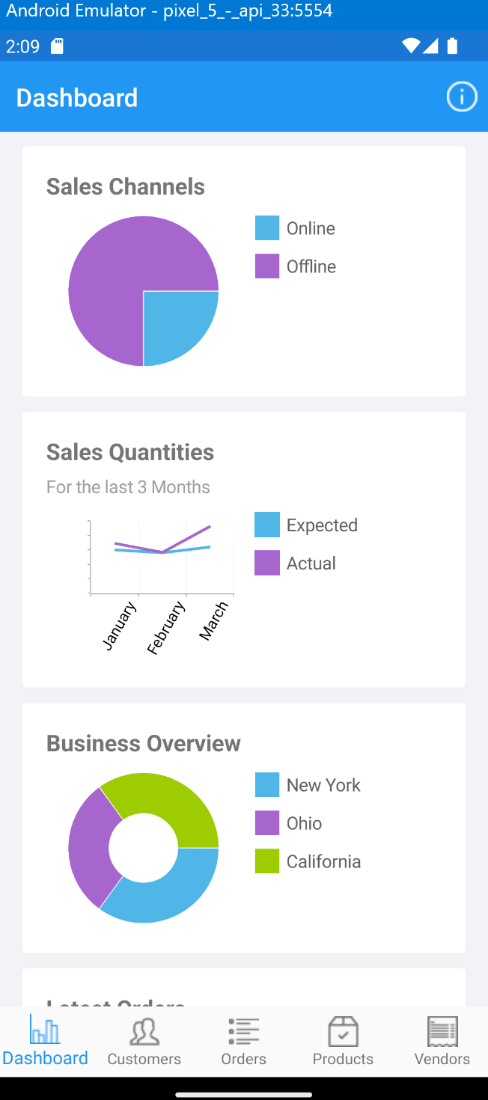
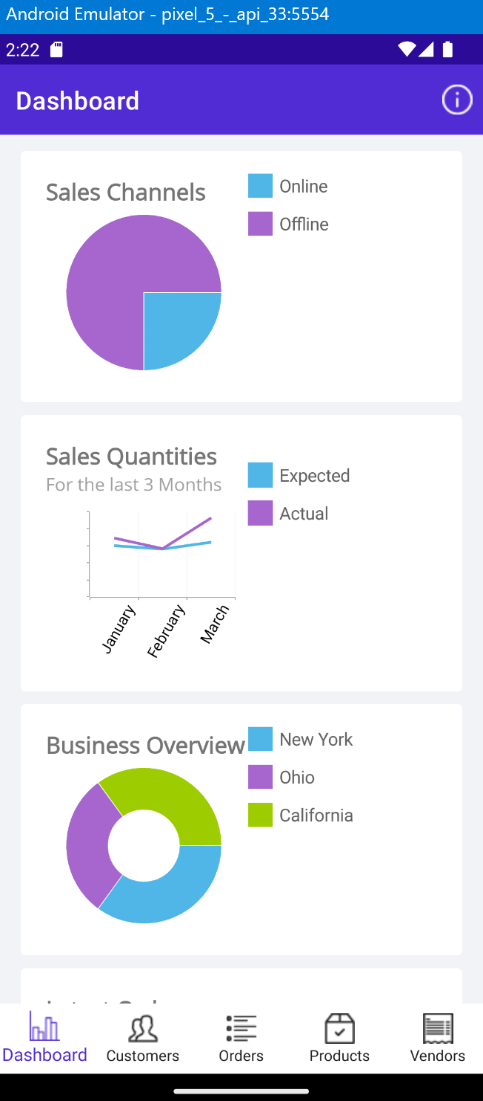
builder.Services.AddSingleton<IErpService, ErpService>();In the result we now receive, you can see some minor differences:
Xamarin vs. .NET MAUI
10. Custom Renderers
Our app contains a simple custom renderer in Android that we don’t need any more as we transformed TabbedPage to Shell Tabs. However, our next post will be focused on renderers and how to deal with them.
11. MauiSplash Screen & Icon 😊
In Xamarin.Forms, we had different resources and splash screen configurations, but now we can use one shared Resource folder and use the new type as MauiSplashScreen to update them.
Still, here we need help from a friend—our UX designer to give us .svg files instead of .png.
Note also that if you run the app on Windows, the splash screen will not appear. Do not search for an error, it is simply not supported for now in WinUI framework. 😊
Conclusion
.NET MAUI offers all we need to port our app to the next level, and there are also enough resources now that can support you in this effort.
The time needed for such migration is not a constant, as it depends on many factors, but I hope that this post and the rest of the series will help you plan the major parts.
Again here they are for our app: replacing the MVVM API, changing the Navigation API, rewriting the connection with Azure services, and the easiest transition—replacing Telerik UI for Xamarin with Telerik UI .NET MAUI.
Telerik UI for .NET MAUI is also here with all the components needed and documentation to ease the journey of apps including Telerik controls. Try it for free.

Rossitza Fakalieva
Rossitza Fakalieva is a Technical Manager, Microsoft MVP in Developer Technologies and a Director of the Bulgarian chapter of the global Women Who Code organization. She previously worked on the Telerik engineering team and defines herself as .NET enthusiast. She loves to empower others to grow in their career and in the tech field—by teaching, by delivering courses and presentations, and as part of her daily job.
Related Posts
Comments
All articles
Topics

Latest Stories
in Your Inbox
Subscribe to be the first to get our expert-written articles and tutorials for developers!
All fields are required