How to Install Percona XtraDB Cluster on Debian 11
On this page
Percona XtraDB Cluster is a fully open-source database clustering solution for MySQL. It allows you to create a robust, high-availability MySQL server deployment that provides high performance. The latest version of Percona XtraDB Cluster is 8.0, which is fully compatible with MySQL Server Comunity Edition 8.0.
Percona XtraDB Cluster provides features such as synchronous replication, multi-source replication, automatic node provisioning, automatic SSL encryption configuration, and optimized performance.
Percona XtraDB Cluster ensures the high availability of your database server, provides linear scalability and prevents downtime and data loss.
In this tutorial, you will install and set up MySQL cluster via Percona XtraDB Cluster (PXC) on Debian 11 servers. You will install Percona XtraDB Cluster - An open-source solution for MySQL cluster - to multiple Debian servers, then set up MySQL cluster to enable replication between multiple MySQL servers.
Prerequisites
To complete this tutorial, you will need two or more servers running Debian 11. Also, you must have a non-root user with sudo/root administrator privileges on all of your servers.
This example uses three Debian 11 servers with the following details:
Hostname       IP Address
--------------------------
pxc01       192.168.5.15
pxc02       192.168.5.16
pxc03       192.168.5.17
When all servers are ready, you can start installing the Percona XtraDB Cluster.
Setup Hosts and Firewall
First, you must set up the /etc/hosts file on each server to ensure that every hostname is resolved to the proper IP address, then set up a firewall to open some ports that Percona XtraDB Cluster will use. This you must do on all servers.
Below are the details of the Percona XtraDB Cluster ports you must open on your firewall.
Ports   Used for
---------------------------
3306    MySQL client connection and SST (State Snapshot Transfer)
4444    SST via Percona XtraBackup
4567    write-set replication traffic (over TCP) and multicast replication (over TCP and UDP)
4568    IST (Incremental State Transfer)
To start, open the config file '/etc/hosts' using the following nano editor.
sudo nano /etc/hosts
Add the following lines to the file and be sure to change the details of IP addresses and hostnames with your environment.
192.168.5.15  pxc01
192.168.5.16  pxc02
192.168.5.17  pxc03
Save and exit the file when finished.
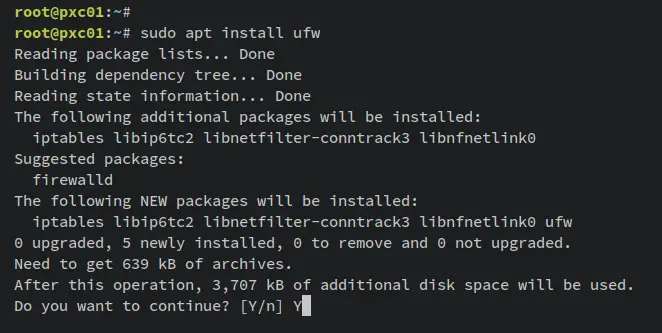
Now enter the following 'apt install' command to install the ufw firewall package. When prompted, input y to confirm and press ENTER to proceed.
sudo apt install ufw
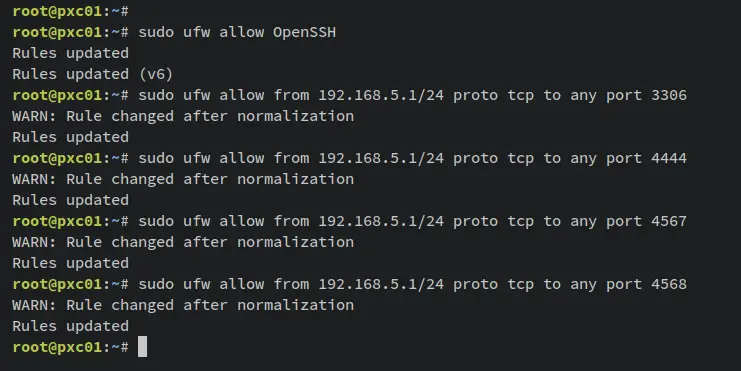
After ufw installed, run the following ufw command to add the OpenSSH service. This will ensure that you're not locked out from your server. And if you have a custom SSH port, you can just change the 'OpenSSH' parameter with your SSH port.
sudo ufw allow OpenSSH
Next, enter the following ufw command to open some ports that Percona XtraDB Cluster will use. Be sure to change the subnet of an internal IP address with your current environment.
sudo ufw allow from 192.168.5.1/24 proto tcp to any port 3306
sudo ufw allow from 192.168.5.1/24 proto tcp to any port 4444
sudo ufw allow from 192.168.5.1/24 proto tcp to any port 4567
sudo ufw allow from 192.168.5.1/24 proto udp to any port 4567
sudo ufw allow from 192.168.5.1/24 proto tcp to any port 4568
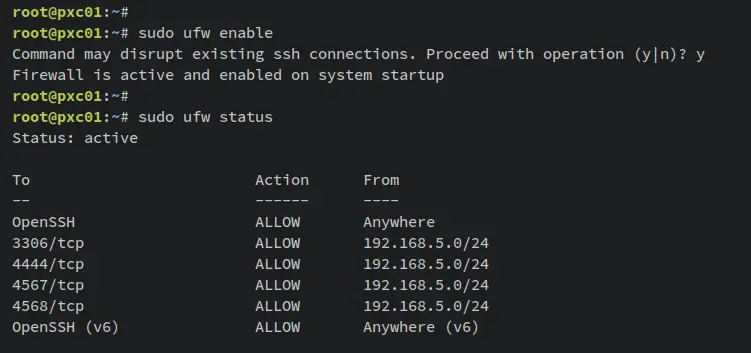
After that, run and enable the ufw firewall by entering the 'ufw enable' command. When prompted, input y to confirm and press ENTER to proceed. An output 'Firewall is active and enabled on system startup' confirms that the ufw firewall is running and will start automatically upon the system startup.
sudo ufw enable
Lastly, verify the ufw firewall status using the following command.
sudo ufw status
You should receive an output like this.
Installing Percona XtraDB Cluster
In this section, you will add and set up the Percona XtraDB repository for Debian-based distribution. Then, you will install Percona XtraDB on all of your servers.
Also, during the installation, you will be prompted to set up the MySQL root password and set up the default authentication plugin for Percona XtraDB Cluster. Lastly, you will verify the Percona XtraDB Cluster installation by logging into the MySQL shell via the MySQL root user and password that you've configured.
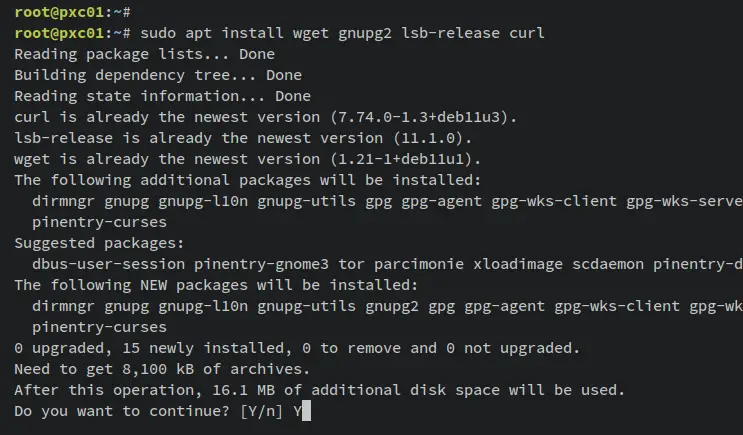
To start, enter the following apt command to install some basic dependencies. Inpu y when prompted and press ENTER to proceed.
sudo apt install wget gnupg2 lsb-release curl -y
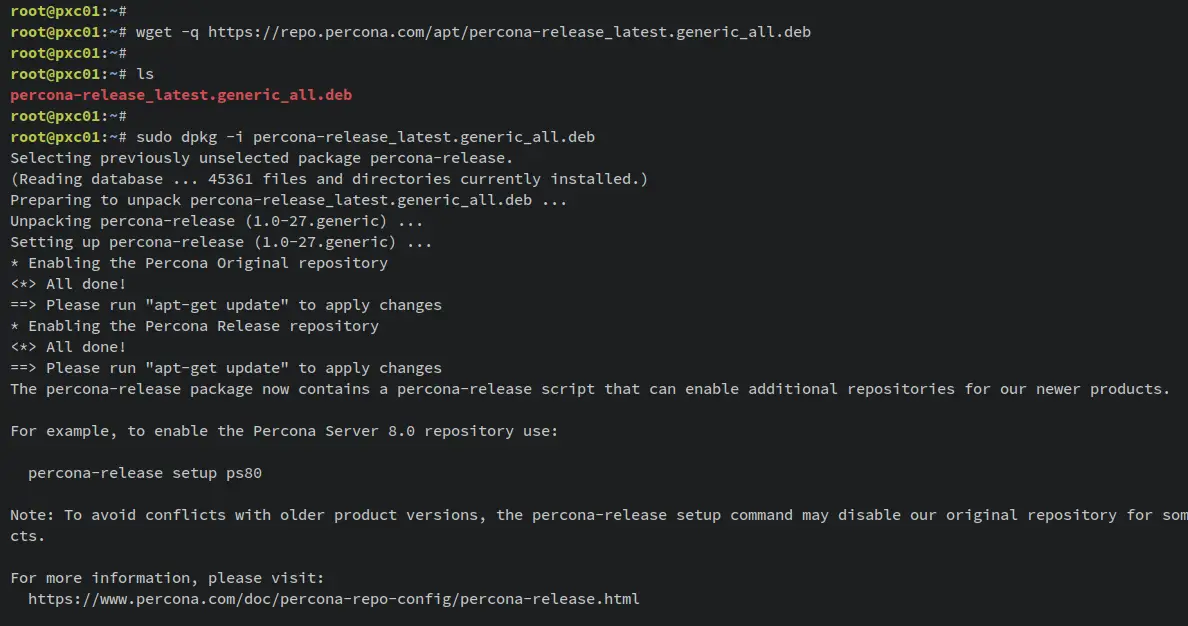
Next, download the Percona XtraDB repository package via the following wget command. Once downloaded, install it via the 'dpkg -i' command below.
wget -q https://repo.percona.com/apt/percona-release_latest.generic_all.deb
sudo dpkg -i percona-release_latest.generic_all.deb
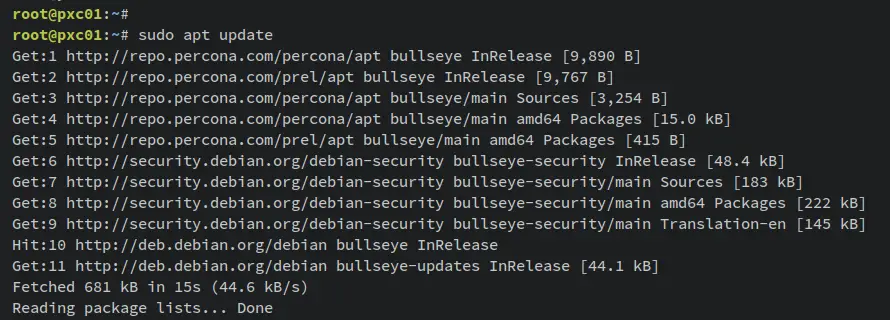
Now update and refresh your Debian package index and run the 'percona-release' command to set up the Percona XtraDB Cluster repository. In this example, you will enable Percona XtraDB Cluster package v8.0, which is equivalent to MySQL server v8.0.
sudo apt update
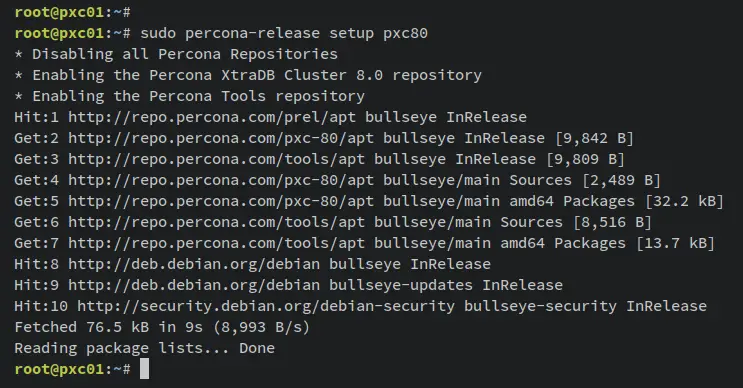
sudo percona-release setup pxc80
Update repository.
Enable Percona XtraDB Cluster v8.0 repository.
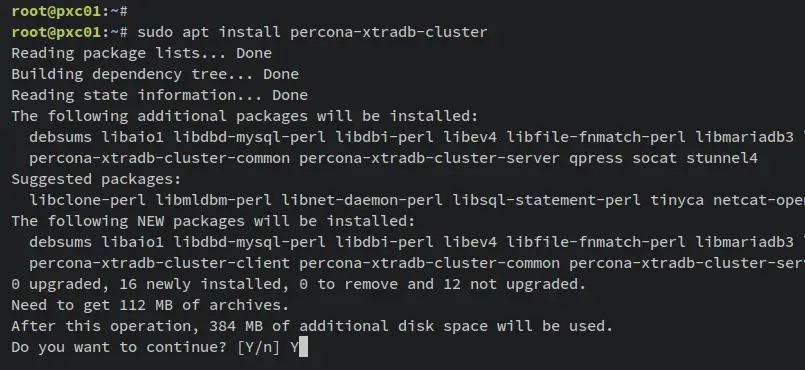
Once the repository is enabled, enter the 'apt install' command to install the 'percona-xtradb-cluster' package to your systems. Input y to confirm the installation and press ENTER to proceed.
sudo apt install percona-xtradb-cluster
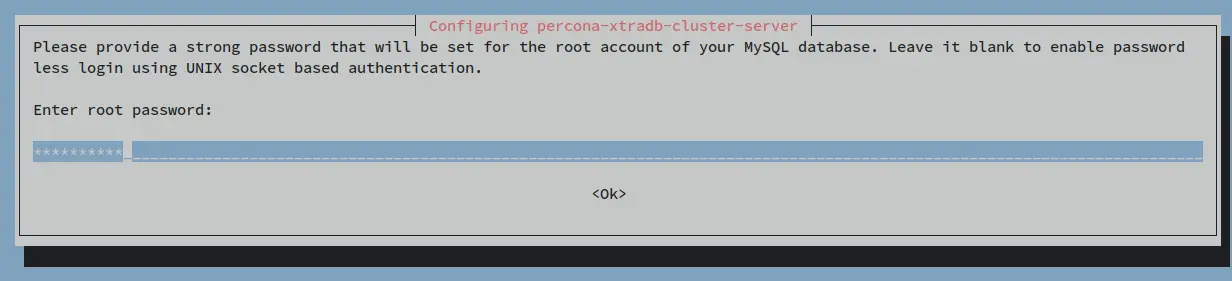
During the Percona XtraDB Cluster installation, you should be asked to set up the MySQL root password.
Input the new strong password and select OK.
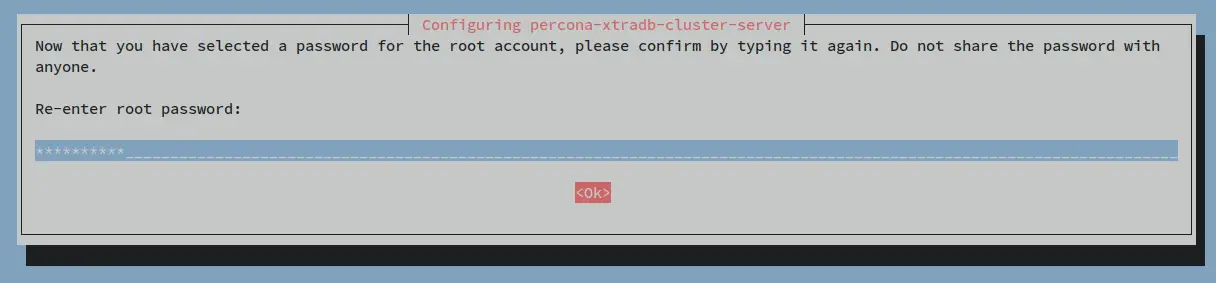
Repeat your password and select OK again.
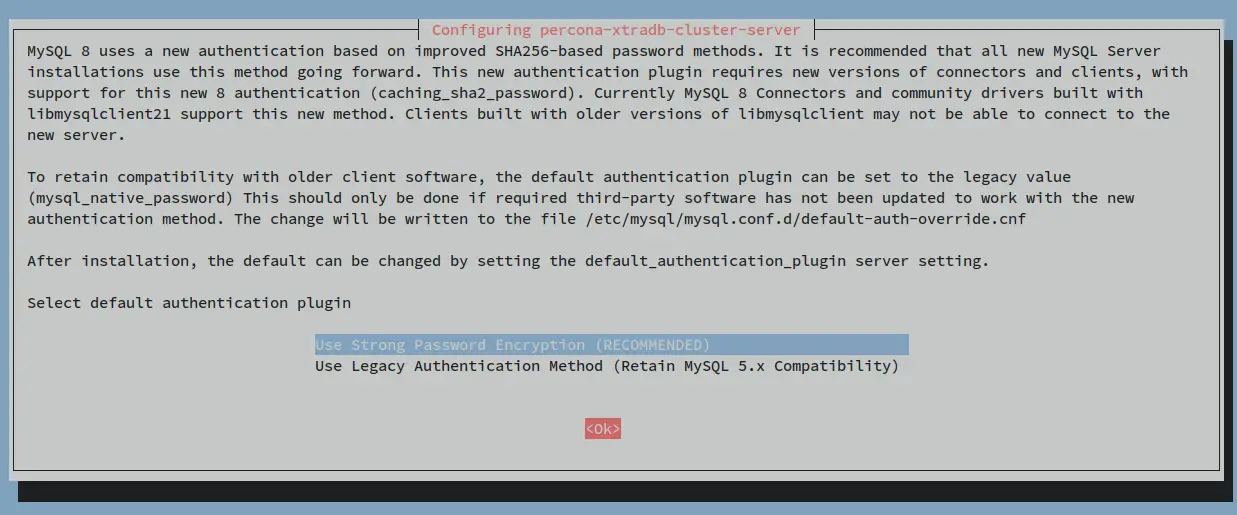
For the default MySQL authentication plugin, choose the option 'Use strong password encryption (RECOMMENDED)' and select OK.
Now the Percona XtraDB Cluster should be installed and it will start and be enabled automatically.
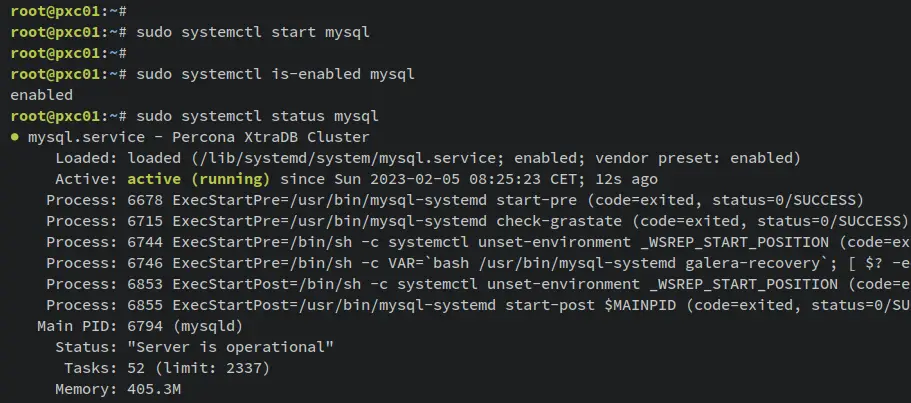
When Percona XtraDB Cluster is installed, enter the following command to verify the status of the MySQL service.
sudo systemctl is-enabled mysql
sudo systemctl status mysql
An output 'enabled' confirms that the MySQL server is enabled and will start automatically upon the system startup. And the output 'active (running)' confirm that the MySQL server is running.
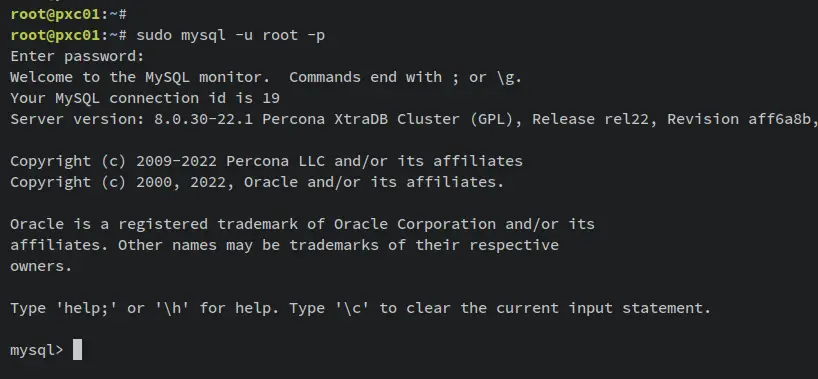
To verify your MySQL root password, log in to the MySQL shell via the 'mysql' command below. When asked for the password, input your MySQL root password.
sudo mysql -u root -p
When successful, you should get the MySQL shell.
You can also verify the details status of your MySQL server by entering the following query.
sudo systemctl status mysql
You should receive an output similar to this - You have logged in to the MySQL 8.0 Percona XtraDB Cluster.
At this point, you have now configured your system /etc/hosts file, installed and configured the ufw firewall, and also install the Percona XtraDB Cluster MySQL 8.0 on all of your servers. You're ready to start configuring Percona XtraDB Cluster.
Stopping Percona XtraDB Cluster Service
Before you start configuring the Percona XtraDB Cluster, you must ensure that the MySQL server is stopped.
Enter the following systemctl command utility to stop the MySQL server on your servers. Then, verify the MySQL server status to ensure that the service is stopped.
sudo systemctl stop mysql
An output 'inactive (dead)' confirms that the MySQL server is stopped.
You can now start initializing Percona XtraDB Cluster for the first node 'pxc01'.
Copying SSL/TLS Certificates
Percona XtraDB Cluster has two kinds of traffic encryption: a client-server connection and replication traffic. On the latest Percona XtraDB Cluster v8.0, all replication traffic is enabled by default to enhance security.
During the Percona XtraDB Cluster installation, SSL/TLS is automatically generated at the data directory '/var/lib/mysql'. Enter the following command to check the list of SL/TLS certificates on the '/var/lib/mysql' directory.
ls /var/lib/mysql/*.pem
You should see three types of SSL/TLS certificates, Client, Server, and CA.

To create and set up Percona XtraDB Cluster, all servers must have the same CA and Server certificates. So, you must copy the default certificates CA and Server certificates from 'pxc01' to 'pxc02' and 'pxc03'.
On the 'pxc01' server, move your working directory to the '/var/lib/mysql' directory.
cd /var/lib/mysql
Enter the following scp command to copy CA and Server certificates to the 'pxc02' and 'pxc03' servers.
scp server-key.pem server-cert.pem ca.pem root@pax02:/var/lib/mysql
scp server-key.pem server-cert.pem ca.pem root@pax03:/var/lib/mysql
You will receive an output similar to this - Copy CA and Server certificates from 'pxc01' to 'pxc02' and 'pxc03' servers.


With SSL/TLS certificates copied, you can initialize the Percona XtraDB Cluster.
Initializing Percona XtraDB Cluster on First Node
In this section, you will initialize the Percona XtraDB Cluster from the first node server 'pxc01'. Ensure that you run the following steps on the 'pxc01' server.
Open the MySQL config file '/etc/mysql/my.cnf' using the following nano editor command.
sudo nano /etc/mysql/my.cnf
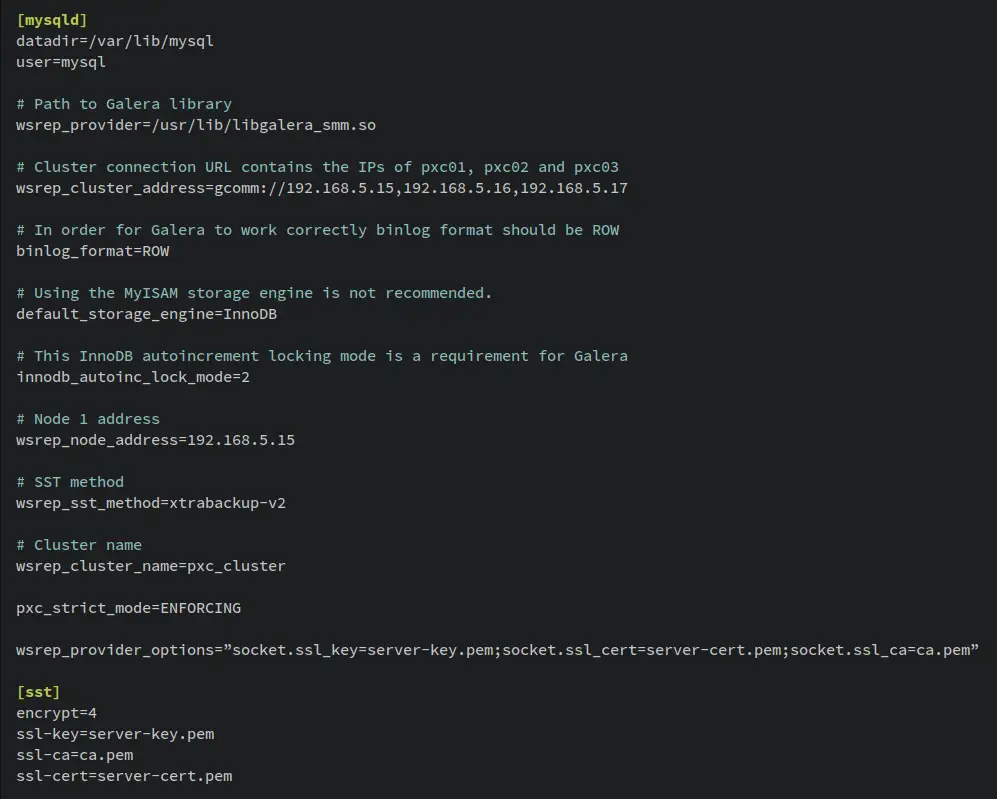
Add the following lines to the file. Be sure to change the value of 'wsrep_cluster_address' with the IP addresses of all your servers. Also, on the 'wsrep_node_address', you must enter the 'pxc01' IP address.
[mysqld]
datadir=/var/lib/mysql
user=mysql

# Path to Galera library
wsrep_provider=/usr/lib/libgalera_smm.so

# Cluster connection URL contains the IPs of pxc01, pxc02, and pxc03
wsrep_cluster_address=gcomm://192.168.5.15,192.168.5.16,192.168.5.17

# In order for Galera to work correctly binlog format should be ROW
binlog_format=ROW

# Using the MyISAM storage engine is not recommended.
default_storage_engine=InnoDB

# This InnoDB autoincrement locking mode is a requirement for Galera
innodb_autoinc_lock_mode=2

# Node 1 address
wsrep_node_address=192.168.5.15

# SST method
wsrep_sst_method=xtrabackup-v2

# Cluster name
wsrep_cluster_name=pxc_cluster

#pxc_strict_mode allowed values: DISABLED,PERMISSIVE,ENFORCING,MASTER
pxc_strict_mode=ENFORCING

wsrep_provider_options="socket.ssl_key=server-key.pem;socket.ssl_cert=server-cert.pem;socket.ssl_ca=ca.pem"

[sst]
encrypt=4
ssl-key=server-key.pem
ssl-ca=ca.pem
Save and close the file '/etc/mysql/my.cnf' when finished.
Next, run the following systemctl command to bootstrapping and initialize the Percona XtraDB Cluster.
The 'mysql@bootstrap' is a systemd service that is used to run Percona XtraDB Cluster and this is different from the 'mysql' service. When building a MySQL server with percona XtraDB Cluster, the first node must be run with the 'mysql@bootstrap' service.
systemctl start [email protected]
When finished, enter the following mysql command to log in to the MySQL shell. Input the root password of your MySQL server.
sudo mysql -u root -p
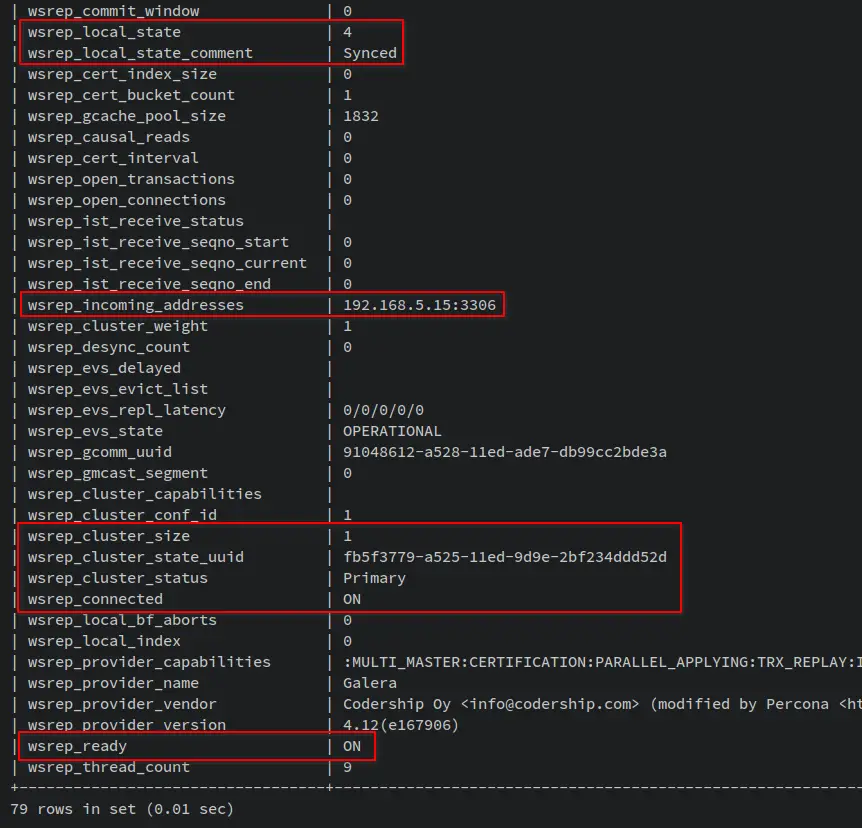
Enter the following MySQL query to ensure that the cluster is initialized.
show status like 'wsrep%';
You should receive an output like this - On the 'wsrep_cluster_size' section you will see the value '1', which means the Percona XtraDB Cluster is initialized with 1 server. You will also get server IP addresses on the 'wsrep_incoming_address' section. Lastly, the node is in the Synced state, which means it is fully connected and ready for write-set replication.
With the first node initialized, you're ready to add the second and third nodes 'pxc02' and 'pxc03' to the Percona XtraDB Cluster.
Adding Node2 and Node3 to the Cluster
Adding new nodes to percona XtraDB Cluster is similar to the initialization on the first node. Below are the simple steps you will need to do:
- Modify the MySQL config file '/etc/mysql/my.cnf'.
- Start the MySQL server
- Login to MySQL shell and verify the Percona XtraDB Cluster.
Now, let's start adding 'pxc02' and 'pxc03' to Percona XtraDB Cluster.
Addding Node pxc02
Log in to the 'pxc02' server and open the MySQL configuration file '/etc/mysql/my.cnf' using the following nano editor command.
sudo nano /etc/mysql/my.cnf
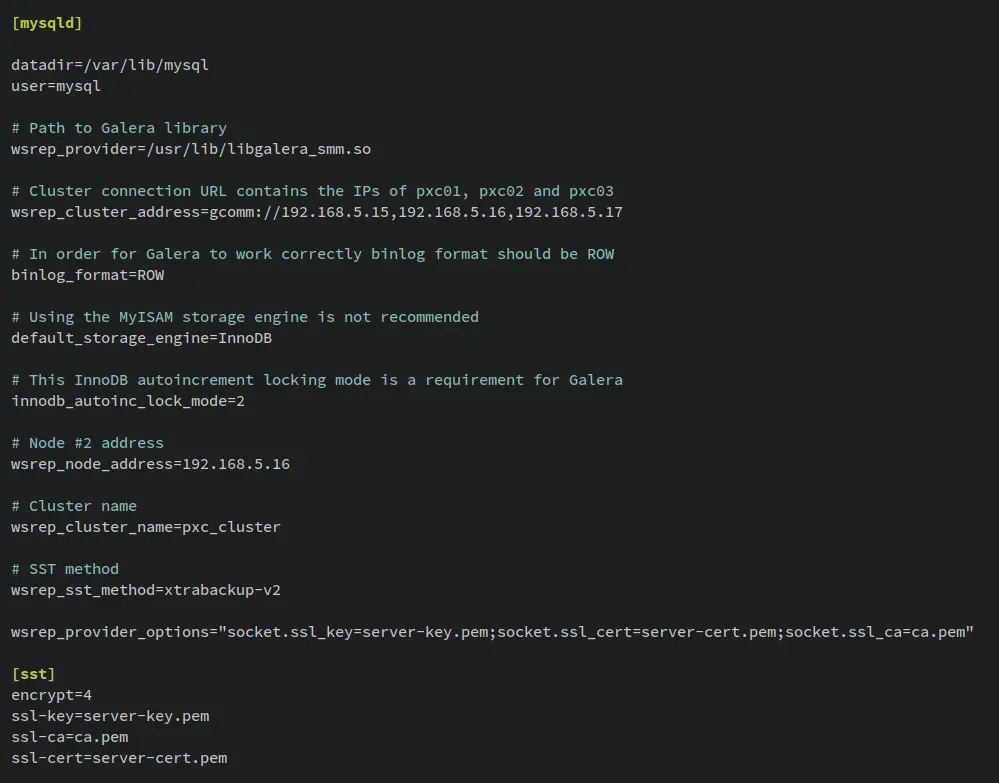
Add the following lines to the file and be sure to change the value of 'wsrep_cluster_address' with the IP addresses of all your servers. Also, on the 'wsrep_node_address', you must enter the 'pxc02' IP address.
[mysqld]

datadir=/var/lib/mysql
user=mysql

# Path to Galera library
wsrep_provider=/usr/lib/libgalera_smm.so

# Cluster connection URL contains the IPs of pxc01, pxc02, and pxc03
wsrep_cluster_address=gcomm://192.168.5.15,192.168.5.16,192.168.5.17

# In order for Galera to work correctly binlog format should be ROW
binlog_format=ROW

# Using the MyISAM storage engine is not recommended
default_storage_engine=InnoDB

# This InnoDB autoincrement locking mode is a requirement for Galera
innodb_autoinc_lock_mode=2

# Node #2 address
wsrep_node_address=192.168.5.16

# Cluster name
wsrep_cluster_name=pxc_cluster

# SST method
wsrep_sst_method=xtrabackup-v2

wsrep_provider_options="socket.ssl_key=server-key.pem;socket.ssl_cert=server-cert.pem;socket.ssl_ca=ca.pem"

[sst]
encrypt=4
ssl-key=server-key.pem
ssl-ca=ca.pem
ssl-cert=server-cert.pem
Save and close the file '/etc/mysql/my.cnf' when finished.
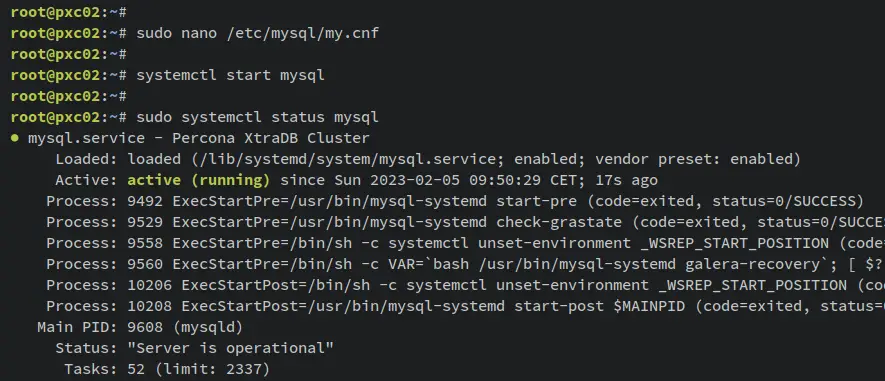
Next, start the MySQL server by entering the following systemctl command utility. Then verify the MySQL server status to ensure that it's running.
This will start the MySQL service and join the initialized Percona XtraDB Cluster on the 'pxc01' server.
sudo systemctl start mysql
sudo systemctl status mysql
To verify that the process is successful, you should log in to the MySQL shell. Enter the following command to log in to the MySQL shell as the root user. When prompted, input your MySQL root password.
sudo mysql -u root -p
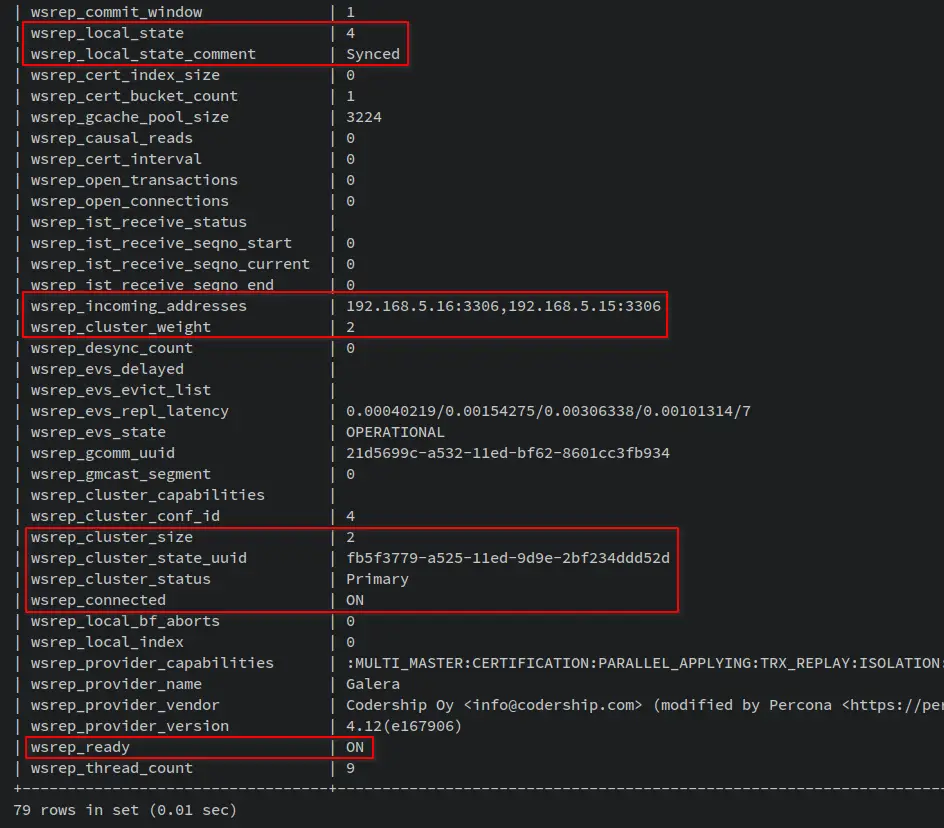
Once logged in, enter the following MySQL query to verify Percona XtraDB Cluster status.
show status like 'wsrep%';
You should receive an output like this - On the 'wsrep_cluster_size' section you will see the value '2', which means there are two servers available on the Percona XtraDB Cluster. You will also get server IP addresses on the 'wsrep_incoming_address' section, which are the pxc01 and pxc02 server IP addresses. Lastly, the node is in the Synced state, which means it is fully connected and ready for write-set replication.
With this, the Percona XtraDB Cluster is now running with two nodes/servers pxc01 and pxc02. Next, move to the pxc03 server to add it to the Percona XtraDB Cluster.
Adding Node pxc03
Log in to the 'pxc03' server and open the MySQL configuration file '/etc/mysql/my.cnf' using the following nano editor command.
sudo nano /etc/mysql/my.cnf
Add the following lines to the file and be sure to change the value of 'wsrep_cluster_address' with the IP addresses of all your servers. Also, on the 'wsrep_node_address', you must enter the 'pxc03' IP address.
[mysqld]

datadir=/var/lib/mysql
user=mysql

# Path to Galera library
wsrep_provider=/usr/lib/libgalera_smm.so

# Cluster connection URL contains the IPs of pxc01, pxc02, and pxc03
wsrep_cluster_address=gcomm://192.168.5.15,192.168.5.16,192.168.5.17

# In order for Galera to work correctly binlog format should be ROW
binlog_format=ROW

# Using the MyISAM storage engine is not recommended
default_storage_engine=InnoDB

# This InnoDB autoincrement locking mode is a requirement for Galera
innodb_autoinc_lock_mode=2

# Node #2 address
wsrep_node_address=192.168.5.17

# Cluster name
wsrep_cluster_name=pxc_cluster

# SST method
wsrep_sst_method=xtrabackup-v2

wsrep_provider_options="socket.ssl_key=server-key.pem;socket.ssl_cert=server-cert.pem;socket.ssl_ca=ca.pem"

[sst]
encrypt=4
ssl-key=server-key.pem
ssl-ca=ca.pem
ssl-cert=server-cert.pem
Save and close the file '/etc/mysql/my.cnf' when finished.

Next, start the MySQL server by entering the following systemctl command utility. Then verify the MySQL server status to ensure that it's running.
This will start the MySQL service and join the Percona XtraDB Cluster.
sudo systemctl start mysql

To verify that the process is successful, you should log in to the MySQL shell. Enter the following command to log in to the MySQL shell as the root user. When prompted, input your MySQL root password.
sudo mysql -u root -p
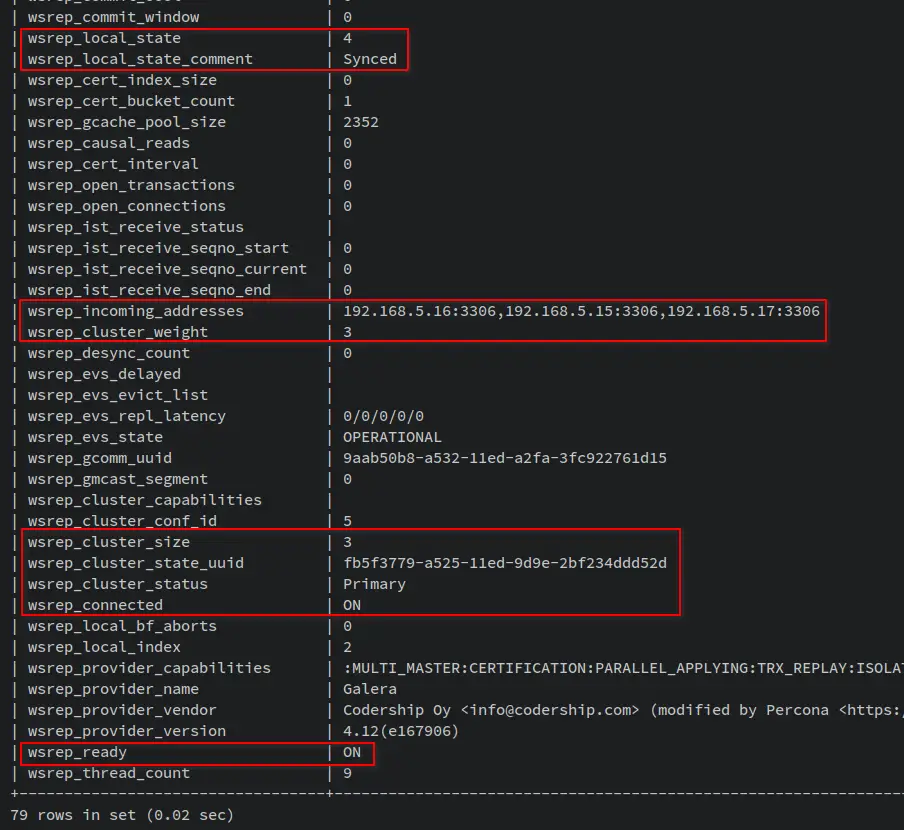
Once logged in, enter the following MySQL query to verify Percona XtraDB Cluster status.
show status like 'wsrep%';
You should receive an output like this - On the 'wsrep_cluster_size' section you will see the value '3', meaning three servers are available on the Percona XtraDB Cluster. You will also get server IP addresses on the 'wsrep_incoming_address' section, which are the pxc01, pxc02, and pxc03 server IP addresses. Lastly, the node is in the Synced state, which means it is fully connected and ready for write-set replication.
With this, the Percona XtraDB Cluster is now running with three Debian servers pxc01, pxc02, and pxc03. You have now finished the deployment of the Percona XtraDB Cluster with three Debian 11 servers. In the next step, you'll verify the database replication between the Percona XtraDB Cluster server.
Testing Replication
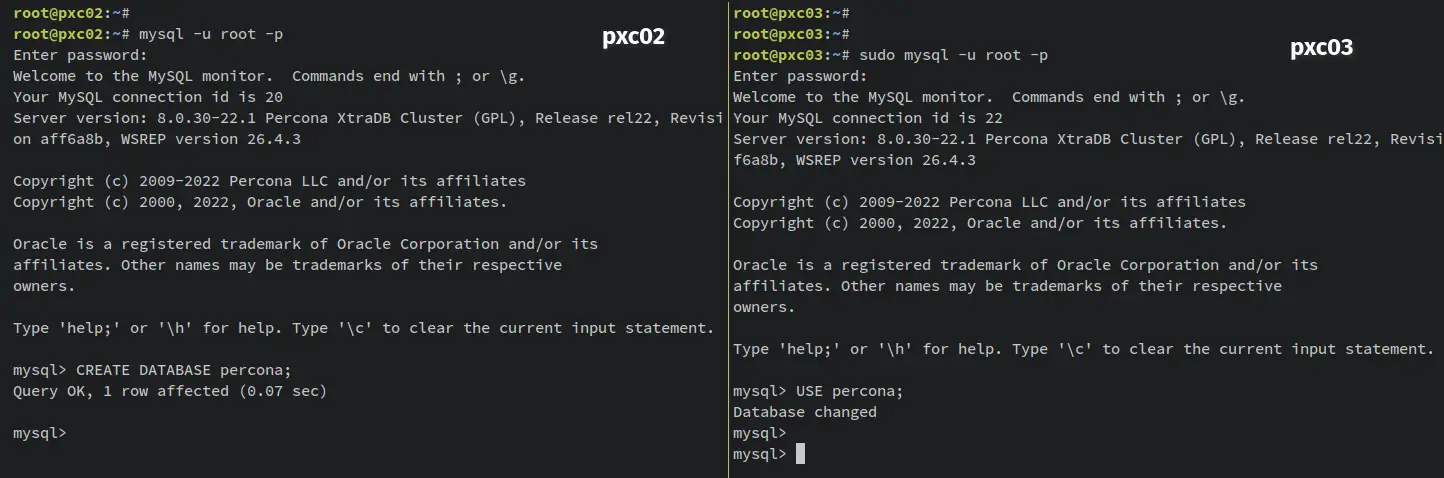
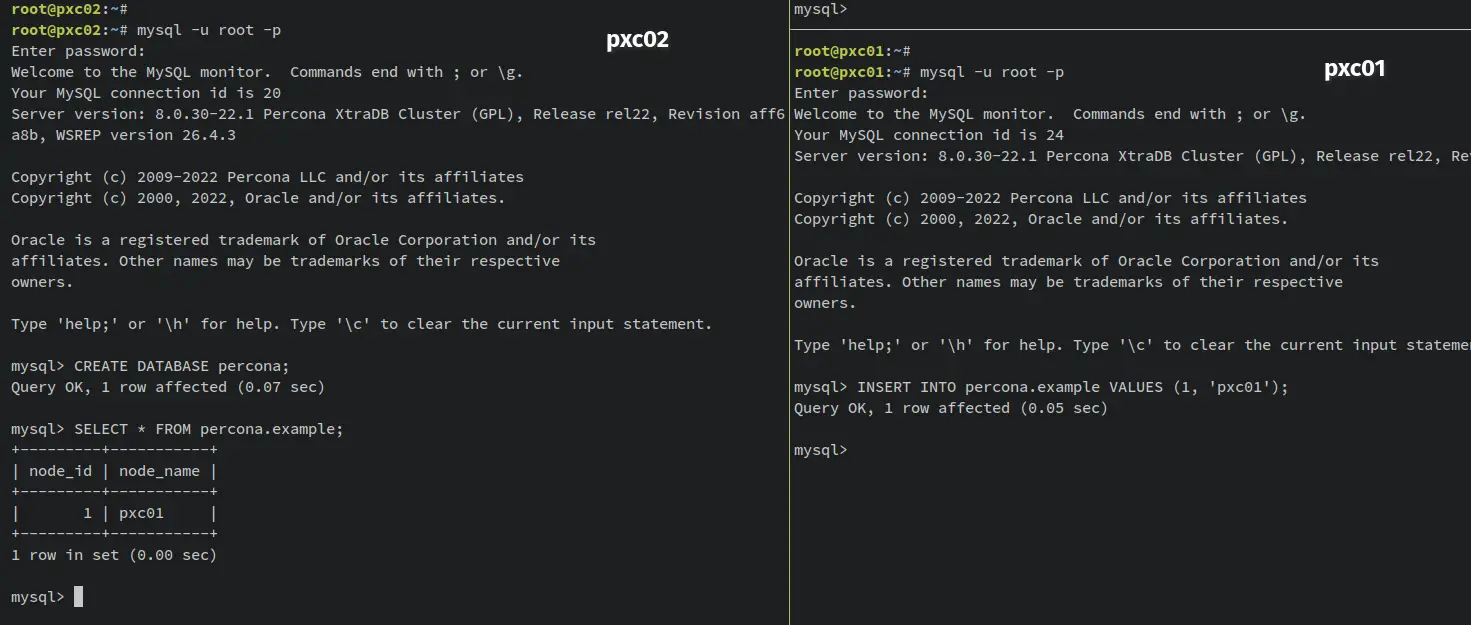
Log in to the MySQL shell from the 'pxc02' server and create a new database 'percona'.
sudo mysql -u root -p
CREATE DATABASE percona;
Now move to the 'pxc03' server, log in to the MySQL shell via MySQL root user, then switch to the database 'percona' that you've created from the 'pxc02' server.
sudo mysql -u root -p
USE percona;
When successful, you should receive an output such as 'Database changed'. This also confirms that the database 'percona' is replicated across Percona XtraDB Cluster servers.
Next, run the following MySQL query to create a new table 'example' from the 'pxc03' server.
CREATE TABLE example (node_id INT PRIMARY KEY, node_name VARCHAR(30));
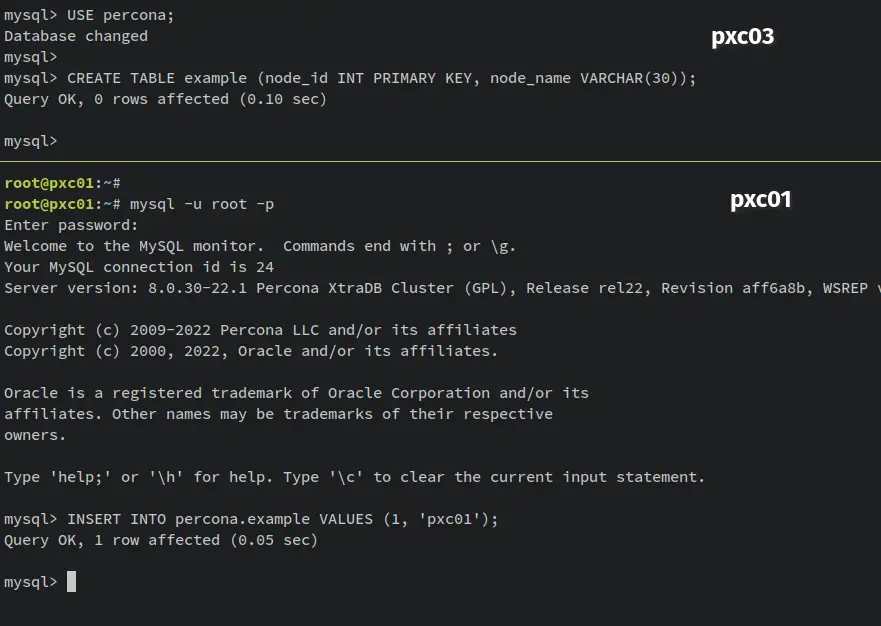
Then, move to the 'pxc01' server again and run the following query to insert new data into the 'percona' database.
INSERT INTO percona.example VALUES (1, 'pxc01');
INSERT INTO percona.example VALUES (2, 'pxc02');
INSERT INTO percona.example VALUES (3, 'pxc03');
Lastly, move back to the 'pxc02' server and run the following query to retrieve the data from the database 'percona' and table 'example'.
SELECT * FROM percona.example;
You should receive an output like this - The data is available on the 'pxc02' Percona XtraDB Cluster. With this, the replication between percona XtraDB Cluster servers is working, which means that your Percona XtraDB Cluster deployment on Debian 11 servers is also successful.
Conclusion
In this tutorial, you have installed and configured Percona XtraDB Cluster with three Debian 11 servers. You've initialized Percona XtraDB Cluster and added two nodes/servers to the Percona XtraDB Cluster. Also, you have secured Percona XtraDB Cluster via ufw firewall.
In addition to that, you have also secured Percona XtraDB Cluster by encrypting traffic between all servers using SSL/TLS certificates. This is achieved with the option 'pxc-encrypt-cluster-traffic', enabled by default.
With this, you can now start adding more servers to your Percona XtraDB Cluster by using the steps that you have learned and adding additional nodes that will enable high availability and load balancing on Percona XtraDB Cluster. To learn more, visit the Percona XtraDB Cluster official documentation.

