The Ultimate Guide to Installing Nextcloud on AlmaLinux: Step-by-Step Tutorial
On this page
- Prerequisites
- Installing httpd Web Server
- Installing and Configuring PHP 8.1
- Installing MariaDB 10.6
- Securing MariaDB Server
- Creating MariaDB Database and User for Nextcloud
- Downloading Nextcloud Source Code
- Configuring SELinux
- Configuring httpd Virtual Host for Nextcloud
- Securing Nextcloud with SSL/TLS Letsencrypt
- Installing Nextcloud via Web Installer
- Conclusion
Nextcloud is free and open-source software that allows you to create file hosting services like Dropbox, Google Drive, or Mega.nz. It was created by the original owncloud developer Frank Karlitschek. In 2016, he forked the Owncloud project and created a new one named "Nextcloud".
By this time, the Nextcloud project grew rapidly and became more than file hosting software. With the support of a lot of plugins, Nextcloud has become such a Collaboration software. You can install plugins for project management, video conferencing, collaborative editing, note-taking, email client, etc.
This guide will teach you how to install Nextcloud on AlmaLinux 9. You will be installing Nextcloud on a fresh/generic AlmaLinux server. This guide will include some installation of package dependencies such as the httpd web server, MariaDB database server, and PHP. Through the end of this guide, you will also secure the Nextcloud with firewalld, SELinux, and SSL/TLS certificates from Letsencrypt.
Below are some packages requirements for installing Nextcloud:
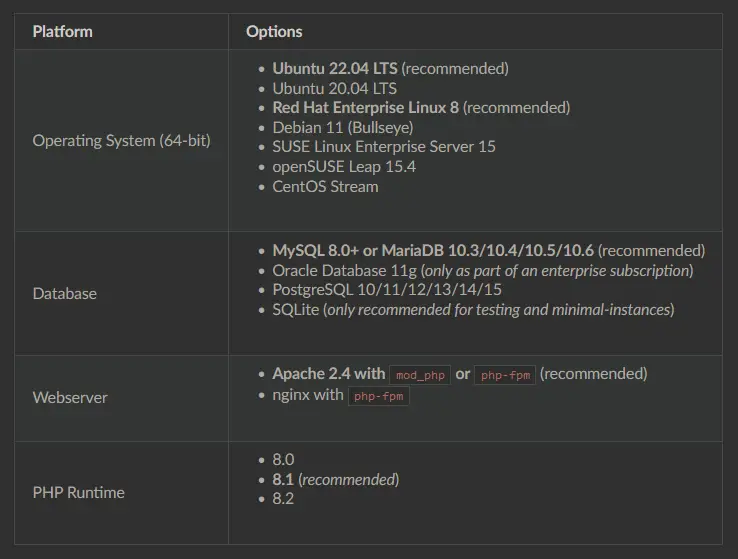
Prerequisites
To complete this guide, you need the following requirements:
- A Linux server running AlmaLinux 9 - This example uses a server with hostname 'alma-nextcloud' and IP address '192.168.5.25'.
- Administrative user or non-root user with sudo/root privileges.
- Firewalld running and enabled.
- SELinux runs in the enforcing mode.
- A domain name pointed to a server IP address - This example uses a domain 'nextcloud.hwdomain.io'.
Now let's get started with the installation.
Installing httpd Web Server
To get Nextcloud up and running, you can use Apache/httpd or Nginx. In this section, you will install the httpd web server that will be used to run Nextcloud. On AlmaLinux, the httpd package is available by default, you can install it via the DNF package manager.
Run the following command to install the httpd web server.
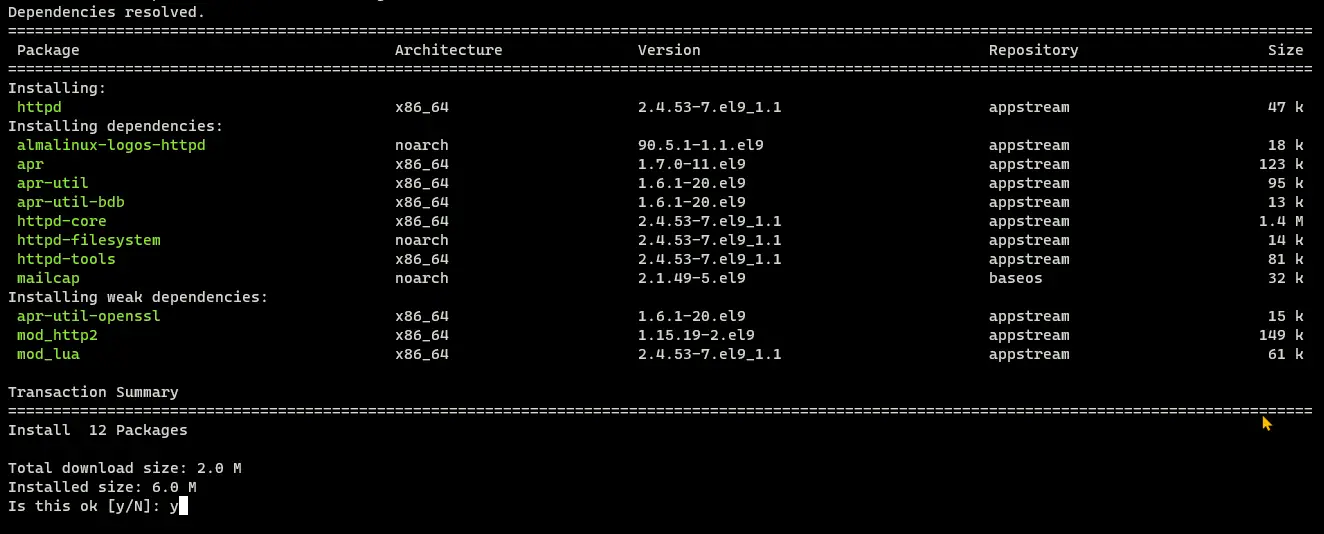
sudo dnf install httpd
Input y when prompted and press ENTER to proceed.
Once the httpd web server is installed, start and enable the httpd using the following command.
sudo systemctl start httpd
sudo systemctl enable httpd
Now verify the httpd web server to ensure that the service running.
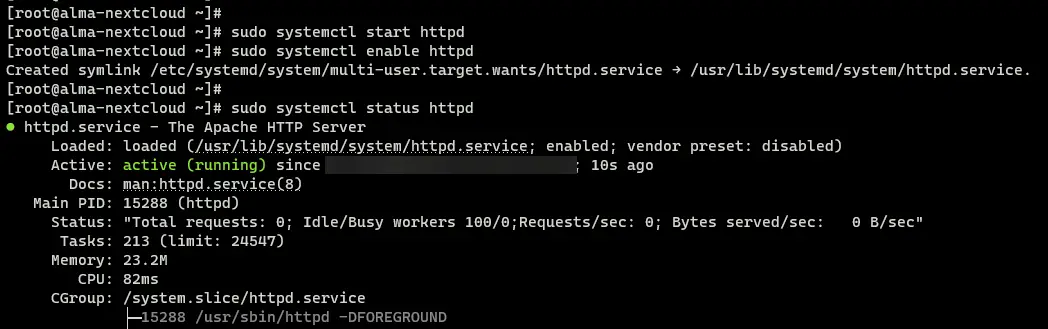
sudo systemctl status httpd
You should receive an output like this - The httpd web server is enabled and will start automatically at system startup. And the status of the httpd web server is running.
Next up, you must open HTTP and HTTPS on the firewalld by running the following command.
sudo firewall-cmd --add-service={http,https} --permanent
sudo firewall-cmd --reload
An output 'success' confirms that the operation is successful.
Now verify the list of services on the firewall using the command below.
sudo firewall-cmd --list-services
You should see both HTTP and HTTPS services are added to the firewalld.

With the firewalld configured, now open your web browser and visit the server IP address (i.e: http://192.168.5.25/). You should see the default index.html page of the httpd web server.

Installing and Configuring PHP 8.1
Now that you have installed the httpd web server and configured the firewalld, it's time to install PHP packages. This section will cover how to install PHP 8.1 on AlmaLinux 9 via the REMI repository.
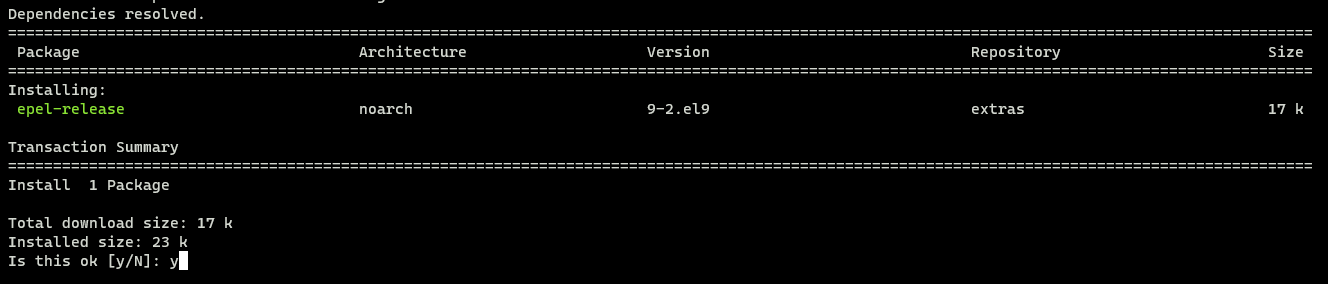
First, run the below command to add the EPEL repository to your system. To install PHP packages from the REMI repository, you must add the EPEL repository first.
sudo dnf install epel-release
When prompted, input y to confirm, then press ENTER.
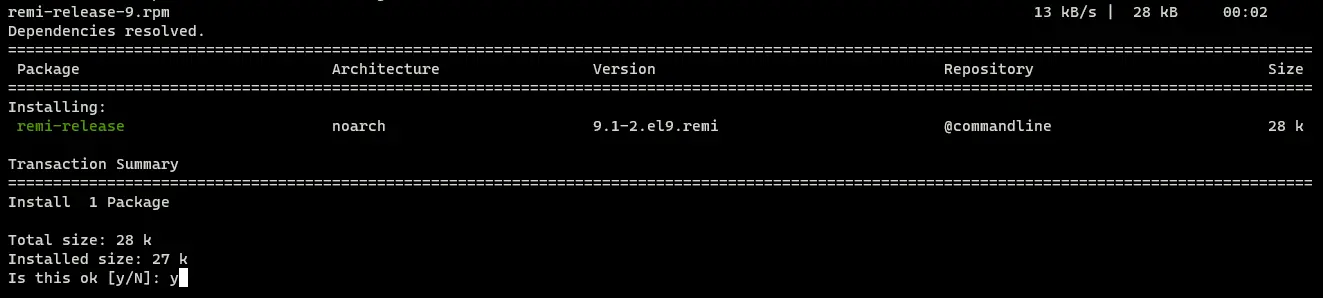
Next, run the following command to install the REMI repository for the RHEL 9 system.
sudo dnf install https://rpms.remirepo.net/enterprise/remi-release-9.rpm
Input y when prompted, then press ENTER to proceed.
After adding the REMI repository, run the following command to reset the current PHP repository configuration. Then, enable the repository module for 'php:remi-8.1'.
sudo dnf module reset php -y
sudo dnf module enable php:remi-8.1 -y
The expected output will look like this:

Now run the following dnf command to install PHP 8.1 packages via the REMI repository. The following command will also install some PHP extensions that are needed for Nextcloud, including the PHP-FPM.
sudo dnf install php php-ctype php-curl php-gd php-iconv php-json php-libxml php-mbstring php-openssl php-posix php-session php-xml php-zip php-zlib php-pdo php-mysqlnd php-intl php-bcmath php-gmp php-imagick php-apcu
Input y when prompted, then press ENTER.

After PHP is installed, you will next make some changes to the 'php.ini' config file and set up the PHP OPCache extension for Nextcloud.
Open the '/etc/php.ini' file using the following nano editor command.
sudo nano /etc/php.ini
Change some default options like the following lines. Also, adjust the size of 'memory_limit' with the available memory on your server and the 'date.timezone' options with the location of your server.
file_uploads = On
allow_url_fopen = On
memory_limit = 512M
upload_max_filesize = 500M
post_max_size = 600M
max_execution_time = 300
display_errors = Off
date.timezone = Europe/Amsterdam
Save the file, then exit the editor when finished.
Now open the PHP OPCache config file '/etc/php.d/10-opcache.ini' using the nano editor.
sudo nano /etc/php.d/10-opcache.ini
Add the following lines to the file to enable and tuning-up the PHP OPCache for Nextcloud.
opcache.enable = 1
opcache.interned_strings_buffer = 8
opcache.max_accelerated_files = 10000
opcache.memory_consumption = 128
opcache.save_comments = 1
opcache.revalidate_freq = 1
Save the file, then close the editor when finished.
Next on, run the following command to restart the httpd web server and PHP-FPM service to apply the changes.
sudo systemctl restart httpd
sudo systemctl restart php-fpm
Now that you have configured PHP, it's time to verify your PHP installation by creating the file 'test.php' that will give you detailed information about your PHP installation.
Run the following command to create a new file '/var/www/test.php'.
echo "<?php phpinfo(); ?>" > /var/www/test.php
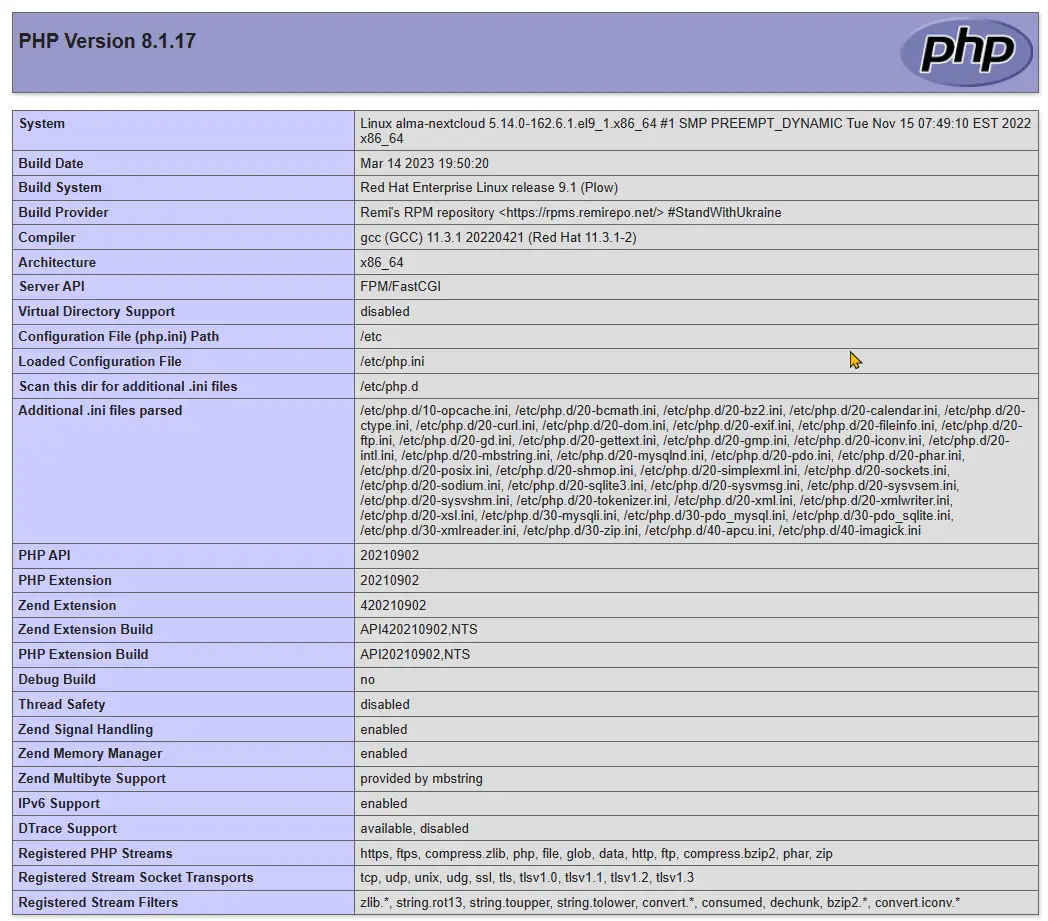
Open your web browser and visit your server IP address followed by the file path 'test.php' (i.e: http://192.168.5.25/test.php).
The following page should be shown if the installation was successful:
Installing MariaDB 10.6
By default, Nextcloud supports multiple RDBMS (Relational Database Management Systems) such as MySQL/MariaDB, PostgreSQL, Oracle (Enterprise version), and SQLite. In this section, you will install MariaDB server 10.6 from the official MariaDB repository.
First, add the official MariaDB repository by creating a new repository configuration file 'MariaDB.repo' within the '/etc/yum.repos.d/' directory using the following nano editor.
sudo nano /etc/yum.repos.d/MariaDB.repo
Add the following lines to the file.
# MariaDB 10.6 RedHatEnterpriseLinux repository list
# https://mariadb.org/download/
[mariadb]
name = MariaDB
# rpm.mariadb.org is a dynamic mirror if your preferred mirror goes offline. See https://mariadb.org/mirrorbits/ for details.
# baseurl = https://rpm.mariadb.org/10.6/rhel/$releasever/$basearch
baseurl = https://mirror.23m.com/mariadb/yum/10.6/rhel/$releasever/$basearch
# gpgkey= https://rpm.mariadb.org/RPM-GPG-KEY-MariaDB
gpgkey=https://mirror.23m.com/mariadb/yum/RPM-GPG-KEY-MariaDB
gpgcheck=1
Save the file and exit the editor.
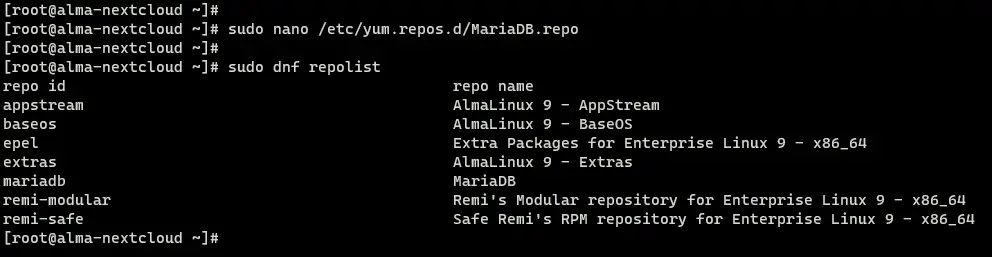
Verify the list of available repositories using the below command.
sudo dnf repolist
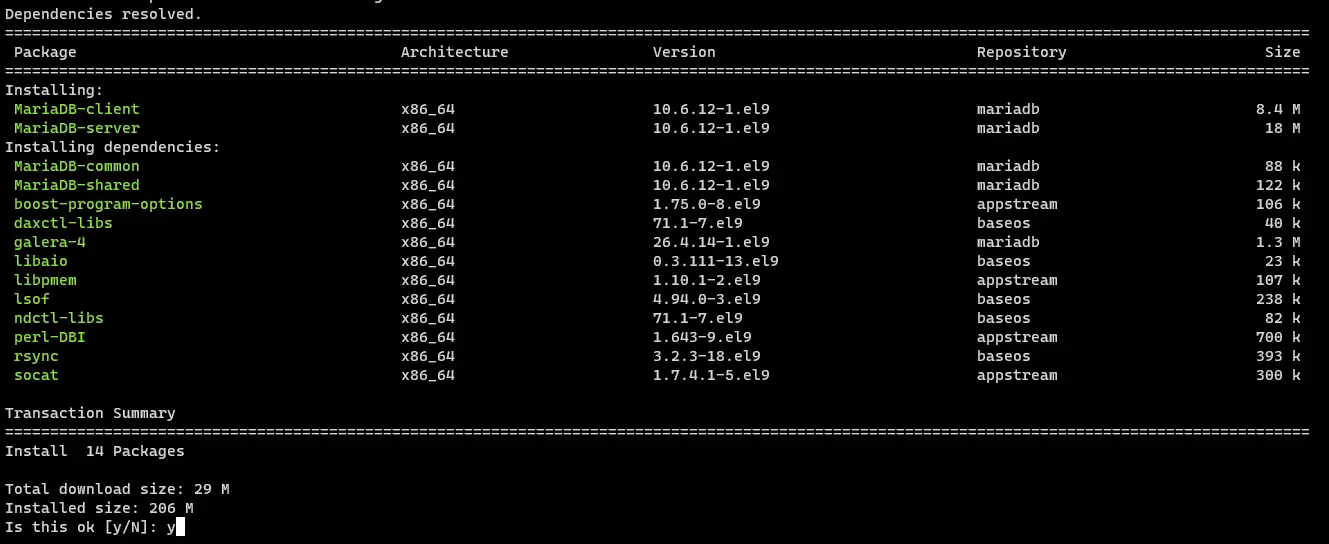
Once the MariaDB repository is added, install the MariaDB server and client packages using the following dnf command.
sudo dnf install MariaDB-server MariaDB-client
When prompted, input y to confirm, then press ENTER to proceed.
Once the MariaDB is installed, run the following command to start and enable the MariaDB server.
sudo systemctl start mariadb
sudo systemctl enable mariadb
Then, run the command below to ensure that the MariaDB service is running and enabled.
sudo systemctl status mariadb
The following output should be shown when the MariaDB service is running.

Lastly, you can also verify the MariaDB version by running the following command.
sudo mariadb --version
If you're following along with this guide, you will see the MariaDB server 10.6 installed.

Securing MariaDB Server
Now that you have installed the MariaDB server, it's time to secure the MariaDB deployment. This section will cover the basic usage of the 'mariadb-secure-installation' utility to secure the MariaDB deployment.
You will use the 'mariadb-secure-installation' utility to set up the MariaDB root password, disable remote login for the root user, and remove the default anonymous user and database test from your deployment.
Run the following command to secure your MariaDB deployment.
sudo mariadb-secure-installation
You will be asked with the following MariaDB configurations:
- When prompted for a password, press ENTER to continue. The default MariaDB installation comes without a password for the root user.
- When asked to switch the authentication method to 'unix_socket', press 'n' for 'No'.
- Now create a new MariaDB root password when prompted. Input 'Y', then input a new password and repeat it.
- When asked to disable remote login to the MariaDB root user, input 'Y'.
- Now delete the default anonymous user from your MariaDB server. Input 'Y' for 'Yes'.
- Input 'Y' again to delete the default database 'test' from your deployment.
- Lastly, input 'Y' again to reload table privileges and apply the changes.
Creating MariaDB Database and User for Nextcloud
Now that you have secured the MariaDB deployment, let's now create a new MariaDB database and user that Nextcloud will use.
To begin, you will start by logging in to the MariaDB shell via the root user using the below command. When prompted for the password, input your MariaDB root password.
sudo mariadb -u root -p
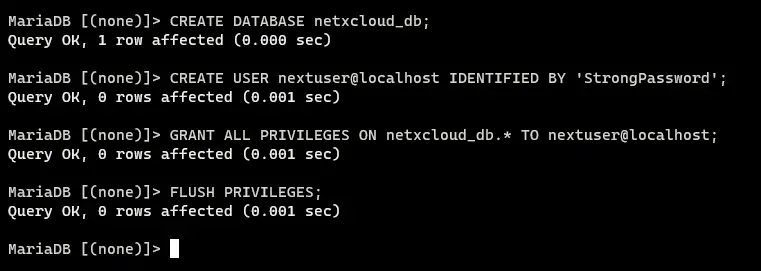
Next, create a new database 'nextcloud_db' and user 'nextuser@localhost' by running the following queries. Be sure to change the password in the following query with your password.
CREATE DATABASE netxcloud_db;
CREATE USER nextuser@localhost IDENTIFIED BY 'StrongPassword';
GRANT ALL PRIVILEGES ON netxcloud_db.* TO nextuser@localhost;
FLUSH PRIVILEGES;
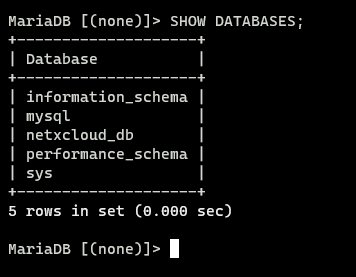
Once the database and user are created, run the following query to ensure that the database 'nextcloud_db' is created.
SHOW DATABASES;
Then, run the following query to ensure that the MariaDB user 'nextuser@localhost' can access the database 'nextcloud_db'.
SHOW GRANTS FOR nextuser@localhost;

Downloading Nextcloud Source Code
If you've followed the instructions so far, you should now have the LAMP Stack (Linux, Apache/httpd, MariaDB, and PHP) installed on your AlmaLinux server. Moving forward, you will download the Nextcloud source code, then set up the proper SELinux labeling for the Nextcloud source code.
First, run the following dnf command to install the unzip, wget, the SELinux troubleshoot utilities.
sudo dnf install unzip wget setroubleshoot-server setools-console -y
Now, move to the directory '/var/www/' and download the latest version of Nextcloud source code via the wget command below. Once the download is finished, you will see the file 'latest.zip'.
cd /var/www/
wget -q https://download.nextcloud.com/server/releases/latest.zip
Run the following command to extract the file 'latest.zip'. The Nextcloud source code should be available in the '/var/www/nextcloud' directory.
sudo unzip latest.zip
Now, run the following command to change the ownership of the '/var/www/nextcloud' directory to the user 'apache2'. This allows the httpd web server to access the Nextcloud source code.
sudo chown -R apache:apache /var/www/nextcloud
Configuring SELinux
After downloading the Nextcloud source code, the next step is to set up SELinux policies and labeling for Nextcloud.
Now, let's start by running the following command to set up labeling for Nextcloud source code and directories.
sudo semanage fcontext -a -t httpd_sys_rw_content_t '/var/www/nextcloud/data(/.*)?'
sudo semanage fcontext -a -t httpd_sys_rw_content_t '/var/www/nextcloud/config(/.*)?'
sudo semanage fcontext -a -t httpd_sys_rw_content_t '/var/www/nextcloud/apps(/.*)?'
sudo semanage fcontext -a -t httpd_sys_rw_content_t '/var/www/nextcloud/.htaccess'
sudo semanage fcontext -a -t httpd_sys_rw_content_t '/var/www/nextcloud/.user.ini'
sudo semanage fcontext -a -t httpd_sys_rw_content_t '/var/www/nextcloud/3rdparty/aws/aws-sdk-php/src/data/logs(/.*)?'

sudo restorecon -Rv '/var/www/nextcloud/'

Next, run the following command to allow the httpd web server to connect to the network (this allows Server-to-Server sharing), database, and Memcache.
sudo setsebool -P httpd_can_network_connect_db on
sudo setsebool -P httpd_can_network_connect on
sudo setsebool -P httpd_can_network_memcache on
sudo setsebool -P mysql_connect_http on
With this in mind, you have now downloaded the Nextcloud source code, allowed the httpd web server to access the Nextcloud source code, and configured SELinux policies for Nextcloud. Next, you will set up an httpd virtual host for Nextcloud.
During the installation, I encountered some error about the PHP-FPM can't connect to the MySQL/MariaDB socket, which SELinux blocks. Below the custom policy generated from the 'audit.log' file.
Create the file 'my-phpfpm.te' using your preferred editor and add the following lines to the file.
module my-phpfpm 1.0;

require {
        type unconfined_service_t;
        type httpd_sys_content_t;
        type httpd_t;
        class dir write;
        class unix_stream_socket connectto;
}

#============= httpd_t ==============

#!!!! This avc is allowed in the current policy
allow httpd_t httpd_sys_content_t:dir write;
allow httpd_t unconfined_service_t:unix_stream_socket connectto;
Now, run the following command to convert the file 'my-phpfpm.te' to the policy module 'my-phpfpm.mod'.
sudo checkmodule -M -m -o my-phpfpm.mod my-phpfpm.te
Once the policy module file 'my-phpfpm.mod' is created, run the below command to compile SELinux policy module to 'my-phpfpm.pp'
sudo semodule_package -o my-phpfpm.pp -m my-phpfpm.mod
Lastly, you can apply the compiled SELinux policy module 'my-phpfpm.pp' by running the command below.
sudo semodule -i my-phpfpm.pp
Configuring httpd Virtual Host for Nextcloud
In the following section, you will create a new httpd virtual host for Nextcloud. So, before going any further, ensure that you have a domain name pointed to the server IP address.
Run the following nano command to create a new virtual host configuration '/etc/httpd/conf.d/nextcloud.conf'.
sudo nano /etc/httpd/conf.d/nextcloud.conf
Add the following lines to the file, and be sure to change the domain name in the following virtual host configuration.
<VirtualHost *:80>
  DocumentRoot /var/www/nextcloud/
  ServerName  nexcloud.hwdomain.io

  <Directory /var/www/nextcloud/>
    Require all granted
    AllowOverride All
    Options FollowSymLinks MultiViews

    <IfModule mod_dav.c>
      Dav off
    </IfModule>
  </Directory>
</VirtualHost>
Save the file, then exit the editor.
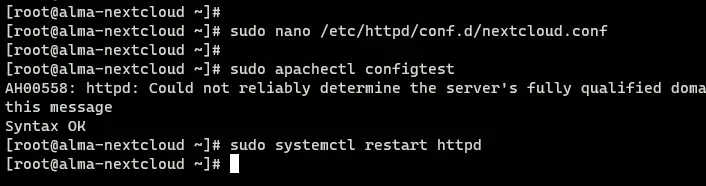
Next, run the following command to verify the httpd web server and ensure that you have proper configurations. As you can see 'Syntax OK' from the output, confirms that you have correct and proper httpd configurations.
sudo apachectl configtest
Now, run the command below to restart the httpd web server and apply the new virtual host configuration.
sudo systemctl restart httpd
Lastly, back to your web browser and visit the domain name of your Nextcloud installation (i.e: http://nexcloud.hwdomain.io/). The following page confirms that you have successfully configured httpd virtual host for Nextcloud.
You have now successfully reached where the Nextcloud is up and running with LAMP Stack on AlmaLinux. To continue the process, you will be securing Nextcloud with SSL/TLS certificates via Letsencrypt.
Securing Nextcloud with SSL/TLS Letsencrypt
This section covers how to secure Nextcloud with SSL/TLS from Letsencrypt. You will install the Certbot tool, set up and enable the httpd mod_ssl, then you will generate SSL/TLS certificate from Letsencrypt via Certbot.
To start, run the following command to install Certbot and its plugin for Apache/httpd web server and the mod_ssl package.
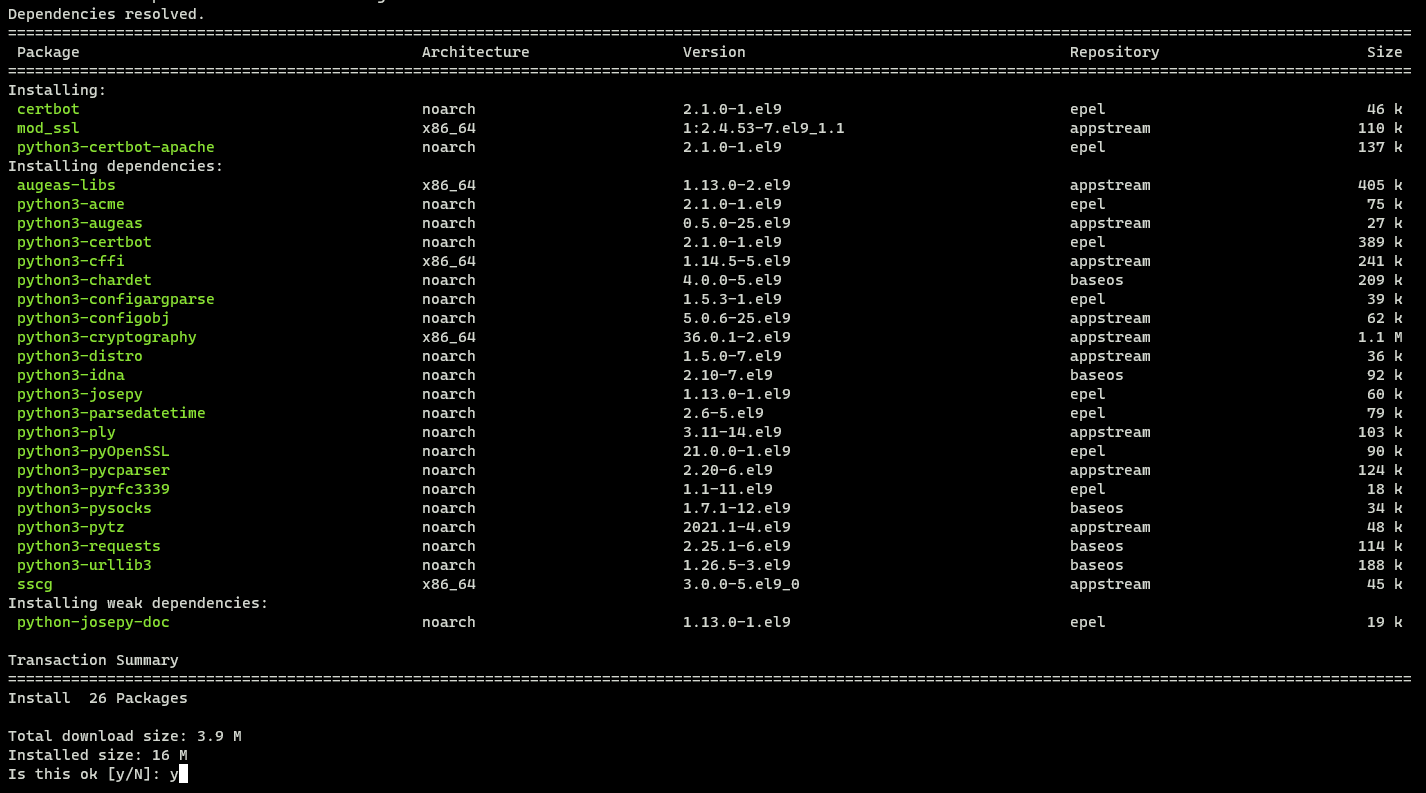
sudo dnf install certbot python3-certbot-apache mod_ssl
Input y when prompted, then press ENTER to proceed.
With the mod_ssl installed, you must generate SSL certificates for localhost, otherwise, the httpd will have an error.
Enter the following command to generate self-signed SSL/TLS certificates for localhost.
openssl req -newkey rsa:2048 -nodes -keyout /etc/pki/tls/private/localhost.key -x509 -days 365 -out /etc/pki/tls/certs/localhost.crt
Lastly, run the following command to generate new SSL/TLS certificates from Letsencrypt. Ensure to change the domain name and the email address in the following command.
sudo certbot --apache --agree-tos --no-eff-email --redirect --hsts --staple-ocsp --email [email protected] -d nextcloud.hwdomain.io
Once the Certbot process is finished, the Nextcloud virtual host configuration '/etc/httpd/conf.d/nextcloud.conf' should be changed automatically with SSL/TLS enabled and auto-redirect from HTTP to HTTPS also enabled.
Installing Nextcloud via Web Installer
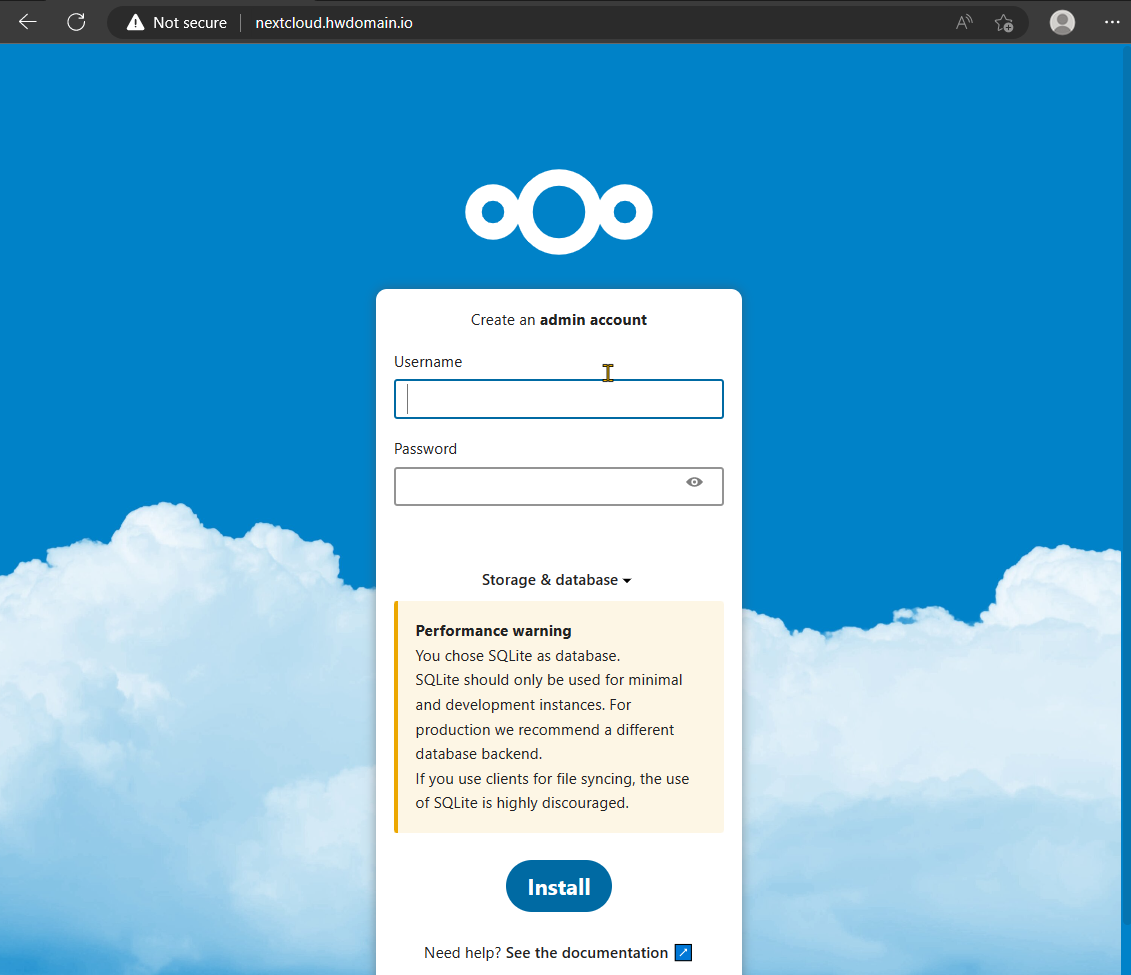
Open up your web browser and visit the domain name of your Nextcloud installation (i.e: https://nexcloud.hwdomain.io/). When your installation is successful, you should get the Nextcloud installation page like the screenshot below:
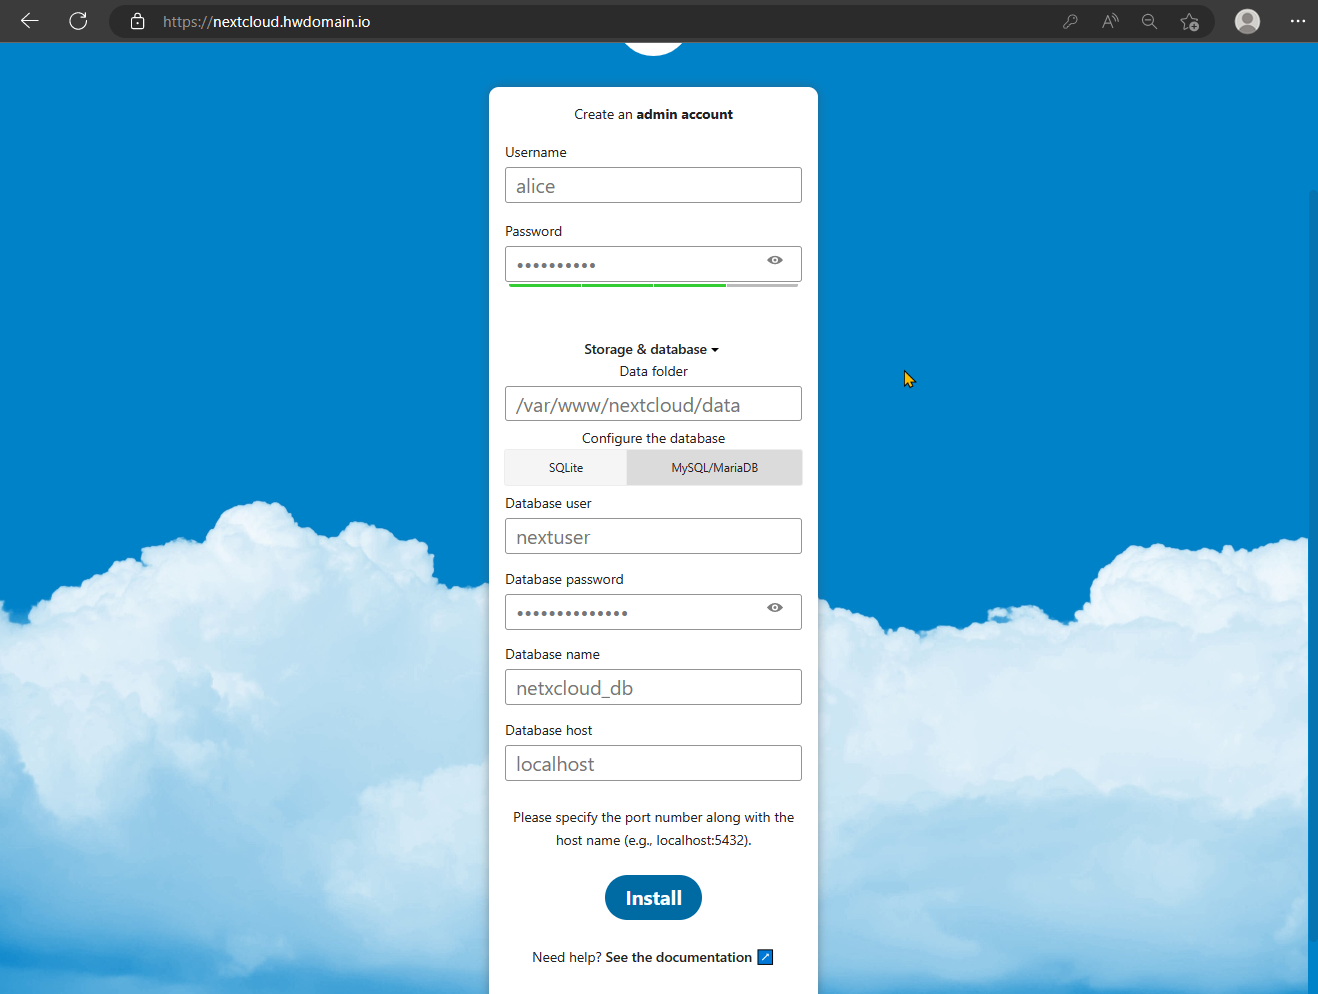
Input the new admin user and password for your Nextcloud. Then click on the database MySQL/MariaDB, and input the details of the MariaDB database name, user, and password. Click Install to perform the installation.
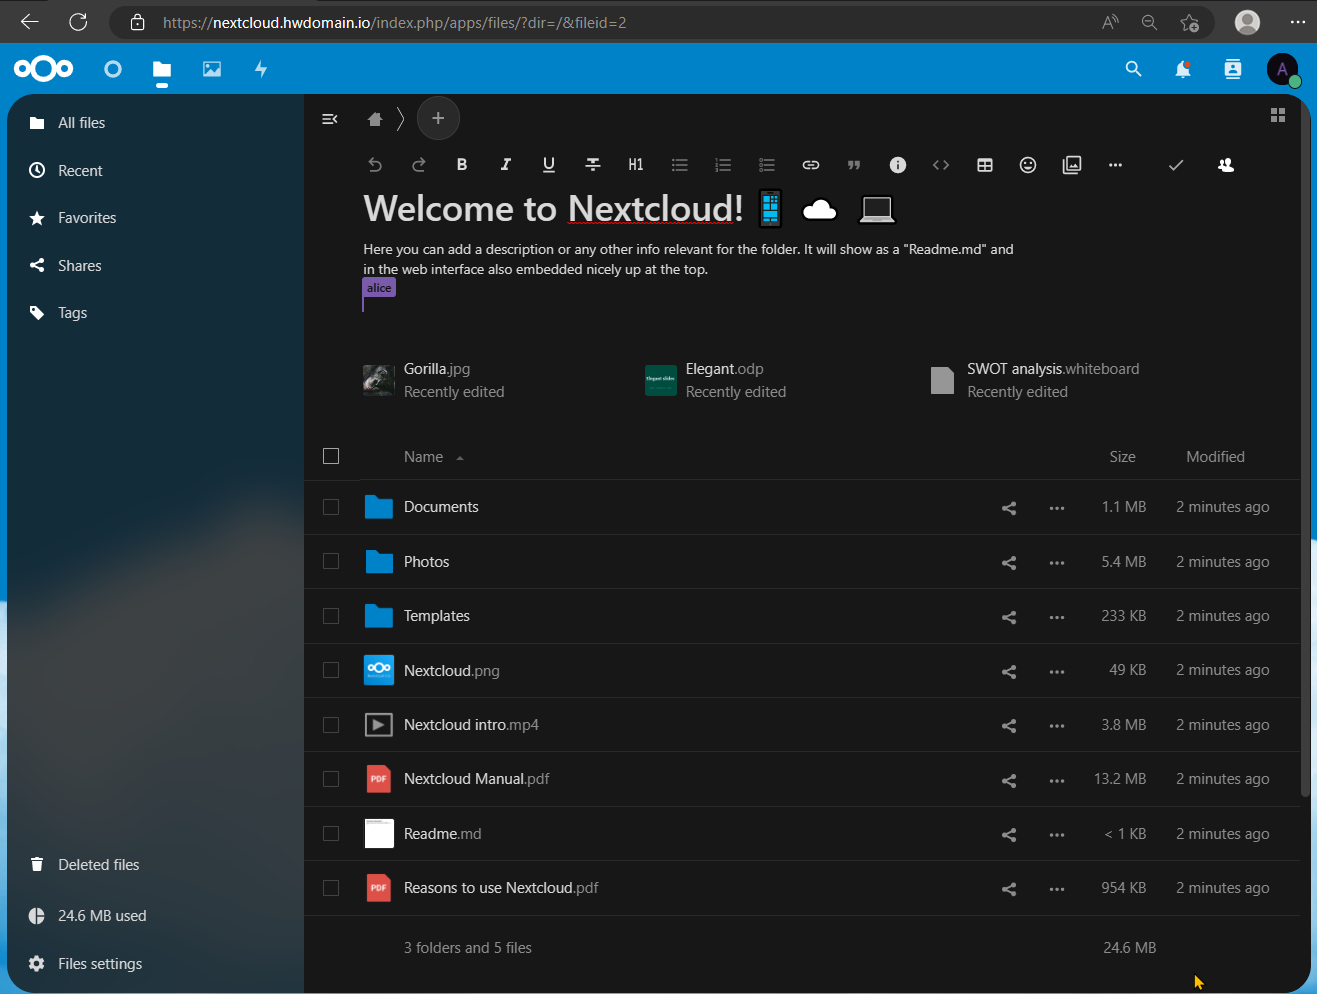
Once Nextcloud installation was successful, you should be redirected to the Nextcloud Dashboard like the following screenshot:

Now click on the file-manager menu on the top-left and you should get the Nextcloud file manager where you can upload, create, or delete files on nextcloud.
Conclusion
In conclusion, by following the steps outlined in his guide, you have successfully installed Nextcloud on AlmaLinux 9 with LAMP Stack. You also have secured Nextcloud with firewalld, SELinux, and SSL/TLS certificates from Letsencrypt.
To take Nextcloud to the next level, you could also set up Memory caching via memcached, secure Nextcloud against brute force attacks via fail2ban, and set up file locking via Redis.

