Power BI and Azure are two related services, but with a considerable independence between them. Power BI share the Azure Tenant for security management, but in relation to networking, they are in completely different environments.
Frequently Power BI needs to access to Azure resources, such as Azure SQL. If we use the easier and most simple configurations, all the network communication between Power BI and Azure services will happen through public internet, creating a security risk.
Of course, many Azure services have their own firewall, protecting the access by IP address. Azure SQL has a firewall as well, two in fact. However, it’s very difficult, if not impossible, open a service by IP to Power BI access. This leads to situations where we need to leave the service public accessible in some levels.
For example, let’s consider Azure SQL. Probably there are many articles on the web with the terrible advice that that in order to access Azure SQL from Power BI “you should enable Allow Azure Services and Resources to access this Server for this to work“. As I explained on my article Eight Azure SQL configurations you may have missed and on the session I delivered and you can watch: Azure SQL Networking Secrets, this should not be used in production.
This configuration allows any Azure service to bypass the Azure SQL firewall. It puts down one layer of security for Azure SQL.
We will focus on an example using Azure SQL to explain how to ensure the network communication from Power BI and Azure services can be made through a private environment, with no network package going on public internet.
Using Private Endpoints and a Gateway
Each one, Power BI and Azure SQL, have part of the solution, which needs to be put together.
Azure SQL: When we need an Azure SQL to be private, not exposed to the web, not even through the firewall protection, we use a private endpoint. We create a private endpoint for Azure SQL inside an Azure Virtual Network and disable public access. Azure SQL will only be accessible through the virtual network. Once the private endpoint is created, it’s possible to disable the public access at all.
Power BI: When we need to access something behind a network barrier, we use a data gateway. For example, when we need to access a server on premises, we install a data gateway on premises and configure it in the portal.
The solution becomes a matter of connecting the pieces: Create a virtual network on Azure, a private endpoint for Azure SQL and install a data gateway for Power BI. This last part requires a virtual machine. This would be what I would call a very “manual” process, managing a data gateway in a virtual machine for Power BI.
Power BI has a new feature that makes this process easier and less “manual”: Virtual Network Data Gateways. This is the focus of this article.
Power BI Virtual Network Data Gateways
Power BI has a feature called Virtual Network Gateway. In summary, it’s a data gateway created and managed automatically by Power BI inside an Azure Virtual Network.
This feature makes the process much more “automated” and less “manual”, including the management of gateway redundancy, for example.
The limitation is the fact the Power BI tenant and the Azure tenant needs to be the same. If the tenants are not the same, you have two options:
- Revert to the Virtual Machine with a Data Gateway installed
- Establish a network connectivity across tenants
In addition, this feature requires a premium workspace. The reports accessing data through Virtual Network Data Gateways need to be premium or Power BI Premium Per User (PPU).
Steps to build the solution
These are the steps to build this solution:
- Build a Virtual Network in Azure. The Virtual network will create a private environment for you, instead of exposing your services to public internet
- Build a private endpoint for Azure SQL. This will insert Azure SQL inside your private environment, eliminating the internet access from the service.
- Build the Power BI Virtual Network Data Gateway to link Power BI with your virtual network
- Create your data source on the Virtual Network Data Gateway. The data source will allow the Power BI access to your private Azure SQL
I will skip the Virtual Network part, because this is a regular Azure feature. You can discover more about creating a virtual network here.
Creating the Private Endpoint
There are some networking considerations when creating a private endpoint. We will not try to be too specific and tell exactly what to do or not to do. Any company planning this architecture on the enterprise level should carefully plan these configurations.
NSG for Private Endpoints
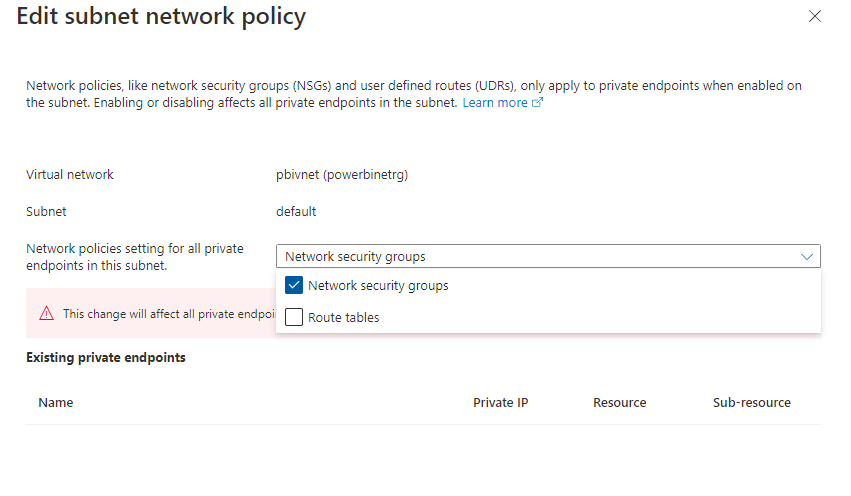
Azure Virtual Networks can use NSGs, Network Security Groups, to protect communications. Private Endpoints, on the other hand, are not protected by NSGs by default. There is a special configuration we can make in a virtual network to define if the Virtual Network will use NSGs to protect private endpoints or not.
This configuration can be done on the level of each subnet and it’s available during the process of creating a private endpoint.
Application Security Group
Application Security Groups enable you to configure application elements in groups to be easily controlled by NSG rules. When you have many application elements which require the same rules, such as private endpoints, virtual machines and more, you can group them using an application security group.
By doing so, you can create single rules for the application security group instead of all the trouble to create rules for each one of the application services.
Learn more about Application Security Groups
DNS Configuration
Private endpoints are built using DNS name resolution. By default, when we create a private endpoint, a DNS Zone is created for us and linked with the virtual network. In enterprise scenarios, you may would like to control your own DNS resolution system instead of using many different DNS zones.
Steps to create the private endpoint
- Access the Azure SQL Server
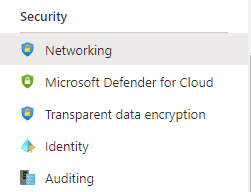
- On the left tab, access Security->Networking
- Click on Private access tab
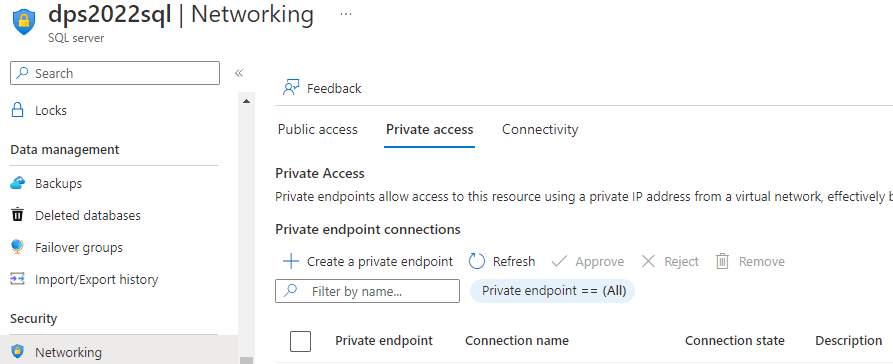
- Click on + Create a private endpoint. A wizard with multiple steps will open.
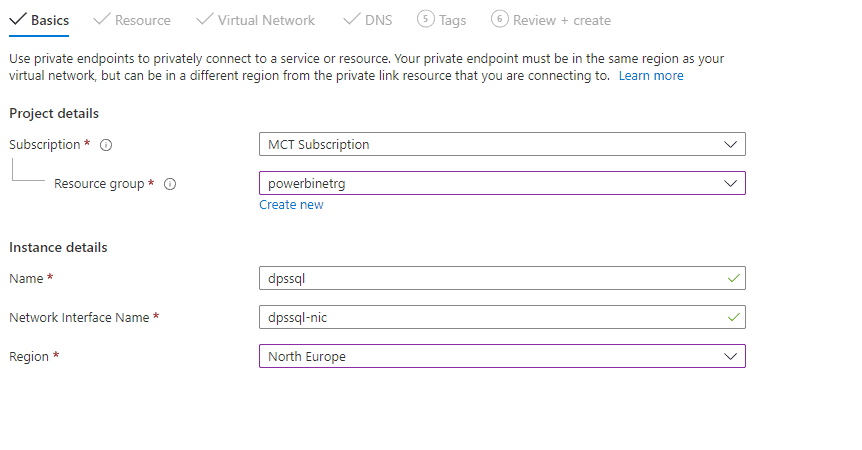
- On the first window, select the resource group
- Create the name for the private endpoint
- Select the region. It should be the same as the Virtual Network region and the Azure SQL
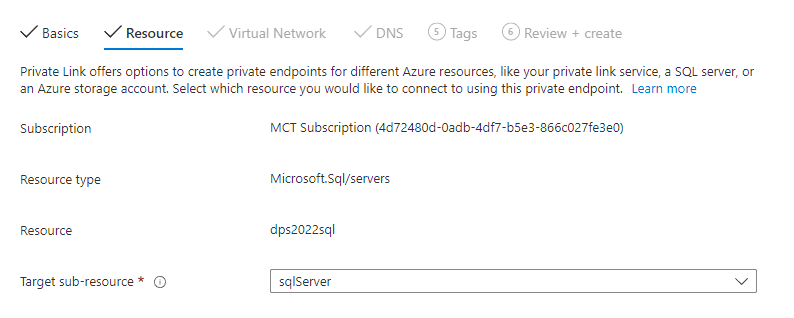
- The 2nd window has a confirmation of the target resource. Ensure SQLServer is selected and move forward
- The 3rd window contains the details of the virtual network. Choose the virtual network and subnet to create the private endpoint.
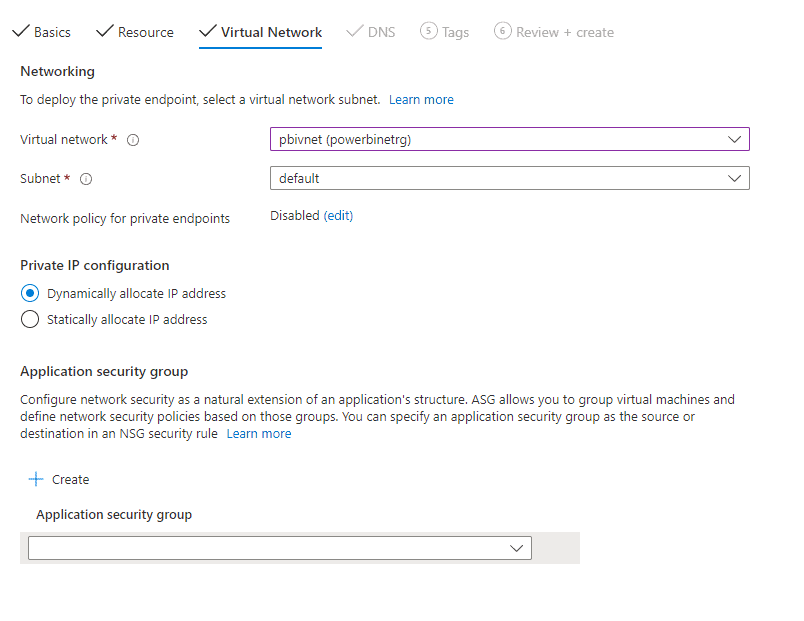
- You can configure the network policy for private endpoints clicking the Edit link. Changing this configuration affects the entire subnet, all private endpoints in the subnet.
- You can select or create an application security group for this private endpoint
- You can select if the private endpoint will be static or dynamic
- After making your decision about the above configurations, move to the next step
- The 4th configuration is about the DNS Zone. It will be filled with default values. It’s the moment to choose how to manage your DNS naming resolution.
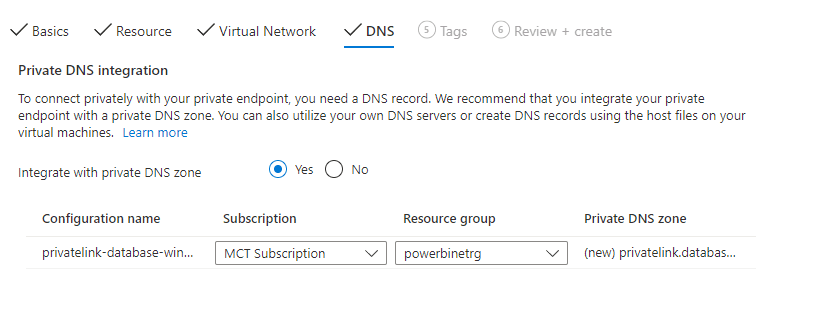
The next two steps are the tagging and the review. These are usual steps for resource creation, you can proceed and create the private endpoint.
Private endpoint result
The image below shows the objects created after these steps:
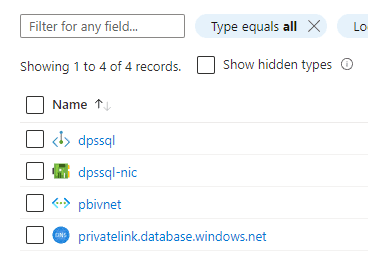
The four items in the list correspond to the following:
Virtual Network: The virtual network was created on the first step, before the private endpoint
Network Interface: The NIC is needed to provide an IP to the private endpoint. It’s an IP belonging to the virtual network
DNS Zone: Created for the name resolution of the private endpoint. It’s linked to the virtual network.
Private Endpoint: As the name points out, this is the private endpoint itself.
Creating the Virtual Network Data Gateway
The Virtual Network Data Gateway is a PaaS service, managed by Power BI. We make the initial configuration, and everything is managed by Power BI.
In order to achieve this, Power BI needs a subnet delegated to it. The subnet delegation feature allows an external software, such as Power BI, to make changes to the subnet settings and the objects inside the subnet.
We also need to register the resource provider Microsoft.PowerPlatform in our Azure subscription. Resource Providers are one of the core building blocks of the Azure environment, you can learn more about them here.
We have three steps to execute:
- Register the resource provider
- Create the delegated subnet
- Create the Virtual Network Data Gateway
Registering the Resource Provider
- On the portal, use the top icon to open the cloud shell.
![]()
If your cloud shell is not configured, you will need to configure it
There are other methods to do command line actions in Azure, which you can learn more about on this link
- Use the following statement to register the resource provider:
Register-AzResourceProvider -ProviderNamespace Microsoft.PowerPlatform

- It will take some moments for the resource provider to be registered. You can check when the registration is complete using the following statement:
Get-AzResourceProvider -ProviderNamespace Microsoft.PowerPlatform
When the registration is complete, the RegistrationState will appear as Registered, in opposite to Registering while the registration is still ongoing.
Creating the delegated subnet
- On the portal, open the Virtual Network object
- On the left tab, under Settings, click Subnets
- Click the +Subnet button
- Fill the name you want to use for the subnet, for example, pbisubnet
- On the Delegate subnet to a service drop down, select Microsoft.PowerPlatform/vnetaccesslinks
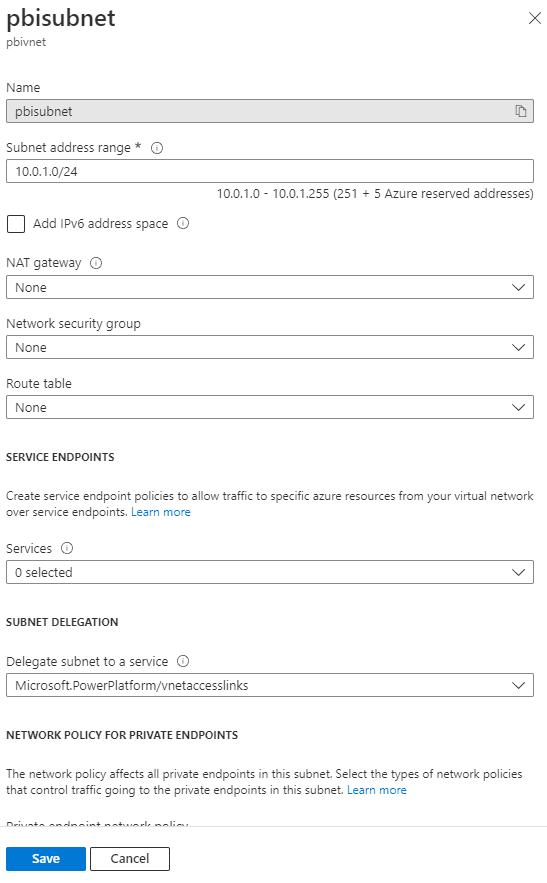
- Click the Save button
Creating the Virtual Network Data Gateway
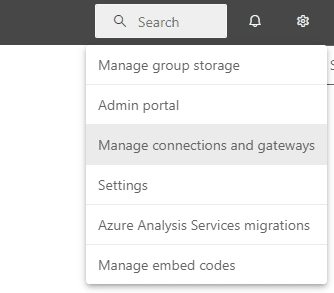
- On the Power BI portal, click the Settings icon and the Manage connections and gateways menu option
- Click the tab Virtual network data gateways
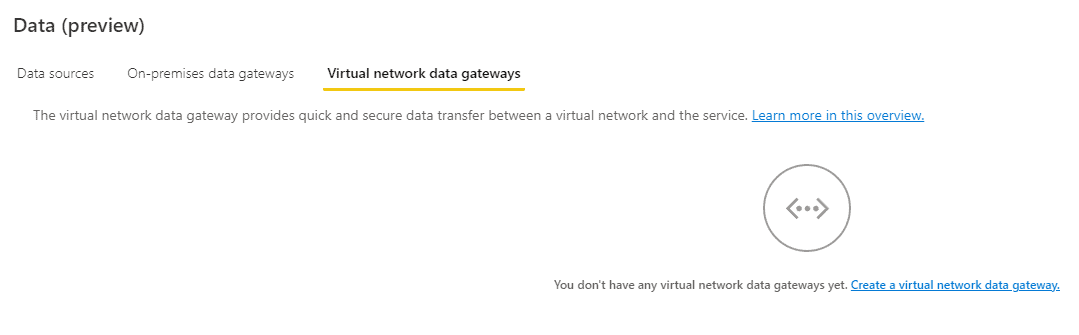
- Click the New button
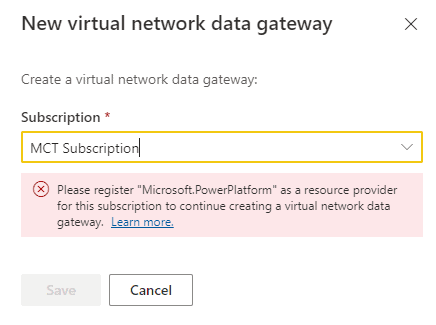
- On the New virtual network data gateway window, select the Azure subscription
If the subscription doesn’t have the correct resource providers registered, an error message will appear.
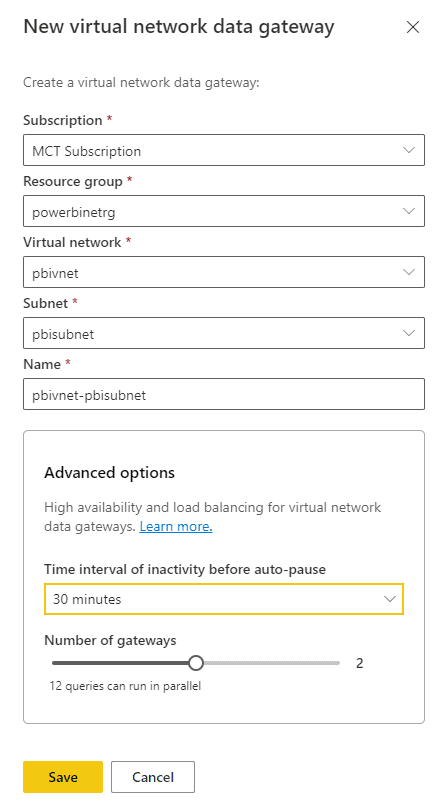
- On the New virtual network data gateway window, select the resource group
- On the New virtual network data gateway window, select the virtual network
- On the New virtual network data gateway window, select the subnet. Only subnets with the correct delegation will be listed.
- On the New virtual network data gateway window, choose the inactivity time before an auto-pause
- On the New virtual network data gateway window, choose the number of gateways to be created
- Click the Save button
Create your data source on the Virtual Network Data Gateway
- Use Power BI Desktop to create a report using the Azure SQL Database as a source
- Create a premium or PPU workspace in Power BI portal
- Publish the Power BI report to the created workspace.
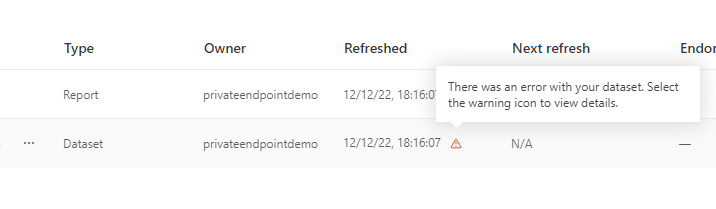
- Refresh the created dataset. The first refresh always fails, asking you to update the credentials used to connect to the source
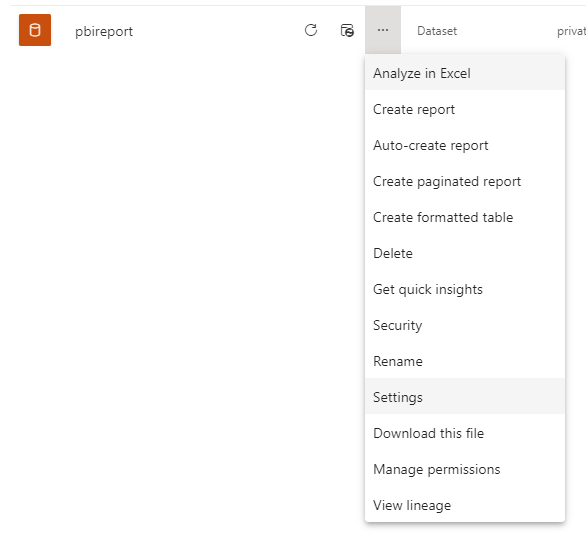
- On the dataset, click the Settings menu item
- Open Data Source Credentials item and click the Edit Credentials link

- After inserting the correct credential, you will receive an error message. The Power BI Ip addresses are not allowed to access the Azure SQL Server.

- Click the Cancel button
- Open the Gateway connection option
- Turn on the option Use an On-premises or VNet data gateway
The gateway will appear as Not configured correctly, because it’s missing the datasource required for this dataset. This datasource will be listed and we will have the option to add it to the gateway.
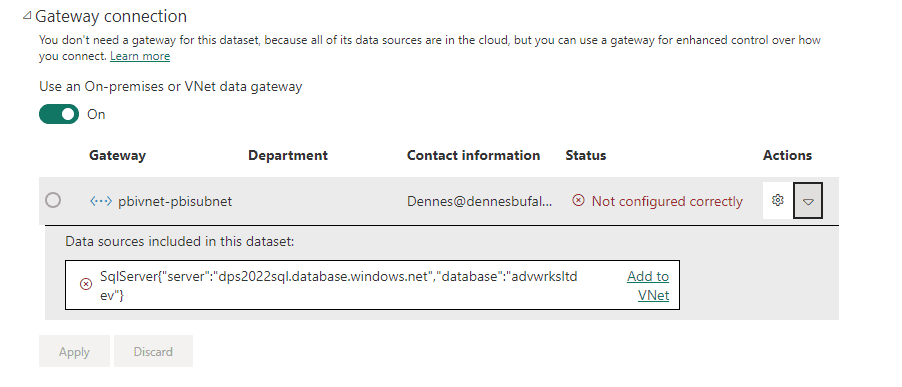
- Click the link Add to VNet
- On the New data source window, create a name for the data source, for example, myAzureSQL
- Set the authentication to be used. The authentication will be registered on the gateway, the report developers will not need to know the authentication used.
There is an interesting feature available for the data sources: We can use SSO via Azure AD for DirectQuery. This means that when a data source uses direct query, the end user will be directly authenticated using Azure AD. This is a subject for future blogs.

- Click the Create button
- Click the Apply button to link the dataset datasource with the new datasource created on the gateway.
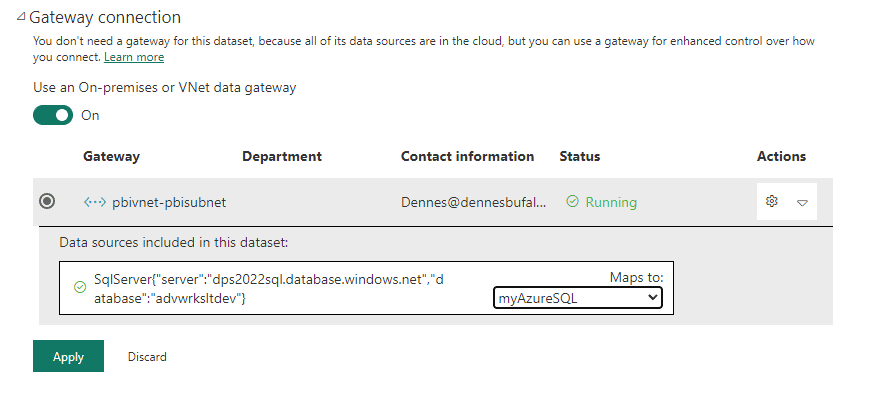
- Refresh the dataset again. This time the refresh will work because it will be using the VNet data gateway.
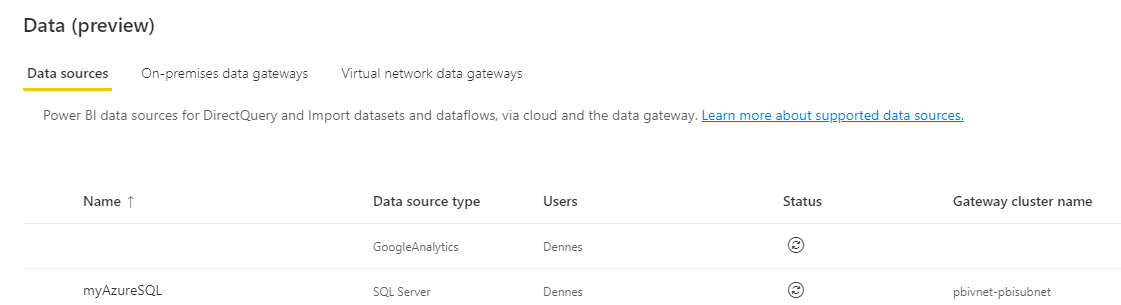
- Go to Settings and click the Manage connections and gateways menu option
- On the data sources tab, you will be able to locate the data source created.
Conclusion
In this and almost all cases where you are setting up security,
it may be complex to set up and maintain a secure environment in your company, but it’s very important to not use shortcuts which will create security breaches.
Load comments