How to Install Redmine Project Management Software on Debian 11
This tutorial exists for these OS versions
- Debian 11 (Bullseye)
- Debian 7 (Wheezy)
On this page
- Prerequisites
- Step 1 - Configure Firewall
- Step 2 - Install Apache Server
- Step 3 - Install and Configure MySQL Server
- Step 4 - Install Ruby and other requisites
- Step 5 - Install Redmine
- Step 6 - Install Phusion Passenger
- Step 7 - Configure Apache Server
- Step 8 - Install Nginx
- Step 9 - Install SSL
- Step 10 - Configure Nginx as Reverse-proxy
- Conclusion
Redmine is a free and open-source project management software and issue-tracking tool. It is written using the Ruby on Rails framework and can be integrated with various version control systems. It includes a repository browser and a diff viewer. It can be used to manage projects' features per project wikis and forums, time tracking, and role-based access control. It is cross-platform, and cross-database, and supports 49 languages.
In this tutorial, you will learn how to install Redmine on a Debian 11 server.
Prerequisites
-
A Server running Debian 11.
-
A non-sudo user with root privileges.
-
Uncomplicated Firewall(UFW) is enabled and running.
-
Few packages that your system needs.
$ sudo apt install wget curl nano software-properties-common dirmngr apt-transport-https gnupg2 ca-certificates lsb-release unzip debian-archive-keyring -y
Some of these packages may already be installed on your system.
-
Make sure everything is updated.
$ sudo apt update && sudo apt upgrade
Step 1 - Configure Firewall
The first step before installing any packages is to configure the firewall to allow HTTP and HTTPS connections.
Check the status of the firewall.
$ sudo ufw status
You should see something like the following.
Status: active

To                         Action      From
--                         ------      ----
OpenSSH                    ALLOW       Anywhere
OpenSSH (v6)               ALLOW       Anywhere (v6)
Allow HTTP and HTTPs ports. Also, open port 3000 for Redmine.
$ sudo ufw allow http
$ sudo ufw allow https
$ sudo ufw allow 3000
Check the status again to confirm.
$ sudo ufw status
Status: active

To                         Action      From
--                         ------      ----
OpenSSH                    ALLOW       Anywhere
80/tcp                     ALLOW       Anywhere
443                        ALLOW       Anywhere
3000                       ALLOW       Anywhere
OpenSSH (v6)               ALLOW       Anywhere (v6)
80/tcp (v6)                ALLOW       Anywhere (v6)
443 (v6)                   ALLOW       Anywhere (v6)
3000 (v6)                  ALLOW       Anywhere (v6)
Step 2 - Install Apache Server
We will use the Apache webserver to deploy Redmine. Install Apache using the following command.
$ sudo apt install apache2
Check the status of the Apache service.
$ sudo systemctl status apache2
? apache2.service - The Apache HTTP Server
     Loaded: loaded (/lib/systemd/system/apache2.service; enabled; vendor preset: enabled)
     Active: active (running) since Sat 2023-03-04 13:28:57 UTC; 41s ago
       Docs: https://httpd.apache.org/docs/2.4/
   Main PID: 3478 (apache2)
      Tasks: 55 (limit: 1129)
     Memory: 9.7M
        CPU: 27ms
     CGroup: /system.slice/apache2.service
             ??3478 /usr/sbin/apache2 -k start
             ??3481 /usr/sbin/apache2 -k start
             ??3482 /usr/sbin/apache2 -k start

Mar 04 13:28:56 redmine systemd[1]: Starting The Apache HTTP Server...
Mar 04 13:28:57 redmine systemd[1]: Started The Apache HTTP Server.
Step 3 - Install and Configure MySQL Server
We will use the MySQL database to store the data. Debian doesn't have MySQL anymore in its repositories. So we will be using the official MySQL repository for installation.
Import MySQL GPG key.
$ curl https://repo.mysql.com/RPM-GPG-KEY-mysql-2022 | gpg --dearmor | sudo tee /usr/share/keyrings/mysql.gpg >/dev/null
Create a MySQL repository file.
$ echo "deb [signed-by=/usr/share/keyrings/mysql.gpg arch=amd64] http://repo.mysql.com/apt/debian/ `lsb_release -cs` mysql-8.0" | sudo tee /etc/apt/sources.list.d/mysql.list
Update the system repository list.
$ sudo apt update
Install MySQL.
$ sudo apt install mysql-server
You will be prompted to set a root password. Choose a strong password. Next, you will be prompted to choose between the newer MySQL caching_sha2_password encryption or the older mysql_native_password encryption. Choose the newer one because Redmine supports it. Select OK to proceed and complete the installation.
Check the status of the MySQL service.
$ sudo systemctl status mysql
? mysql.service - MySQL Community Server
     Loaded: loaded (/lib/systemd/system/mysql.service; enabled; vendor preset: enabled)
     Active: active (running) since Sun 2023-03-05 08:18:15 UTC; 4h 14min ago
       Docs: man:mysqld(8)
             http://dev.mysql.com/doc/refman/en/using-systemd.html
   Main PID: 10500 (mysqld)
     Status: "Server is operational"
      Tasks: 38 (limit: 1129)
     Memory: 391.5M
        CPU: 1min 49.904s
     CGroup: /system.slice/mysql.service
             ??10500 /usr/sbin/mysqld

Mar 05 08:18:14 redmine systemd[1]: Starting MySQL Community Server...
Mar 05 08:18:15 redmine systemd[1]: Started MySQL Community Server.
Secure MySQL installation.
$ sudo mysql_secure_installation
First, you will be asked for the root password. Enter the password you chose during the installation. Next, you will be asked if you want to set up the Validate Password Plugin, which you can use to test the strength of your MySQL password. Choose Y to proceed. You will be asked to choose the password validation level in the next step. Choose 2 which is the strongest level and will require your password to be at least eight characters long and include a mix of uppercase, lowercase, numeric and special characters.
Securing the MySQL server deployment.

Enter password for user root:

VALIDATE PASSWORD COMPONENT can be used to test passwords
and improve security. It checks the strength of password
and allows the users to set only those passwords which are
secure enough. Would you like to setup VALIDATE PASSWORD component?

Press y|Y for Yes, any other key for No: Y

There are three levels of password validation policy:

LOW    Length >= 8
MEDIUM Length >= 8, numeric, mixed case, and special characters
STRONG Length >= 8, numeric, mixed case, special characters and dictionary                  file

Please enter 0 = LOW, 1 = MEDIUM and 2 = STRONG: 2
You will be shown the strength of your root password and will be asked if you want to change it. Enter N if you don't want to change and proceed further. If you wish to change it, you can do it now by entering Y and choosing a password satisfying the requirements above.
Using existing password for root.

Estimated strength of the password: 100
Change the password for root ? ((Press y|Y for Yes, any other key for No) : N

 ... skipping.
Press Y and then ENTER key for all the following prompts to remove anonymous users and the test database, disable root logins and load the newly set rules.
By default, a MySQL installation has an anonymous user,
allowing anyone to log into MySQL without having to have
a user account created for them. This is intended only for
testing, and to make the installation go a bit smoother.
You should remove them before moving into a production
environment.

Remove anonymous users? (Press y|Y for Yes, any other key for No) : Y
Success.


Normally, root should only be allowed to connect from
'localhost'. This ensures that someone cannot guess at
the root password from the network.

Disallow root login remotely? (Press y|Y for Yes, any other key for No) : Y
Success.

By default, MySQL comes with a database named 'test' that
anyone can access. This is also intended only for testing,
and should be removed before moving into a production
environment.


Remove test database and access to it? (Press y|Y for Yes, any other key for No) : Y
 - Dropping test database...
Success.

 - Removing privileges on test database...
Success.

Reloading the privilege tables will ensure that all changes
made so far will take effect immediately.

Reload privilege tables now? (Press y|Y for Yes, any other key for No) : Y
Success.

All done!
Enter the MySQL shell. Enter your root password to continue.
$ mysql -u root -p
Create redmine user. Make sure the password meets the requirements set before.
mysql> CREATE USER 'redmine'@'localhost' IDENTIFIED BY 'Your_password2';
Create redmine database.
mysql> CREATE DATABASE redmine CHARACTER SET utf8mb4;
Grant the user privileges to the redmine database.
mysql> GRANT ALL PRIVILEGES ON redmine.* TO 'redmine'@'localhost';
Exit the Shell.
mysql> exit
Step 4 - Install Ruby and other requisites
Redmine's latest version is compatible with Ruby 3.1. Debian ships with Ruby 2.7 so we will need to install the latest version using Ruby Version Manager (RVM).
Install RVM's GPG key.
$ gpg2 --keyserver keyserver.ubuntu.com --recv-keys 409B6B1796C275462A1703113804BB82D39DC0E3 7D2BAF1CF37B13E2069D6956105BD0E739499BDB
Install RVM.
$ \curl -sSL https://get.rvm.io | bash -s stable
Source the RVM scripts.
$ source ~/.rvm/scripts/rvm
Install Ruby. You can check the latest version from the Ruby website. At the time of writing this tutorial, Ruby 3.1.3 is the latest version in the series.
$ rvm install ruby-3.1.3
Verify the installation.
$ ruby -v
ruby 3.1.3p185 (2022-11-24 revision 1a6b16756e) [x86_64-linux]
Install all the remaining packages required by Redmine.
$ sudo apt install libxml2-dev libxslt1-dev zlib1g-dev imagemagick libmagickwand-dev libmysqlclient-dev apache2-dev build-essential libcurl4-openssl-dev
Step 5 - Install Redmine
Visit the Redmine downloads page and check the latest stable version available. At the time of writing this tutorial, the latest available version is 5.0.5.
Use wget to download Redmine.
$ wget https://www.redmine.org/releases/redmine-5.0.5.tar.gz
You might get the following error while downloading the archive because one of the root certificates on the website has expired.
WARNING: The certificate of ‘www.redmine.org’ is not trusted.
WARNING: The certificate of ‘www.redmine.org’ doesn't have a known issuer.
WARNING: The certificate of ‘www.redmine.org’ has expired.
If you get this error, run the following command instead to download.
$ wget https://www.redmine.org/releases/redmine-5.0.5.tar.gz --no-check-certificate
Extract and move the files to the /var/www/redmine directory.
$ tar xfz redmine-5.0.5.tar.gz
$ sudo mv redmine-5.0.5 /var/www/redmine
Shift to the /var/www/redmine directory.
$ cd /var/www/redmine
You will get the following output and a warning about the Ruby version. You can safely ignore that.
RVM used your Gemfile for selecting Ruby, it is all fine - Heroku does that too,
you can ignore these warnings with 'rvm rvmrc warning ignore /var/www/redmine/Gemfile'.
To ignore the warning for all files run 'rvm rvmrc warning ignore allGemfiles'.

Unknown ruby interpreter version (do not know how to handle): >=2.5.0,<3.2.0.
Create Redmine configuration files by using the supplied example files.
$ cp config/configuration.yml.example config/configuration.yml
$ cp config/database.yml.example config/database.yml
$ cp public/dispatch.fcgi.example public/dispatch.fcgi
Open the database.yml file for editing.
$ nano config/database.yml
Find and configure your database settings under the following section.
production:
  adapter: mysql2
  database: redmine
  host: localhost
  username: redmine
  password: "Your_password2"
  # Use "utf8" instead of "utfmb4" for MySQL prior to 5.7.7
  encoding: utf8mb4
Save the file by pressing Ctrl + X and entering Y when prompted.
Install bundler for managing ruby gem dependencies.
$ gem install bundler
Set the environment for installing gem dependencies.
$ bundle config set --local without 'development test'
Install the gem dependencies.
$ bundle install
If you face any issues with gem versions, use the following command to restore.
$ gem pristine --all
Add webrick dependency.
$ bundle add webrick
Generate a random secret key to prevent tampering with the cookies for storing session data.
$ bundle exec rake generate_secret_token
Create the database structure.
$ RAILS_ENV=production bundle exec rake db:migrate
Insert the data into the MySQL database.
$ RAILS_ENV=production REDMINE_LANG=en bundle exec rake redmine:load_default_data
Create necessary directories and set file permissions.
$ mkdir -p tmp/pdf
$ mkdir -p public/plugin_assets
$ chown -R $USER:$USER files log tmp public/plugin_assets
$ chmod -R 755 /var/www/redmine/
Run the following command to start a Rails server instance.
$ bundle exec rails server -u webrick -e production
=> Booting WEBrick
=> Rails 6.1.7.2 application starting in production http://0.0.0.0:3000
=> Run `bin/rails server --help` for more startup options
[2023-03-06 09:12:11] INFO  WEBrick 1.7.0
[2023-03-06 09:12:11] INFO  ruby 3.1.3 (2022-11-24) [x86_64-linux]
[2023-03-06 09:12:11] INFO  WEBrick::HTTPServer#start: pid=34652 port=3000
Open the URL http://<yourserverIP>:3000/login to obtain the Redmine Login screen.
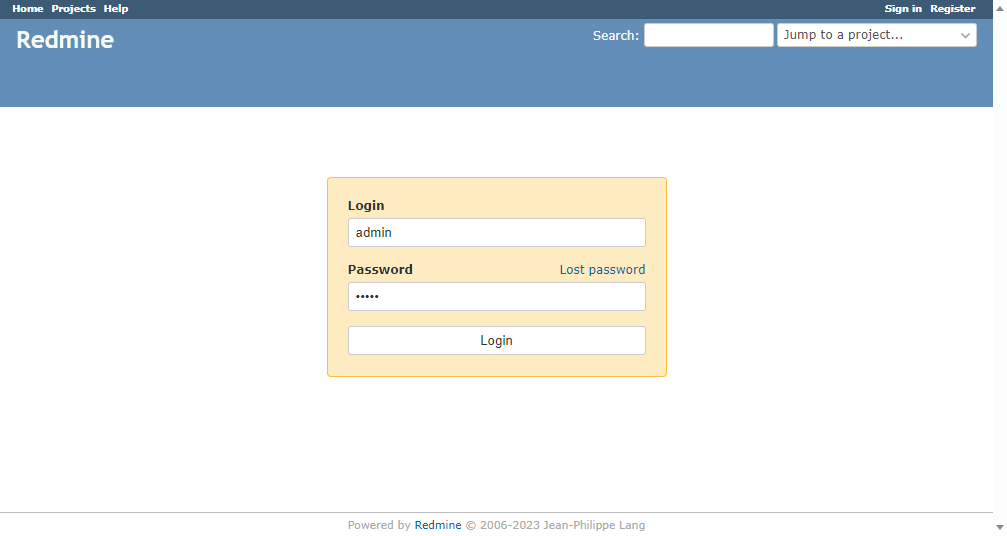
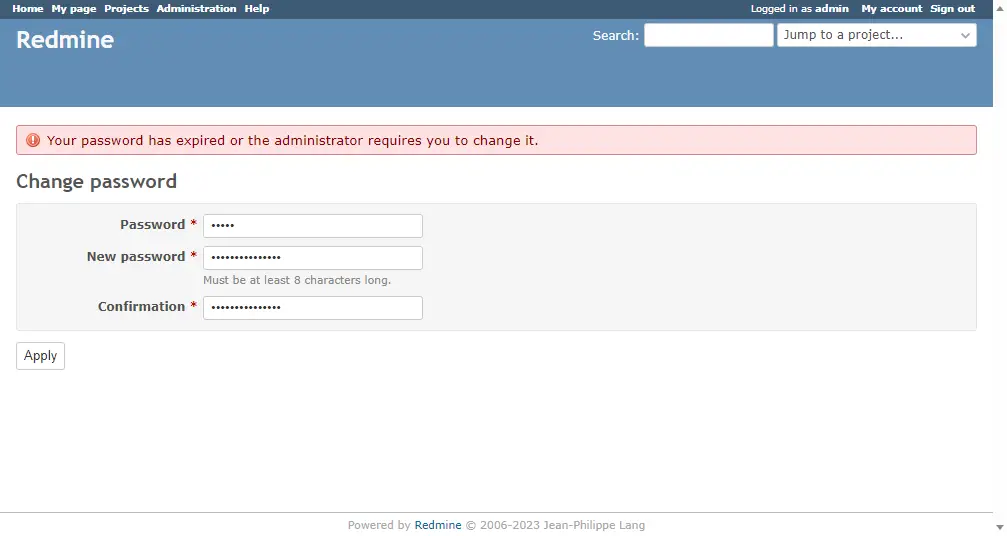
Enter the default credentials (admin/admin) to log in. You will be asked to change the password.
Next, you will be redirected to the My Account page.
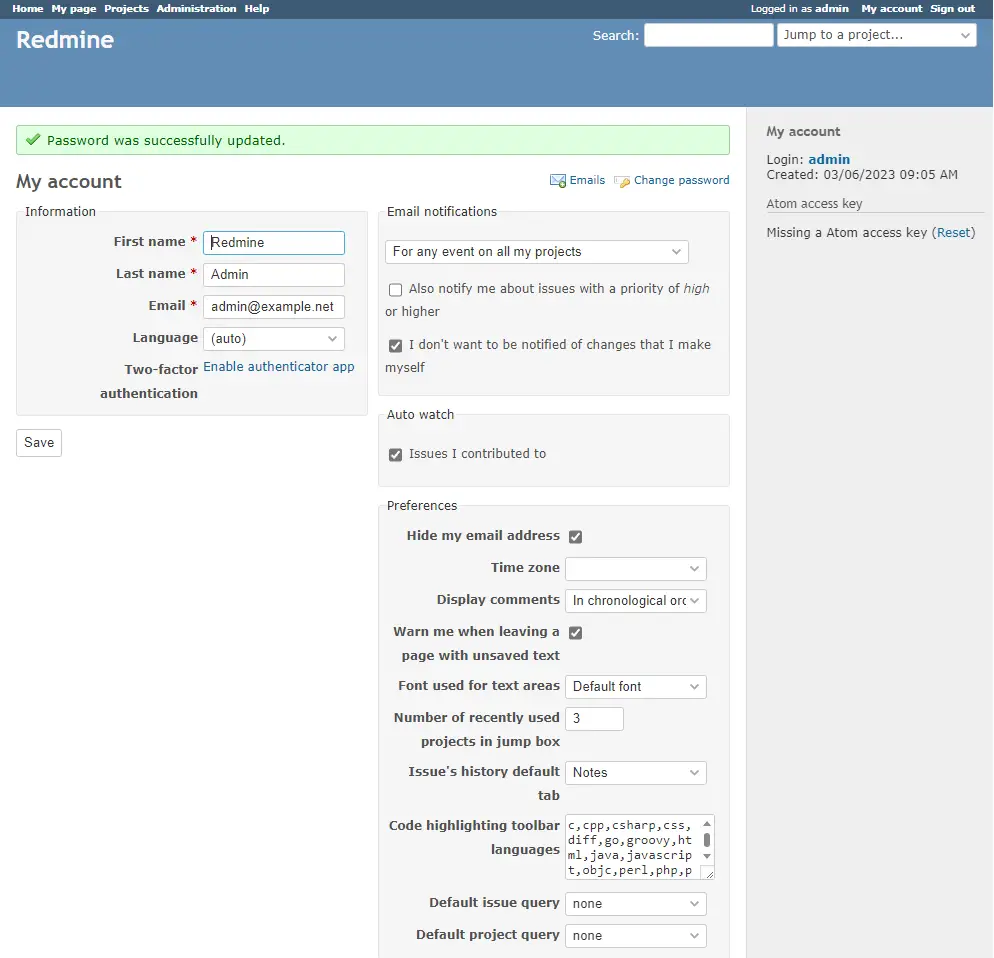
Redmine has been installed successfully.
Next, press CTRL+C on the terminal to stop the server.
Step 6 - Install Phusion Passenger
Phusion Passenger is a ruby application server that allows us to serve Redmine via a 3rd party server. In our case, we will use Apache.
Install Passenger.
$ gem install passenger
Install Passenger module for Apache server.
$ passenger-install-apache2-module
You will be greeted with a welcome message. Press Enter to continue.
Welcome to the Phusion Passenger Apache 2 module installer, v6.0.17.

This installer will guide you through the entire installation process. It
shouldn't take more than 3 minutes in total.

Here's what you can expect from the installation process:

 1. The Apache 2 module will be installed for you.
 2. You'll learn how to configure Apache.
 3. You'll learn how to deploy a Ruby on Rails application.

Don't worry if anything goes wrong. This installer will advise you on how to
solve any problems.

Press Enter to continue, or Ctrl-C to abort.
--------------------------------------------
Next, you will be asked for the language. Ruby is selected by default, so just press Enter to continue.
Which languages are you interested in?

Use <space> to select.
If the menu doesn't display correctly, press '!'

 ? ?  Ruby
   ?  Python
   ?  Node.js
   ?  Meteor
--------------------------------------------
The whole process will take around 10-15 minutes to finish. If you get an error like the following, it is most likely due to low RAM. You should either increase RAM on your server or install swap space.
c++: fatal error: Killed signal terminated program cc1plus
compilation terminated.
rake aborted!
Once the process is complete, you will get the following message.
--------------------------------------------
Almost there!

Please edit your Apache configuration file, and add these lines:

   LoadModule passenger_module /home/navjot/.rvm/gems/ruby-3.1.3/gems/passenger-6.0.17/buildout/apache2/mod_passenger.so
   <IfModule mod_passenger.c>
     PassengerRoot /home/navjot/.rvm/gems/ruby-3.1.3/gems/passenger-6.0.17
     PassengerDefaultRuby /home/navjot/.rvm/gems/ruby-3.1.3/wrappers/ruby
   </IfModule>

After you restart Apache, you are ready to deploy any number of web
applications on Apache, with a minimum amount of configuration!

Press ENTER when you are done editing.
Don't press Enter yet. Open a new session on your server as the current user and perform the following configurations.
Step 7 - Configure Apache Server
Create an Apache module configuration file for Phusion Passenger.
$ sudo nano /etc/apache2/conf-available/00-passenger.conf
Paste the code which you got at the end of the passenger install.
 LoadModule passenger_module /home/navjot/.rvm/gems/ruby-3.1.3/gems/passenger-6.0.17/buildout/apache2/mod_passenger.so
   <IfModule mod_passenger.c>
     PassengerRoot /home/navjot/.rvm/gems/ruby-3.1.3/gems/passenger-6.0.17
     PassengerDefaultRuby /home/navjot /.rvm/gems/ruby-3.1.3/wrappers/ruby
   </IfModule>
Save the file by pressing Ctrl + X and entering Y when prompted.
Create another Apache configuration file for the Redmine site.
$ sudo nano /etc/apache2/sites-available/redmine.conf
Paste the following code in it.
Listen 3000
<IfModule mod_passenger.c>
  PassengerRoot /home/navjot/.rvm/gems/ruby-3.1.3/gems/passenger-6.0.17
  PassengerDefaultRuby /home/navjot/.rvm/gems/ruby-3.1.3/wrappers/ruby
</IfModule>
<VirtualHost *:3000>
    ServerName redmine.example.com
    DocumentRoot "/var/www/redmine/public"

    CustomLog ${APACHE_LOG_DIR}/redmine_access.log combined
    ErrorLog ${APACHE_LOG_DIR}/redmine_error.log
    LogLevel warn

    <Directory "/var/www/redmine/public">
        Options Indexes ExecCGI FollowSymLinks
        Require all granted
        AllowOverride all
    </Directory>
</VirtualHost>
Save the file by pressing Ctrl + X and entering Y when prompted.
Open the main Apache configuration file /etc/httpd/conf/httpd.conf for editing.
$ sudo nano /etc/httpd/conf/httpd.conf
Find the variable ServerName and uncomment by removing the hash (#) in front of it and setting its value as the following.
ServerName localhost
Save the file by pressing Ctrl + X and entering Y when prompted.
Enable the Redmine site and Phusion Passenger configuration.
$ sudo a2ensite redmine.conf
$ sudo a2enconf 00-passenger.conf
Verify your Apache configuration.
$ sudo apachectl configtest
Syntax OK
Go back and press Enter to continue your Passenger installation. It will perform some checks, and you should see the following message on its successful completion.
Deploying a web application

To learn how to deploy a web app on Passenger, please follow the deployment
guide:

  https://www.phusionpassenger.com/library/deploy/apache/deploy/

Enjoy Phusion Passenger, a product of Phusion® (www.phusion.nl) :-)
https://www.phusionpassenger.com

Passenger® is a registered trademark of Phusion Holding B.V.
Restart your Apache server.
$ sudo systemctl restart apache2
Your website should be available at http://redmine.example.com:3000.
This is not the perfect way to access Redmine. It is still being served via the insecure HTTP protocol and uses a port number. We will install Nginx to act as a reverse proxy and serve Redmine using HTTPS protocol to improve this. Before moving to the Nginx installation and configuration, we need to set up the SSL certificate.
Step 8 - Install Nginx
Debian 11 ships with an older version of Nginx. To install the latest version, you need to download the official Nginx repository.
Import Nginx's signing key.
$ curl https://nginx.org/keys/nginx_signing.key | gpg --dearmor \
    | sudo tee /usr/share/keyrings/nginx-archive-keyring.gpg >/dev/null
Add the repository for Nginx's stable version.
$ echo "deb [signed-by=/usr/share/keyrings/nginx-archive-keyring.gpg] \
http://nginx.org/packages/debian `lsb_release -cs` nginx" \
    | sudo tee /etc/apt/sources.list.d/nginx.list
Update the system repositories.
$ sudo apt update
Install Nginx.
$ sudo apt install nginx
Verify the installation. Debian requires the following command to run using sudo.
$ sudo nginx -v
nginx version: nginx/1.22.1
Change Apache Listening Port
To avoid any conflict with Nginx, we need to change the default port Apache is listening to. Open the file /etc/apache2/ports.conf for editing.
$ sudo nano /etc/apache2/ports.conf
Change the port from 80 to 8080 as follows.
Listen 8080
Save the file by pressing Ctrl + X and entering Y when prompted.
Disable the default site configuration.
$ sudo a2dissite 000-default.conf
Restart Apache.
$ sudo systemctl restart apache2
Start the Nginx server.
$ sudo systemctl start nginx
Check the Nginx server status.
$ sudo systemctl status nginx
? nginx.service - nginx - high performance web server
     Loaded: loaded (/lib/systemd/system/nginx.service; enabled; vendor preset: enabled)
     Active: active (running) since Mon 2023-03-06 10:29:44 UTC; 6s ago
       Docs: https://nginx.org/en/docs/
    Process: 53531 ExecStart=/usr/sbin/nginx -c /etc/nginx/nginx.conf (code=exited, status=0/SUCCESS)
   Main PID: 53532 (nginx)
      Tasks: 2 (limit: 1129)
     Memory: 1.7M
        CPU: 8ms
     CGroup: /system.slice/nginx.service
             ??53532 nginx: master process /usr/sbin/nginx -c /etc/nginx/nginx.conf
             ??53533 nginx: worker process
Step 9 - Install SSL
We need to install Certbot to generate the SSL certificate. You can either install Certbot using Debian's repository or grab the latest version using the Snapd tool. We will be using the Snapd version.
Debian doesn't come with Snapd installed. Therefore, install Snapd.
$ sudo apt install snapd
Run the following commands to ensure that your version of Snapd is up to date.
$ sudo snap install core && sudo snap refresh core
Install Certbot.
$ sudo snap install --classic certbot
Use the following command to ensure that the Certbot command can be run by creating a symbolic link to the /usr/bin directory.
$ sudo ln -s /snap/bin/certbot /usr/bin/certbot
Generate the SSL certificate.
$ sudo certbot certonly --nginx --agree-tos --no-eff-email --staple-ocsp --preferred-challenges http -m [email protected] -d redmine.example.com
The above command will download a certificate to the /etc/letsencrypt/live/redmine.example.com directory on your server.
Generate a Diffie-Hellman group certificate.
$ sudo openssl dhparam -dsaparam -out /etc/ssl/certs/dhparam.pem 4096
Check the Certbot renewal scheduler service.
$ sudo systemctl list-timers
You will find snap.certbot.renew.service as one of the services scheduled to run.
NEXT                        LEFT         LAST                        PASSED       UNIT                         ACTIVATES
Mon 2023-03-06 11:37:00 UTC 1h 2min left n/a                         n/a          snap.certbot.renew.timer     snap.certbot.renew.service
Mon 2023-03-06 13:37:15 UTC 3h 2min left Sun 2023-03-05 13:37:15 UTC 20h ago      systemd-tmpfiles-clean.timer systemd-tmpfiles-clean.service
Tue 2023-03-07 00:00:00 UTC 13h left     Mon 2023-03-06 00:00:15 UTC 10h ago      logrotate.timer              logrotate.service
Do a dry run of the process to check whether the SSL renewal is working fine.
$ sudo certbot renew --dry-run
If you see no errors, you are all set. Your certificate will renew automatically.
Step 10 - Configure Nginx as Reverse-proxy
Create and open the file /etc/nginx/conf.d/redmine.conf for editing.
$ sudo nano /etc/nginx/conf.d/redmine.conf
Paste the following code in it.
# Redirect all non-encrypted to encrypted
server {
    listen 80;
    server_name redmine.example.com;
    return 301 https://$host$request_uri;
}

server {
    listen 443 ssl http2;

    server_name redmine.example.com;

    ssl_certificate     /etc/letsencrypt/live/redmine.example.com/fullchain.pem;
    ssl_certificate_key /etc/letsencrypt/live/redmine.example.com/privkey.pem;
	ssl_trusted_certificate /etc/letsencrypt/live/redmine.example.com/chain.pem;

	ssl_session_timeout  5m;
    ssl_session_cache shared:MozSSL:10m;
    ssl_session_tickets off;

    ssl_protocols TLSv1.2 TLSv1.3;
    ssl_prefer_server_ciphers on;
    ssl_ciphers ECDHE-ECDSA-AES128-GCM-SHA256:ECDHE-RSA-AES128-GCM-SHA256:ECDHE-ECDSA-AES256-GCM-SHA384:ECDHE-RSA-AES256-GCM-SHA384:ECDHE-ECDSA-CHACHA20-POLY1305:ECDHE-RSA-CHACHA20-POLY1305:DHE-RSA-AES128-GCM-SHA256:DHE-RSA-AES256-GCM-SHA384;
    ssl_ecdh_curve X25519:prime256v1:secp384r1:secp521r1;
    ssl_stapling on;
    ssl_stapling_verify on;
    ssl_dhparam /etc/ssl/certs/dhparam.pem;
    resolver 8.8.8.8;

    access_log /var/log/nginx/redmine.access.log main;
    error_log  /var/log/nginx/redmine.error.log;

	location / {
        proxy_pass          http://localhost:3000;
        proxy_redirect      off;
        proxy_buffering     off;
        proxy_set_header    Host $host;
        proxy_set_header    X-Real-IP $remote_addr;
        proxy_set_header    X-Forwarded-For $proxy_add_x_forwarded_for;
    }
}
Save the file by pressing Ctrl + X and entering Y when prompted once finished.
Open the file /etc/nginx/nginx.conf for editing.
$ sudo nano /etc/nginx/nginx.conf
Add the following line before the line include /etc/nginx/conf.d/*.conf;.
server_names_hash_bucket_size 64;
Save the file by pressing Ctrl + X and entering Y when prompted.
Verify the Nginx configuration file syntax.
$ sudo nginx -t
nginx: the configuration file /etc/nginx/nginx.conf syntax is ok
nginx: configuration file /etc/nginx/nginx.conf test is successful
Restart the Nginx service to enable the new configuration.
$ sudo systemctl restart nginx
Your Redmine application should be accessible at https://redmine.example.com.
You should delete the entry for port 3000 in the firewall because it is no longer needed.
$ sudo ufw delete allow 3000
Conclusion
This concludes our tutorial where you learned how to install Redmine Project Manager on a Debian 11 server. You also learned to serve the Redmine application via Nginx using HTTPS protocol. If you have any questions, post them in the comments below.

