How to Install and Configure Suricata IDS along with Elastic Stack on Ubuntu 22.04
On this page
- Prerequisites
- PART 1
- Step 1 - Install Suricata
- Step 2 - Configure Suricata
- Step 3 - Configure Suricata Rules
- Step 4 - Validate Suricata Configuration
- Step 5 - Running Suricata
- Step 6 - Testing Suricata Rules
- PART 2
- Step 7 - Install Elasticsearch and Kibana
- Step 8 - Configure Elasticsearch
- Step 9 - Configure Kibana
- Step 10 - Install and Configure Filebeat
- Step 11 - Accessing Kibana Dashboard
- Step 12 - Managing Kibana Dashboards
- Conclusion
Suricata is a Network Monitoring tool that examines and processes every packet of internet traffic that flows through your server. It can generate log events, trigger alerts and drop traffic upon detecting any suspicious activity.
You can either install Suricata on a single machine to monitor its traffic or deploy it on a gateway host to scan all incoming and outgoing traffic from other servers connected to it. You can combine Suricata with Elasticsearch, Kibana, and Filebeat to create a Security Information and Event Management(SIEM) tool.
In this tutorial, you will install Suricata IDS along with ElasticStack on a Ubuntu 22.04 server. The various components of the stack are:
- Elasticsearch to store, index, correlate and search the security events from the server.
- Kibana to display the logs stored in Elasticsearch.
- Filebeat to parse Suricata's
eve.jsonlog file and send each event to Elasticsearch for processing. - Suricata to scan the network traffic for suspicious events and drop the invalid packets.
The tutorial is divided into two parts, the first part will deal with installing and configuring Suricata, and the second part will deal with installing and configuring Elastic Stack.
We will install Suricata and the Elastic stack on different servers for our tutorial.
Prerequisites
-
The servers hosting the Elastic Stack and Suricata should have a minimum of 4GB RAM and 2 CPU cores.
-
The servers should be able to communicate with each other using private IP addresses.
-
The servers should be running Ubuntu 22.04 with a non-root sudo user.
-
If you want to access Kibana dashboards from everywhere, set up a domain (
kibana.example.com) pointing to the server where Elasticsearch will be installed. -
Install essential packages on both servers. Some of them may already be installed.
$ sudo apt install wget curl nano software-properties-common dirmngr apt-transport-https gnupg gnupg2 ca-certificates lsb-release ubuntu-keyring unzip -y
-
Make sure everything is updated on both servers.
$ sudo apt update
PART 1
Step 1 - Install Suricata
To install Suricata, you need to add the Open Information Security Foundation's (OISF) package repository to your server.
$ sudo add-apt-repository ppa:oisf/suricata-stable
Install Suricata.
$ sudo apt install suricata
Enable the Suricata service.
$ sudo systemctl enable suricata
Before proceeding ahead, stop the Suricata service since we need to configure it first.
$ sudo systemctl stop suricata
Step 2 - Configure Suricata
Suricata stores its configuration in the /etc/suricata/suricata.yaml file. The default mode for Suricata is the IDS (Intrusion Detection System) Mode, where the traffic is only logged and not stopped. If you are new to Suricata, you should leave the mode unchanged. Once you have configured it and learned more, you can turn on the IPS (Intrusion Prevention System) mode.
Enable Community ID
The Community ID field makes it easier to correlate data between records generated by different monitoring tools. Since we will use Suricata with Elasticsearch, enabling Community ID can be useful.
Open the file /etc/suricata/suricata.yaml for editing.
$ sudo nano /etc/suricata/suricata.yaml
Locate the line # Community Flow ID and set the value of the variable community-id to true.
. . .
      # Community Flow ID
      # Adds a 'community_id' field to EVE records. These are meant to give
      # records a predictable flow ID that can be used to match records to
      # output of other tools such as Zeek (Bro).
      #
      # Takes a 'seed' that needs to be same across sensors and tools
      # to make the id less predictable.

      # enable/disable the community id feature.
      community-id: true
. . .
Now, your events will carry an ID like 1:S+3BA2UmrHK0Pk+u3XH78GAFTtQ= that you can use to match datasets across different monitoring tools.
Select Network Interface
The default Suricata configuration file inspects traffic on the eth0 device/network interface. If your server uses a different network interface, you will need to update that in the configuration.
Check the device name of your network interface using the following command.
$ ip -p -j route show default
You will receive an output like the following.
[ {
        "dst": "default",
        "gateway": "95.179.184.1",
        "dev": "enp1s0",
        "protocol": "dhcp",
        "prefsrc": "95.179.185.42",
        "metric": 100,
        "flags": [ ]
    } ]
The dev variable refers to the networking device. In our output, it shows enp1s0 as the networking device. Your output may be different depending on your system.
Now that you know your device name open the configuration file.
$ sudo nano /etc/suricata/suricata.yaml
Find the line af-packet: around line number 580. Under it, set the value of the variable interface to the device name for your system.
# Linux high speed capture support
af-packet:
  - interface: enp1s0
    # Number of receive threads. "auto" uses the number of cores
    #threads: auto
    # Default clusterid. AF_PACKET will load balance packets based on flow.
    cluster-id: 99
. . .
If you want to add additional interfaces, you can do so by adding them at the bottom of the af-packet section at around line 650.
To add a new interface, insert it just above the - interface: default section as shown below.
    #  For eBPF and XDP setup including bypass, filter and load balancing, please
    #  see doc/userguide/capture-hardware/ebpf-xdp.rst for more info.

  - interface: enp0s1
    cluster-id: 98
...
  - interface: default
    #threads: auto
    #use-mmap: no
    #tpacket-v3: yes
We have added a new interface enp0s1 and a unique value for the cluster-id variable in our example. You need to include a unique cluster id with every interface you add.
Find the line pcap: and under it, set the value of the variable interface to the device name for your system.
# Cross platform libpcap capture support
pcap:
  - interface: enp1s0
    # On Linux, pcap will try to use mmap'ed capture and will use "buffer-size"
    # as total memory used by the ring. So set this to something bigger
    # than 1% of your bandwidth.
To add a new interface just like before, insert it just above the - interface: default section as shown below.
- interface: enp0s1
# Put default values here
  - interface: default
    #checksum-checks: auto
Once you are finished, save the file by pressing Ctrl + X and entering Y when prompted.
Step 3 - Configure Suricata Rules
Suricata, by default, only uses a limited set of rules to detect network traffic. You can add more rulesets from external providers using a tool called suricata-update. Run the following command to include additional rules.
$ sudo suricata-update
25/2/2023 -- 06:48:14 - <Info> -- Using data-directory /var/lib/suricata.
25/2/2023 -- 06:48:14 - <Info> -- Using Suricata configuration /etc/suricata/suricata.yaml
25/2/2023 -- 06:48:14 - <Info> -- Using /etc/suricata/rules for Suricata provided rules.
.....
25/2/2023 -- 06:48:14 - <Info> -- No sources configured, will use Emerging Threats Open
25/2/2023 -- 06:48:14 - <Info> -- Fetching https://rules.emergingthreats.net/open/suricata-6.0.10/emerging.rules.tar.gz.
 100% - 3744681/3744681
.....
25/2/2023 -- 06:48:19 - <Info> -- Writing rules to /var/lib/suricata/rules/suricata.rules: total: 41022; enabled: 33278; added: 41022; removed 0; modified: 0
25/2/2023 -- 06:48:19 - <Info> -- Writing /var/lib/suricata/rules/classification.config
25/2/2023 -- 06:48:19 - <Info> -- Testing with suricata -T.
25/2/2023 -- 06:48:41 - <Info> -- Done.
Add Ruleset Providers
You can expand Suricata's rules by adding more providers. It can fetch rules from a variety of free and commercial providers.
You can list the default provider list by using the following command.
$ sudo suricata-update list-sources
For example, if you want to include the tgreen/hunting ruleset, you can enable it with the following command.
$ sudo suricata-update enable-source tgreen/hunting
Run the suricata-update command again to download and update the new rules. Suricata, by default, can process any rule changes without restarting.
Step 4 - Validate Suricata Configuration
Suricata ships with a validation tool to check the configuration file and rules for errors. Run the following command to run the validation tool.
$ sudo suricata -T -c /etc/suricata/suricata.yaml -v
25/2/2023 -- 06:51:11 - <Info> - Running suricata under test mode
25/2/2023 -- 06:51:11 - <Notice> - This is Suricata version 6.0.10 RELEASE running in SYSTEM mode
25/2/2023 -- 06:51:11 - <Info> - CPUs/cores online: 2
25/2/2023 -- 06:51:11 - <Info> - fast output device (regular) initialized: fast.log
25/2/2023 -- 06:51:11 - <Info> - eve-log output device (regular) initialized: eve.json
25/2/2023 -- 06:51:11 - <Info> - stats output device (regular) initialized: stats.log
25/2/2023 -- 06:51:22 - <Info> - 1 rule files processed. 33519 rules successfully loaded, 0 rules failed
25/2/2023 -- 06:51:22 - <Info> - Threshold config parsed: 0 rule(s) found
25/2/2023 -- 06:51:22 - <Info> - 33522 signatures processed. 1189 are IP-only rules, 5315 are inspecting packet payload, 26814 inspect application layer, 108 are decoder event only
25/2/2023 -- 06:51:34 - <Notice> - Configuration provided was successfully loaded. Exiting.
25/2/2023 -- 06:51:34 - <Info> - cleaning up signature grouping structure... complete
The -T flag instructs Suricata to run in testing mode, the -c flag configures the location of the configuration file, and the -v flag prints the verbose output of the command. Depending upon your system configuration and the number of rules added, the command can take a few minutes to finish.
Step 5 - Running Suricata
Now that Suricata is configured and set up, it is time to run the application.
$ sudo systemctl start suricata
Check the status of the process.
$ sudo systemctl status suricata
You should see the following output if everything is working correctly.
? suricata.service - LSB: Next Generation IDS/IPS
     Loaded: loaded (/etc/init.d/suricata; generated)
     Active: active (running) since Sat 2023-02-25 07:04:23 UTC; 5s ago
       Docs: man:systemd-sysv-generator(8)
    Process: 2701 ExecStart=/etc/init.d/suricata start (code=exited, status=0/SUCCESS)
      Tasks: 1 (limit: 4575)
     Memory: 190.6M
        CPU: 5.528s
     CGroup: /system.slice/suricata.service
             ??2710 /usr/bin/suricata -c /etc/suricata/suricata.yaml --pidfile /var/run/suricata.pid --af-packet -D -vvv

Feb 25 07:04:23 kibana systemd[1]: Starting LSB: Next Generation IDS/IPS...
Feb 25 07:04:23 kibana suricata[2701]: Starting suricata in IDS (af-packet) mode... done.
Feb 25 07:04:23 kibana systemd[1]: Started LSB: Next Generation IDS/IPS.
The process can take a few minutes to finish parsing all the rules. Therefore, the above status check is not a complete indication of whether Suricata is up and ready. You can monitor the log file for that using the following command.
$ sudo tail -f /var/log/suricata/suricata.log
If you see the following line in the log file, it means Suricata is running and ready to monitor network traffic.
25/2/2023 -- 07:04:44 - <Info> - All AFP capture threads are running.
Step 6 - Testing Suricata Rules
We will check whether Suricata is detecting any suspicious traffic. The Suricata guide recommends testing the ET Open rule number 2100498 using the following command.
$ curl http://testmynids.org/uid/index.html
You will get the following response.
uid=0(root) gid=0(root) groups=0(root)
The above command pretends to return the output of the id command that can be run on a compromised system. To test whether Suricata detected the traffic, you need to check the log file using the specified rule number.
$ grep 2100498 /var/log/suricata/fast.log
If your request used IPv6, you should see the following output.
02/25/2023-07:06:09.513208 [**] [1:2100498:7] GPL ATTACK_RESPONSE id check returned root [**] [Classification: Potentially Bad Traffic] [Priority: 2] {TCP} 2600:9000:2250:3200:0018:30b3:e400:93a1:80 -> 2001:19f0:5001:225f:5400:04ff:fe52:2ca2:36770
If your request used IPv4, you would see the following output.
02/19/2023-10:13:17.872335 [**] [1:2100498:7] GPL ATTACK_RESPONSE id check returned root [**] [Classification: Potentially Bad Traffic] [Priority: 2] {TCP} 108.158.221.5:80 -> 95.179.185.42:36364
Suricata also logs events to the /var/log/suricata/eve.log file using JSON format. To read and interpret those rules, you need to install jq which is outside the scope of this tutorial.
PART 2
We are done with part one of the tutorial, where we installed Suricata and tested it. The next part involves installing the ELK stack and setting it up to visualize Suricata and its logs. Part two of the tutorial is supposed to be done on the second server unless otherwise specified.
Step 7 - Install Elasticsearch and Kibana
The first step in installing Elasticsearch involves adding the Elastic GPG key to your server.
$ wget -qO - https://artifacts.elastic.co/GPG-KEY-elasticsearch | sudo gpg --dearmor -o /usr/share/keyrings/elasticsearch-keyring.gpg
Create a repository for the Elasticsearch package by creating the file /etc/apt/sources.list.d/elastic-7.x.list.
$ echo "deb [signed-by=/usr/share/keyrings/elasticsearch-keyring.gpg] https://artifacts.elastic.co/packages/7.x/apt stable main" | sudo tee /etc/apt/sources.list.d/elastic-7.x.list
Update your system's repository list.
$ sudo apt update
Install Elasticsearch and Kibana.
$ sudo apt install elasticsearch kibana
Locate your server's private IP address using the following command.
$ ip -brief address show
lo               UNKNOWN        127.0.0.1/8 ::1/128
enp1s0           UP             78.141.220.30/23 metric 100 2001:19f0:5001:b35:5400:4ff:fe52:2ca3/64 fe80::5400:4ff:fe52:2ca3/64
enp6s0           UP             10.7.96.4/20 fe80::5800:4ff:fe52:2ca3/64
Note down the private IP of your server (10.7.96.4 in this case). We will refer to it as your_private_IP. The public IP address of the server (78.141.220.30) will be referred as your_public_IP in the remaining tutorial. Also, note the network name of your server, enp6s0.
Step 8 - Configure Elasticsearch
Elasticsearch stores its configuration in the /etc/elasticsearch/elasticsearch.yml file. Open the file for editing.
$ sudo nano /etc/elasticsearch/elasticsearch.yml
Elasticsearch only accepts local connections by default. We need to change it so that Kibana can access it over the private IP address.
Find the line #network.host: 192.168.0.1 and add the following line right below it, as shown below.
# By default Elasticsearch is only accessible on localhost. Set a different
# address here to expose this node on the network:
#
#network.host: 192.168.0.1
network.bind_host: ["127.0.0.1", "your_private_IP"]
#
# By default Elasticsearch listens for HTTP traffic on the first free port it
# finds starting at 9200. Set a specific HTTP port here:
This will ensure that Elastic can still accept local connections while being available to Kibana over the private IP address.
The next step is to turn on some security features and ensure that Elastic is configured to run on a single node. To do that, add the following lines at the end of the file.
. . .
discovery.type: single-node
xpack.security.enabled: true
If you are going to use multiple Elastic search nodes, you can leave out the first line.
Once you are finished, save the file by pressing Ctrl + X and entering Y when prompted.
Configure Firewall
Add the proper firewall rules for Elasticsearch so that it is accessible via the private network.
$ sudo ufw allow in on enp6s0
$ sudo ufw allow out on enp6s0
Make sure you choose the interface name in the first command like the one you got from step 7.
Start Elasticsearch
Reload the service daemon.
$ sudo systemctl daemon-reload
Enable the Elasticsearch service.
$ sudo systemctl enable elasticsearch
Now that you have configured Elasticsearch, it is time to start the service.
$ sudo systemctl start elasticsearch
Create Elasticsearch Passwords
After enabling the security setting of Elasticsearch, the next step is to generate some passwords for the default user. Elasticsearch ships with a password creation utility at /usr/share/elasticsearch/bin/elasticsearch-setup-passwords which can generate random passwords.
Create the passwords.
$ cd /usr/share/elasticsearch/bin
$ sudo ./elasticsearch-setup-passwords auto
You will get an output like the following. Press y to continue when prompted.
Initiating the setup of passwords for reserved users elastic,apm_system,kibana,kibana_system,logstash_system,beats_system,remote_monitoring_user.
The passwords will be randomly generated and printed to the console.
Please confirm that you would like to continue [y/N]y


Changed password for user apm_system
PASSWORD apm_system = y5uilzBu8akwRChvXFEq

Changed password for user kibana_system
PASSWORD kibana_system = nEeGIo9YJysUITU0ywLO

Changed password for user kibana
PASSWORD kibana = nEeGIo9YJysUITU0ywLO

Changed password for user logstash_system
PASSWORD logstash_system = VmumYBdNAwjsjwql6F5j

Changed password for user beats_system
PASSWORD beats_system = NZJxIPySwsNwPwCD2rsy

Changed password for user remote_monitoring_user
PASSWORD remote_monitoring_user = c2GafzJIueAxZEAAC6tZ

Changed password for user elastic
PASSWORD elastic = l4r7CyCHPw5p4c43RfA1
You can only run the utility once, so save all the passwords in a secure location.
Step 9 - Configure Kibana
The first step in configuring Kibana is to enable the xpack security function by generating secret keys. Kibana uses these secret keys to store data in Elasticsearch. The utility to generate secret keys can be accessed from the /usr/share/kibana/bin directory.
$ cd /usr/share/kibana/bin/
$ sudo ./kibana-encryption-keys generate -q --force
The -q flag suppresses the command instructions, and the --force flag ensures fresh secrets are generated. You will receive an output like the following.
xpack.encryptedSavedObjects.encryptionKey: 20cabb5381ad09aeb6cccd1136c8138f
xpack.reporting.encryptionKey: d5293c386d14479f72bb2f6f6f984ad9
xpack.security.encryptionKey: 9cda918cc718fb58f022423b97e3171a
Copy the output. Open Kibana's configuration file at /etc/kibana/kibana.yml for editing.
$ sudo nano /etc/kibana/kibana.yml
Paste the code from the previous command at the end of the file.
. . .

# Specifies locale to be used for all localizable strings, dates and number formats.
# Supported languages are the following: English - en , by default , Chinese - zh-CN .
#i18n.locale: "en"

xpack.encryptedSavedObjects.encryptionKey: 0f4e5e1cf8fad1874ffed0faac6be0da
xpack.reporting.encryptionKey: d435c78a4e37521e539c0e905420c9f5
xpack.security.encryptionKey: 7ba0e2a02747bb90fb0f9a3c267b99ed
Configure Kibana Port
Kibana needs to be configured so that it's accessible on the server's private IP address. Find the line #server.host: "localhost" in the file and add the following line right below it as shown.
# Kibana is served by a back end server. This setting specifies the port to use.
#server.port: 5601

# Specifies the address to which the Kibana server will bind. IP addresses and host names are both valid values.
# The default is 'localhost', which usually means remote machines will not be able to connect.
# To allow connections from remote users, set this parameter to a non-loopback address.
#server.host: "localhost"
server.host: "your_private_IP"
Once you are finished, save the file by pressing Ctrl + X and entering Y when prompted.
Configure Kibana Access
The next step is to create a username and password that Kibana can use for authentication. You can do that by directly editing Kibana's configuration file, but it can cause a security issue. The secure method involves the use of kibana-keystore application.
Run the following commands to set a username. Enter kibana_system as the username.
$ cd /usr/share/kibana/bin
$ sudo ./kibana-keystore add elasticsearch.username
Enter value for elasticsearch.username: *************
Run the command again to set the password. Make sure you use the password you created for Kibana in step 8. For our tutorial, the password is dTanR7Q2HtgDtATRvuJv.
$ sudo ./kibana-keystore add elasticsearch.password
Enter value for elasticsearch.password: ********************
Starting Kibana
Now that you have configured secure access and networking for Kibana start and enable the process.
$ sudo systemctl enable kibana --now
Check the status to see if it is running.
$ sudo systemctl status kibana
? kibana.service - Kibana
     Loaded: loaded (/etc/systemd/system/kibana.service; enabled; vendor preset: enabled)
     Active: active (running) since Sat 2023-02-25 07:24:37 UTC; 6s ago
       Docs: https://www.elastic.co
   Main PID: 3884 (node)
      Tasks: 11 (limit: 4575)
     Memory: 181.8M
        CPU: 6.700s
     CGroup: /system.slice/kibana.service
             ??3884 /usr/share/kibana/bin/../node/bin/node /usr/share/kibana/bin/../src/cli/dist --logging.dest=/var/log/kibana/kibana.log --pid.file=/run/kibana/kibana.pid "--deprecation.skip_de>
Feb 25 07:24:37 elasticsearch systemd[1]: Started Kibana.
Step 10 - Install and Configure Filebeat
It is important to note that we will be installing Filebeat on the Suricata server. So switch back to it and add the Elastic GPG key to get started.
$ wget -qO - https://artifacts.elastic.co/GPG-KEY-elasticsearch | sudo gpg --dearmor -o /usr/share/keyrings/elasticsearch-keyring.gpg
Create the elastic repository.
$ echo "deb [signed-by=/usr/share/keyrings/elasticsearch-keyring.gpg] https://artifacts.elastic.co/packages/7.x/apt stable main" | sudo tee /etc/apt/sources.list.d/elastic-7.x.list
Update the system repository list.
$ sudo apt update
Save the file by pressing Ctrl + X and entering Y when prompted.
Install Filebeat.
$ sudo apt install filebeat
Filebeat stores its configuration in the /etc/filebeat/filebeat.yml file. Open it for editing.
$ sudo nano /etc/filebeat/filebeat.yml
The first thing you need to do is connect it to Kibana's dashboard. Find the line #host: "localhost:5601" in the Kibana section and add the following line right below it as shown.
. . .
# Starting with Beats version 6.0.0, the dashboards are loaded via the Kibana API.
# This requires a Kibana endpoint configuration.
setup.kibana:

  # Kibana Host
  # Scheme and port can be left out and will be set to the default (http and 5601)
  # In case you specify and additional path, the scheme is required: http://localhost:5601/path
  # IPv6 addresses should always be defined as: https://[2001:db8::1]:5601
  #host: "localhost:5601"
  host: "your_private_IP:5601"

. . .
Next, find the Elasticsearch Output section of the file and edit the values of hosts, username, and password as shown below. For the username, choose elastic as the value, and for the password, use the value generated in step 8 of this tutorial.
output.elasticsearch:
  # Array of hosts to connect to.
  hosts: ["your_private_IP:9200"]

  # Protocol - either `http` (default) or `https`.
  #protocol: "https"

  # Authentication credentials - either API key or username/password.
  #api_key: "id:api_key"
  username: "elastic"
  password: "bd1YJfhSa8RC8SMvTIwg"

. . .
Once you are finished, save the file by pressing Ctrl + X and entering Y when prompted.
Next, enable Filebeat's built-in Suricata module.
$ sudo filebeat modules enable suricata
The final step in configuring Filebeat is to load the SIEM dashboards and pipelines into Elasticsearch using the filebeat setup command.
$ sudo filebeat setup
It may take a few minutes for the command to finish. Once finished, you should receive the following output.
Overwriting ILM policy is disabled. Set `setup.ilm.overwrite: true` for enabling.

Index setup finished.
Loading dashboards (Kibana must be running and reachable)
Loaded dashboards
Setting up ML using setup --machine-learning is going to be removed in 8.0.0. Please use the ML app instead.
See more: https://www.elastic.co/guide/en/machine-learning/current/index.html
It is not possble to load ML jobs into an Elasticsearch 8.0.0 or newer using the Beat.
Loaded machine learning job configurations
Loaded Ingest pipelines
Start the Filebeat service.
$ sudo systemctl start filebeat
Check the status of the service.
$ sudo systemctl status filebeat
Step 11 - Accessing Kibana Dashboard
Since KIbana is configured to only access Elasticsearch via its private IP address, you have two options to access it. The first method is to use an SSH Tunnel to the Elastic search server from your PC. This will forward port 5601 from your PC to the server's private IP address, and you will be able to access Kibana from your PC at http://localhost:5601. But this method means you won't be able to access it from anywhere else.
The other option is to install Nginx on your Suricata server and use it as a reverse proxy to access Elasticsearch's server via its private IP address. We will discuss both ways. You can choose either way based on your requirements.
Using SSH Local Tunnel
If you are using Windows 10 or Windows 11, you can run the SSH LocalTunnel from your Windows Powershell. On Linux or macOS, you can use the terminal. You will probably need to configure SSH access if you haven't already.
Run the following command in your computer's terminal to create the SSH Tunnel.
$ ssh -L 5601:your_private_IP:5601 navjot@your_public_IP -N
- The
-Lflag refers to the local SSH Tunnel, which forwards traffic from your PC's port to the server. - The
private_IP:5601is the IP address where your traffic is forwarded to on the server. In this case, replace it with the private IP address of your Elasticsearch server. - The
your_public_IPis the public IP address of the Elasticsearch server, which is used to open an SSH connection. - The
-Nflag tells OpenSSH not to execute any command but keep the connection alive as long as the tunnel runs.
Now that the tunnel is open, you can access Kibana by opening the URL http://localhost:5601 on your PC's browser. You will get the following screen.
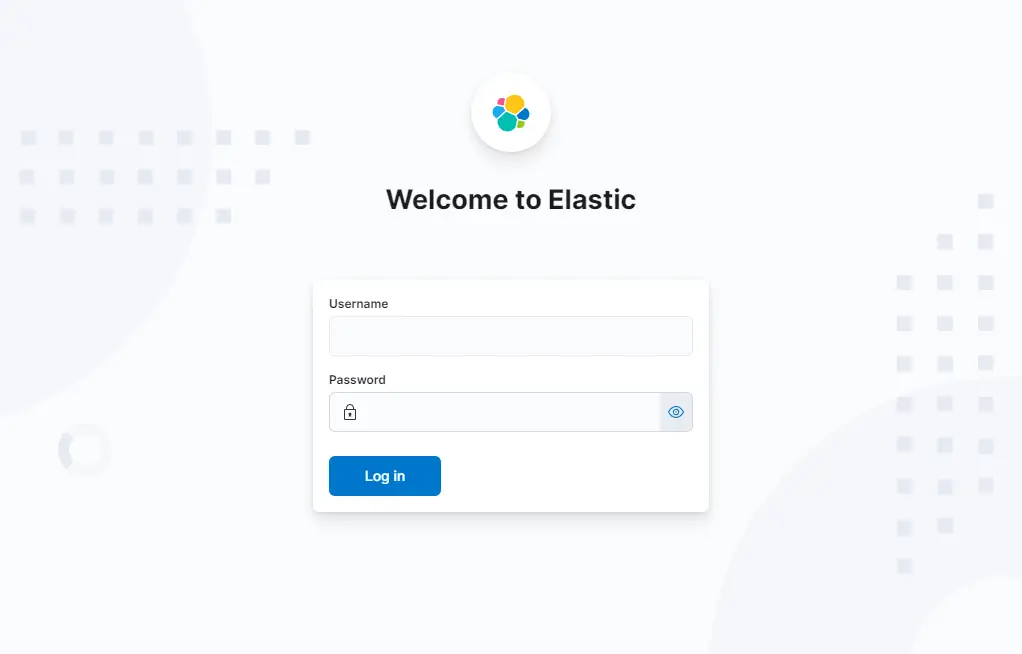
You will need to keep the command running for as long as you need to access Kibana. Press Ctrl + C in your terminal to close the tunnel.
Using Nginx Reverse-proxy
This method is best suited if you want to access the dashboard from anywhere in the world.
Configure Firewall
Before proceeding further, you need to open HTTP and HTTPS ports in the firewall.
$ sudo ufw allow http
$ sudo ufw allow https
Install Nginx
Ubuntu 22.04 ships with an older version of Nginx. To install the latest version, you need to download the official Nginx repository.
Import Nginx's signing key.
$ curl https://nginx.org/keys/nginx_signing.key | gpg --dearmor \
| sudo tee /usr/share/keyrings/nginx-archive-keyring.gpg >/dev/null
Add the repository for Nginx's stable version.
$ echo "deb [signed-by=/usr/share/keyrings/nginx-archive-keyring.gpg arch=amd64] \
http://nginx.org/packages/ubuntu `lsb_release -cs` nginx" \
| sudo tee /etc/apt/sources.list.d/nginx.list
Update the system repositories.
$ sudo apt update
Install Nginx.
$ sudo apt install nginx
Verify the installation.
$ nginx -v
nginx version: nginx/1.22.1
Start the Nginx server.
$ sudo systemctl start nginx
Install and configure SSL
The first step is to install the Let's Encrypt SSL Certificate. We need to install Certbot to generate the SSL certificate. You can either install Certbot using Ubuntu's repository or grab the latest version using the Snapd tool. We will be using the Snapd version.
Ubuntu 22.04 comes with Snapd installed by default. Run the following commands to ensure that your version of Snapd is up to date.
$ sudo snap install core && sudo snap refresh core
Install Certbot.
$ sudo snap install --classic certbot
Use the following command to ensure that the Certbot command can be run by creating a symbolic link to the /usr/bin directory.
$ sudo ln -s /snap/bin/certbot /usr/bin/certbot
Generate the SSL certificate for the domain kibana.example.com.
$ sudo certbot certonly --nginx --agree-tos --no-eff-email --staple-ocsp --preferred-challenges http -m [email protected] -d kibana.example.com
The above command will download a certificate to the /etc/letsencrypt/live/kibana.example.com directory on your server.
Generate a Diffie-Hellman group certificate.
$ sudo openssl dhparam -dsaparam -out /etc/ssl/certs/dhparam.pem 4096
To check whether the SSL renewal is working fine, do a dry run of the process.
$ sudo certbot renew --dry-run
If you see no errors, you are all set. Your certificate will renew automatically.
Configure Nginx
Create and open the Nginx configuration file for Kibana.
$ sudo nano /etc/nginx/conf.d/kibana.conf
Paste the following code in it. Replace the IP address with the private IP address of your Elasticsearch server.
server {
        listen 80; listen [::]:80;
        server_name kibana.example.com;
        return 301 https://$host$request_uri;
}

server {
        server_name kibana.example.com;
        charset utf-8;

        listen 443 ssl http2;
        listen [::]:443 ssl http2;

        access_log /var/log/nginx/kibana.access.log;
        error_log /var/log/nginx/kibana.error.log;

        ssl_certificate /etc/letsencrypt/live/kibana.example.com/fullchain.pem;
        ssl_certificate_key /etc/letsencrypt/live/kibana.example.com/privkey.pem;
        ssl_trusted_certificate /etc/letsencrypt/live/kibana.example.com/chain.pem;
        ssl_session_timeout 1d;
        ssl_session_cache shared:MozSSL:10m;
        ssl_session_tickets off;

        ssl_protocols TLSv1.2 TLSv1.3;
        ssl_ciphers ECDHE-ECDSA-AES128-GCM-SHA256:ECDHE-RSA-AES128-GCM-SHA256:ECDHE-ECDSA-AES256-GCM-SHA384:ECDHE-RSA-AES256-GCM-SHA384:ECDHE-ECDSA-CHACHA20-POLY1305:ECDHE-RSA-CHACHA20-POLY1305:DHE-RSA-AES128-GCM-SHA256:DHE-RSA-AES256-GCM-SHA384;

		resolver 8.8.8.8;

        ssl_stapling on;
        ssl_stapling_verify on;
        ssl_dhparam /etc/ssl/certs/dhparam.pem;

        location / {
                proxy_pass http://your_private_IP:5601;
                proxy_set_header Host $host;
                proxy_set_header X-Real-IP $remote_addr;
                proxy_set_header X-Forwarded-For $proxy_add_x_forwarded_for;
                proxy_set_header X-Forwarded-Proto $scheme;
        }
}
Save the file by pressing Ctrl + X and entering Y when prompted.
Open the file /etc/nginx/nginx.conf for editing.
$ sudo nano /etc/nginx/nginx.conf
Add the following line before the line include /etc/nginx/conf.d/*.conf;.
server_names_hash_bucket_size 64;
Save the file by pressing Ctrl + X and entering Y when prompted.
Verify the configuration.
$ sudo nginx -t
nginx: the configuration file /etc/nginx/nginx.conf syntax is ok
nginx: configuration file /etc/nginx/nginx.conf test is successful
Restart the Nginx service.
$ sudo systemctl restart nginx
Your Kibana dashboard should be accessible via the URL https://kibana.example.com from anywhere you want.
Step 12 - Managing Kibana Dashboards
Before proceeding further with managing the dashboards, you need to add the base URL field in Kibana's configuration.
Open Kibana's configuration file.
$ sudo nano /etc/kibana/kibana.yml
Find the commented line #server.publicBaseUrl: "" and change it as follows by removing the hash in front of it.
server.publicBaseUrl: "https://kibana.example.com"
Save the file by pressing Ctrl + X and entering Y when prompted.
Restart the Kibana service.
$ sudo systemctl restart kibana
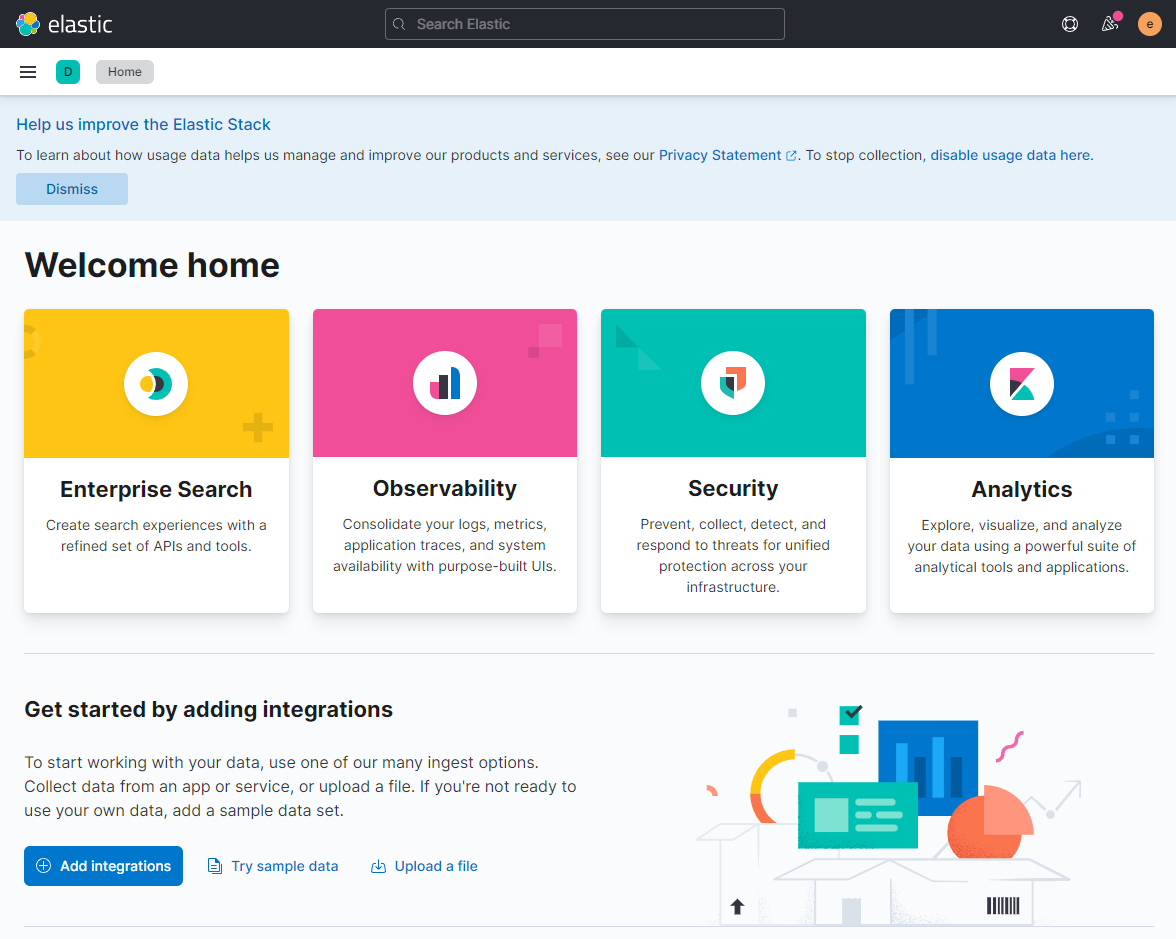
Wait for a few minutes and load the URL https://kibana.example.com in your browser. Log in with the username elastic and the password you generated before (bd1YJfhSa8RC8SMvTIwg) and you will get the following screen.
Type type:data suricata in the search box at the top to locate Suricata's information.
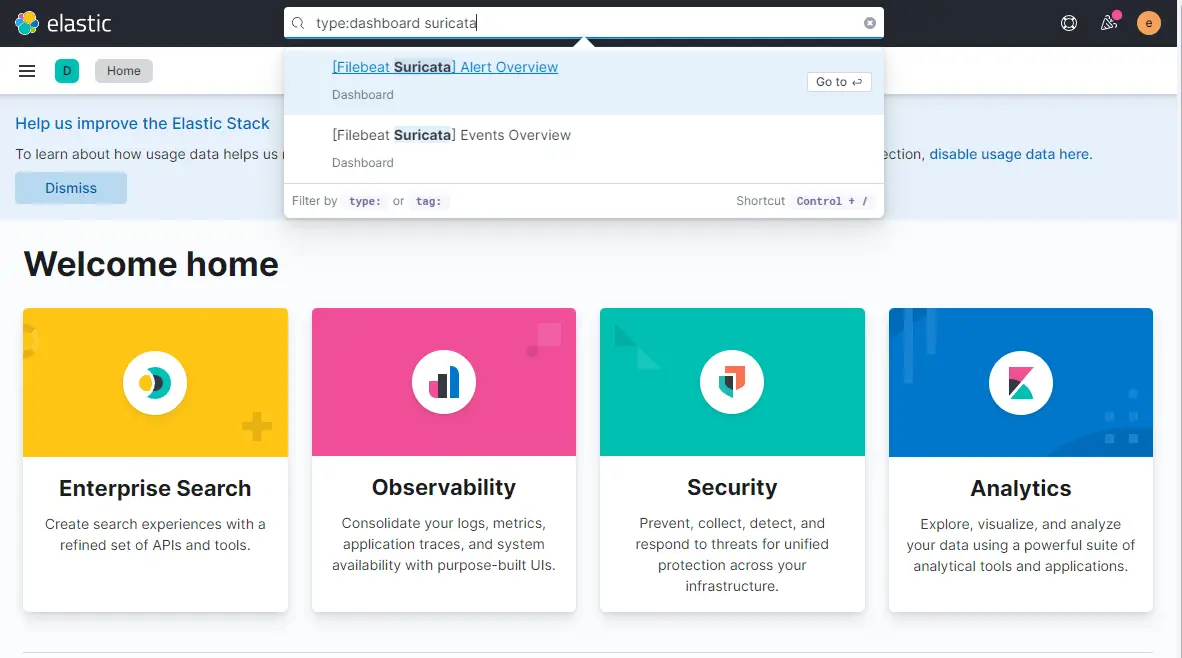
Click the first result ([Filebeat Suricata] Alert Overview), and you will get a screen similar to the following. By default, it shows the entries for only the last 15 minutes, but we are displaying it over a larger timespan to show more data for the tutorial.
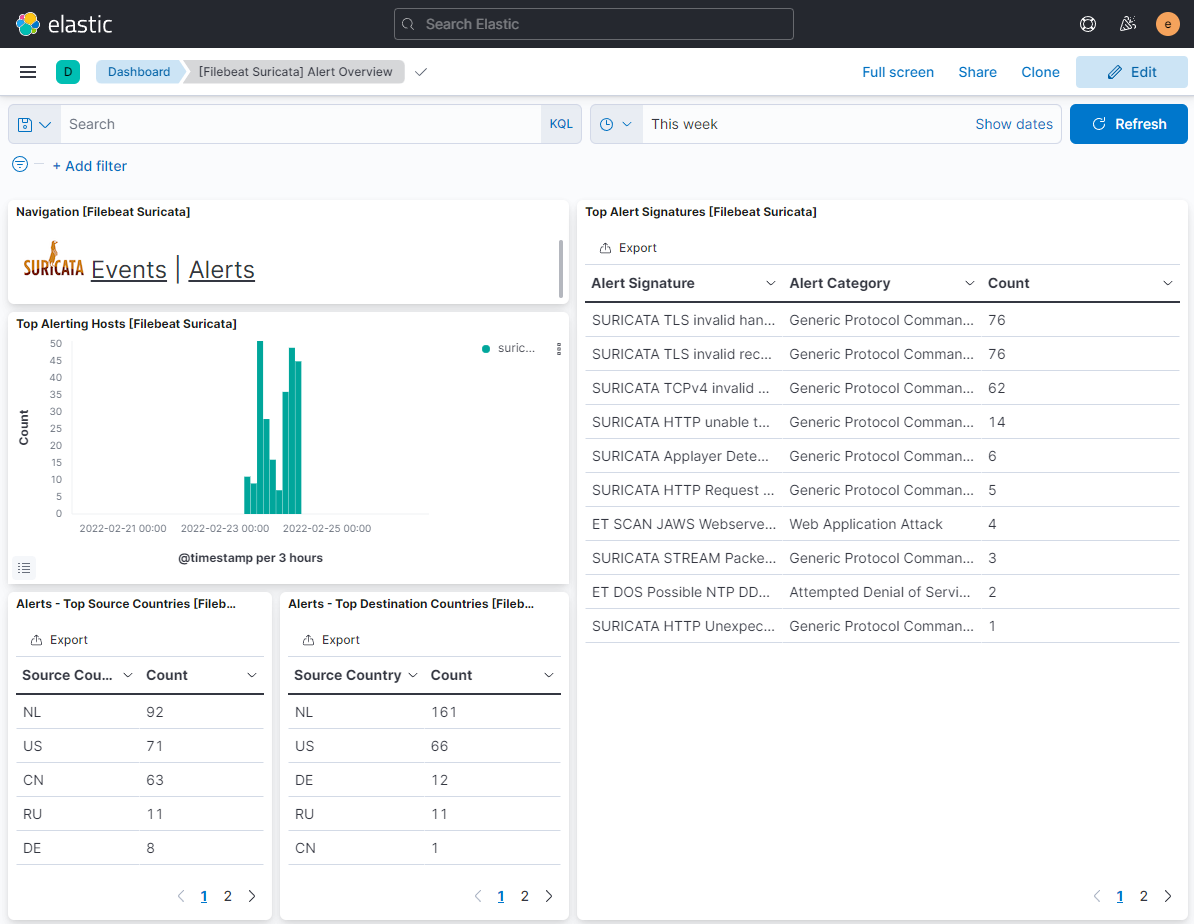
Click on the Events button to view all the logged events.
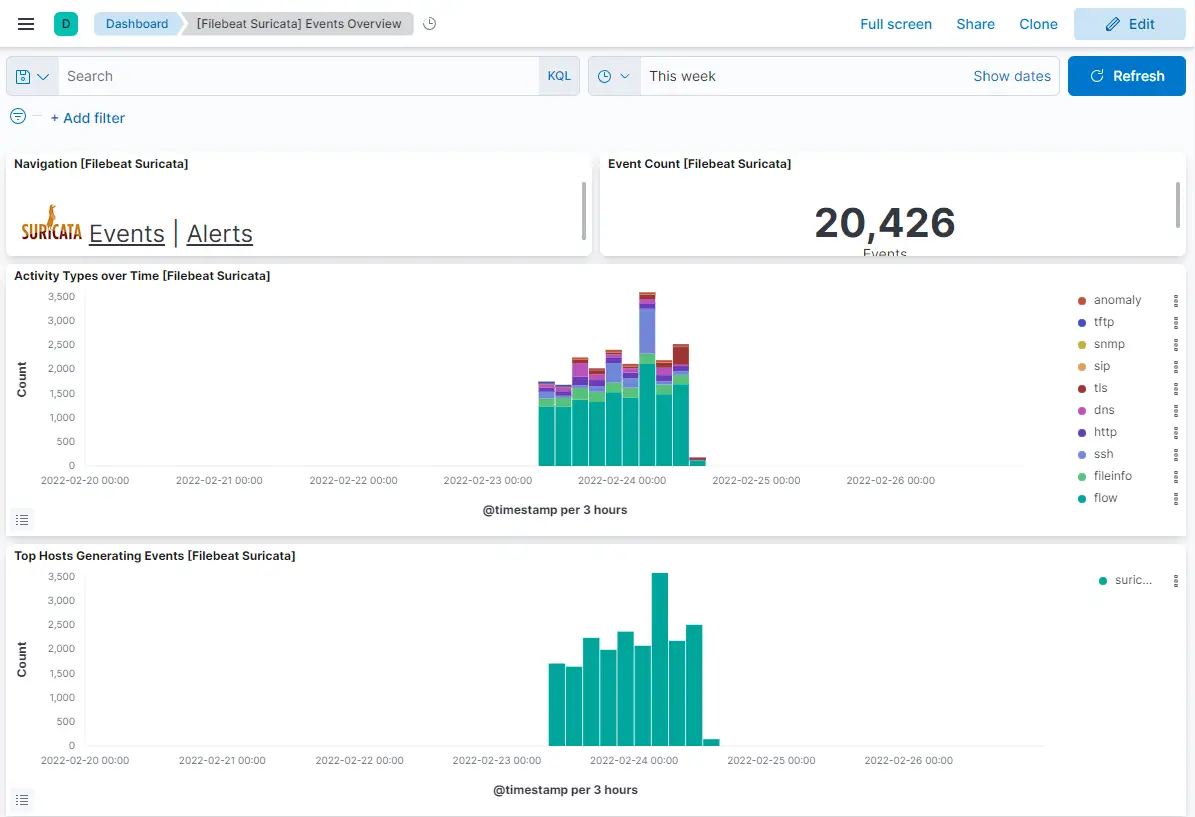
On scrolling down on events and alert pages, you can identify each event and alert by the type of protocol, the source and destination ports, and the IP address of the source. You can also view the countries from where the traffic originated.
You can use Kibana and Filebeat to access and generate other types of dashboards. One of the useful in-built dashboards that you can right away is the Security dashboard. Click on the Network dashboard from the left hamburger menu, and you will get the following screen.
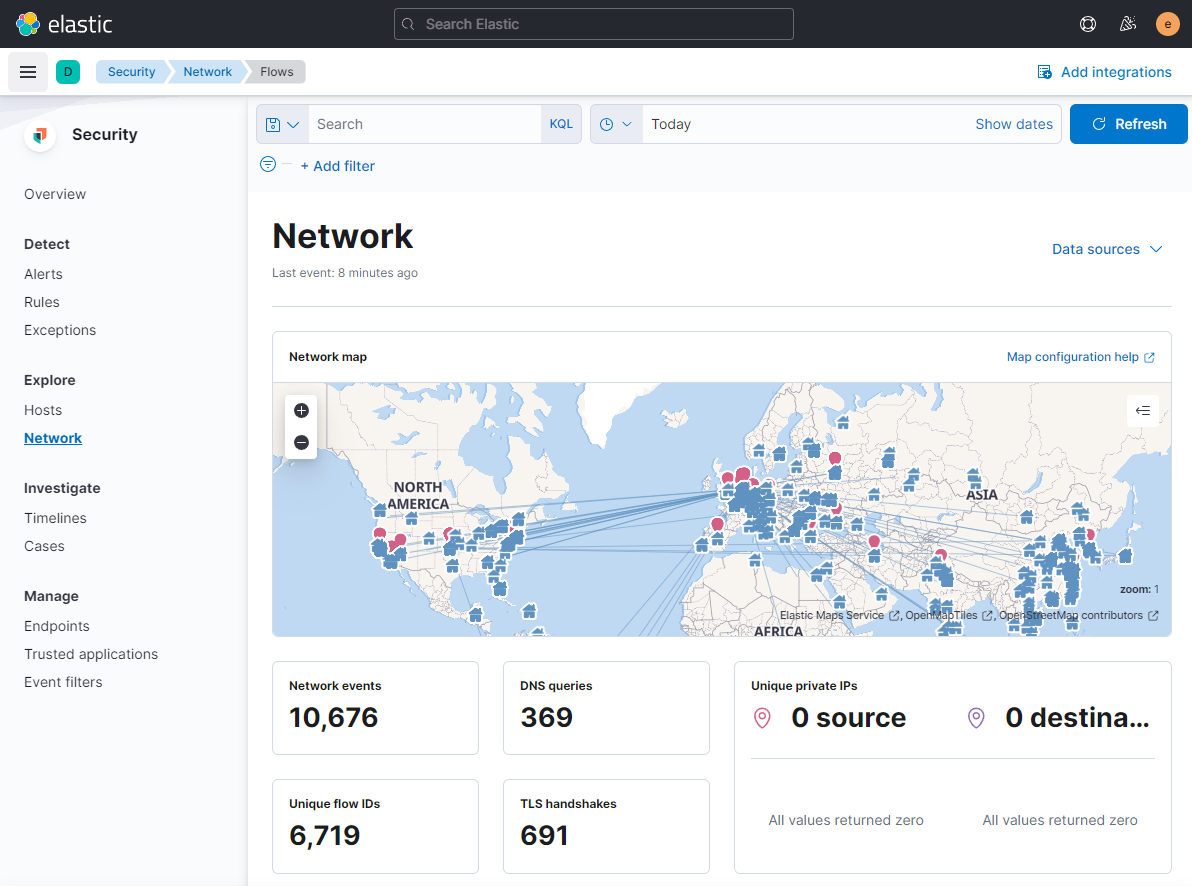
You can add more dashboards like Nginx by enabling and configuring in-built Filebeat modules.
Conclusion
This concludes the tutorial for installing and configuring Suricata IDS with Elastic Stack on a Ubuntu 22.04 server. You also configured Nginx as a reverse proxy to access Kibana dashboards externally. If you have any questions, post them in the comments below.

