How to Install Ntopng to Monitor Network Traffic on Debian 11
Are you a system administrator or network engineer looking for a lightweight, easy-to-use, cross-platform network monitoring tool? Well, then Ntopng might be the tool you are looking for.
Ntopng is an open-source network monitoring tool that monitors real-time network traffic from a web interface. Ntopng is the next-generation edition of the original ntop. It is a cross-platform tool available on nearly all operating systems, including Windows, Unix/Linux, macOS, and BSD.
Ntopng offers many features like:
- Traffic filtering and sorting according to their source and destination
- Supports various protocols, including TCP, UDP, SMTP, ICMP, ARP, FTP, Netbios, SSH, Telnet, and many more
- Provide Geolocation of IP addresses
- Generates alerts and notifications while detecting unusual network behavior
- Easily navigate and visualize traffic data from the web interface
- Support encrypted network traffic analysis
- Discover the application protocols (YouTube, Facebook, BitTorrent etc.) using Deep Packet Inspection technology.
In this article, you will learn how to install Ntopng on Debian 11.
Step 1: Prerequisites
- A system is running Debian 11.
- A user with sudo privileges
Step 2: Update the system
Before you start the installation, It is recommended to update your Debian base system by executing the following command:
sudo apt update -y
sudo apt upgrade -y
Step 3: Configure Ntopng repository:
Ntopng is not a part of the default Debian 11 repository, So you need to configure Ntopng repository on your Debian system, to do so, run the following command:
wget http://apt.ntop.org/buster/all/apt-ntop.deb
sudo dpkg -i apt-ntop.deb
The above command will add “ntop.list” repository on your system. Next, apply the repository changes by executing the below command:
sudo apt update -y
Step 4: Install and Configure Ntopng
Run the below command on the terminal to install Ntopng package with the required dependencies:
Sudo apt install ntopng pfring-dkms nprobe n2disk cento -y
Ntopng listens on port 3000 by default. You can configure your network interface, and change the default port number and other settings by editing ntop.conf
sudo vim /etc/ntopng/ntopng.conf
Now, make the changes as per your system interface name. Here, you can specify more than one interface name.
#    -i|--interface

#    Specifies the network interface or collector endpoint to be used by ntopng for network.
-i=eth0

# -i=eth2

#    Sets the HTTP port of the embedded web server.

-w=3000
Save and Close the file once you have made the necessary changes.
You can give Network IP range in a separate file. Create a new file called ntopng.start in the Ntopng root directory.
sudo vim /etc/ntopng/ntopng.start
Add your network IP range as shown below:
--local-networks "192.168.0.0/24"  ## give your local IP Ranges here.

--interface 1
Save and Exit the file. You need to restart Ntopng service to apply the configuration changes:
systemctl restart ntopng
Next, start Ntopng service at a boot time and then verify the service status using the below command:
sudo systemctl enable ntopng
sudo systemctl status ntopng
Output:
ntopng service - ntopng high-speed web-based traffic monitoring and analysis tool

Loaed: loaded (/etc/systemd/system/ntopng.service; enabled; vendor preset: enabled)
Active: active (running) since Tue 2023-02-28 16:45:28 UTC; 1min 0s ago
Process: 15335 ExecStartPre=/bin/sh -c /usr/bin/ntopng-utils-manage-config -a check-restore  && /usr/bin/ntopng-utils-manage-config -a resto
Process: 15350 ExecStartPre=/bin/sh -c /bin/cat /etc/ntopng/ntopng.conf > /run/ntopng.conf.raw (code=exited, status=0/SUCCESS)
Process: 15352 ExecStartPre=/bin/sh -c /bin/cat /etc/ntopng/ntopng.conf.d/*.conf >> /run/ntopng.conf.raw 2>/dev/null || true (code=exited, s
Process: 15354 ExecStartPre=/bin/sh -c /bin/sed "/^[ ]*-e.*$\|^[ ]*-G.*\|^[ ]*--daemon.*\|[ ]*--pid.*/s/^/#/" /run/ntopng.conf.raw > /run/nt

   Main PID: 15356 (ntopng-main)
   Tasks: 24 (limit: 525)
  Memory: 140.6M
     CPU: 9.146s
  CGroup: /system.slice/ntopng.service
          ??15356 /usr/bin/ntopng /run/ntopng.conf

Feb 28 16:45:29 debian11 ntopng[15356]: 28/Feb/2023 16:45:29 [startup.lua:35] Processing startup.lua: please hold on...
Feb 28 16:45:30 debian11 ntopng[15356]: 28/Feb/2023 16:45:30 [startup.lua:120] [lists_utils.lua:827] Refreshing category lists...
You can verify Ntopng service on your system with the following command:
sudo ss -tnlp | grep ntopng
The output should be similar to the following:
LISTEN 0 4096 0.0.0.0:3000 0.0.0.0:* users:(("ntopng-main",pid=15356,fd=37))
Step 5: Access the Ntopng from a web browser
Open your web browser and write the URL http://your-server-ip:3000. Kindly note that you need to replace your system IP address followed by the port number, and you will be redirected to the Ntopng login page:

Enter the default username and password as admin/admin, and click on the Login button. You should see the following screenshot:
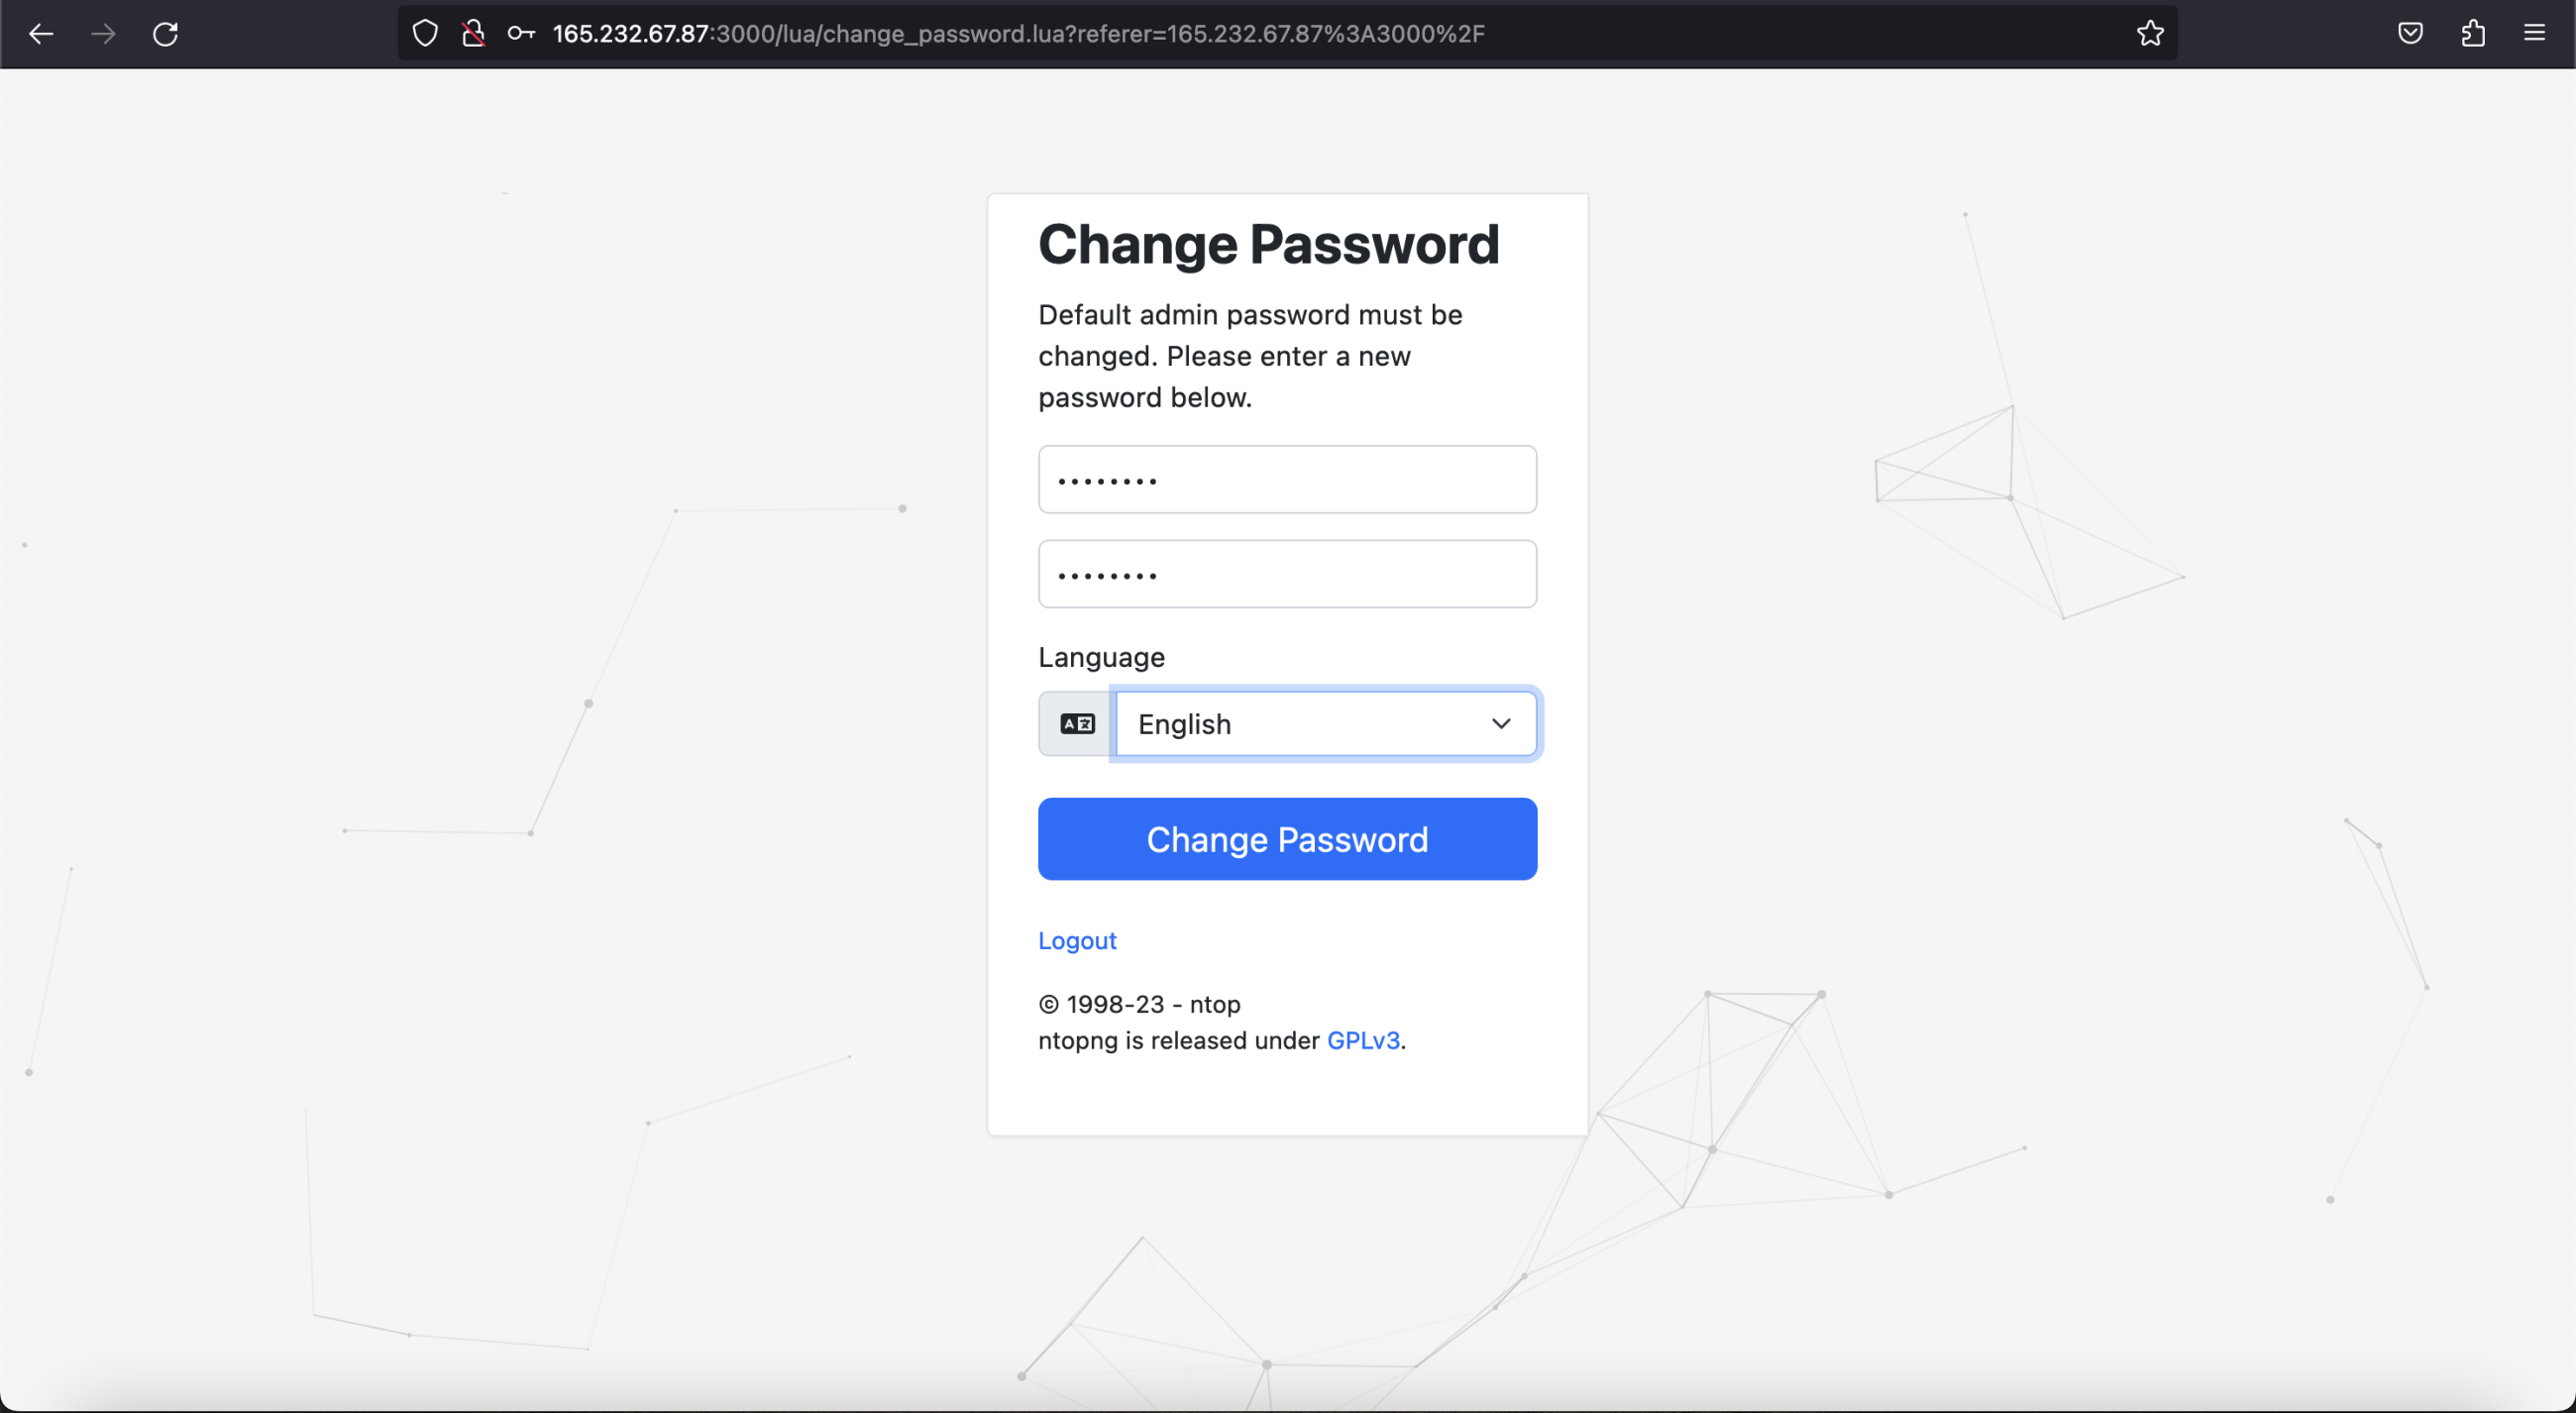
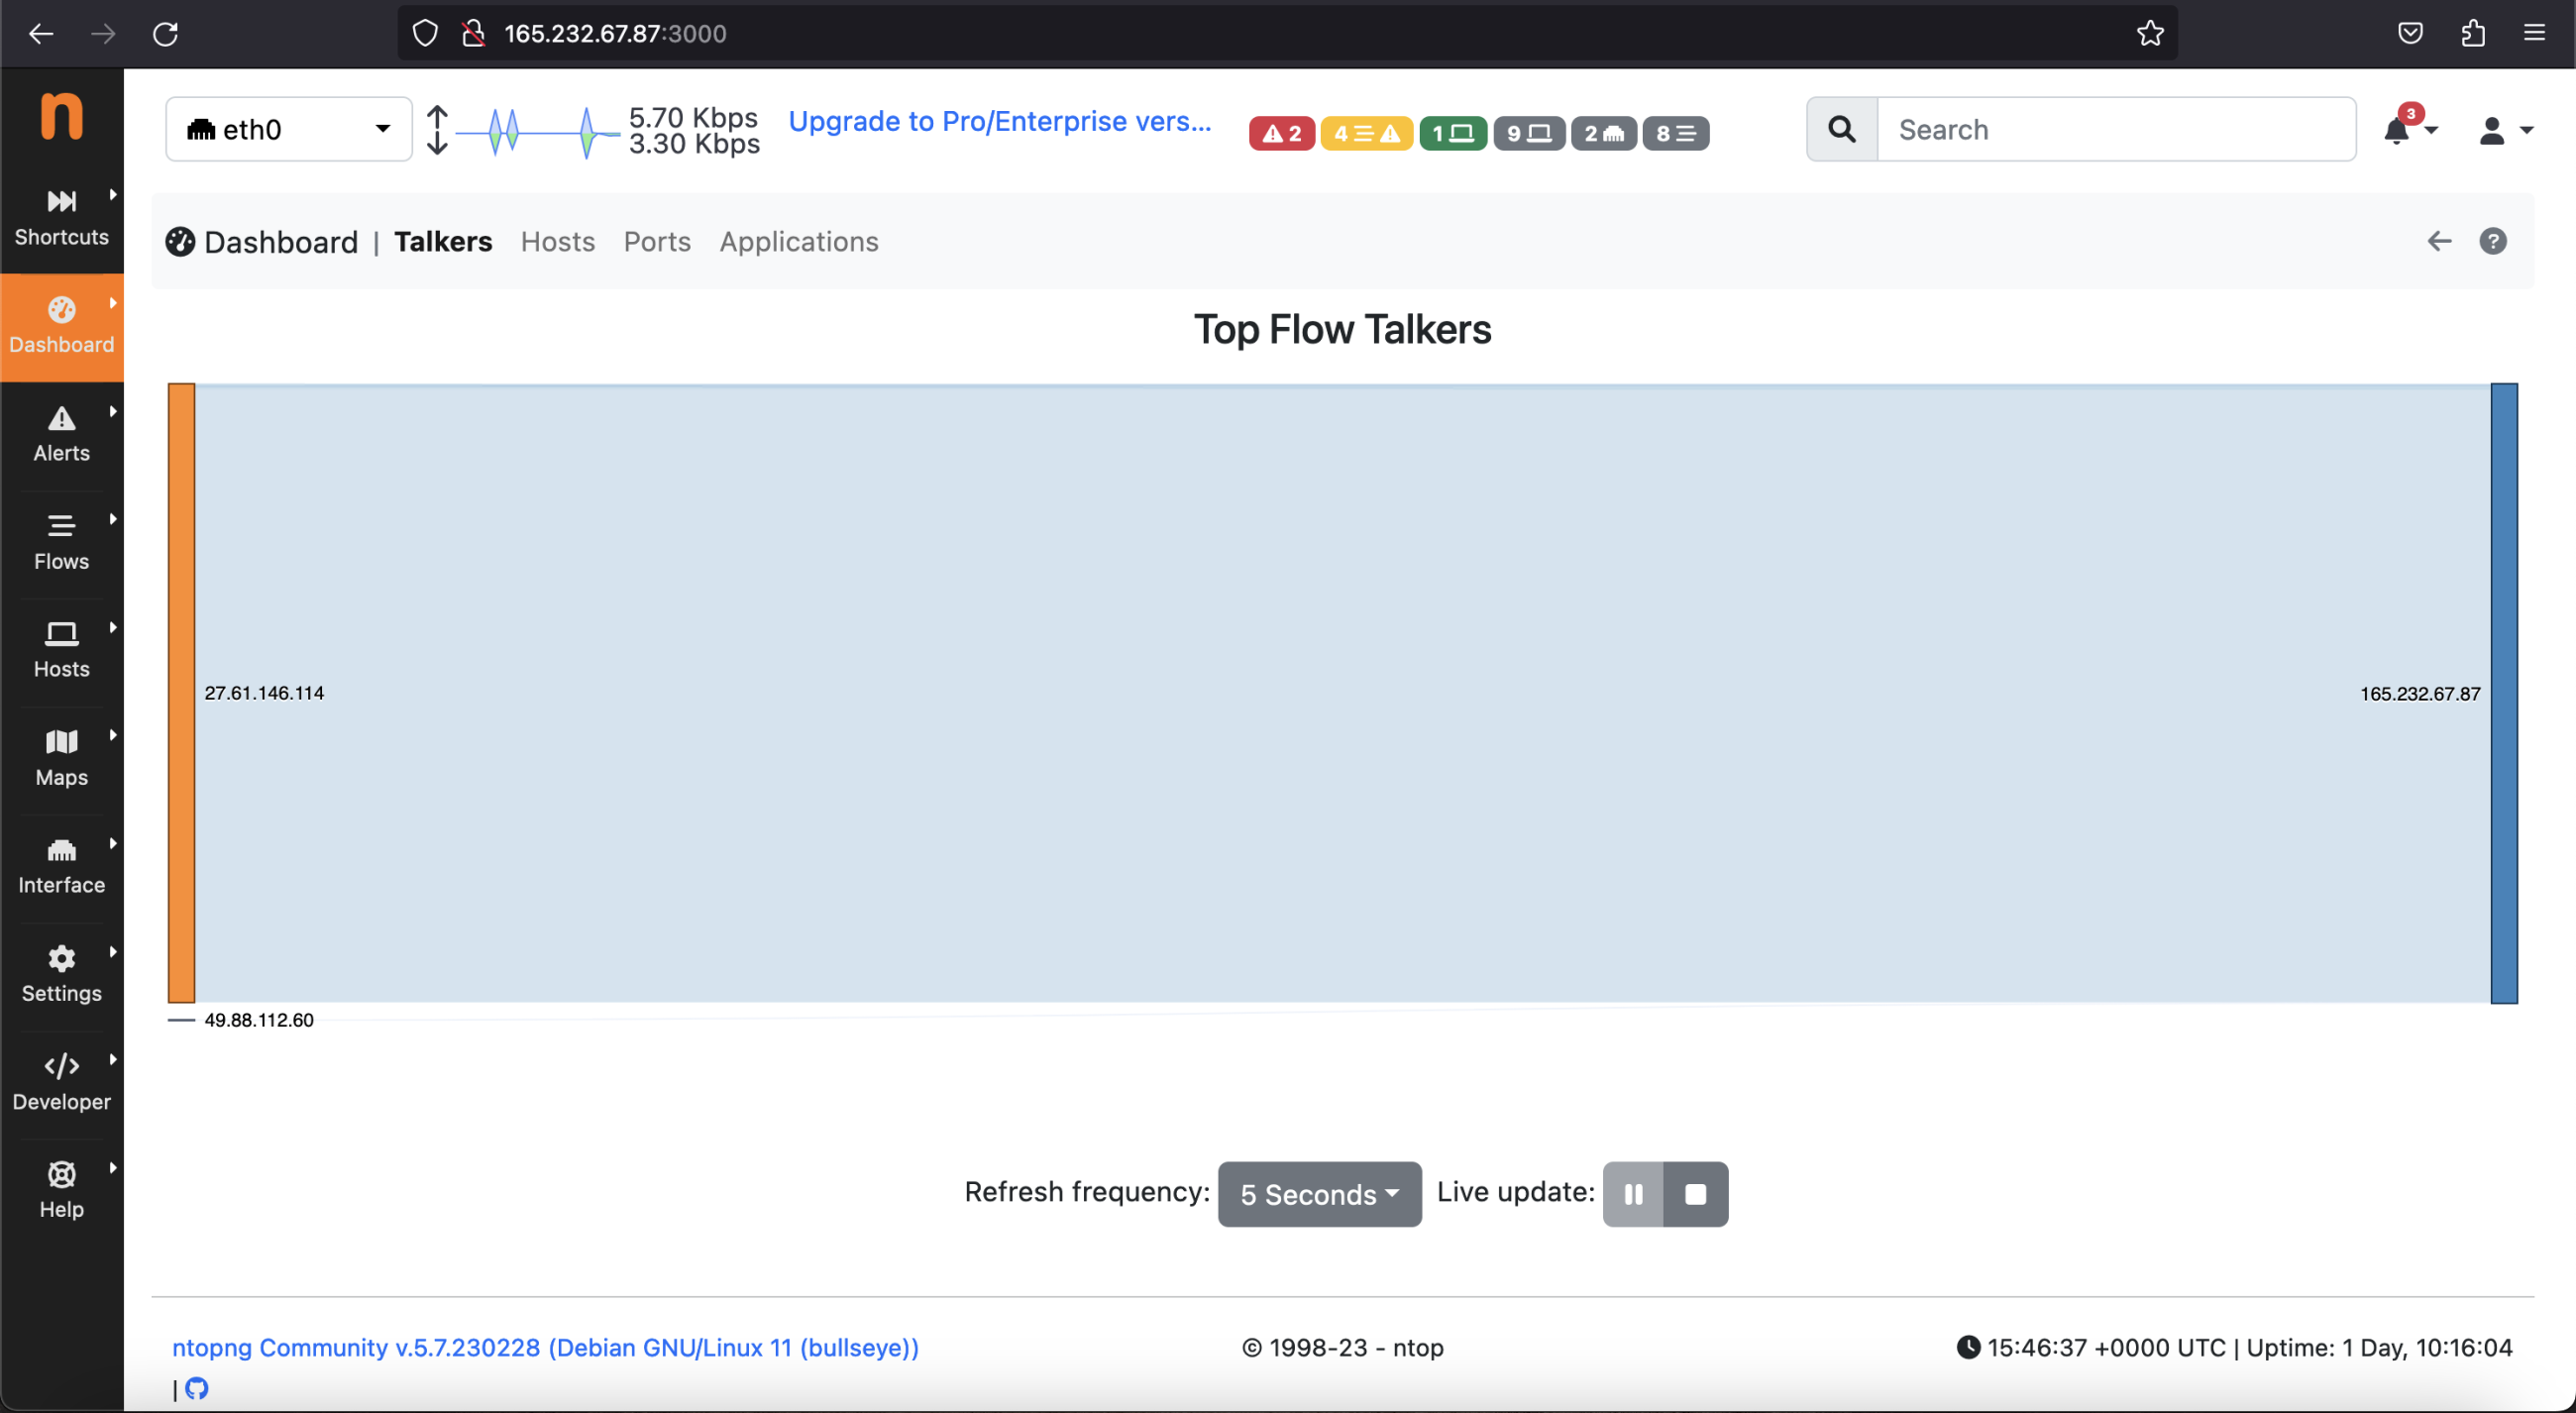
Set a new password and click the “Change Password” button. You should see the Ntopng default dashboard page as shown in the below screenshot:
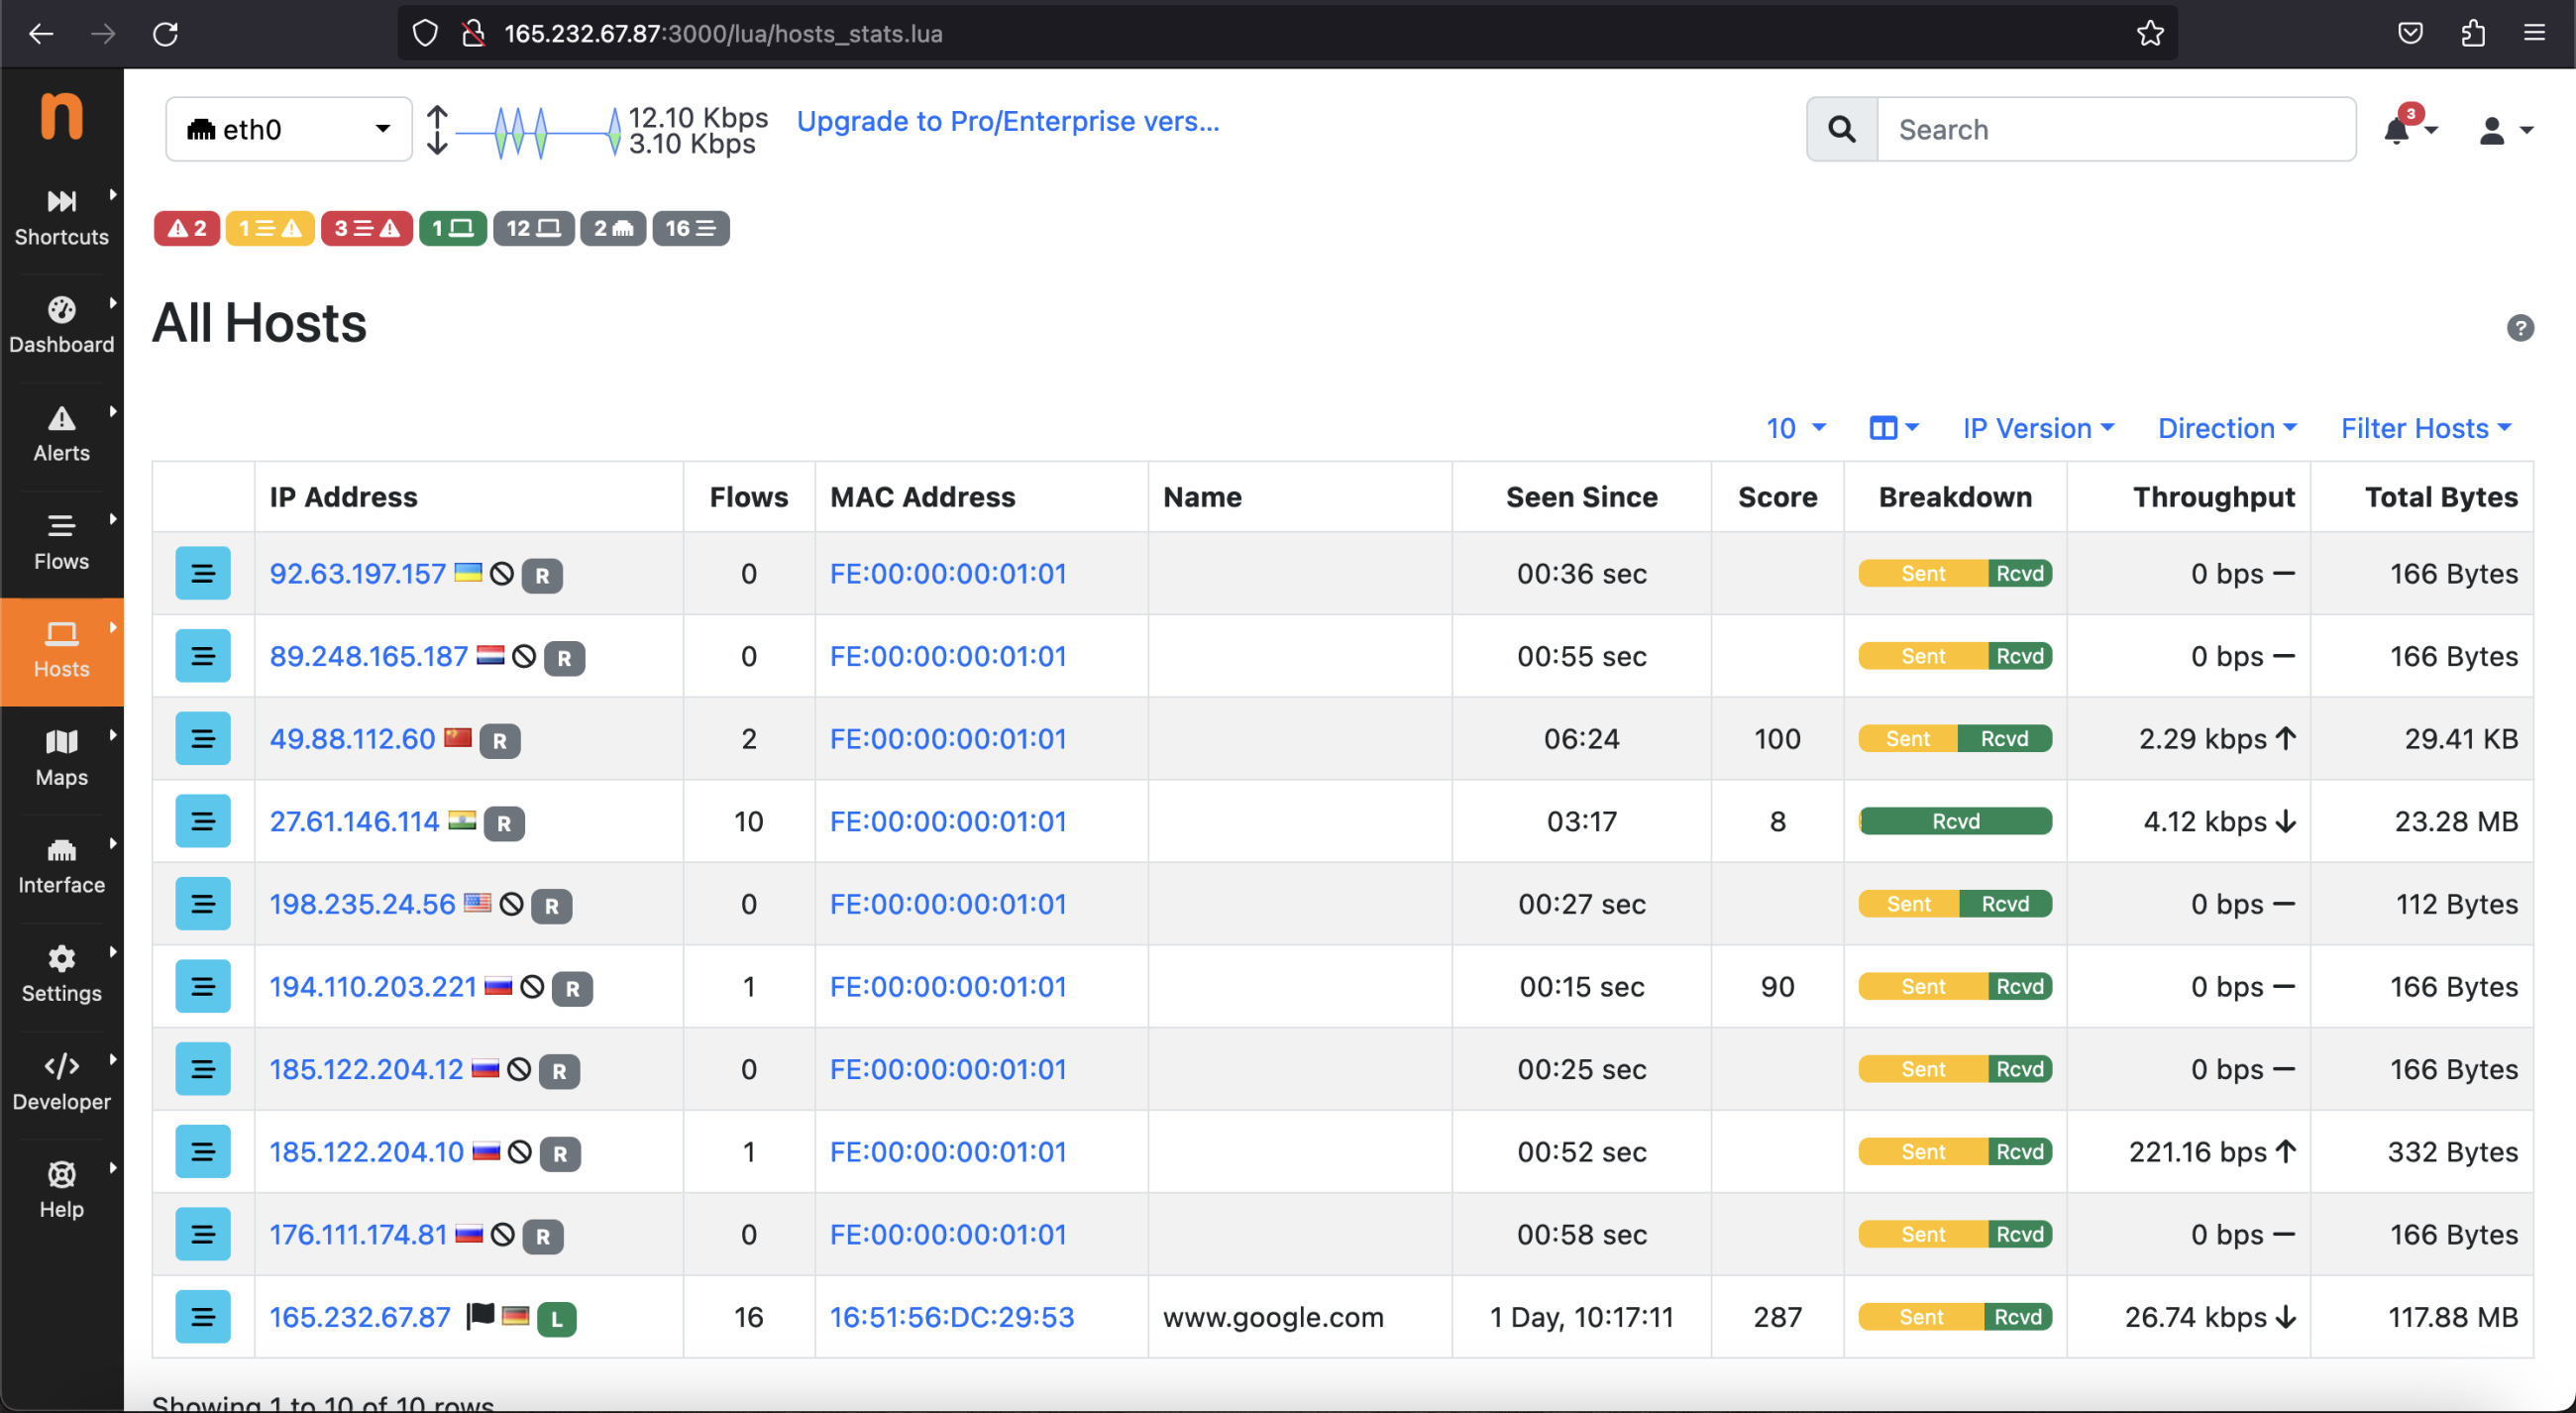
Next, Click on the Hosts > Hosts option from the left side, and you see a list of available hosts for your network.
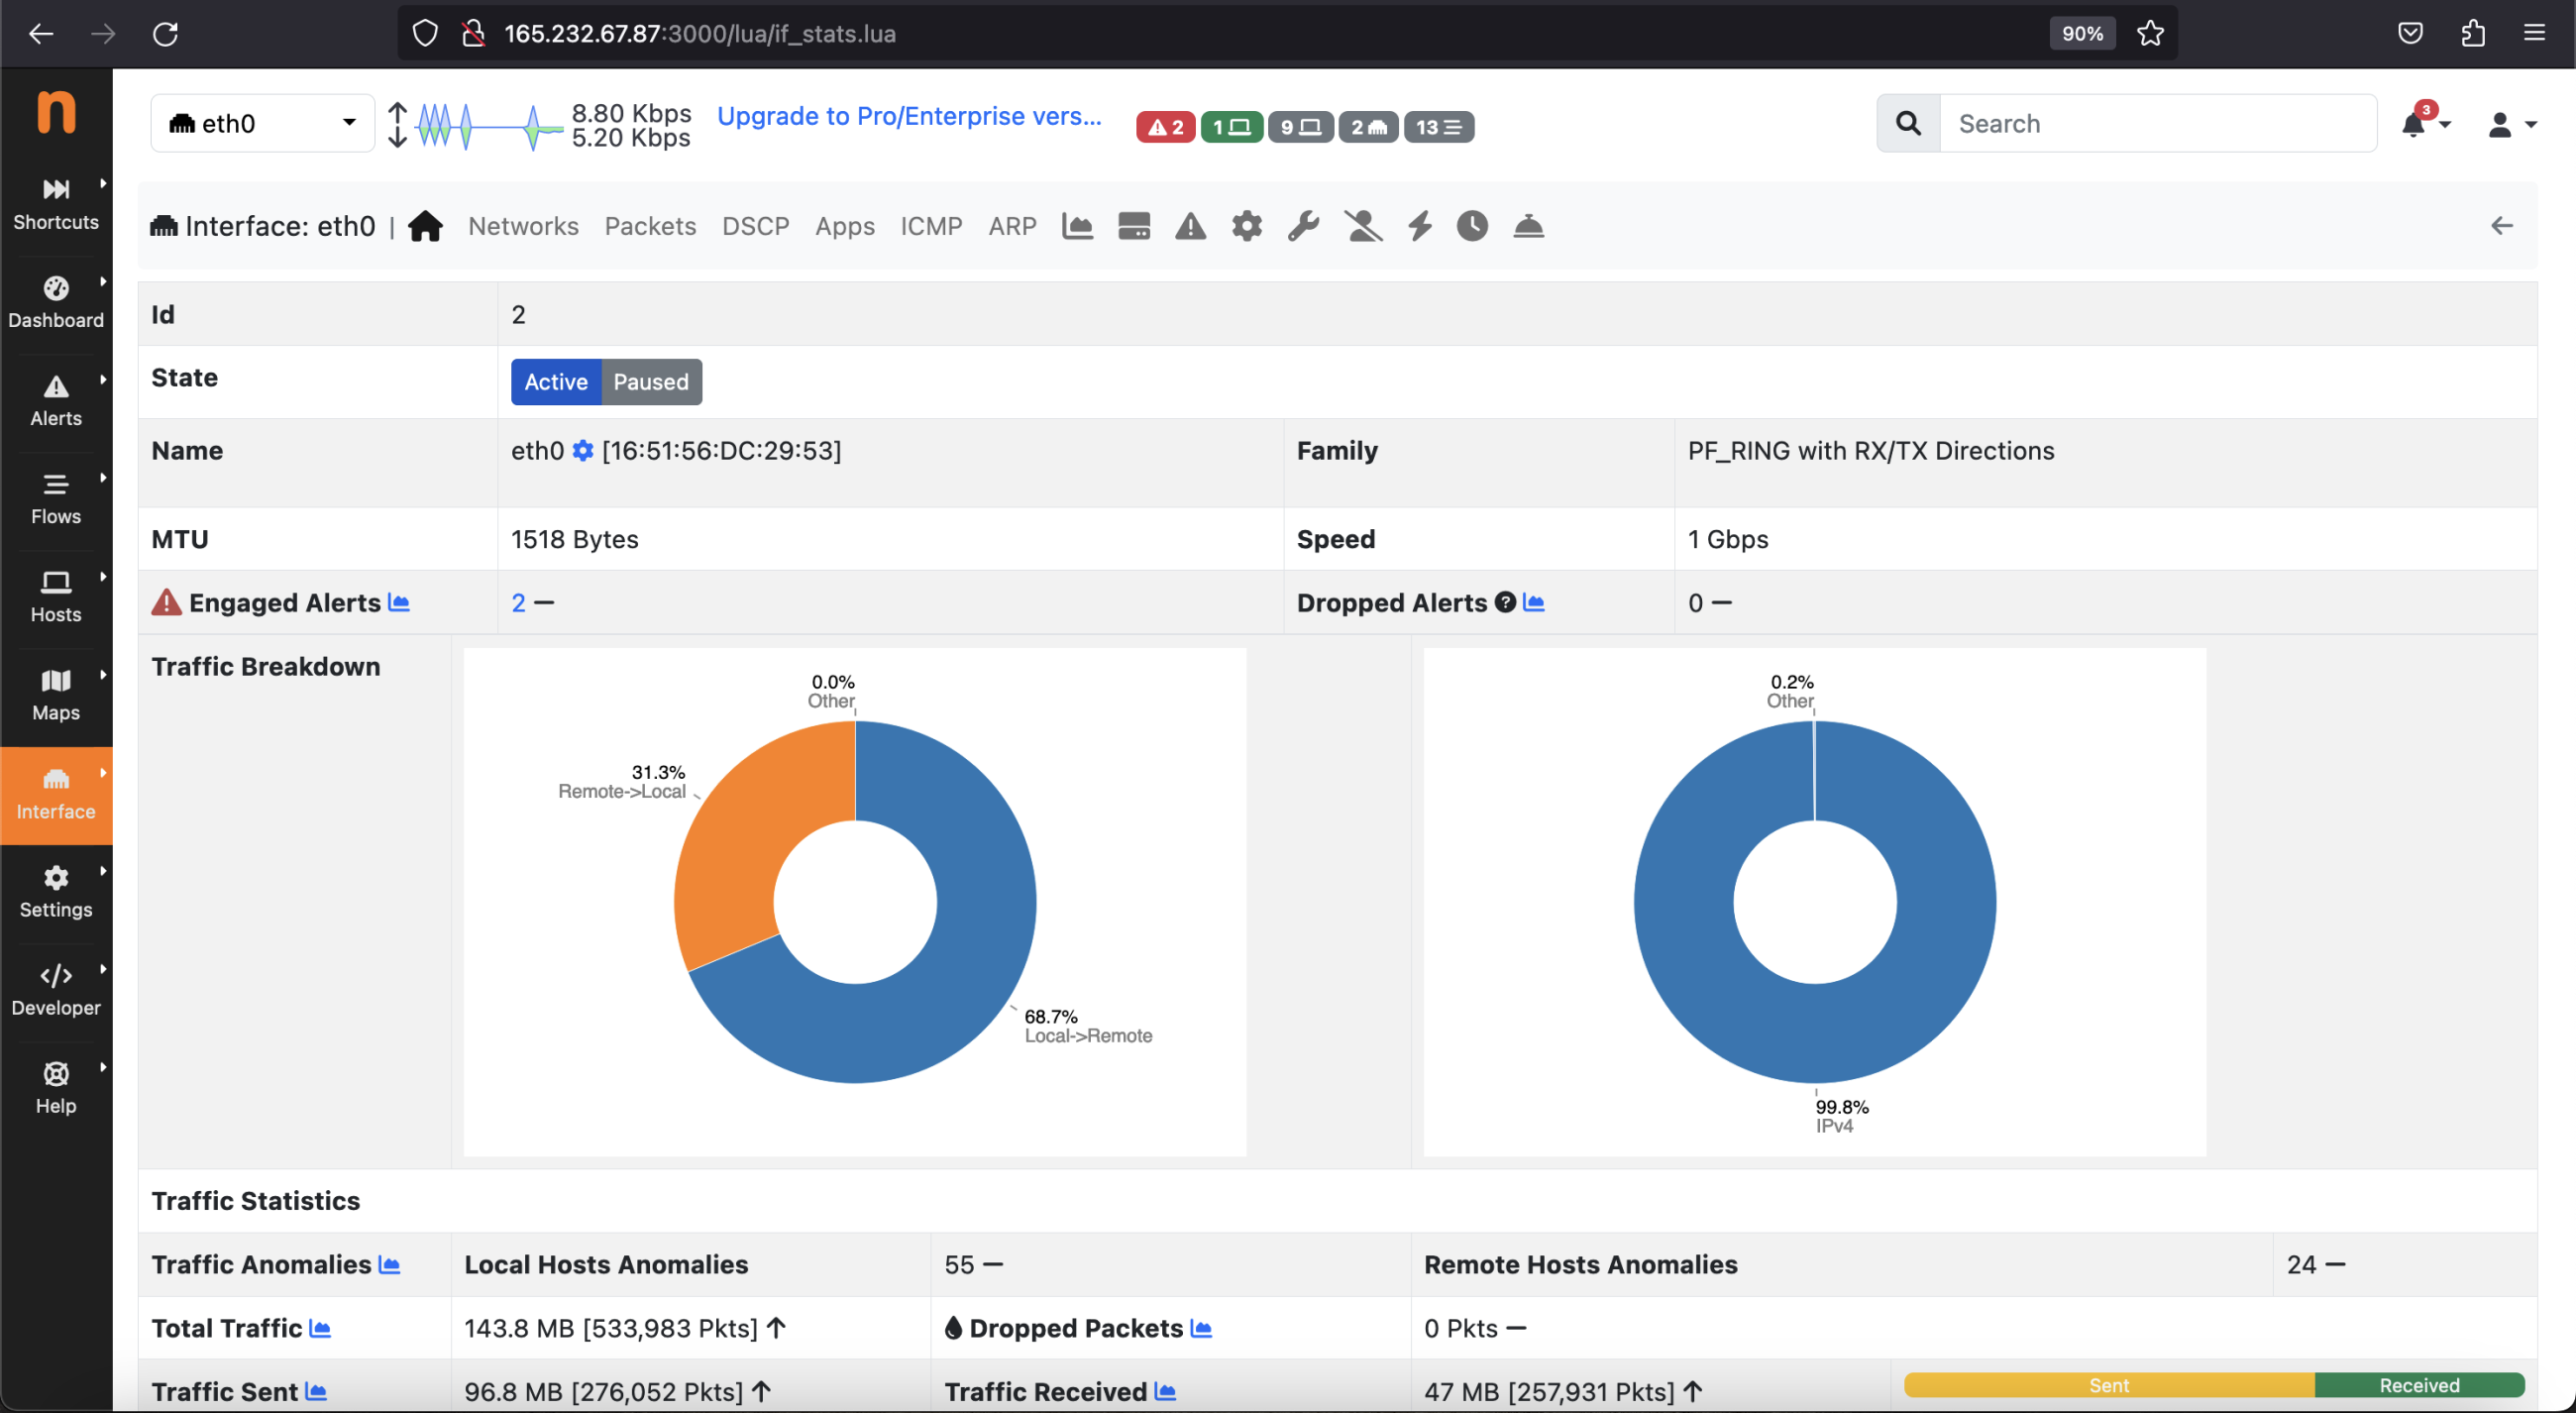
You can also check your network interface details from the left pane by clicking on interface > Details option.
Conclusion
Congratulations! You have installed Ntopng on your Debian 11. Ntopng provides many other options that can be very useful for real-time network monitoring and generating alerts. You can see system information and also configured alert endpoint. You are welcome to ask me if you have any questions.

