How to Install FreeIPA Server with Docker on Debian 12
FreeIPA is an open-source identity management solution for Linux/Unix operating systems. It's an upstream project from the RedHat Identity Management System, which provides authentication and authorization solutions for Linux/Unix systems.
FreeIPA is built on top of multiple components, including the Directory Server, DNS, Kerberos, PKI, Certmonger, NTP Server, web administration UI, etc. It provides a centralized source of user credentials and access control. Using FreeIPA allows administrators to manage identity in a centralized environment easily, and also provides user monitoring, authentication, and access control.
In this guide, you will install and set up the FreeIPA server on Debian 12 machine via Docker. You will install Docker CE (Community Edition), build a FreeIPA Server Docker image, install FreeIPA Server, then you will learn the basic management of the FreeIPA server. In addition to that, you will also learn how to add a Linux client machine as the FreeIPA client to the FreeIPA server that runs as a Docker container.
Prerequisites
For this guide, you will need a Linux server running Debian 12 or Debian 11 with a minimum of 4 GB of memory. You will also need a root user or non-root user with administrator privileges. As for the client, you can use any Linux distribution, but for this example, you will be using Ubuntu as the FreeIPA client machine.
Setup FQDN and Timezone
Before installing Docker and FreeIPA, you must first ensure that you have the proper fqdn (fully qualified domain name), correct '/etc/hosts' file, and also the proper timezone. In this first step, you will set up the fqdn, /etc.hosts file, and timezone on your Debian server.
To start, set up the fqdn of your FreeIPA server by entering the following command.
sudo hostnamectl set-hostname ipa.hwdomain.lan
Now open the '/etc/hosts' file using the following nano editor command.
sudo nano /etc/hosts
Add details of IP address, fqdn, and the hostname of your system.
192.168.5.10 ipa.hwdomain.lan ipa
Save and close the file when finished.
Now type the following command to verify the fqdn of your system and ensure that the fqdn is pointed to the correct internal IP address.
sudo hostname -f
sudo ping -c3 ipa.hwdomain.lan
Next, enter the following command to set up the timezone on your system. Be sure to change the timezone in the following command with your server timezone.
sudo timedatectl set-timezone Europe/Stockholm
Enter the following command to set up the localtime for your system.
sudo unlink /etc/localtime
sudo ln -s /usr/share/timezone/Europe/Stockholm /etc/localtime
Now go to the next step to start the Docker CE installation.
Installing Docker CE
FreeIPA Server can be installed in many ways, as for Debian-based distributions, you can use Docker. In this section, you will install Docker CE (Community Edition) via the official Docker repository, Then you will also set up your user to allow for executing and running Docker containers.
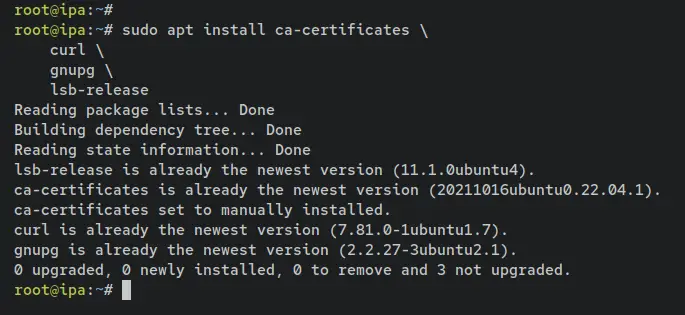
First, input the following apt command to install basic dependencies. When prompted, input y to confirm and press ENTER to proceed.
sudo apt install ca-certificates \
    curl \
    gnupg \
    git \
    lsb-release
Next, add and download the GPG key of the Docker CE repository.
sudo mkdir -m 0755 -p /etc/apt/keyrings
curl -fsSL https://download.docker.com/linux/ubuntu/gpg | sudo gpg --dearmor -o /etc/apt/keyrings/docker.gpg
Once the GPG key is added, enter the following command to add the Docker CE repository.
echo \
  "deb [arch=$(dpkg --print-architecture) signed-by=/etc/apt/keyrings/docker.gpg] https://download.docker.com/linux/ubuntu \
  $(lsb_release -cs) stable" | sudo tee /etc/apt/sources.list.d/docker.list > /dev/null

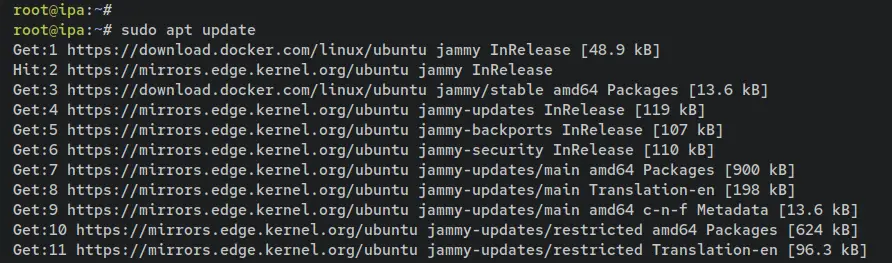
Now run the 'apt update' command below to update and refresh your Debian package index.
sudo apt update
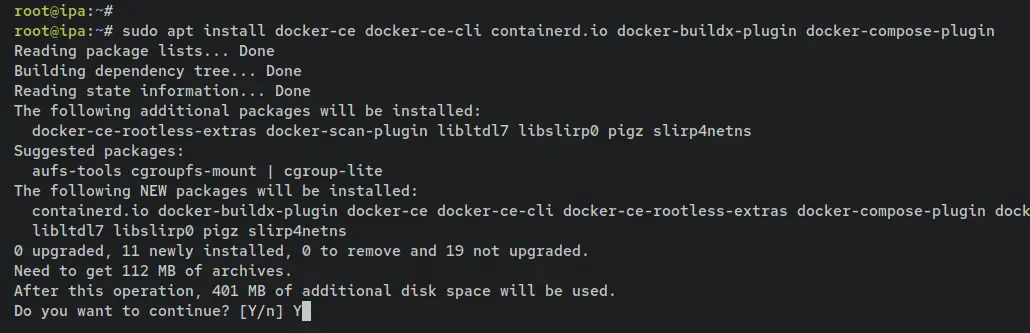
Then, install the Docker CE packages by entering the 'apt install' command below. Input y to confirm when prompted and press ENTER to proceed.
sudo apt install docker-ce docker-ce-cli containerd.io docker-buildx-plugin docker-compose-plugin
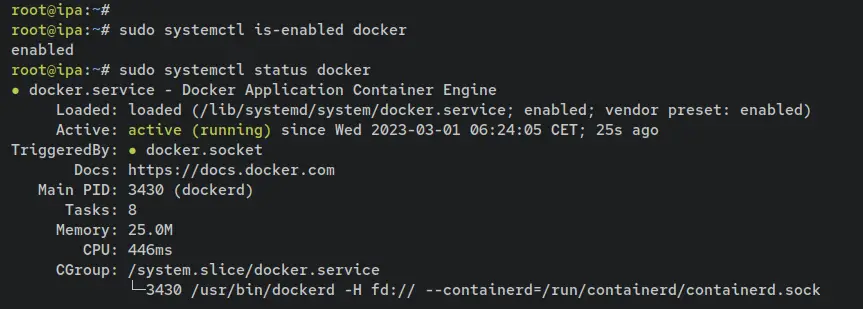
With the Docker CE installed, it's also automatically running and enabled. execute the 'systemctl' command below to verify the Docker service.
sudo systemctl is-enabled docker
sudo systemctl status docker
You should see the output 'enabled', meaning the Docker service will automatically run at system startup. The output 'active (running)' confirms that the current Docker service is running.
Lastly, if you plan to run your Docker application via a non-root user, then you must add your user to the group 'docker'. Type the following command to add your user to the group 'docker'. In this example, you will add a user 'bob' to the 'docker' group.
sudo usermod -aG docker bob
Now log in as the user 'bob' and type the docker command below to run the 'hello-world' container. if successful, you should see the welcome message from the container printed out on your terminal screen.
su - bob
docker run hello-world
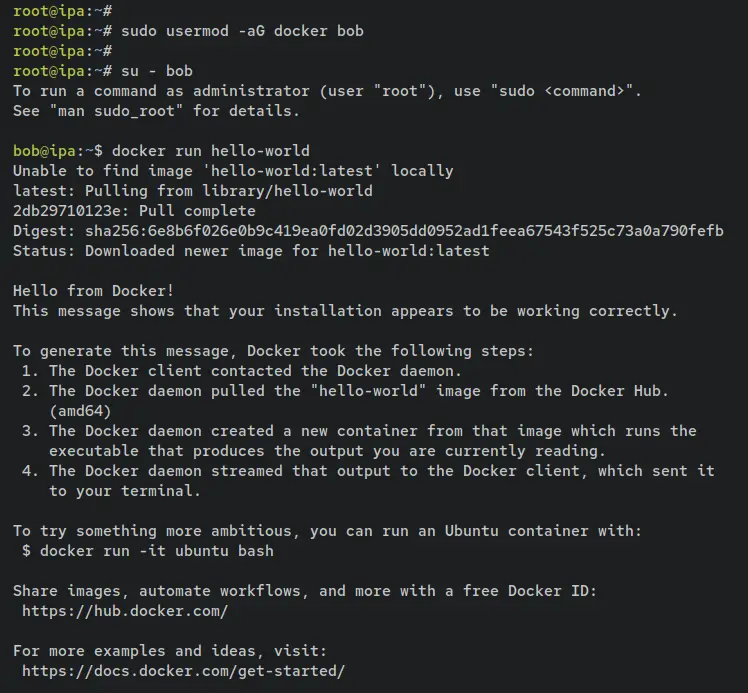
With this, you have now successfully executed and run the Docker container as a non-root user with the user called 'bob'. As for the rest of this guide, you will execute commands within the user 'bob'.
Building FreeIPA Docker Image
In this section, you will build the Docker image for the FreeIPA server. To do that, you can easily download the FreeIPA container repository from the official FreeIPA GitHub page. After that, you can choose any Linux distribution for the base image.
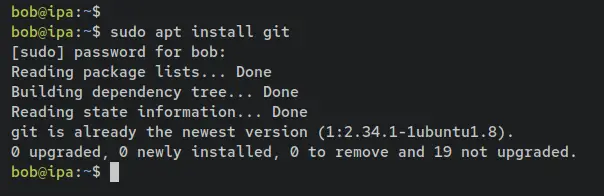
First, install 'git' to your Debian server via the apt command below. When prompted, input y to confirm, then press ENTER.
sudo apt install git
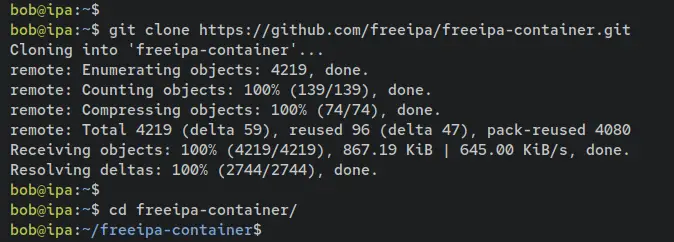
Now run the following git command to download the 'freeipa-container repository to your system. Then, move your working directory into it.
git clone https://github.com/freeipa/freeipa-container.git
cd freeipa-container
Now run the 'ls' command below to verify the list of files and directories on the 'freeipa-container' repository. You should see multiple files of Dockerfile that you can use to set up the FreeIPA server on your Debian system.
ls
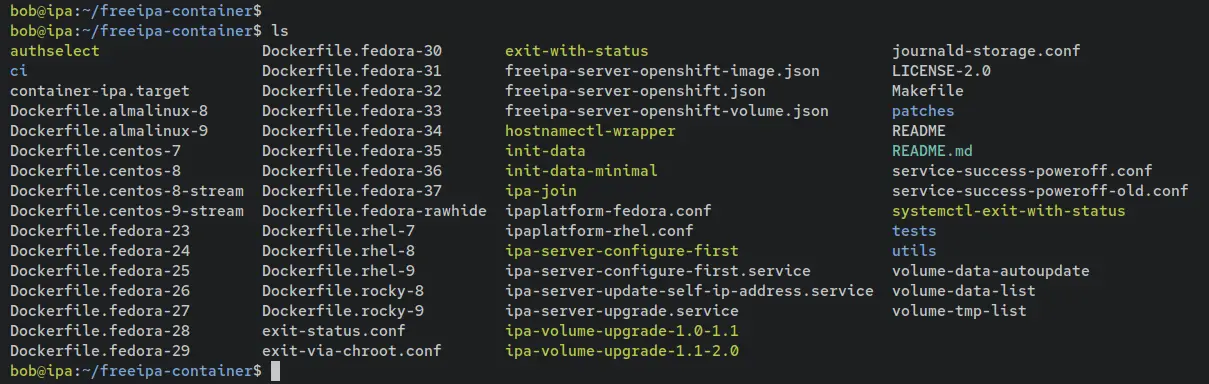
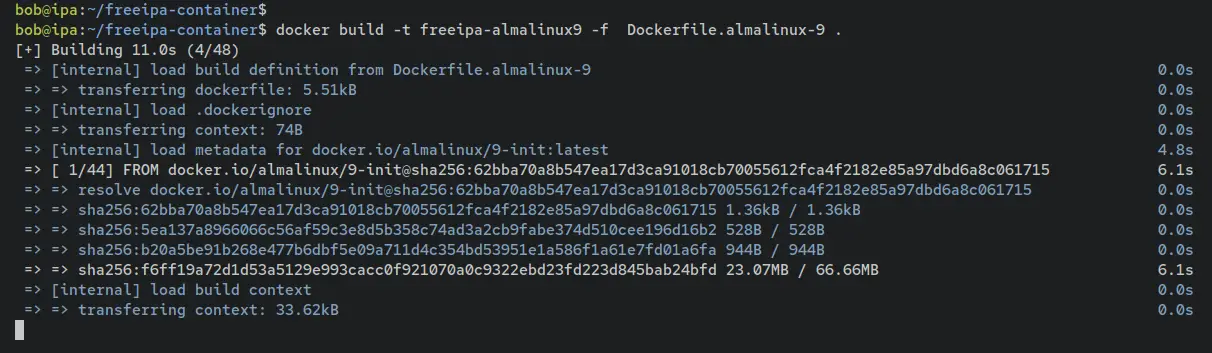
Next, enter the following command to build a new FreeIPA server Docker image. In this example, you will create a FreeIPA server Docker image based on the 'AlmaLinux 9' and will be called 'freeipa-almalinux9'.
docker build -t freeipa-almalinux9 -f Dockerfile.almalinux-9 .
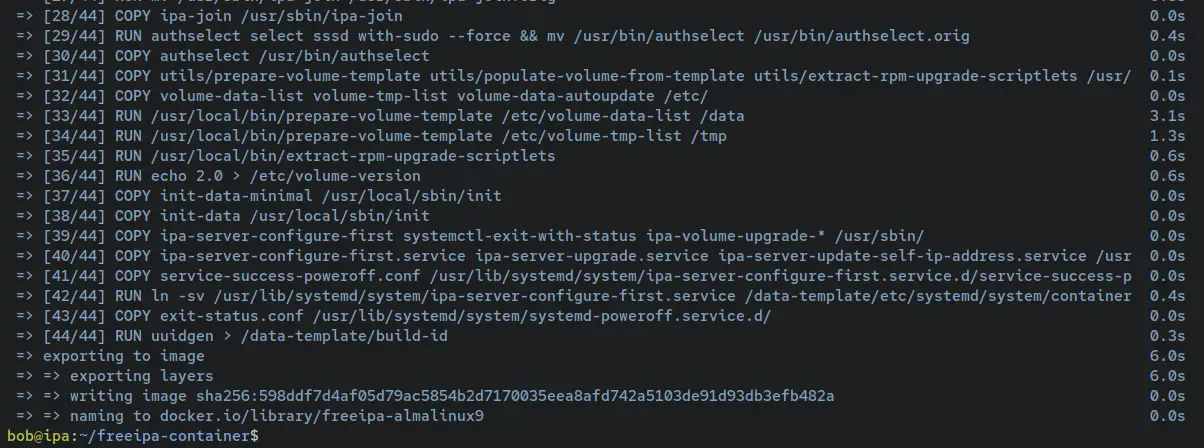
Once the 'docker build' command is executed, you should see the building process of the Docker image for the FreeIPA server.
When the process is finished, you should see the output such as 'naming to .../.../freeipa-almalinux9'.
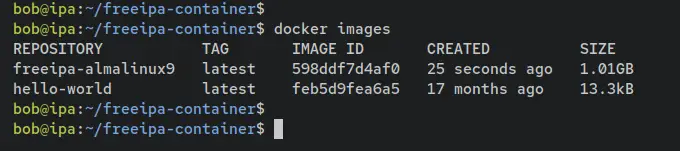
Run the following command to verify the list of Docker images that are available on your system. You should see the Docker image called 'freeipa-almalinux9' created and available on your system.
docker images
With the FreeIPA Docker image created, you will install the FreeIPA server and configuration via Docker.
Creating FreeIPA Server Container
In this section, you will install and configure the FreeIPA server via the Docker container. You will run a new container with the base image 'freeipa-almalinux9' that you have created, then you will start the configurations of the FreeIPA server. Once configurations are finished, you will next set up the port mapping of the FreeIPA server container to the Docker host machine.
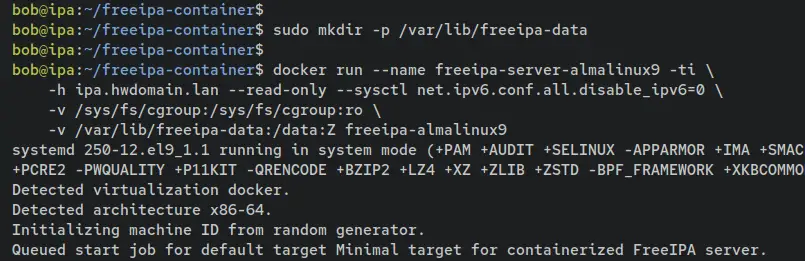
First, type the following command to create a new data directory '/var/lib/freeipa-data'. This will be used as the FreeIPA server data directory.
sudo mkdir -p /var/lib/freeipa-data
Now run the following 'docker run' command to create and run the FreeIPA server container. In this example, you will create a new FreeIPA container called 'freeipa-server-almalinux9' and store FreeIPA server data to the host machine on the '/var/lib/freeipa-data' directory.
docker run --name freeipa-server-almalinux9 -ti \
    -h ipa.hwdomain.lan --read-only --sysctl net.ipv6.conf.all.disable_ipv6=0 \
    -v /sys/fs/cgroup:/sys/fs/cgroup:ro \
    -v /var/lib/freeipa-data:/data:Z freeipa-almalinux9
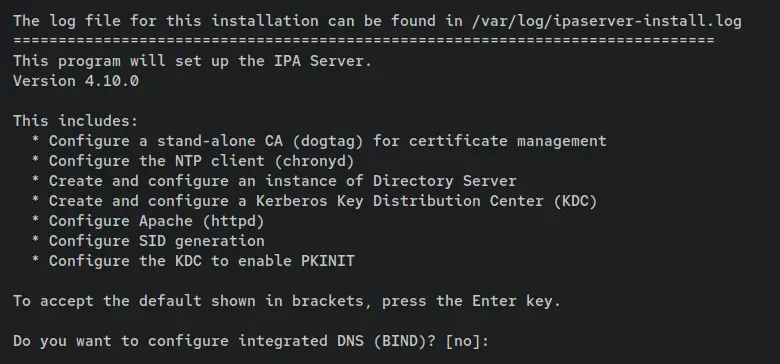
During the installation, you should be asked for some configurations of the FreeIPA server.
When asked to set up integrated DNS via BIND, press ENTER or input no.
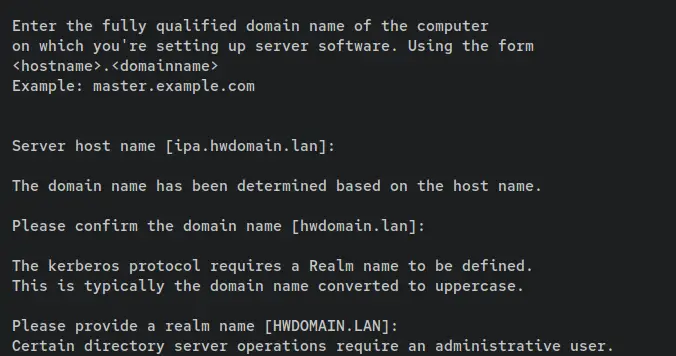
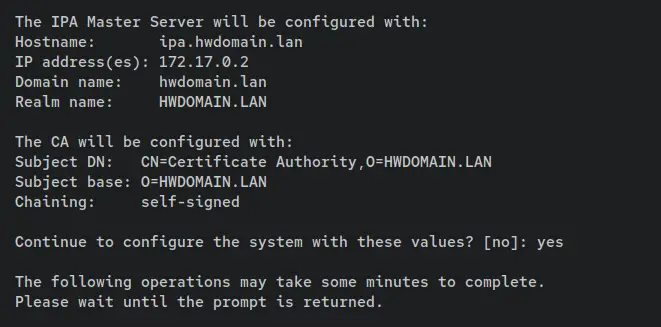
Now input the server hostname, the domain name, and the REALM for your FreeIPA server.
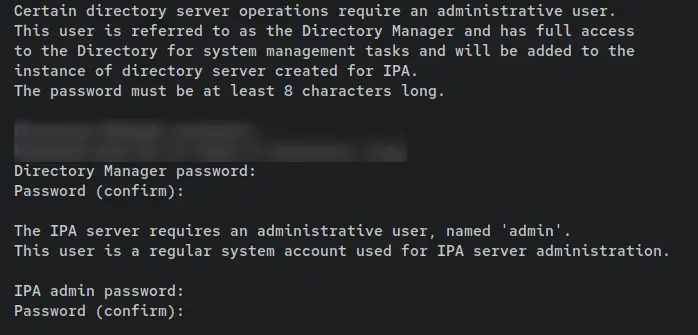
Now type a new password and repeat for the Directory manager and IPA admin user.
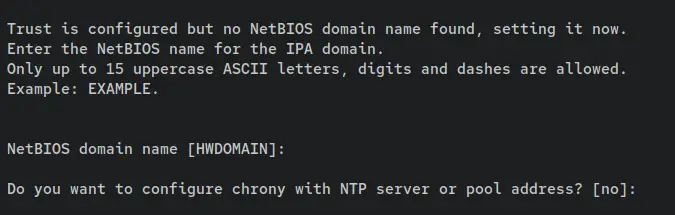
For the NetBIOS name, leave it as default and press ENTER. As for NTP configuration, input no or just press ENTER.
Now check and verify the configuration of your FreeIPA server installation. When finished, type 'yes' and press ENTER to confirm. With this, the FreeIPA server configuration should be running and take time.
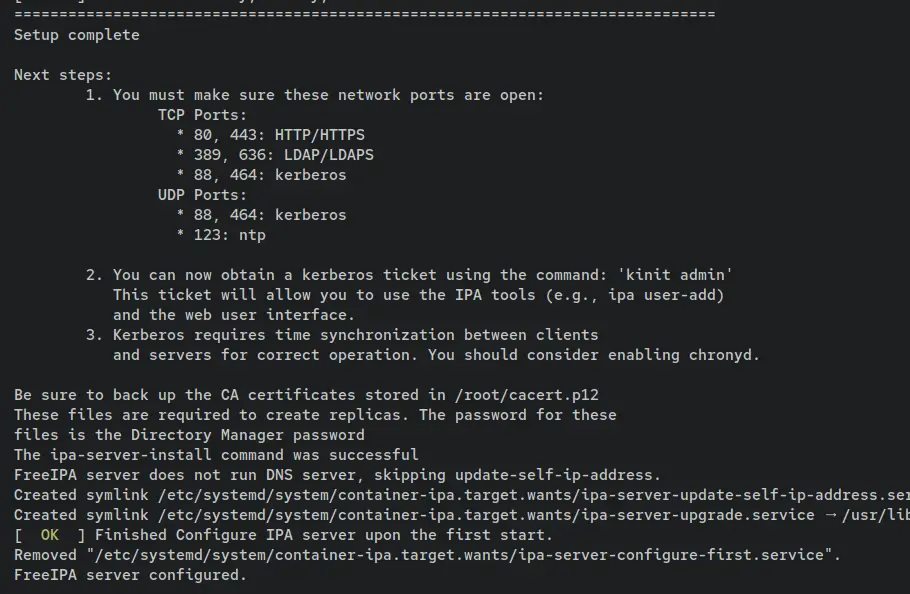
When the FreeIPA server configuration is finished, you should receive an output such as 'Setup complete' and the instructions for the next steps.
Now open a new terminal session and connect to your Debian server. Then, log in as the user 'bob' and enter the following docker command to verify the running container on your system.
docker ps
You should see the container called 'freeipa-server-almalinux9' with the status 'Up'.

At this point, the FreeIPA server is running with data that is now stored in the '/var/lib/freeipa-data' directory. In the next step, you must add port mapping for the FreeIPA server.
Enter the following command to stop the container 'freeipa-server-almalinux9' and remove it. This will remove the container, but not for the data directory '/var/lib/freeipa-data'.
docker stop freeipa-server-almalinux9
docker rm freeipa-server-almalinux9
Then run the following command to create a new container with port mapping for the FreeIPA server. This will create a new version of container 'freeipa-server-almalinux9' with specific ports mapping to the host machine and using the same data as the previous FreeIPA server.
docker run --name freeipa-server-almalinux9 -ti \
    -h ipa.hwdomain.lan -p 53:53/udp -p 53:53 -p 80:80 -p 443:443 -p 389:389 -p 636:636 -p 88:88 -p 464:464 -p 88:88/udp -p 464:464/udp -p 123:123/udp \
    --read-only --sysctl net.ipv6.conf.all.disable_ipv6=0 \
    -v /sys/fs/cgroup:/sys/fs/cgroup:ro \
    -v /var/lib/freeipa-data:/data:Z freeipa-almalinux9
Move again to another terminal session and run the following command to stop and start again the container 'freeipa-server-almalinux9'. This will ensure that the container 'freeipa-server-almalinux9' is running in the background.
docker stop freeipa-server-almalinux9
docker start freeipa-server-almalinux9
Check again the list of running containers on your system you should see the container 'freeipa-server-almalinux9' is running with new ports mapped to the host machine.
docker ps

With this, the deployment of the FreeIPA Server via Docker is finished. Your FreeIPA server is now accessible from clients and also you've configured the administrator password for both IPA admin and Directory Manager.
Authenticate against FreeIPA Server
After installing the FreeIPA server via Docker, you will now verify the installation by authenticating to the Kerberos FreeIPA server from the Docker host server. To do that, you must ensure that the domain name of your FreeIPA server is pointed to the correct server, and you must have the Kerberos client utilities installed.
Before you start, open the '/etc/hosts' file on your Debian system using the following nano editor command.
sudo nano /etc/hosts
Add the following lines to the file and be sure to change the IP address and the domain name with your FreeIPA Server host.
192.168.5.10 ipa.hwdomain.lan
Save and close the file when you are done.
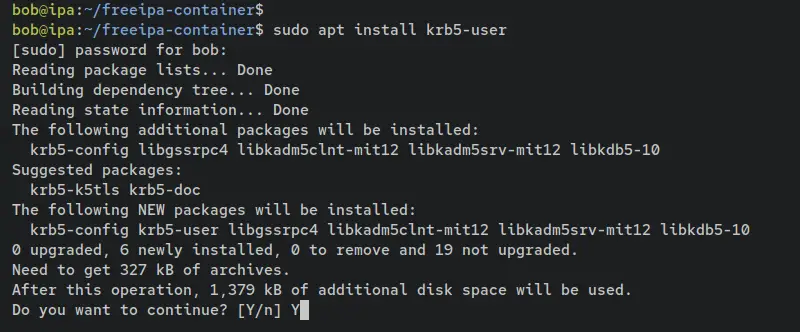
Next, install the 'krb5-user' package to your system via the apt command below. This will install some Kerberos utilities that can be used to connect to your FreeIPA server.
sudo apt install krb5-user
Input y when prompted and press ENTER to proceed.
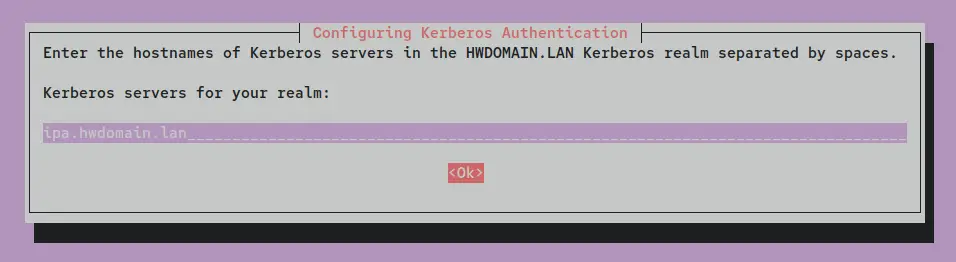
When asked for the default REALM configuration, input the REALm for your FreeIPA server - In this example, the REALM is 'HWDOMAIN.LAN'.

As for the Kerberos server, input the domain name of your FreeIPA server such as 'ipa.hwdomain.lan'.
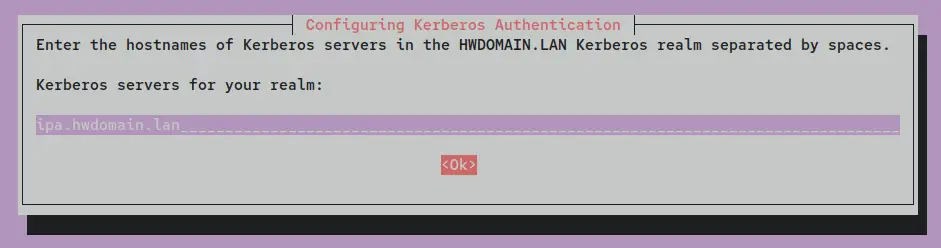
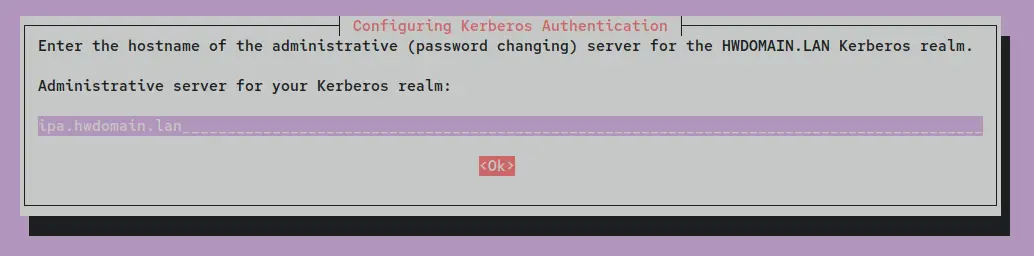
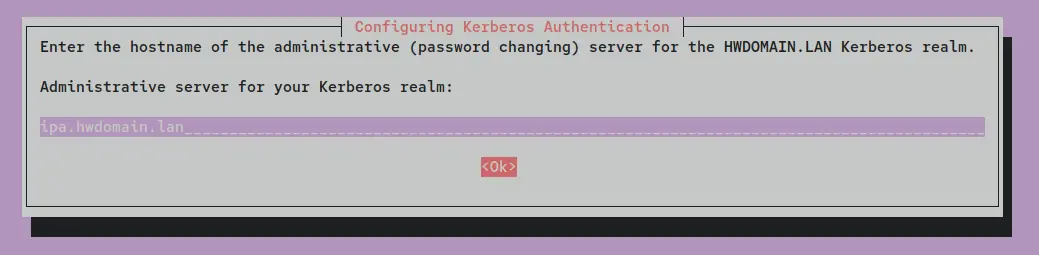
Use the same value for the administrative server for the Kerberos realm - 'ipa.hwdomain.lan'.
Now the installation should be finished and new settings are generated at the '/etc/krb5.conf' file.
With the Kerberos utilities installed, enter the following command to test the authentication to the Kerberos server that running as a Docker container. When prompted, input the admin password for your FreeIPA server.
kinit admin
Enter the following command to verify your authentication to the Kerberos server. When successful, you should get the details of the tickets for your Kerberos authentication.
klist

Lastly, you can also visit your FreeIPA server web administration dashboard. Be sure that the domain name of your FreeIPA server is added to the '/etc/hosts' file on your local machine.
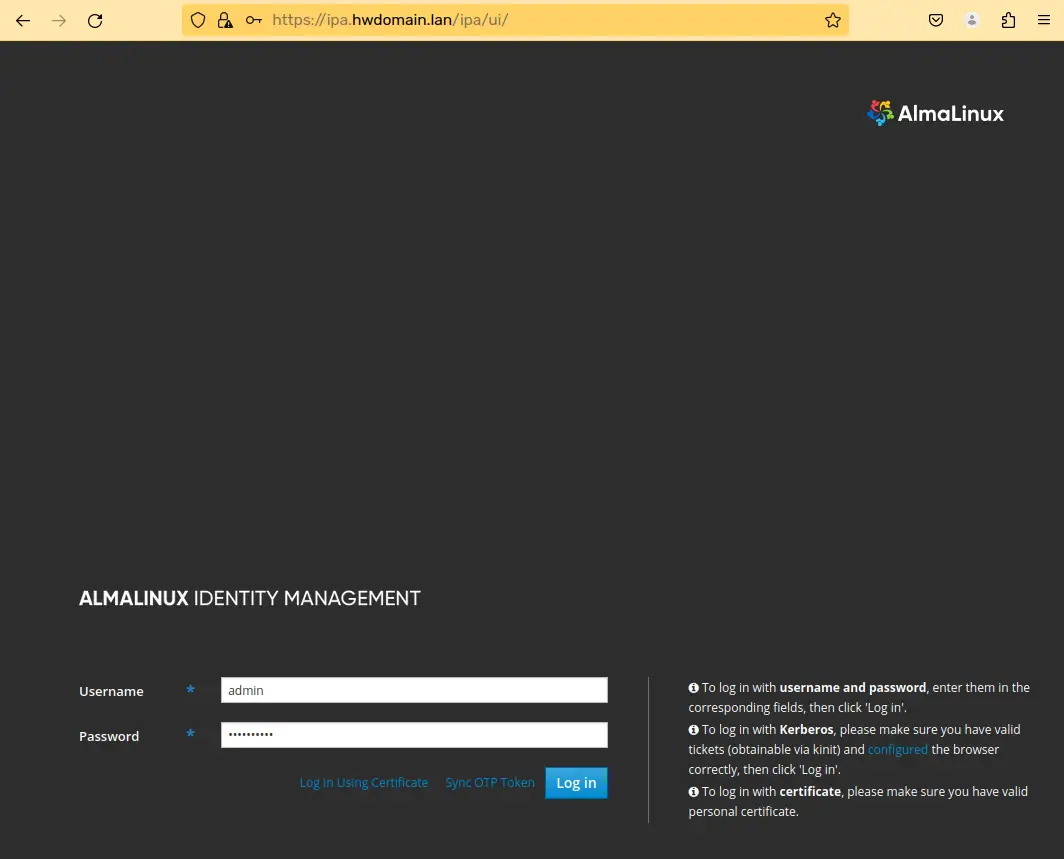
Open your web browser and visit the FreeIPA server domain name (i.e: https://ipa.hwdomain.lan/). When successful, you should see the FreeIPA server login page.
Input the user admin and your password, then click Log in.
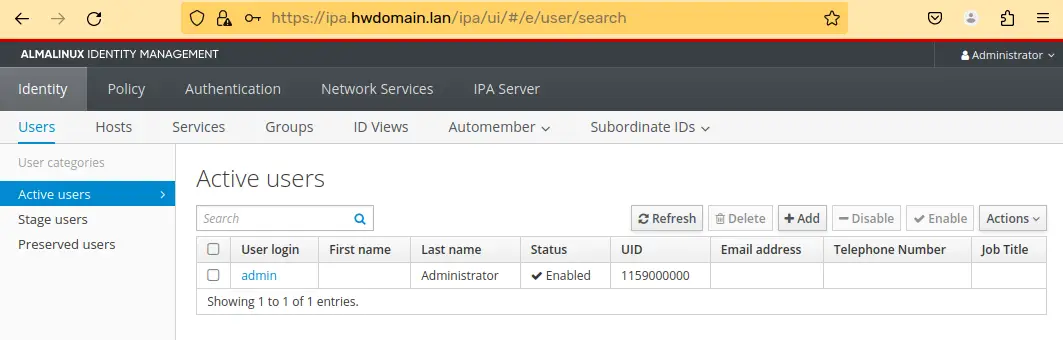
When authentication is successful, you should see the web administration dashboard of your FreeIPA server.
Adding FreeIPA User and Group Via Command Linux
There are different methods for managing the FreeIPA server that runs as a Docker container, you can manage it via a web administration dashboard or managing directory from the FreeIPA server container. In this section, you will manage the FreeIPA user and group via the 'ipa' command utility from the FreeIPA server container.
First, enter the following command to log in to the 'freeipa-server-almalinux9' container.
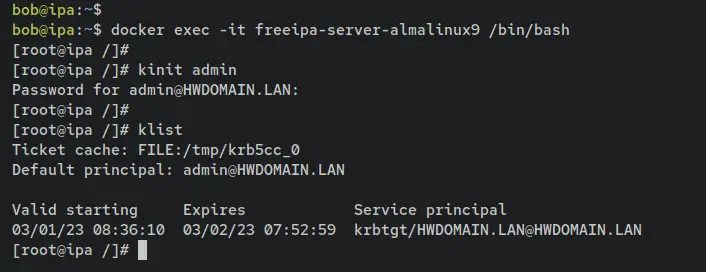
docker exec -it freeipa-server-almalinux9 /bin/bash
Once logged in, authenticate yourself against the Kerberos server via the user 'admin'. Then, verify the Kerberos ticket details. When prompted for the password, input the password for your Directory Manager.
kinit admin
klist
After being authenticated to Kerberos, you can now start configuring the FreeIPA server.
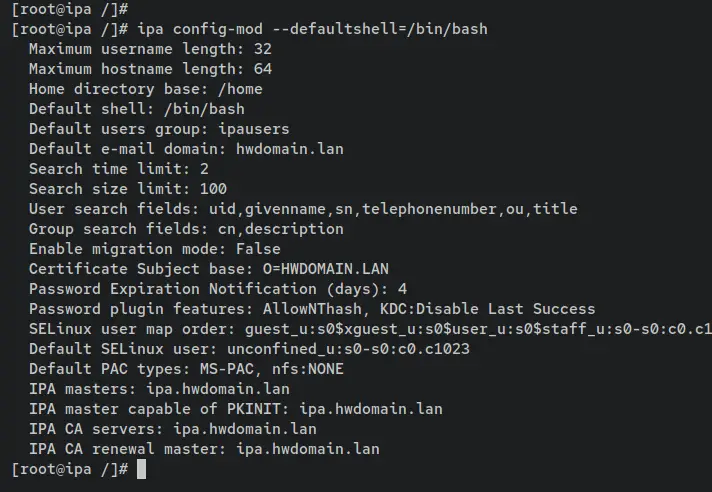
Enter the following 'ipa config-mod' command to set up the default shell for FreeIPA users to '/bin/bash'.
ipa config-mod --defaultshell=/bin/bash
You should see the detail of user configurations for the FreeIPA server.
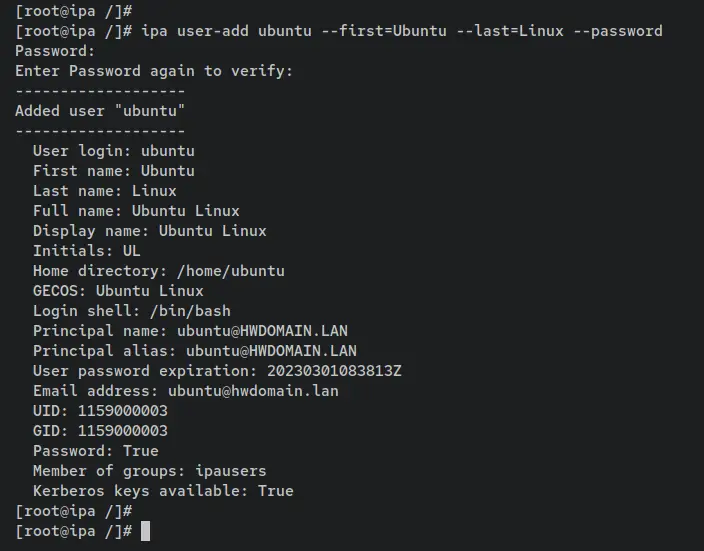
Next, enter the following command to create a new FreeIPA user called 'ubuntu'. Also, input a new password when prompted and repeat.
ipa user-add ubuntu --first=Ubuntu --last=Linux --password
Once added, you should get an output such as 'Added user "ubuntu"'.
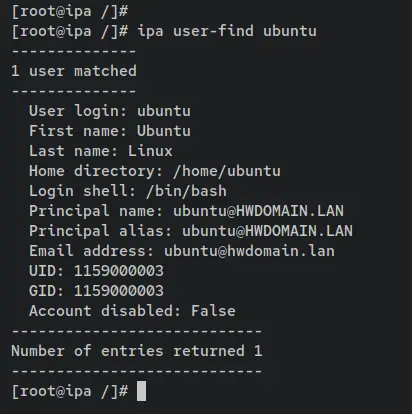
Now enter the following command to find the user 'ubuntu' on your FreeIPA server. When the user is available, you should get an output such as '1 user matched'. Also, you can see the details of the user 'ubuntu'.
ipa user-find ubuntu
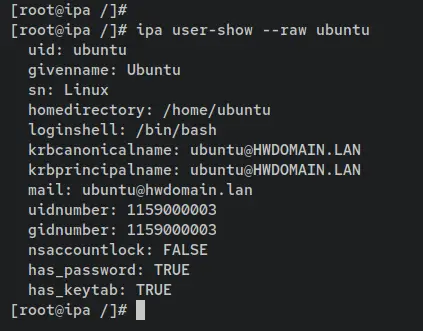
You can also get the details of available users on FreIPA by entering the following command.
ipa user-show --raw ubuntu
Below is a similar output you will get.
Next, create a new group 'development' using the command 'ipa group-add' and verify the group to ensure that new is added and available.
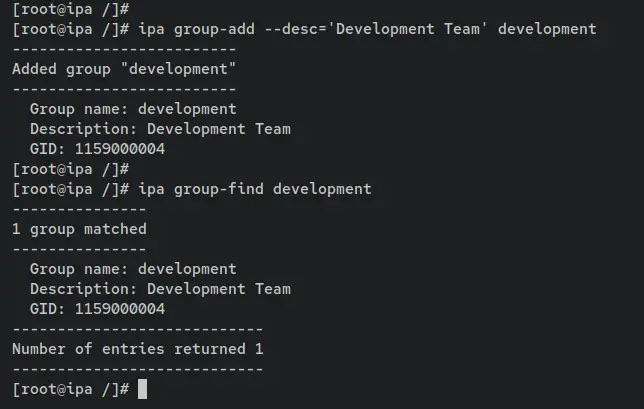
ipa group-add --desc='Development Team' development
ipa group-find development
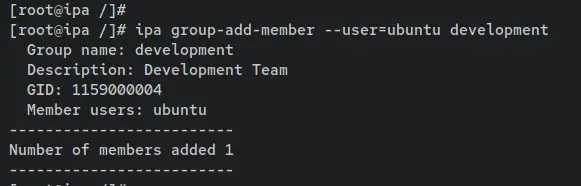
Now run the following 'ipa group-add-member' command to add the FreeIPA user 'ubuntu' to the group 'development'.
ipa group-add-member --user=ubuntu development
Verify the detail of group 'development' using the following command. You should see the user 'ubuntu' added to the group 'development'.
ipa group-show development
Adding Hosts to FreeIPA Server
FreeIPA provides the easiest way for adding a new host to the FreeIPA server, which can be done via the FreeIPA client package that provides the 'ipa-client-install' utility. In this section, you will add an Ubuntu machine to the FreeIPA server 'ipa.hwdomain.lan' that runs as a container.
Below are the steps you must do to add a new host to the FreeIPA server:
- Setup FQDN and Timezone of the Client machine
- Installing FreeIPA Client packages
- Verify the FreeIPA Client machine
Now let's start adding the Ubuntu machine to the FreeIPA Server Docker container.
Setup FQDN and Timezone
First, log in to your client machine and set up the fqdn using the following command.
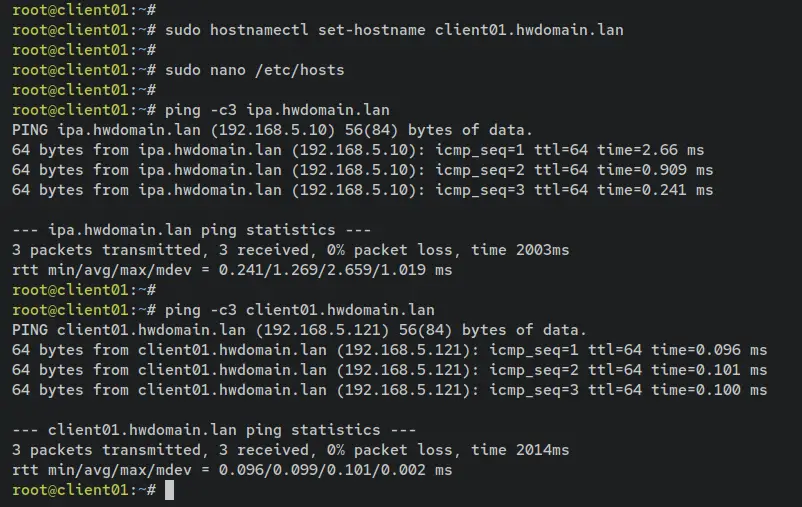
sudo hostnamectl set-hostname client01.hwdomain.lan
Now open the config file '/etc/hosts' using the following nano editor command.
sudo nano /etc/hosts
Add the following lines to the file and be sure to change the details of the IP address, fqdn, and hostname.
192.168.5.10    ipa.hwdomain.lan        ipa
192.168.5.121   client01.hwdomain.lan   client01
Save the file when you're done.
Now enter the following command to ensure that the fqdn of the client machine is pointed to the correct IP address and that the domain name of the FreeIPA server is also pointed to the correct and proper IP address.
ping -c3 ipa.hwdomain.lan
ping -c3 client01.hwdomain.lan
Next, enter the following command to set up the timezone of your client machine.
sudo timedatectl set-timezone Europe/Stockholm
Lastly, enter the following command to set up the '/etc/localtime' file to the proper timezone settings.
sudo unlink /etc/localtime
sudo ln -s /usr/share/timezone/Europe/Stockholm /etc/localtime
Installing FreeIPA Client
First, update and refresh your Ubuntu package index via the apt command below.
sudo apt update
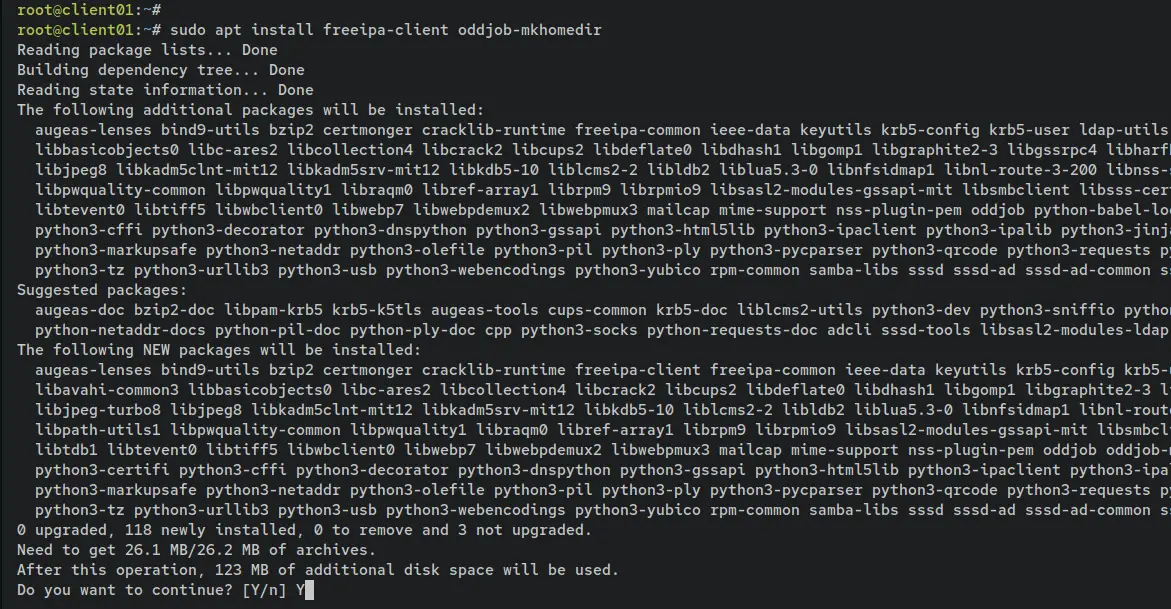
Now install the FreeIPA client package using the following command. When prompted, input y to confirm and press ENTER to proceed.
sudo apt install freeipa-client oddjob-mkhomedir
When prompted for the default REALM domain name, input your main domain such as 'HWDOMAIN.LAN'.

Input the Kerberos realm domain name with the FreeIPA server domain 'ipa.hwdomain.lan'.
Lastly, input again the domain name of the FreeIPA server 'ipa.hwdomain.lan' as an administrative server for the Kerberos server.
Once the FreeIPA client package is installed, run the following command 'ipa-client-install' to add the client machine to the FreeIPA server. Be sure to change the details of the FreeIPA server domain name and realm.
ipa-client-install --hostname=`hostname -f` \
--mkhomedir \
--server=ipa.hwdomain.lan \
--domain hwdomain.lan \
--realm HWDOMAIN.LAN
When asked to use the fixed configurations, input yes to confirm and press ENTER. As for the NTP server, leave it as default to no. Lastly, input yes again to confirm the installation.
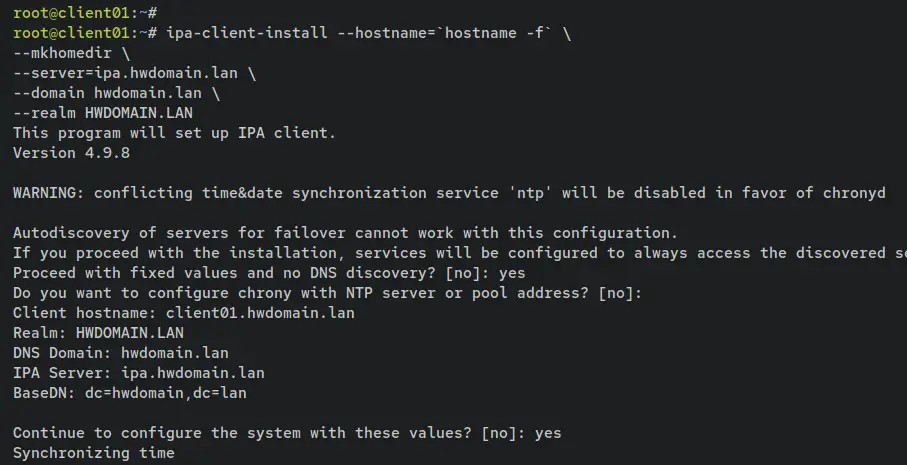
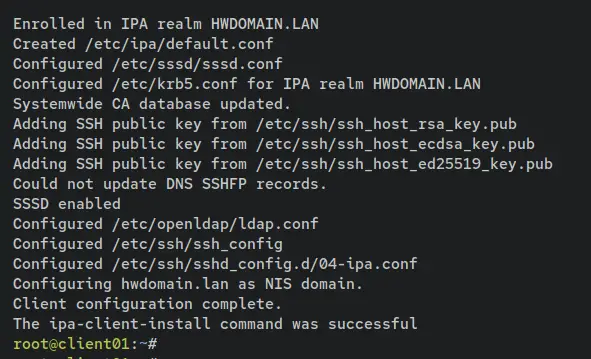
Below is the output during the installation and configurations.
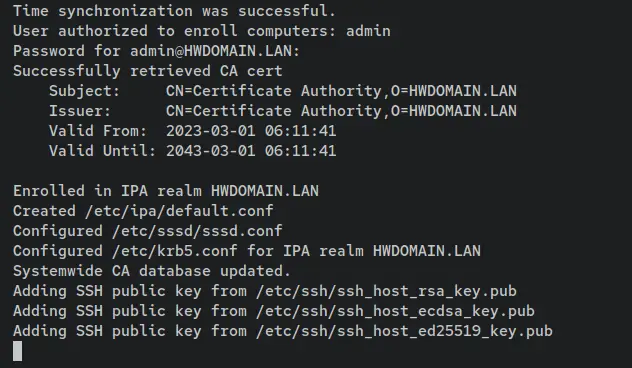
Once finished, the output such as 'The ipa-client-install command was successful' will be prompted to your terminal screen.
Verify Hosts FreeIPA Client
From the FreeIPA server, type the following command to connect to the client machine '192.168.5.121' using the FreeIPA user 'ubuntu'. When prompted, input yes to confirm and add the SSH fingerprint of the client machine, then input the password for the 'ubuntu' FreeIPA user.
ssh [email protected]
Once logged in, you should be asked to change the default current password. So, input the current password and input the new password and repeat.
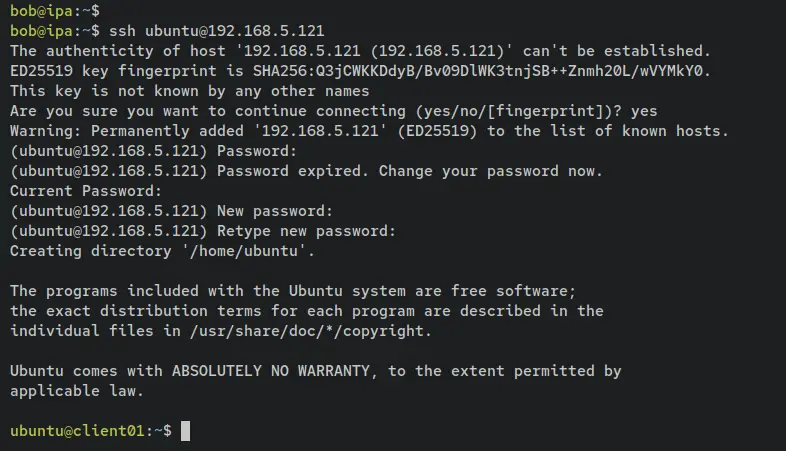
Lastly, enter the following command to identify your current user. You should see that you've logged into the client machine via the user 'ubuntu', which is also part of the group 'development'.
id
whoami

Conclusion
In this tutorial, you have learned how to install and deploy the FreeIPA server via Docker on a Debian 12 server. You have also learned the basic usage of the 'ipa' command for creating and managing FreeIPA users and groups and also learned how to obtain a Kerberos ticket via the kinit command and log in to the FreeIPA web administration via the admin user and password.
Lastly, you have also added an ubuntu client machine to the FreeIPA server via the FreeIPA client package. You've learned step-by-step how to do it and also verified your settings by logging into the client machine via FreeIPA user.
With this, you can now add more hosts, users, and groups to your FreeIPA server. You can also integrate FreeIPA into your production. To get detailed information, visit the FreeIPA's official documentation.

