


Pulumi is an infrastructure as a Code tool that you can use to spin up any infrastructure-related components in the cloud or on-prem. In this blog, we will go through the steps involved in creating AWS service components using Pulumi.
Pre-requisites
AWS Access Key
AWS Secret Key
Pulumi client
Let’s create a new directory for our workloads.
mkdir knoldus
cd knoldus
Create a Pulumi stack
pulumi new aws-yaml
You can log in via GitHub or mail. Once you log in, you will be redirected to generate a token for Pulumi.

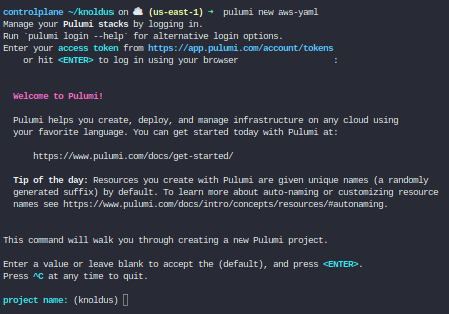
Enter the name of your project. Next, you will be asked for a stack name. Hit ENTER to accept the default value of dev.

If you list the content, pulumi generated two files in this directory.
Pulumi.yaml defines both the project and the program that manages your stack resources.
Pulumi.dev.yaml contains configuration values for the stack you just initialized.
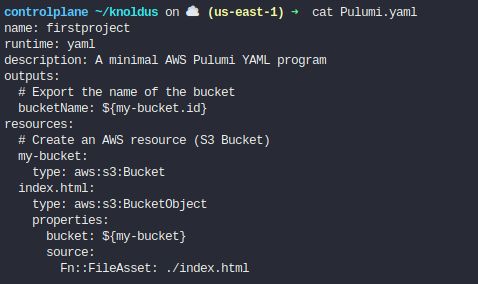
Open the pulumi.yaml file

It contains a basic configuration file that has a snippet for an S3 bucket.
This Pulumi program creates a new S3 bucket and exports the name of the bucket.
Next, you’ll deploy your stack, which will provision your S3 bucket.
Type:
pulumi up
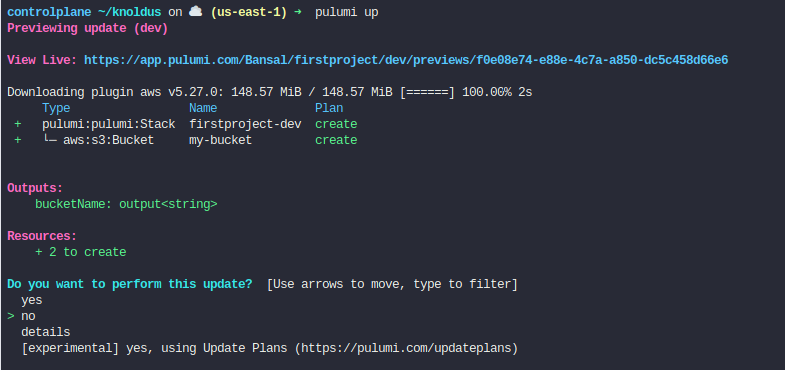
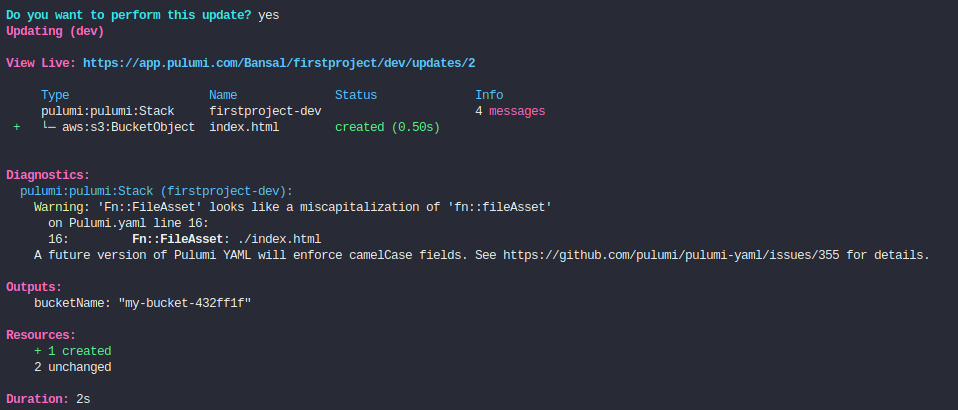
Once the preview is finished, you are given three options to choose from. Choosing details will show you a rich difference between the changes to be made. Selecting yes will create your new S3 bucket in AWS. Choosing no will return you to the user prompt without performing the update operation.
Go to Yes and hit ENTER
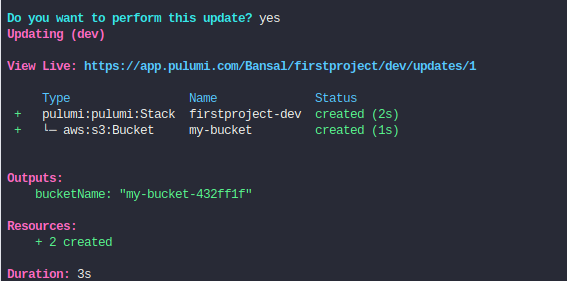
A bucket named my-bucket-432ff1f is created.
You can also print the bucket name which is mentioned in the output section from the following command:
pulumi stack output bucketName
To add an object to your S3 bucket.
cat <<EOT > index.html
<html>
   <body>
      <h1> Hello, Knoldus!! </h1>
   </body>
 </html>
EOT
Add the index.html section in the resource.
Type:
pulumi up

Hit Enter
Now that your index.html is in your bucket, modify the program to have the bucket serve index.html as a static website. To do that, set the bucket’s website property, passing the filename to use as an indexDocument:
name: firstproject
runtime: yaml
description: A minimal AWS Pulumi YAML program
outputs:
  # Export the name of the bucket
  bucketName: ${my-bucket.id}
  bucketEndpoint: http://${my-bucket.websiteEndpoint}
resources:
  # Create an AWS resource (S3 Bucket)
my-bucket:
  type:  aws:s3:Bucket
  properties:
    website:
      indexDocument: index.html
index.html:
type: aws:s3:BucketObject
properties:
bucket: ${my-bucket}
source:
 Fn::FileAsset: ./index.html
acl: public-read
contentType: text/html
Type:
pulumi up
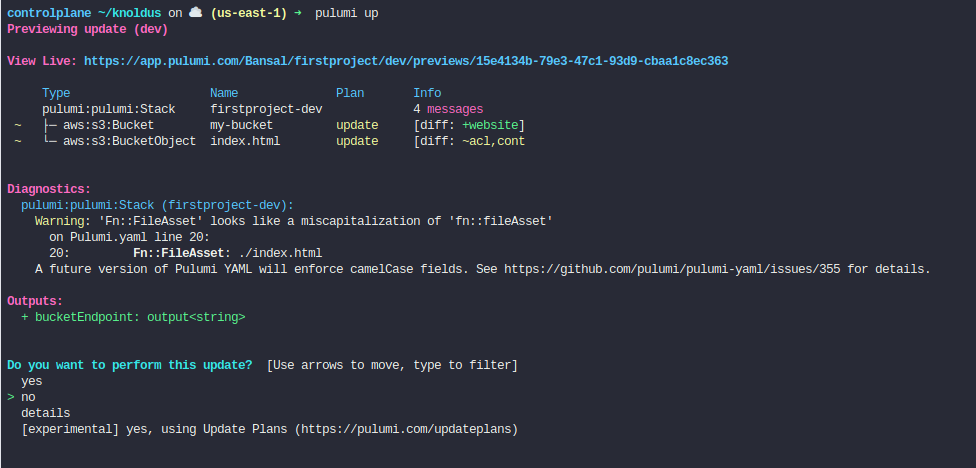
Hit Enter

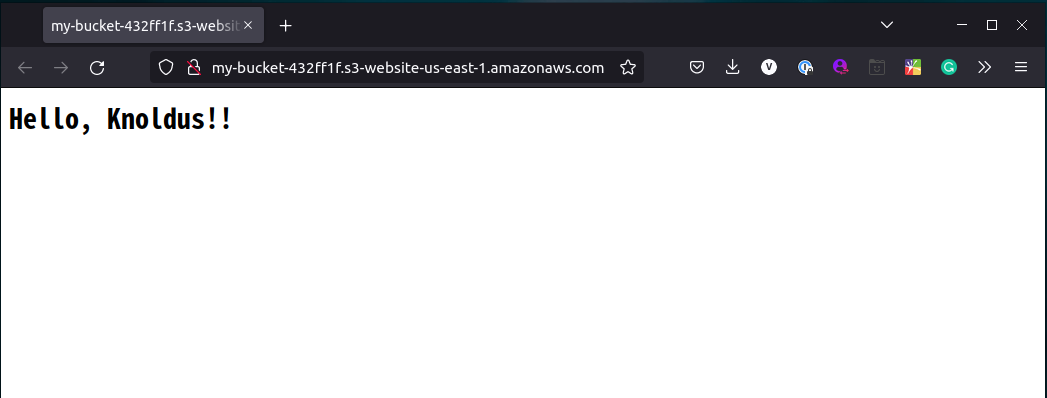
Finally, you can check out your new static website at the URL in the Outputs section of your update or you can make a curl request and see the contents of your index.html object printed out in your terminal.
curl $(pulumi stack output bucketEndpoint)

OR view the web page via URL
pulumi stack output bucketEndpoint
To destroy the stack, run :
pulumi destroy
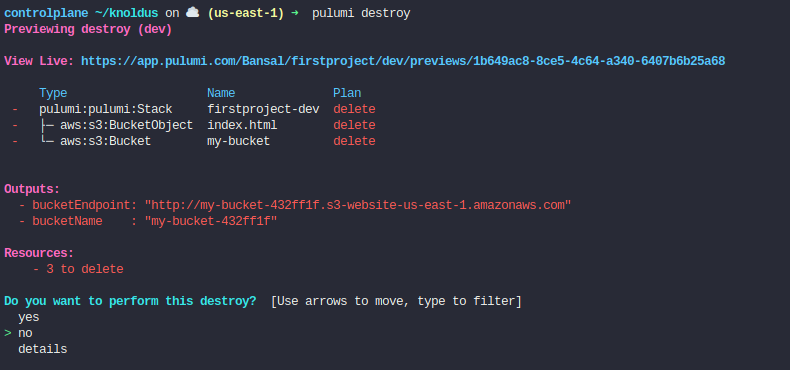
Click Yes.
Your infrastructure is now destroyed successfully.
Plumi is very similar to any infrastructure as a code tool you might have come across.