Intro
In this post, I’ll be playing with the RadListView by Telerik UI for Xamarin.
I’ve been wanting to try out this suite of controls for quite some time now. However I’m usually doing really small projects and using a trial isn’t the greatest. I did find out that there may be a license available for Indie Developers, and need to look more into that. These controls are really worth the cost either way. They’re professional looking, fully featured, bug free and you didn’t have to go through the pain of writing custom controls yourself. If you haven’t seen them before, be sure to check them out here.
Telerik UI for Xamarin – RadListView
The Telerik UI for Xamarin RadListView is quite a powerful upgrade from the out of the box list view in Xamarin.Forms. If you take a look at the online documentation, you’ll see the extensive list of features available. Including but not limited to Cell customization, Reordering items via “drag and drop”, Sorting and Filtering methods, Gestures and more. The layouts are also quite special, from regular list to grid layout… you can even mix them together to make interesting views.
The Example Project
To test this out, I needed some simple data of something interesting to display. I stumbled upon the https://pokeapi.co API and found my idea! A simple Pokemon search, complete with an image sprite. There is so much data here on this API, I could have built a full blown Pokedex, but I’m trying to control myself. 🙂
Getting Started
Telerik UI for Xamarin controls have their own NuGet package feed, and require authentication in order to access them. That being said, you’ll need to sign up for an account here. Once you have an account with them, you can setup a new NuGet package source using this URL: https://nuget.telerik.com/nuget
- Sign up for an account here.
- Setup NuGet package feed in Visual Studio using: https://nuget.telerik.com/nuget
RadListView ItemTemplate
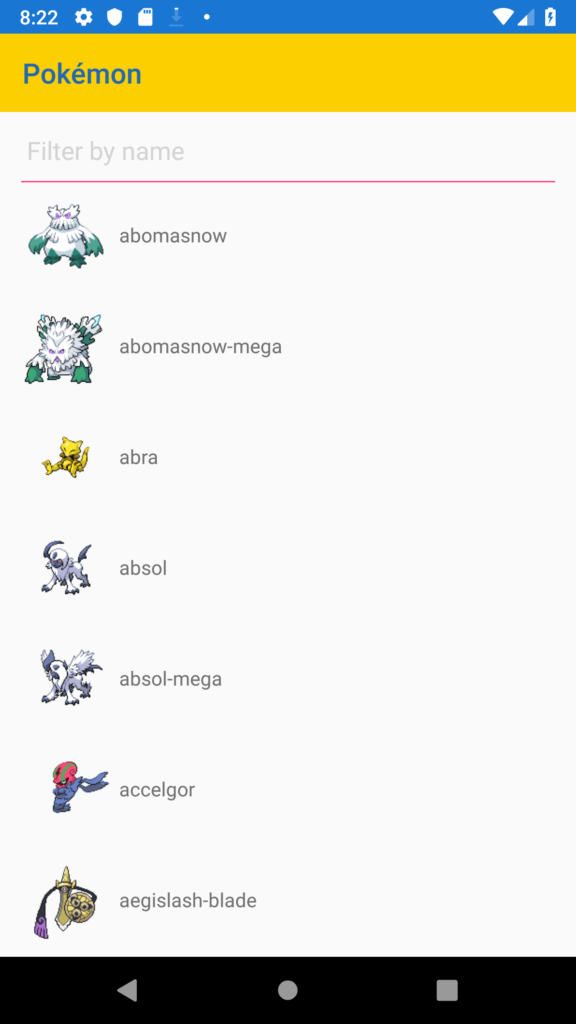
This is how the control was implemented in my example. I’m using bindings that attach my Page back to the ViewModel, in this case we bind to a list of Pokemon, and display them.
Make sure to add the following namespaces (and NuGet packages):
xmlns:telerikDataControls="clr-namespace:Telerik.XamarinForms.DataControls;assembly=Telerik.XamarinForms.DataControls" xmlns:telerikListView="clr-namespace:Telerik.XamarinForms.DataControls.ListView;assembly=Telerik.XamarinForms.DataControls"<telerikDataControls:RadListView ItemsSource="{Binding Pokemon}" IsItemsReorderEnabled="True" VerticalOptions="FillAndExpand"> <telerikDataControls:RadListView.ItemTemplate> <DataTemplate> <telerikListView:ListViewTemplateCell> <telerikListView:ListViewTemplateCell.View> <StackLayout Orientation="Horizontal" Margin="0,0,0,15"> <Image Source="{Binding ImageUrl}" HeightRequest="64" WidthRequest="64" VerticalOptions="Center" /> <Label Text="{Binding Name}" VerticalOptions="Center" HorizontalOptions="Fill"/> </StackLayout> </telerikListView:ListViewTemplateCell.View> </telerikListView:ListViewTemplateCell> </DataTemplate> </telerikDataControls:RadListView.ItemTemplate> </telerikDataControls:RadListView>Result:
Looks nice for a little effort, works well too… but this is just a list. What is so cool? We haven’t even began to scratch the surface of the features here. Lets try to use the Grid Layout feature and see how that works. Have a look at the following code, we’re going to add this into our RadListView control and the magic will happen.
<telerikDataControls:RadListView.LayoutDefinition> <telerikListView:ListViewGridLayout HorizontalItemSpacing="5" ItemLength="120" SpanCount="2" VerticalItemSpacing="5" /> </telerikDataControls:RadListView.LayoutDefinition>All we’re doing here is defining the Grid Layout, and how the items will fit together. Its pretty simple to use and works just like a Grid. Simply add this code to your existing RadListView control and it works!
<telerikDataControls:RadListView ItemsSource="{Binding Pokemon}" IsItemsReorderEnabled="True" VerticalOptions="FillAndExpand"> <telerikDataControls:RadListView.ItemTemplate> <DataTemplate> <telerikListView:ListViewTemplateCell> <telerikListView:ListViewTemplateCell.View> <StackLayout Orientation="Horizontal" Margin="0,0,0,15"> <Image Source="{Binding ImageUrl}" HeightRequest="64" WidthRequest="64" VerticalOptions="Center" /> <Label Text="{Binding Name}" VerticalOptions="Center" HorizontalOptions="Fill"/> </StackLayout> </telerikListView:ListViewTemplateCell.View> </telerikListView:ListViewTemplateCell> </DataTemplate> </telerikDataControls:RadListView.ItemTemplate> <telerikDataControls:RadListView.LayoutDefinition> <!-- Grid Layout --> <telerikListView:ListViewGridLayout HorizontalItemSpacing="5" ItemLength="120" SpanCount="2" VerticalItemSpacing="5" /> </telerikDataControls:RadListView.LayoutDefinition> </telerikDataControls:RadListView>Have a look at the result now:
This is neat, and would otherwise take a lot of elbow grease to get going by yourself (think cross platform and performance). This is a real time saver on any project, and works very well. I loaded up 980 Pokemon (Remember when there were just 100?) into this list, and it handles it like a champ… even on the emulator!
Final Thoughts
USE CONTROLS, save yourself the time and headache. Telerik UI for Xamarin is a great choice, they’re definitely a leader in this space and already have everything you need for your next Xamarin project.
I’m going to have to spend some more time with not only the RadListView, but all the other controls available in this suite. Maybe I will extend this app out to try some more features, if you would like to see more let me know!Be sure to check out my Xamarin.Forms Hamburger Menu, or my example Clean Architecture Application.
Thank YOU for reading.